Give your event participants good orientation in the area with a map that highlights important and interesting places. The Maps feature is built on Google Maps, which lets participants use GPS navigation to the selected point.
If you want to add new places, you first need to create a category for them, meaning a group that indicates the type, e.g. restaurants, tourist attractions, or parking lots.
In the top menu, choose the Create section, then on the left side select the Maps module. To add a new category, click (+) Add New Category and give it a name in all language layers:
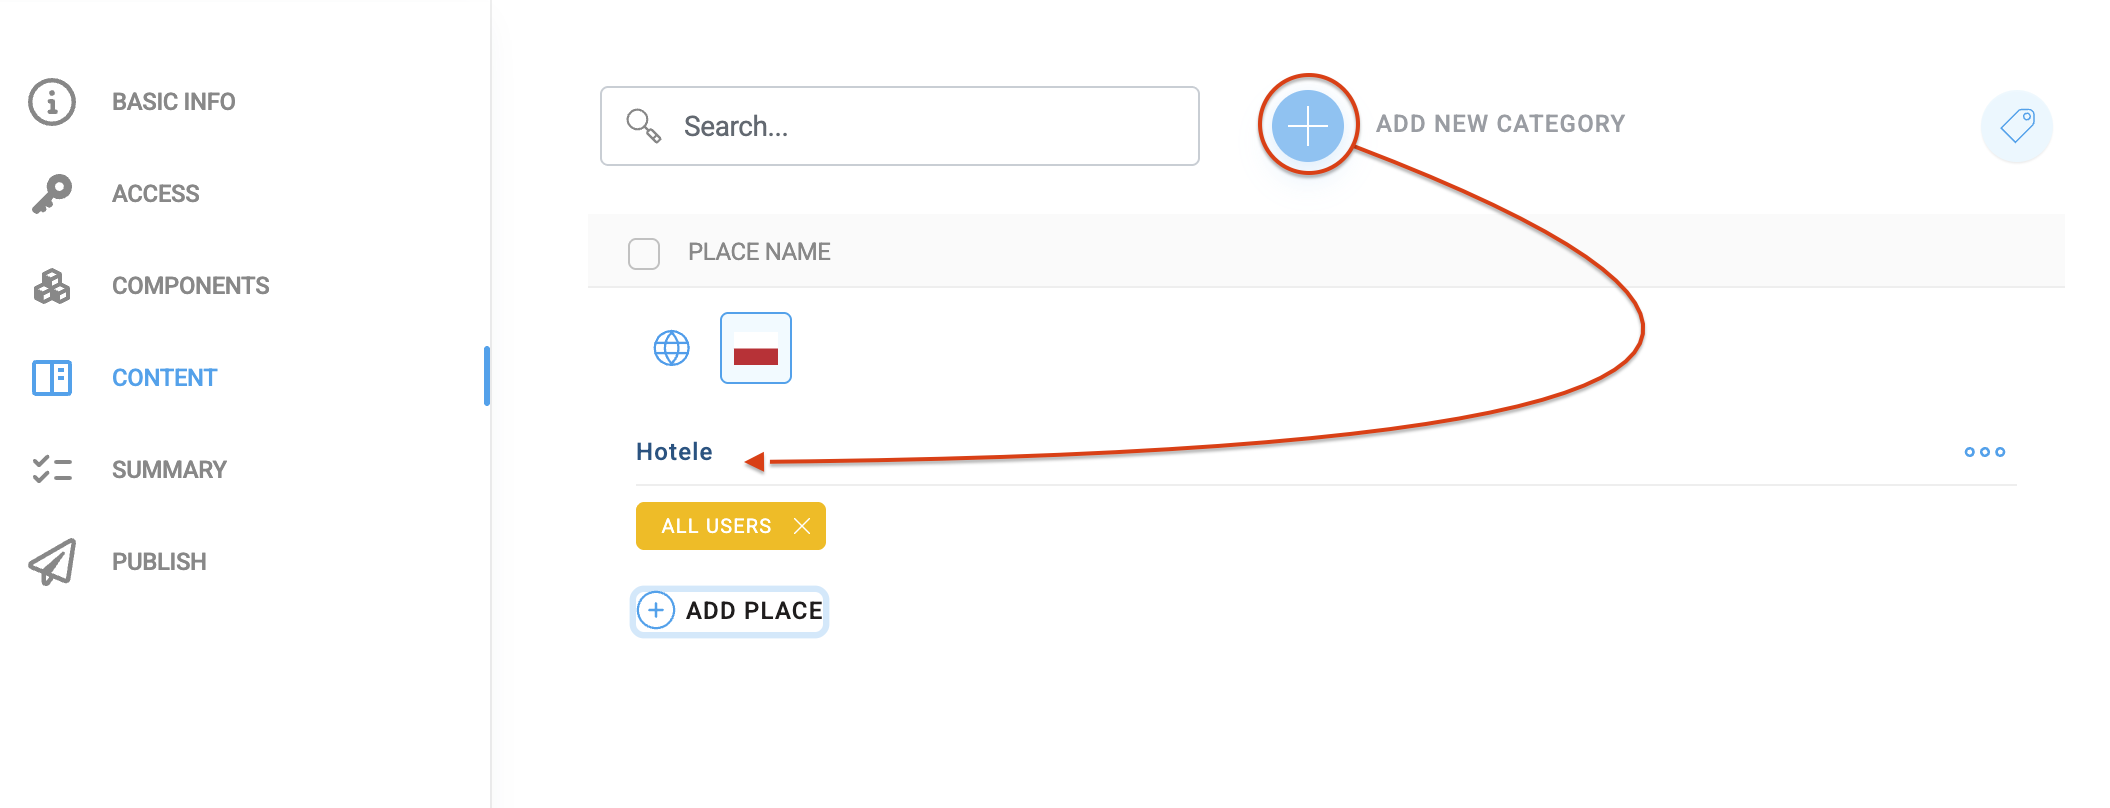
To add a new place on the map, press the (+) Add Place button in the selected category.
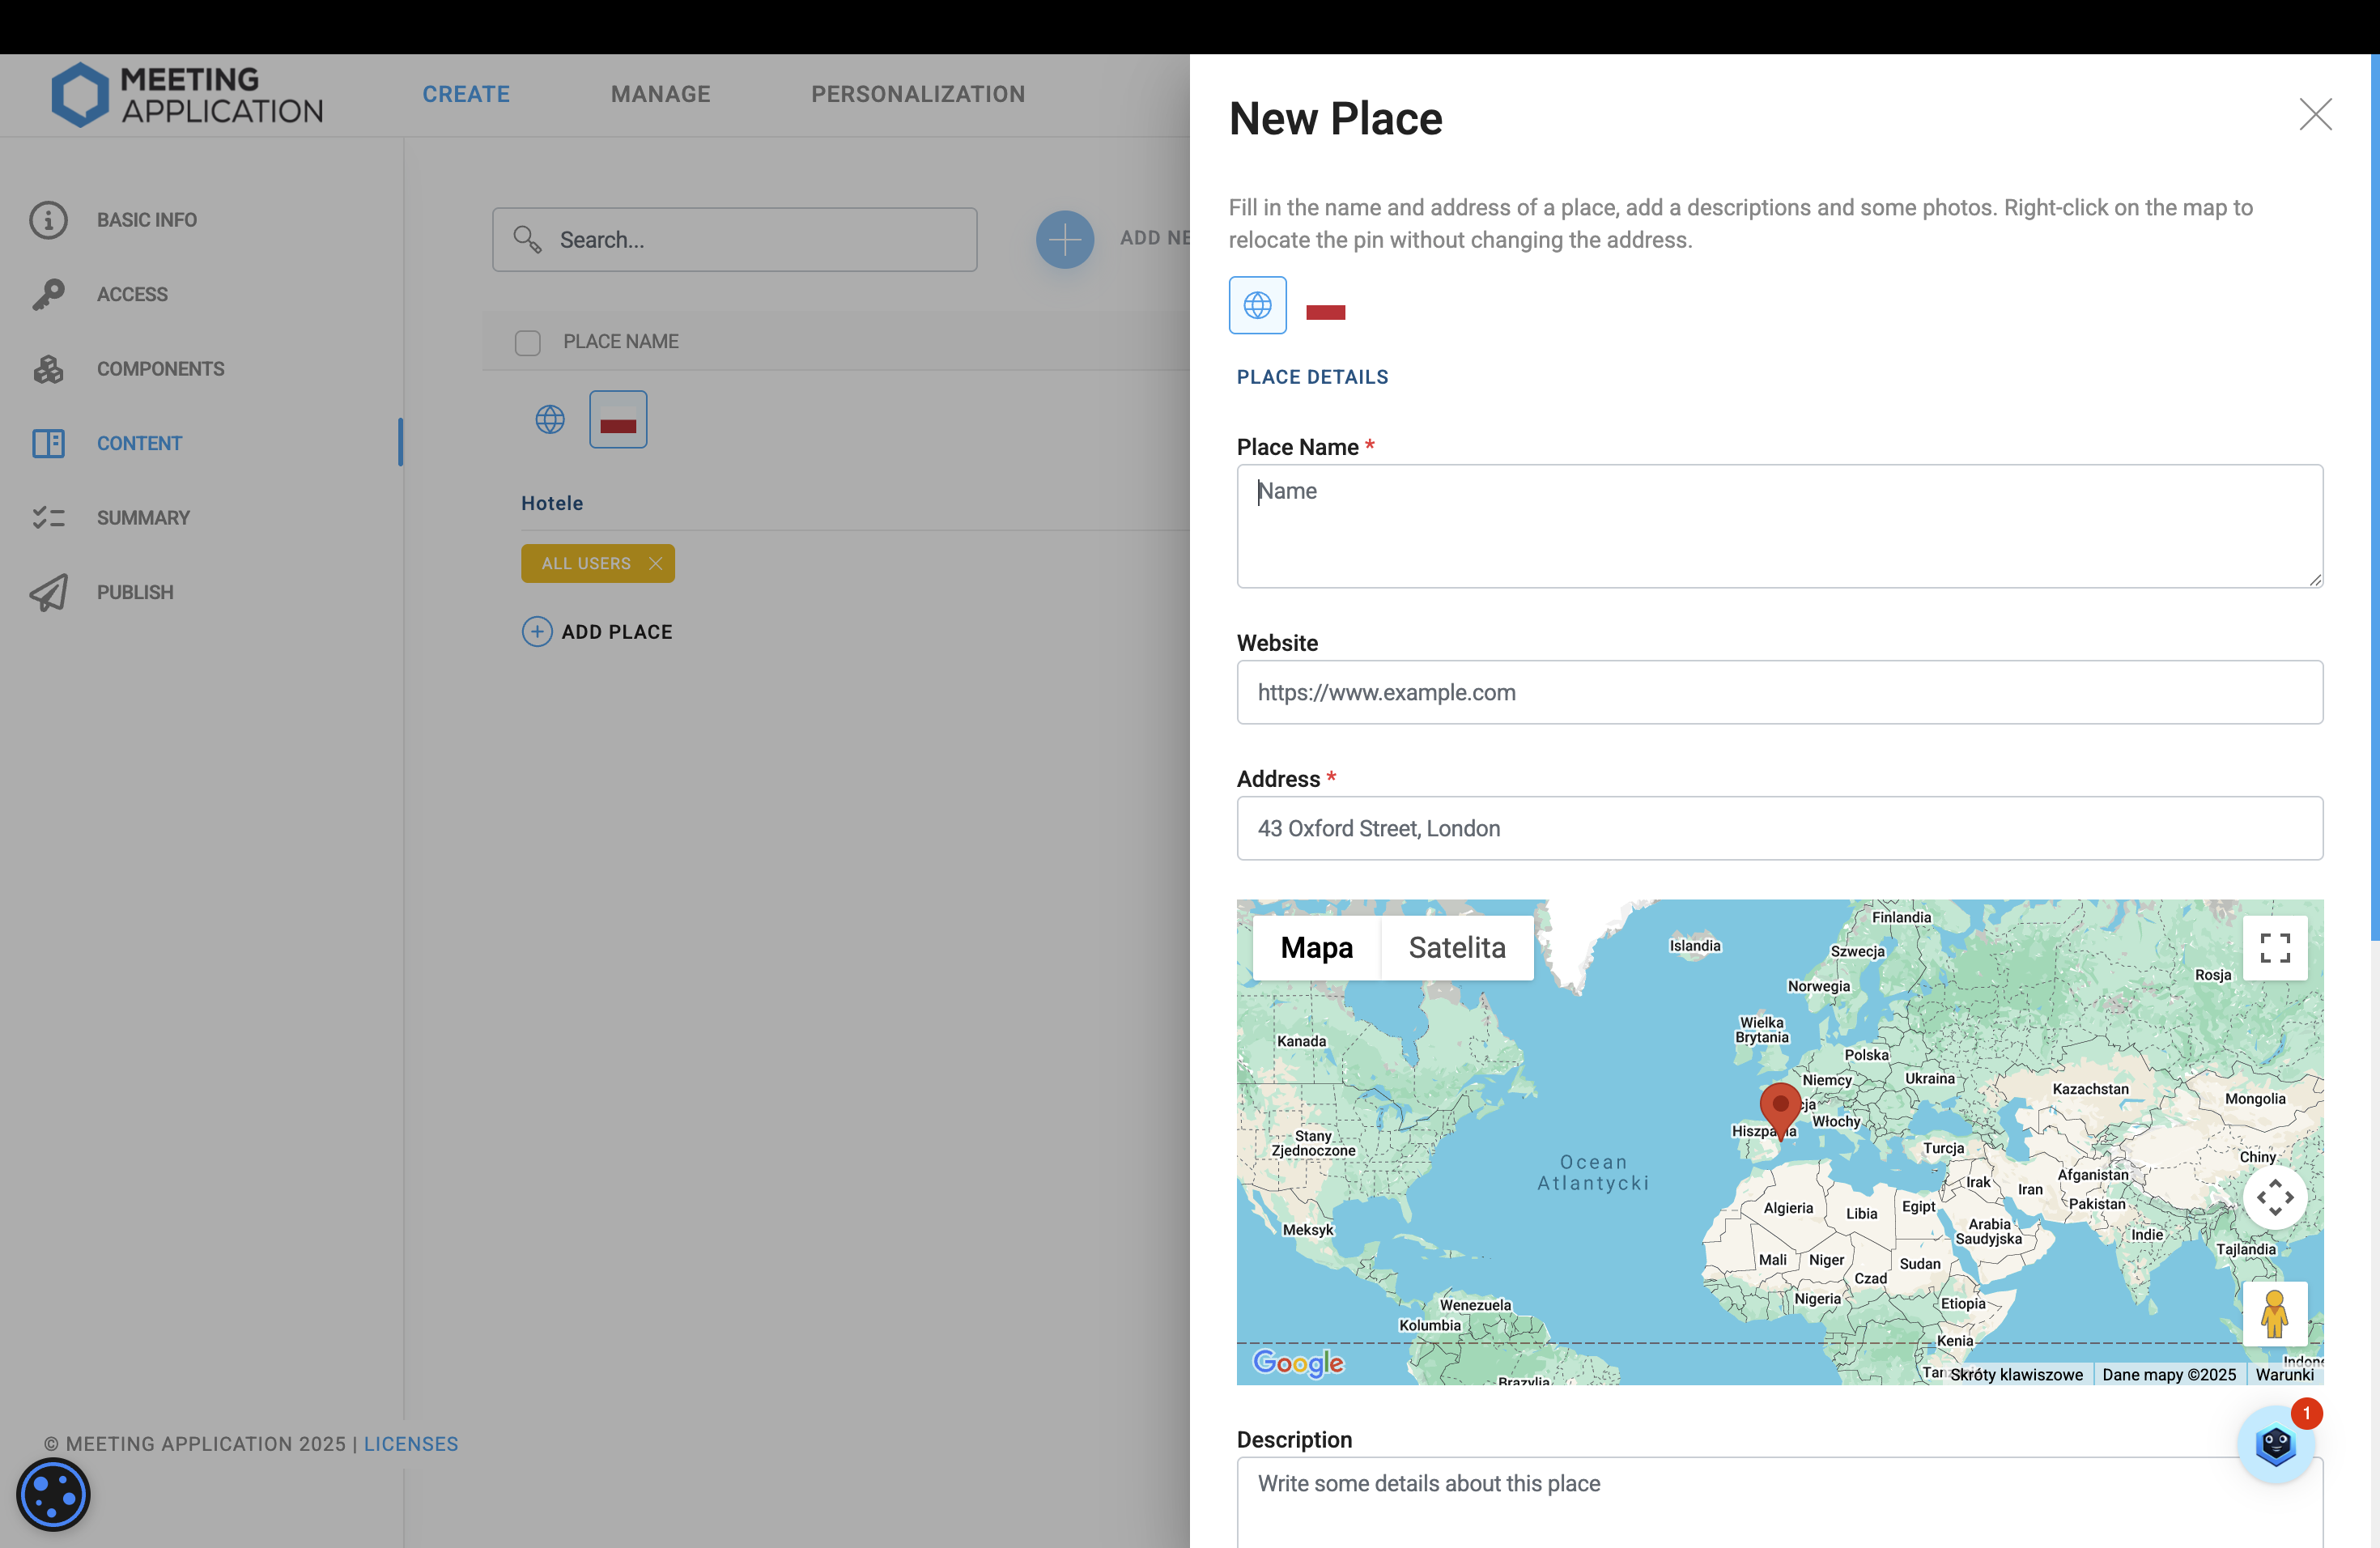
Name the pin and assign it an Address. To do this, you can either choose one of the suggestions that appear below or type the full address and point to the correct place manually:
If you choose one of Google’s suggestions that appear under the Address field, the pin will automatically move to the target location
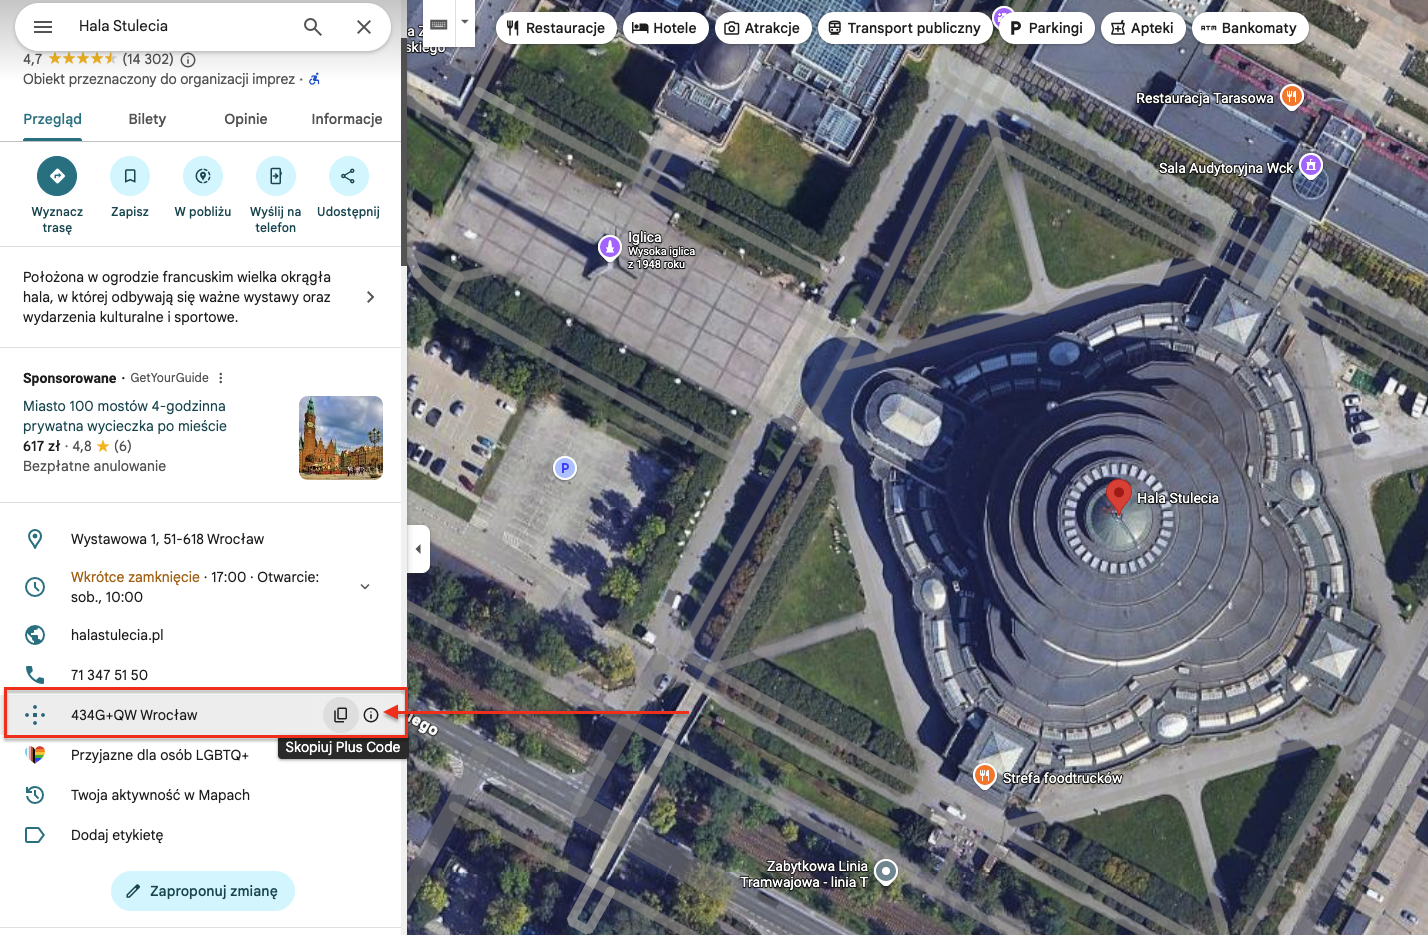
If, while typing the address, you don’t get precise locations, use the Plus Code in Google Maps:
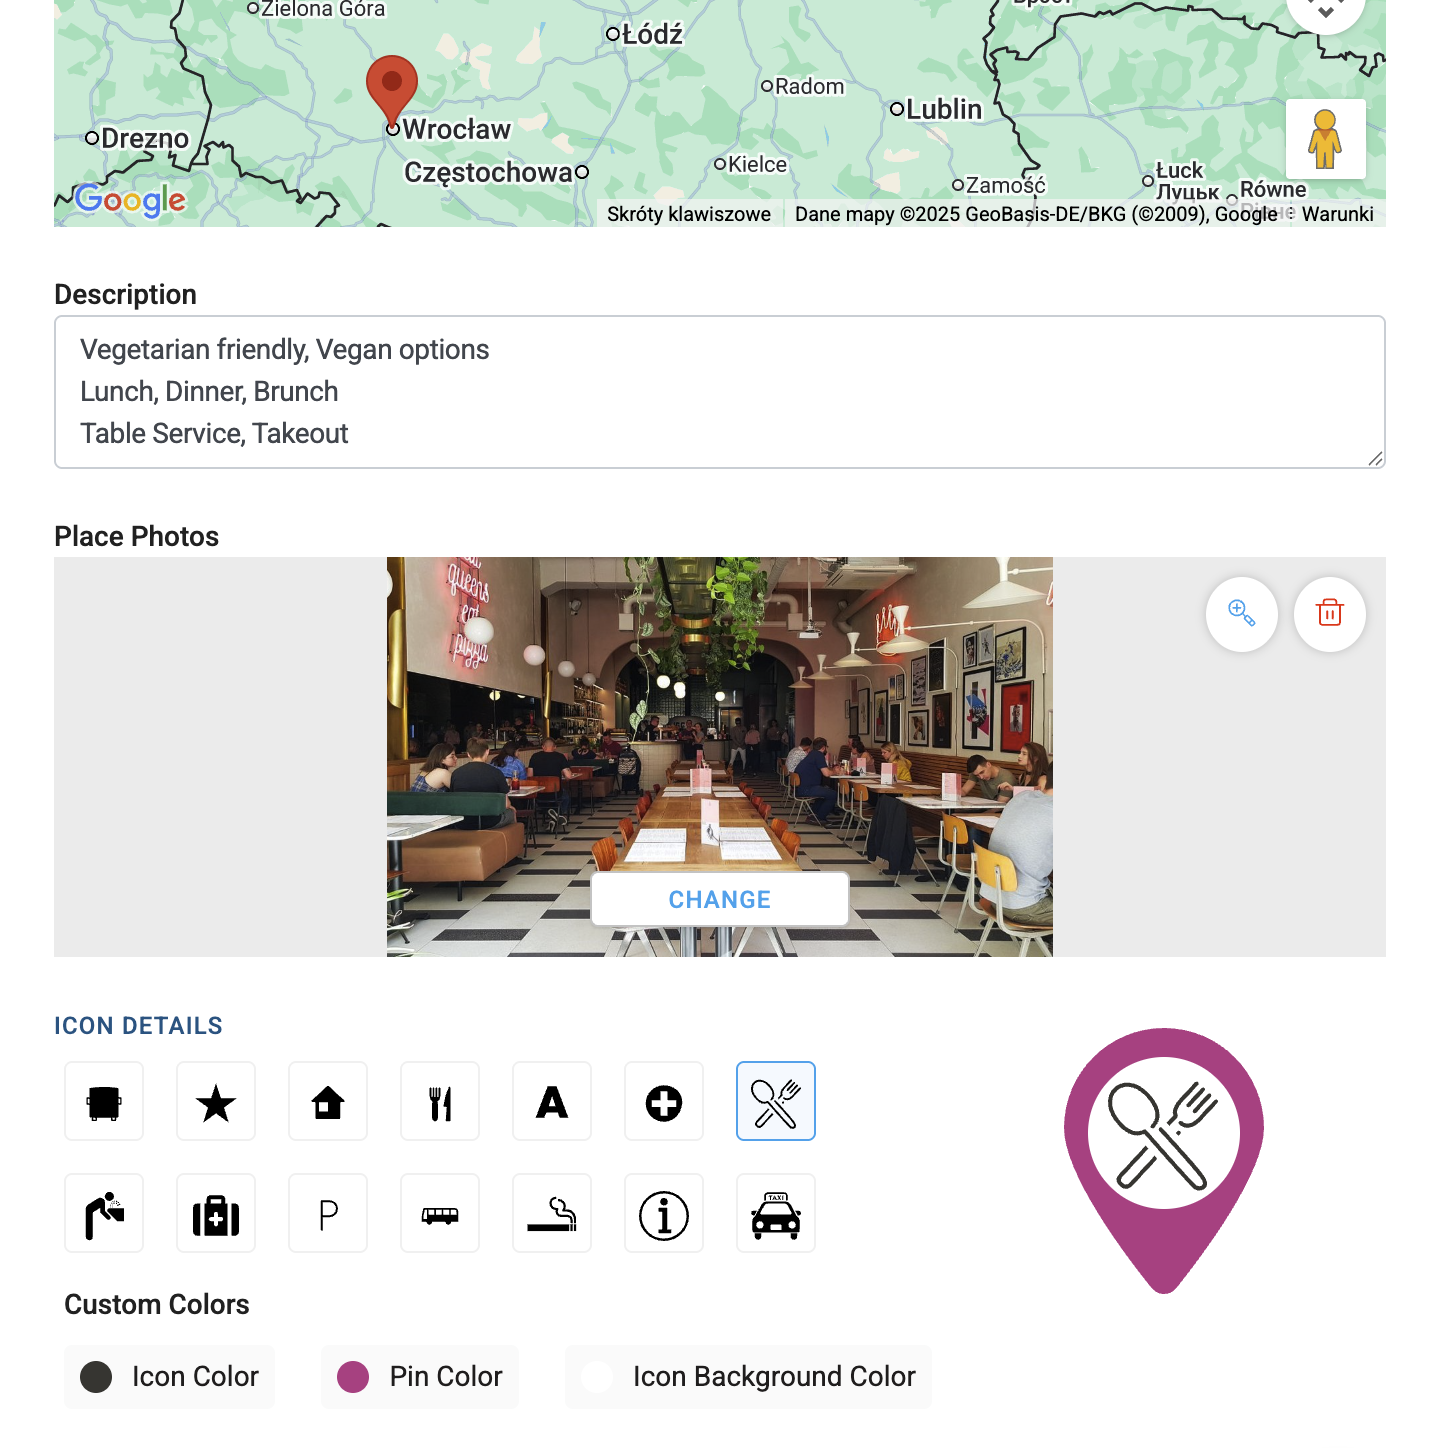
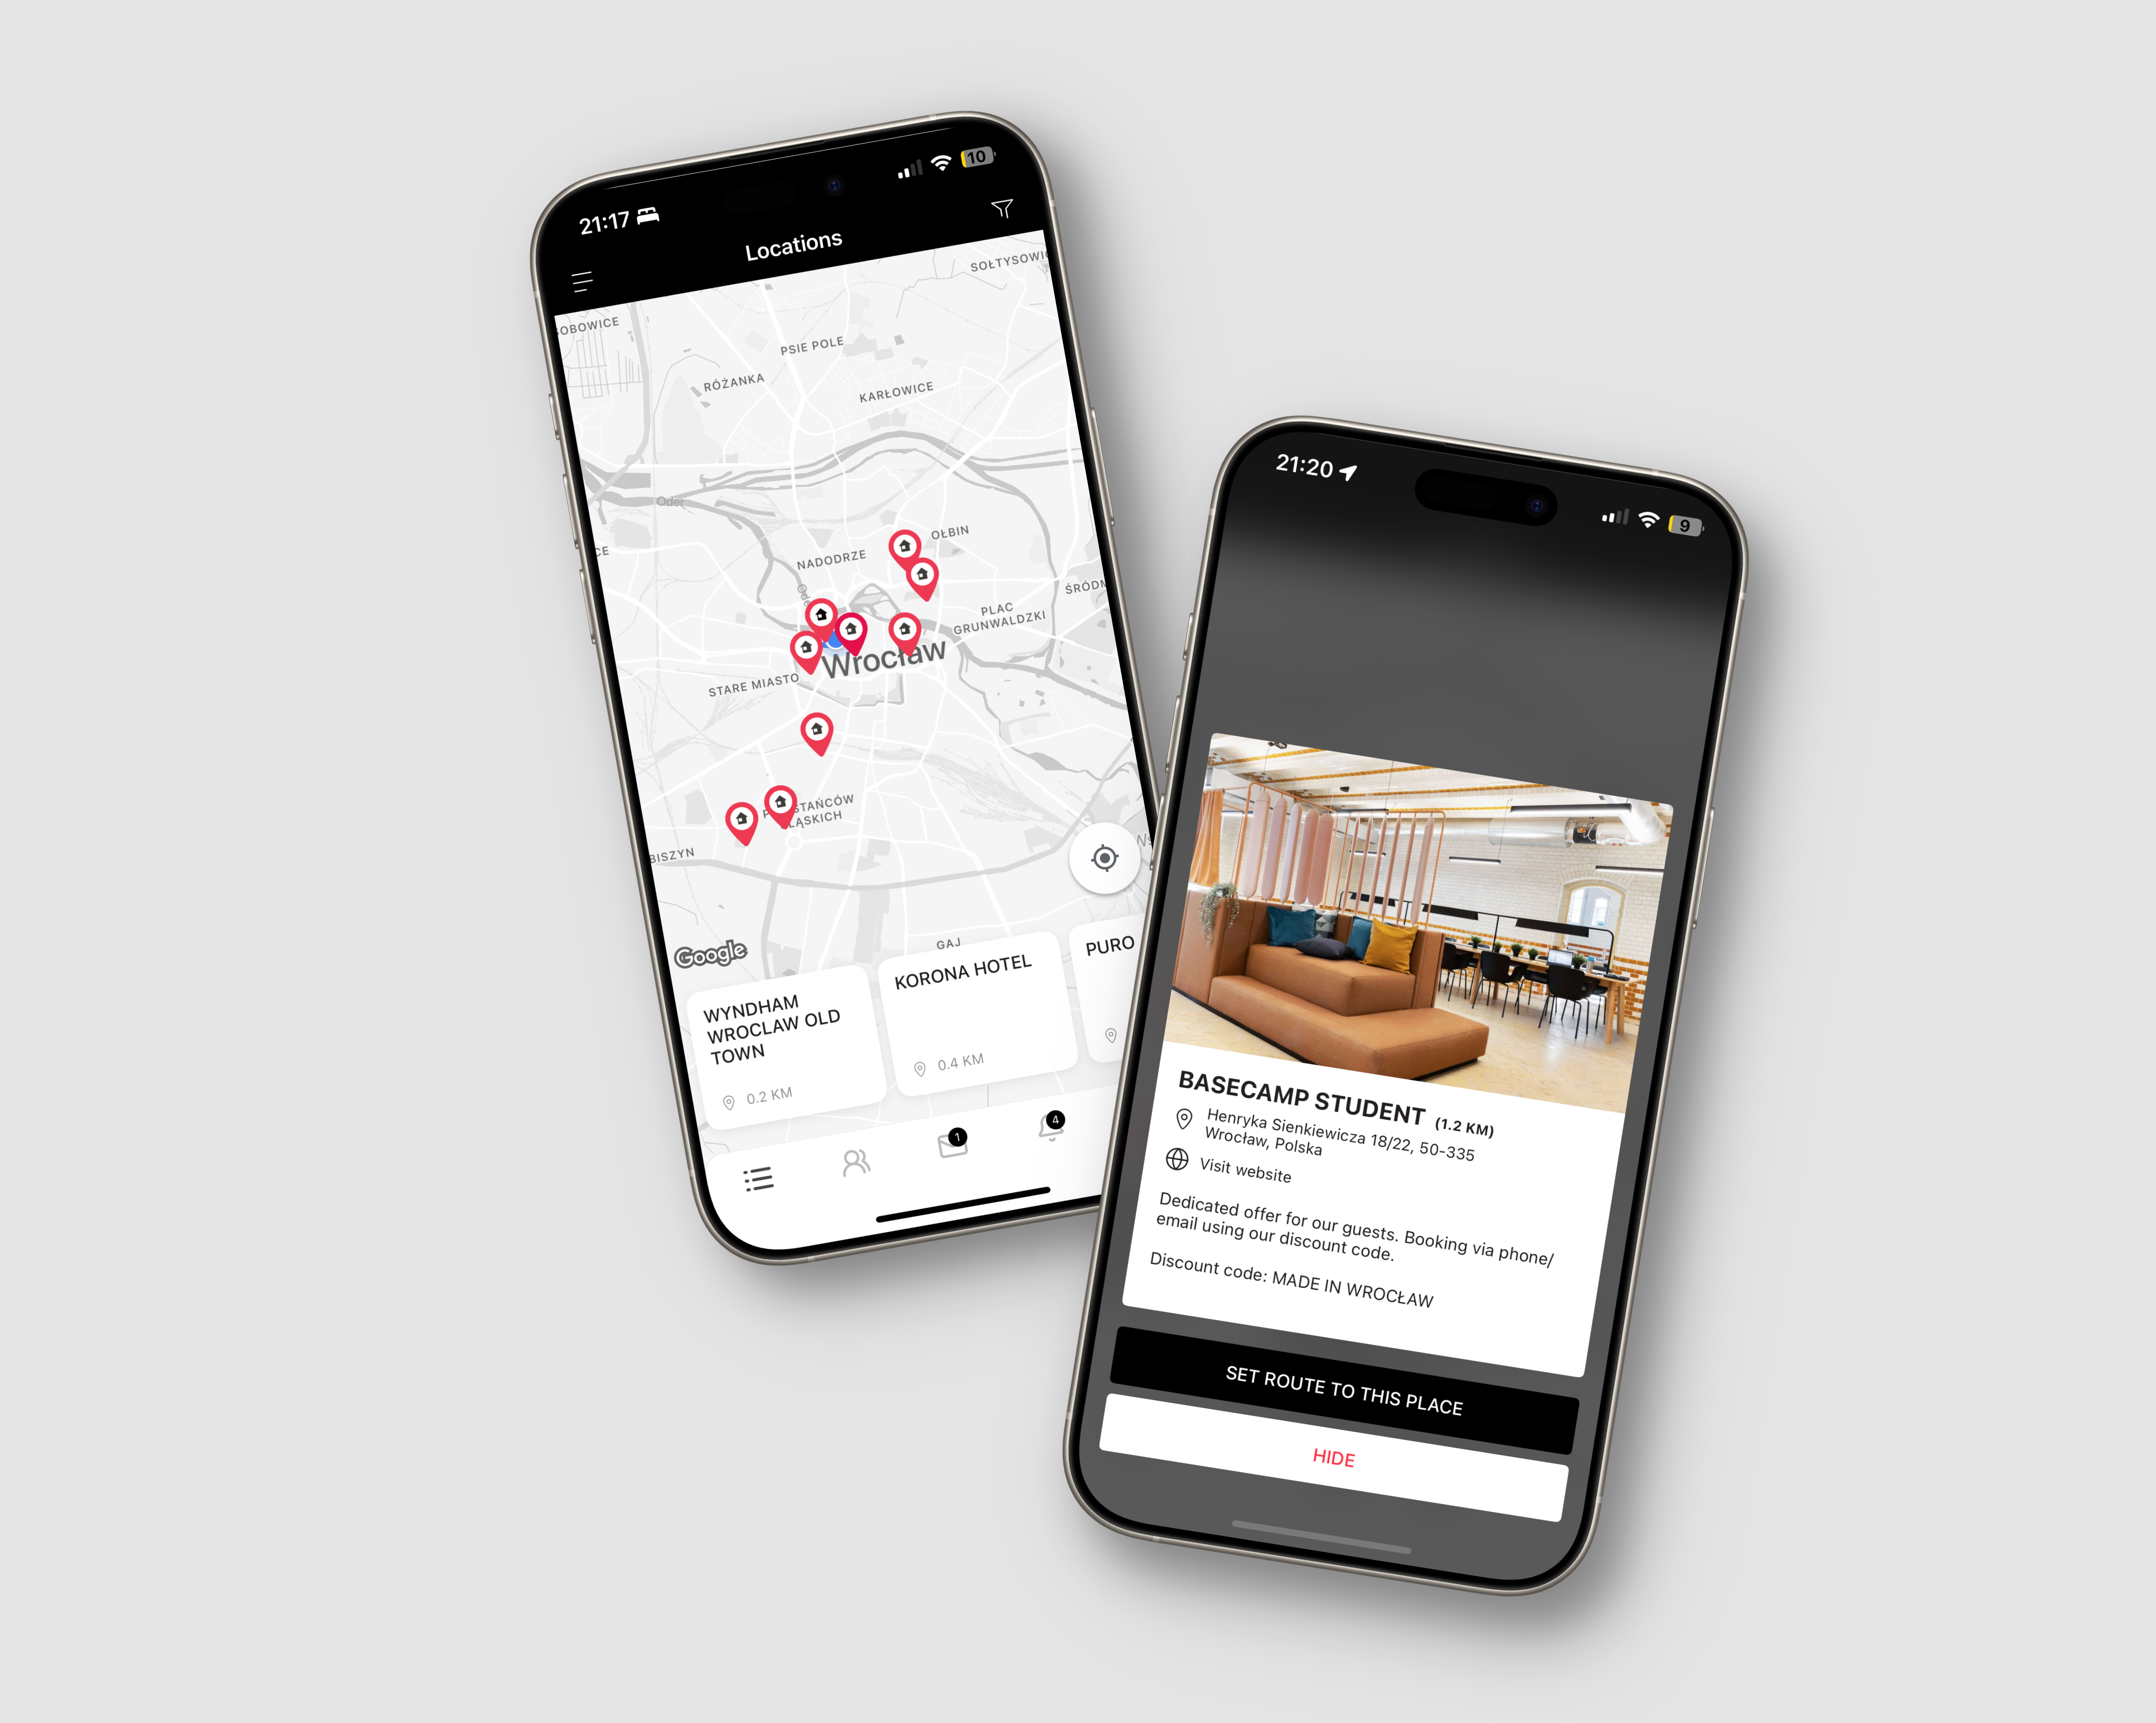
For each created object, you can add a website address, a description, and a photo. These elements are meant to help participants correctly identify the place, as well as get additional information or make it easier to reserve a spot.
Each pin can look different on the map. You can set the appearance of the pin using a simple color and icon editor. Choose one of the available icons and set the color scheme for each element:

Editing visibility in the Venues module lets you subtly distribute dedicated data, such as VIP parking or the evening party location for a closed guest list. You can set a user group for the entire module or for specific categories within the module.
To create objects with access limited to a selected user group, you first need to prepare tags of the user_group type. You can find a detailed guide in the article: Zarządzanie treściami w aplikacji – Tag Database.
After creating tags in the Tag Database section, from Create > Content choose the Venues module from the menu on the right side. In the window that appears, go to the module settings by clicking the three dots located to the right of the name. Then choose Choose User Group from the dropdown list:
After opening the window on the right side of the screen, select the previously created user_grup tags that you want to assign to this module:
To change the visibility of specific categories, go to edit the user_groups tags assigned to them. To do this, click the three dots located to the right of the category name, and then select Edit User Groups from the dropdown list to change the settings for the chosen category:
After opening the window on the right side of the screen, select the previously created user_grup tags that you want to assign to the selected category within the module.
ATTENTION!
From now on, newly created categories will automatically include all tags added to the module. Remember to remove the All users tag from the category intended only for a specific user group, e.g. for the VIP group:

Have a great event with Meeting Application!
