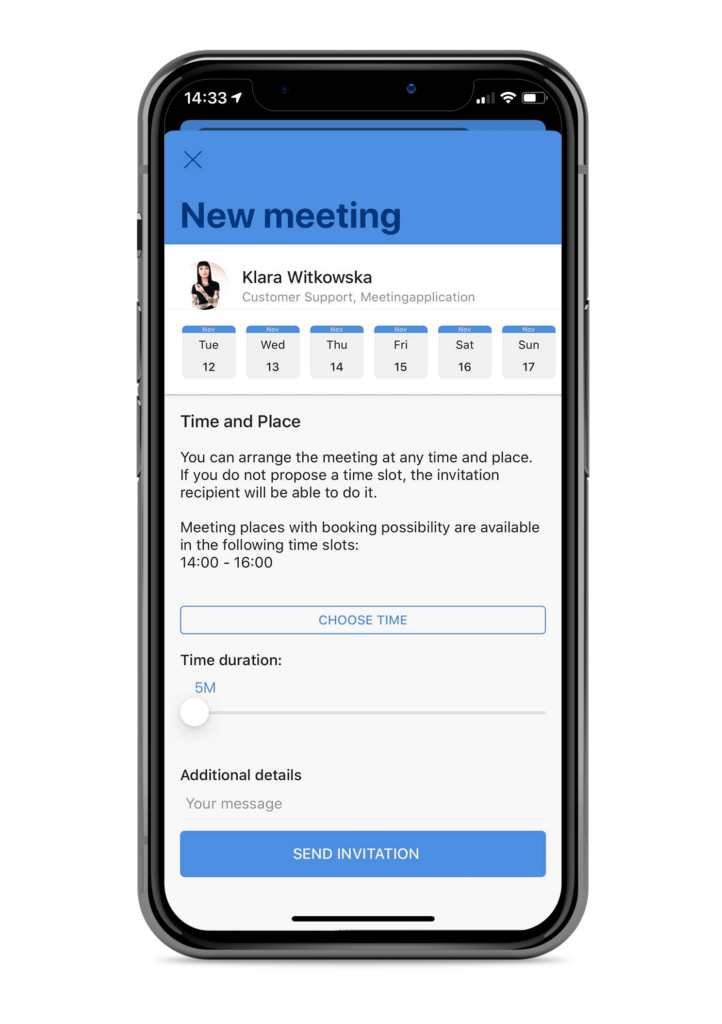
Business Matching is a unique component that allows for the creation of business meetings during a conference. Add the "Business Matching" component in the panel and start its configuration by selecting the "Business Matching Type" from the available options: Semi Ride and Strict Ride.
The Meeting Application allows for conducting business meetings in 2 modes:
Semi Ride – allows meetings between application users only within the time frames specified by the administrator. To enable users to schedule meetings, the administrator panel must set the conditions under which these meetings take place by creating Business Matching sessions. Application users will decide on the time and place of the meeting by choosing one of the proposals created based on the conditions set in the admin panel.
Strict Ride – users cannot create meetings among themselves in the application. Meetings are scheduled only by the administrator.
It is required to first add days by clicking “(+)” located at the top of the component. If days have been previously added in the Agenda component, they will already be visible in the Business Matching component and vice versa (days in both components are identical). If you opt out of Business Matching on one of the event days, do not delete the day, as it may also remove it from the Agenda. For the component to function correctly, the next step is for the administrator to create a session specifying the conditions for scheduling meetings.
To add a session in the Business Matching component, press the “(+)” located in the bottom right corner, or hover over any time slot and click “(+) Add Session”. Before saving the data, name the session and fill in all required fields marked with “(*)”. Choose the day, time slot of the session, and the duration of the meetings. Remember, you can create several sessions with different settings in one day.
The choice of session location is made by adding “Agenda Place” tags. Several locations can be added in one session. Users of the application from the list you created will choose the time and indicate the place where they want to meet with another person. Remember to indicate places that will be convenient for users, such as a café, meeting room, or a designated training room. Add as many places as possible because the system will register that, for example, a meeting is already taking place at the Café at 10:00, and no one else will be able to book that place at that time.
To set the duration of scheduled meetings, select the appropriate value for you from the drop-down list in the “Each Session Period” field – you decide how long the meeting will last. If the set session duration is not divisible by the value of Each Session Period, the system will inform you during the attempt to save the settings, which will require you to make a correction.
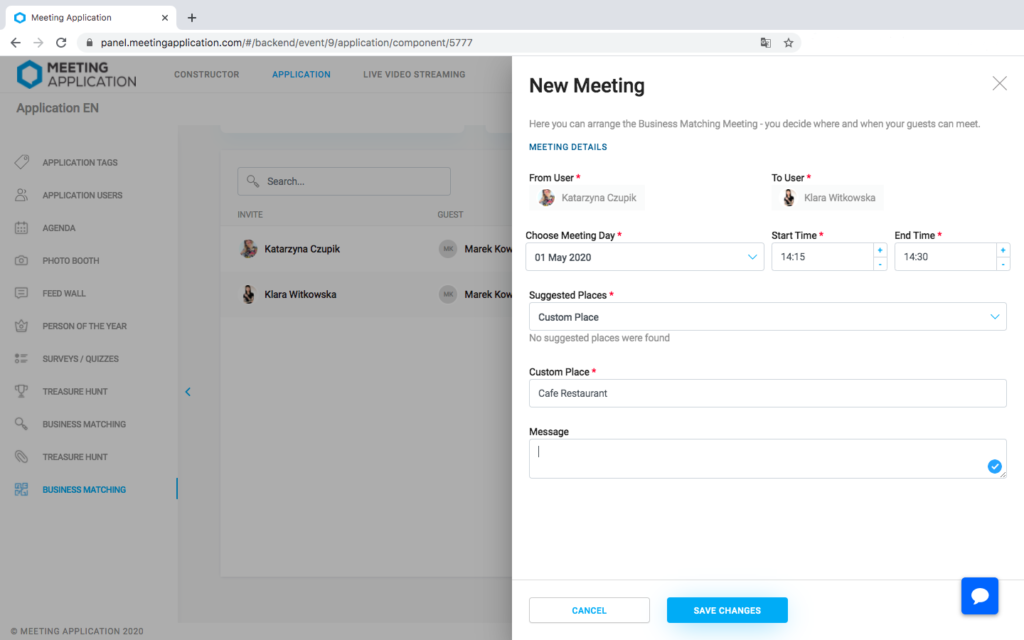
In any chosen type of Business Matching, administrators can schedule meetings between event members. To create a new meeting, go to the Manage>Business Matching section and select “(+)” in the bottom right corner of the screen. In the form displayed by the system, fill in all required fields specifying the time, place, and participants of the meeting. The selection of users is based on the list of guests logged into the application or imported into it through the administrative panel. The saved meeting will be visible in the administrative panel.
Attention!
The Strict Ride type blocks the ability to reschedule or cancel a meeting by users in the application.
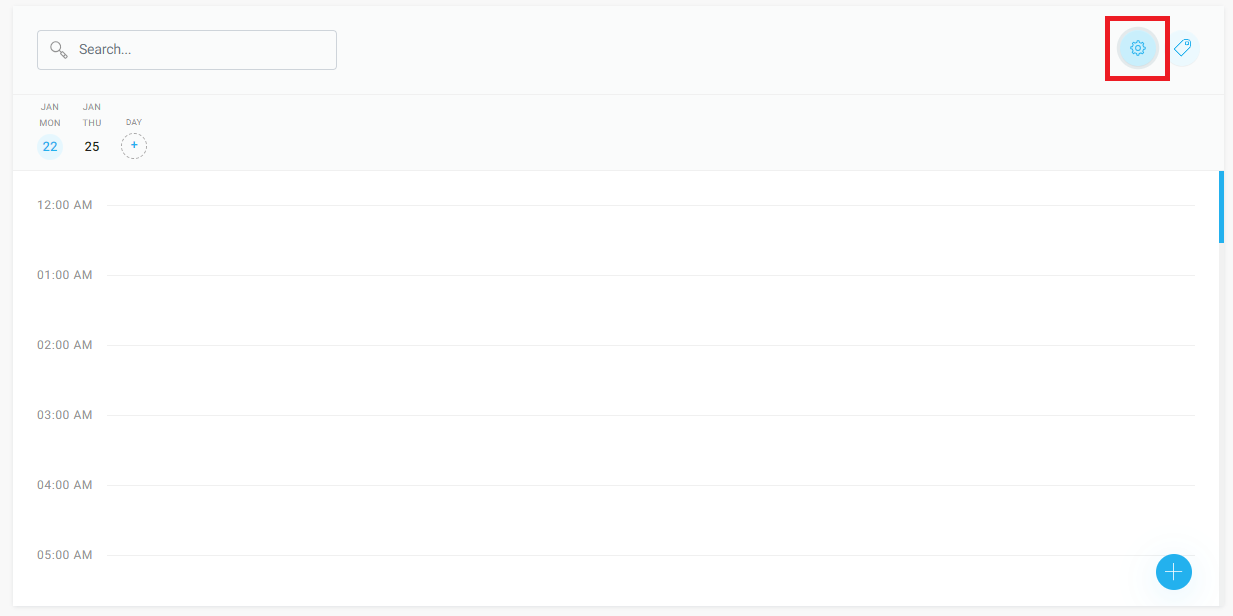
Optionally, you can allow participants to assign tags to themselves and filter participants based on what they have chosen for themselves. To prepare this, select the gear icon above the session calendar section.
Then click the arrow to proceed to edit the options contained within:
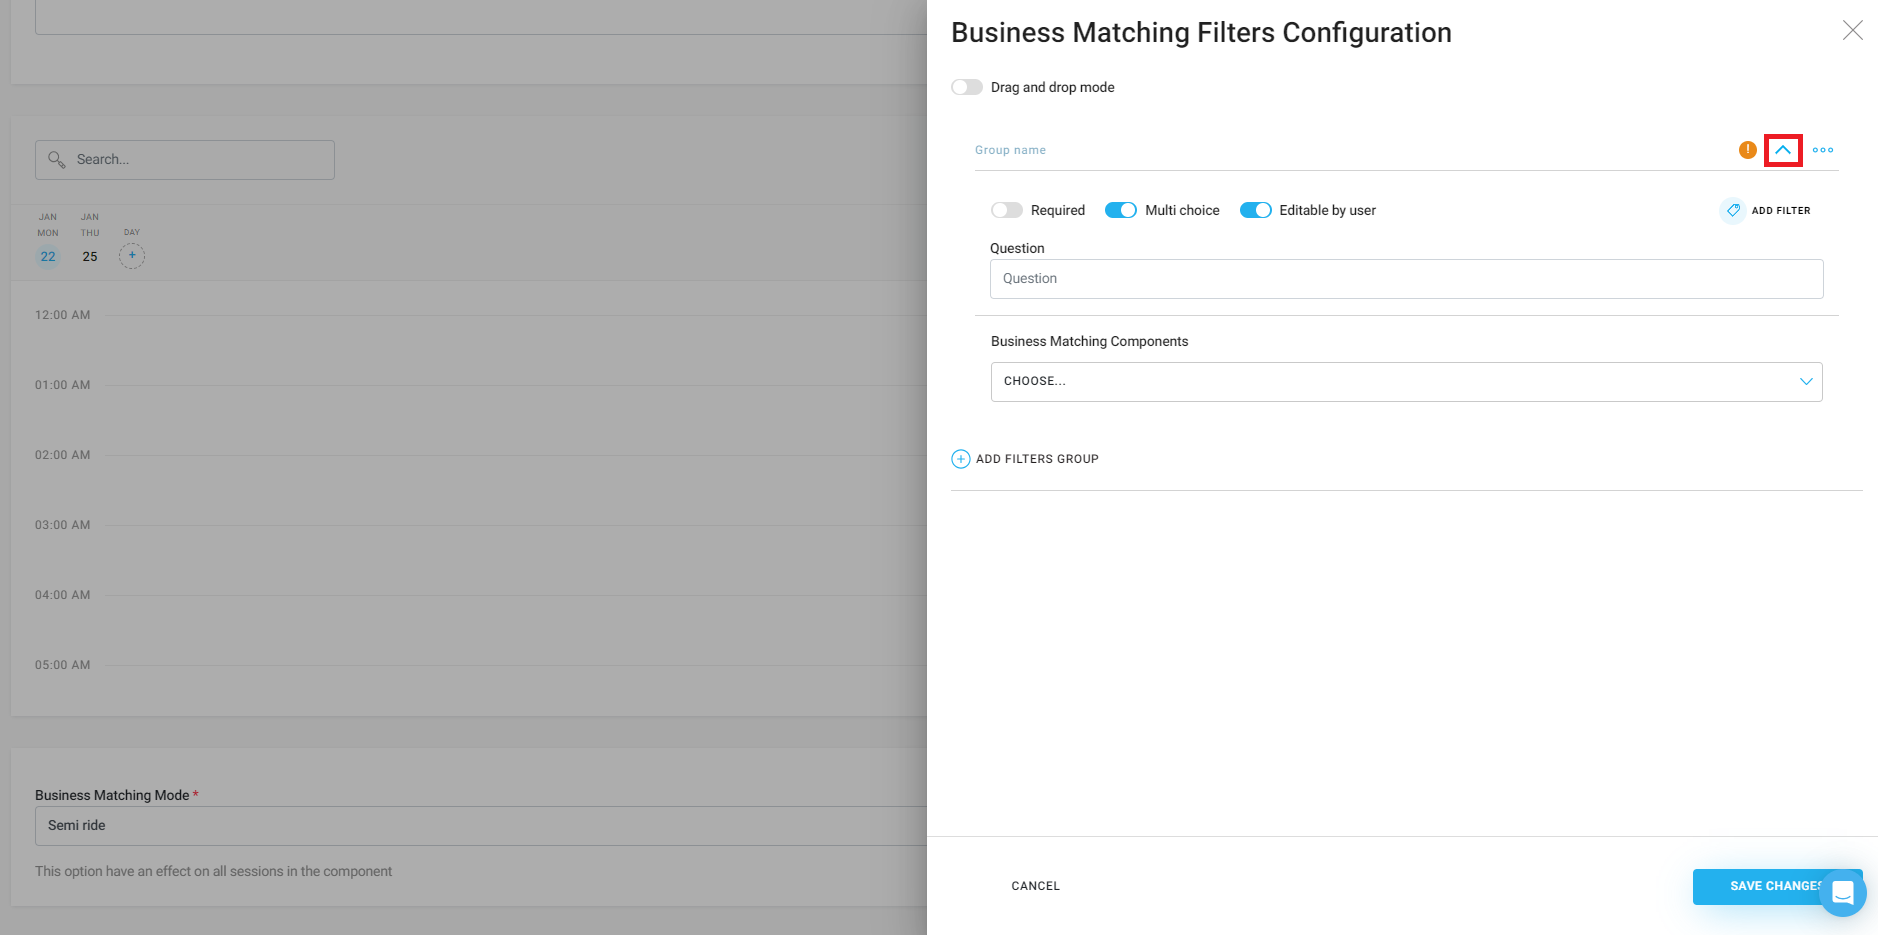
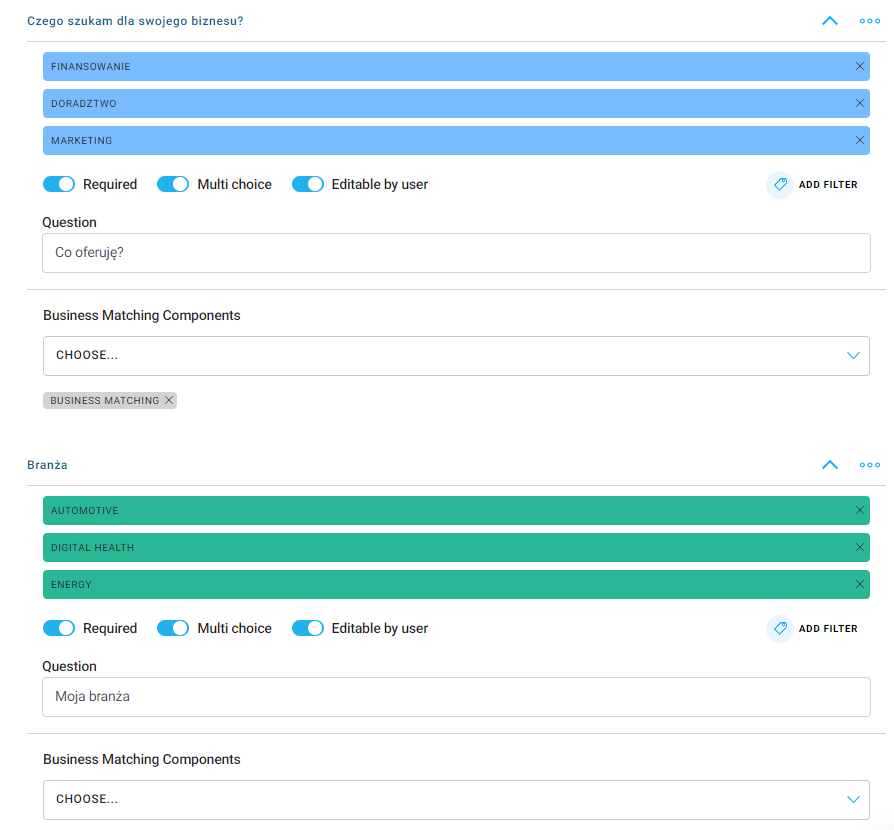
In the Group name section, enter the command that will appear above this filtering section, e.g., "What am I looking for for my business," and in the Question section, the command intended for the participant setting a tag from this group for themselves, e.g., "What do I offer." You can add multiple filter groups using the Add Filters Group button, which will allow participants to provide answers in several categories.
Then click Add filter, to add possible answers to this question, e.g., Financing, Consulting, Marketing.
Under the added tags, you will see several additional settings:
Required - means that the answers to this question cannot be skipped
Multi choice - allows you to select more than one answer for yourself
Editable by user - enable to allow participants to edit their answers independently. Otherwise, they will only be able to use the tags assigned to them by the administrator during import. Enabling this option will allow participants to change the added answers from the Application level.
In the Business Matching Components section, indicate for which Business Matching modules the inserted filters will apply.
PRO TIP
By adding several different categories, assign a different tag color to each of them. This will enable participants to react more intuitively when browsing partner profiles for the meeting.
This section appears in the Application when the module is first launched, and it can be invoked again by selecting the "i" button in its upper right corner. Add a message here to encourage participants to use this tool, and include instructions on how they can do so. Complement it with an attractive photo to catch their attention.
After adding a session, you enable users to schedule business meetings in the Business Matching component. Users should set their individual availability after joining the event. This way, the application will suggest convenient meeting times with a given participant to guests who want to send them an invitation.
The sent invitation will appear on the invitee's phone as a PUSH notification and will also be visible in the Business Matching component, in the pending section. From this place, users can accept, reject, or reschedule the meeting.
Accepted meetings are saved in the component and are visible in the agenda in the “my plan” section.
In the top right corner of the Application, they can change their tag settings (if enabled) and restart the welcome page of the Onboarding section.
