The Business Matching component lets participants schedule business meetings with each other during the event. To start the setup, add the Schedule meetings component in the panel, and then choose the right Business Matching Type: Semi Ride or Strict Ride.
In the Meeting Application app, business meetings can work in two modes:
Semi Ride – allows meetings between app users only within time frames specified by the administrator. For this to be possible, the administrator must first configure Business Matching sessions, defining available days, hours, meeting duration, and available locations. Based on this, users choose a convenient time and place for the meeting.
Strict Ride – In this mode, users can’t create meetings in the app on their own. All meetings are scheduled only by the administrator
To start configuring the component, first add the event days by clicking the “+” icon at the top of the module. If the days have already been added earlier in the Agenda component, they’ll automatically be visible in the Business Matching component as well. It also works the other way around — the days in both components are shared.

The next step is to create a session that sets the rules for arranging meetings.
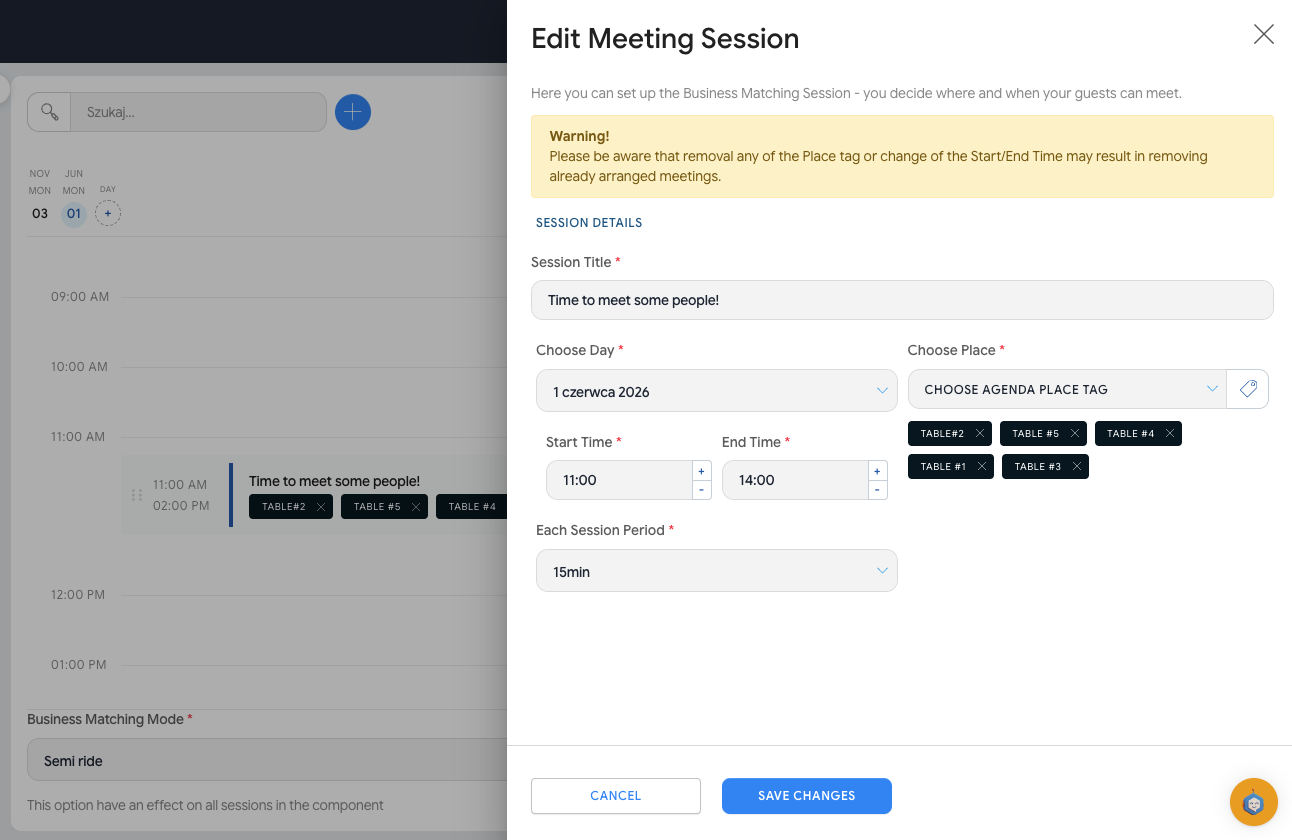
To add a session in the Business Matching component, click the “+” icon in the bottom right corner or hover over the selected time slot and choose the “+ Add Session” option.
Before saving the session:
give it a name,
fill in all required fields marked with an asterisk “*”,
choose the day,
set the session time range,
define the duration of individual meetings.
In one day you can create several sessions, also with different settings.
Meeting places are defined using Agenda Place tags. Within a single session you can add several locations.
This is the list from which users will choose the meeting place with another person. It’s worth adding locations that will be easy for your participants to find and at the same time will allow you to schedule several meetings. To do this, it’s a good idea to prepare a networking zone, set up numbered tables, and create the same kind of meeting places in the Meeting Scheduling module.
A good practice is to add several places. The system makes sure that no more than one meeting is booked in the same place at the same time. This means that if, for example, a café at 10:00 is already taken, other users won’t be able to choose the same location for that same time slot.
Creating places: Table #1; Table #2; Table #3, Table #4, Table #5 will let your participants schedule 5 meetings at the same time!

You can set the duration of a single meeting in the Each Session Period field by choosing the appropriate value from the dropdown list.
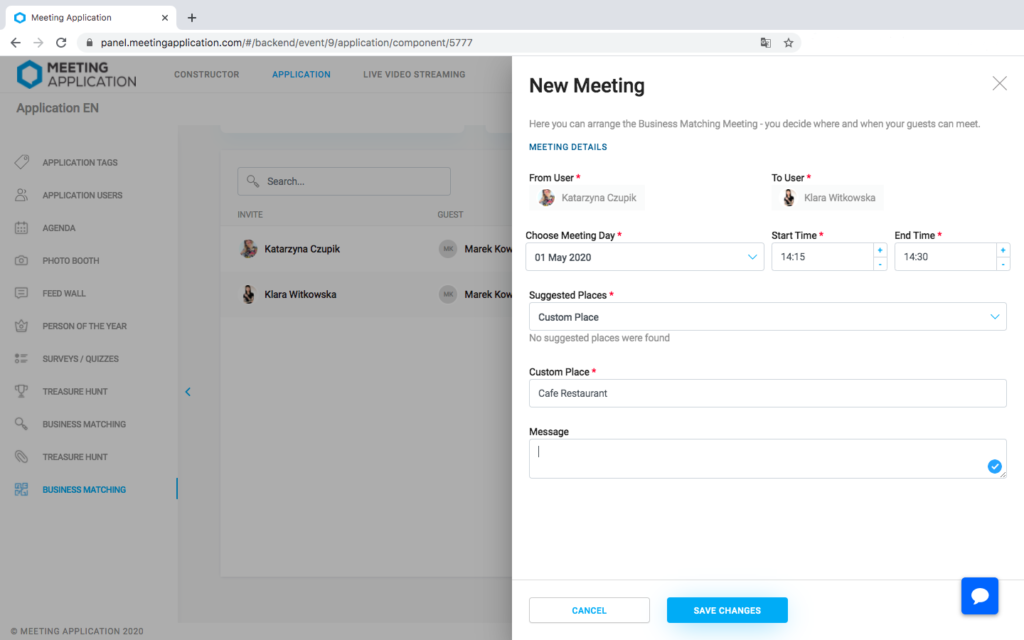
In any chosen type of Business Matching, admins can schedule meetings between event members. To create a new meeting, go to the Manage > Bussines Matching section and click “(+)” in the bottom-right corner of the screen. In the form displayed by the system, fill in all required fields specifying the time, place, and participants of the meeting. Users are selected based on the list of guests logged into the app or imported into it via the admin panel. The saved meeting will be visible in the admin panel.
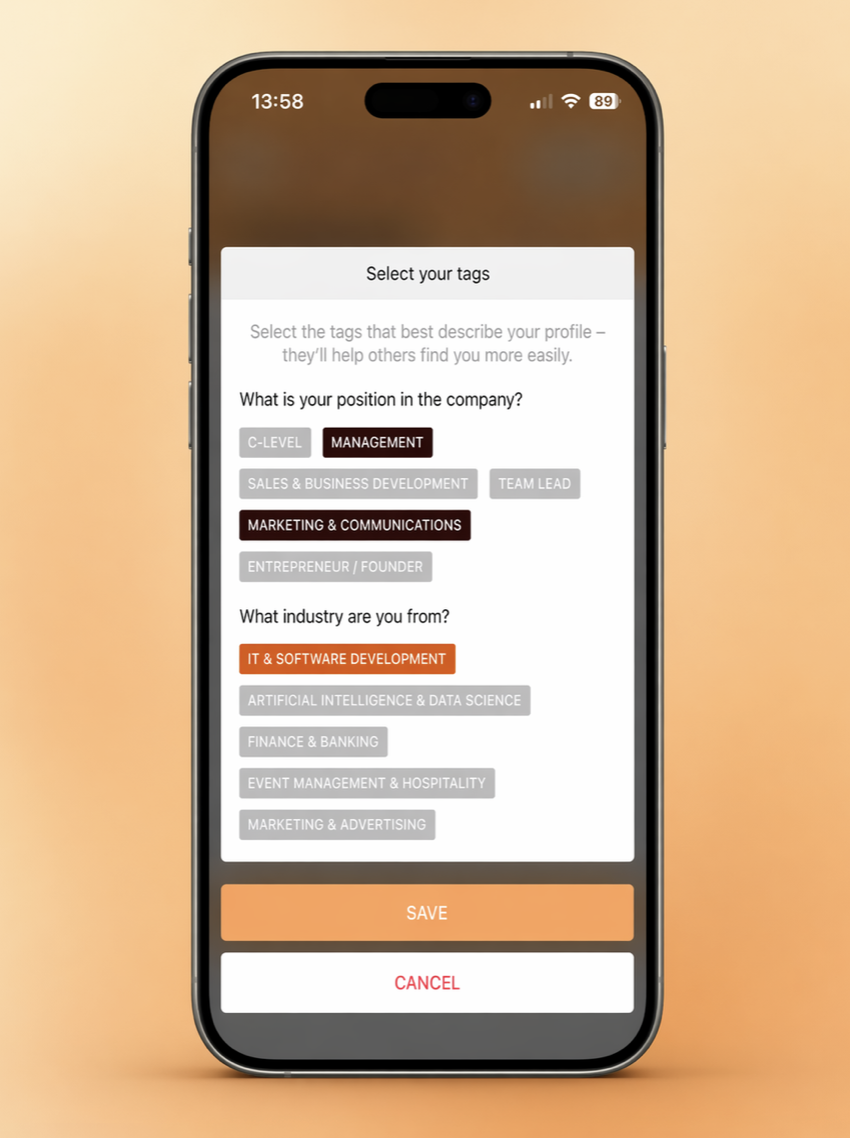
Optionally, you can let participants assign tags to themselves and filter participants by what they selected for themselves.
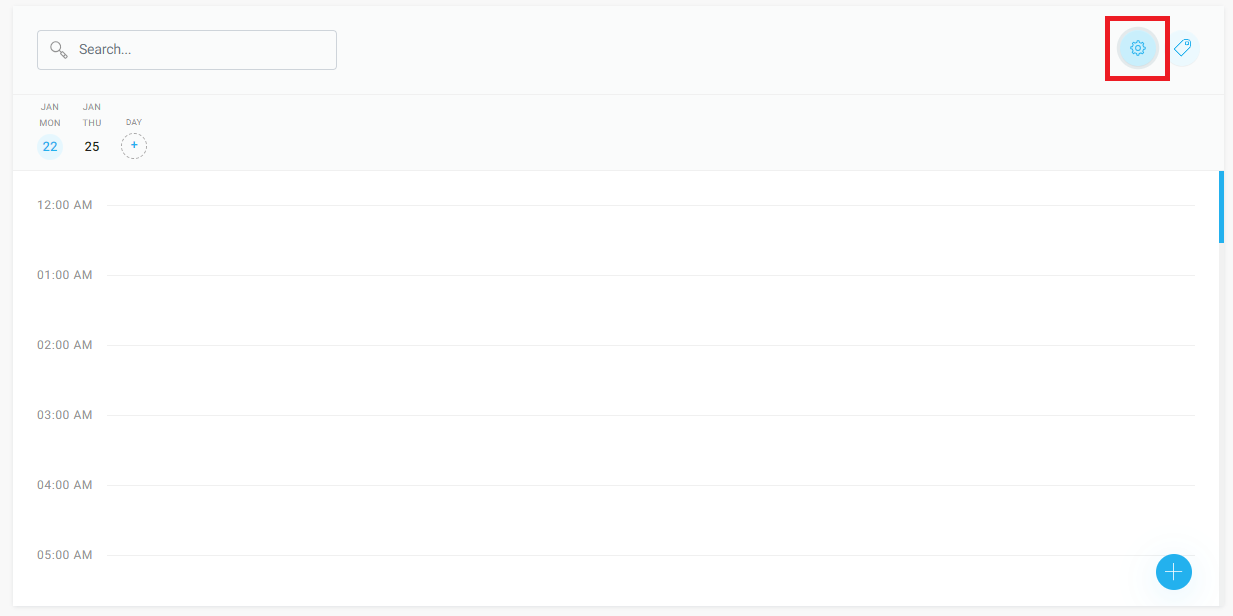
To start creating labels from the Business Matching module, click the gear icon above the session calendar section and follow the instructions from 👉THIS ARTICLE.
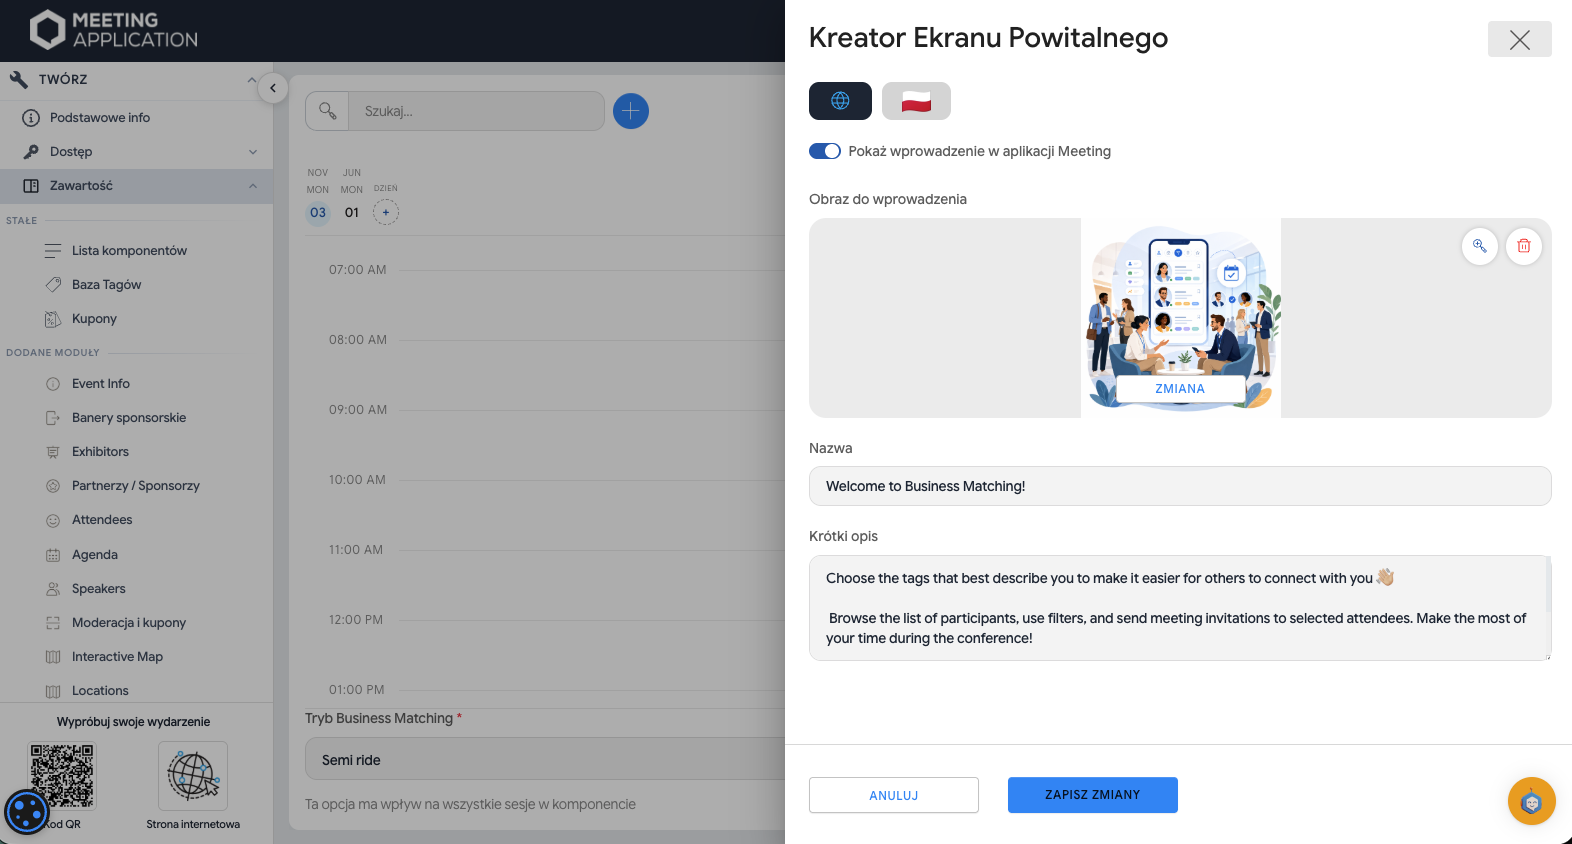
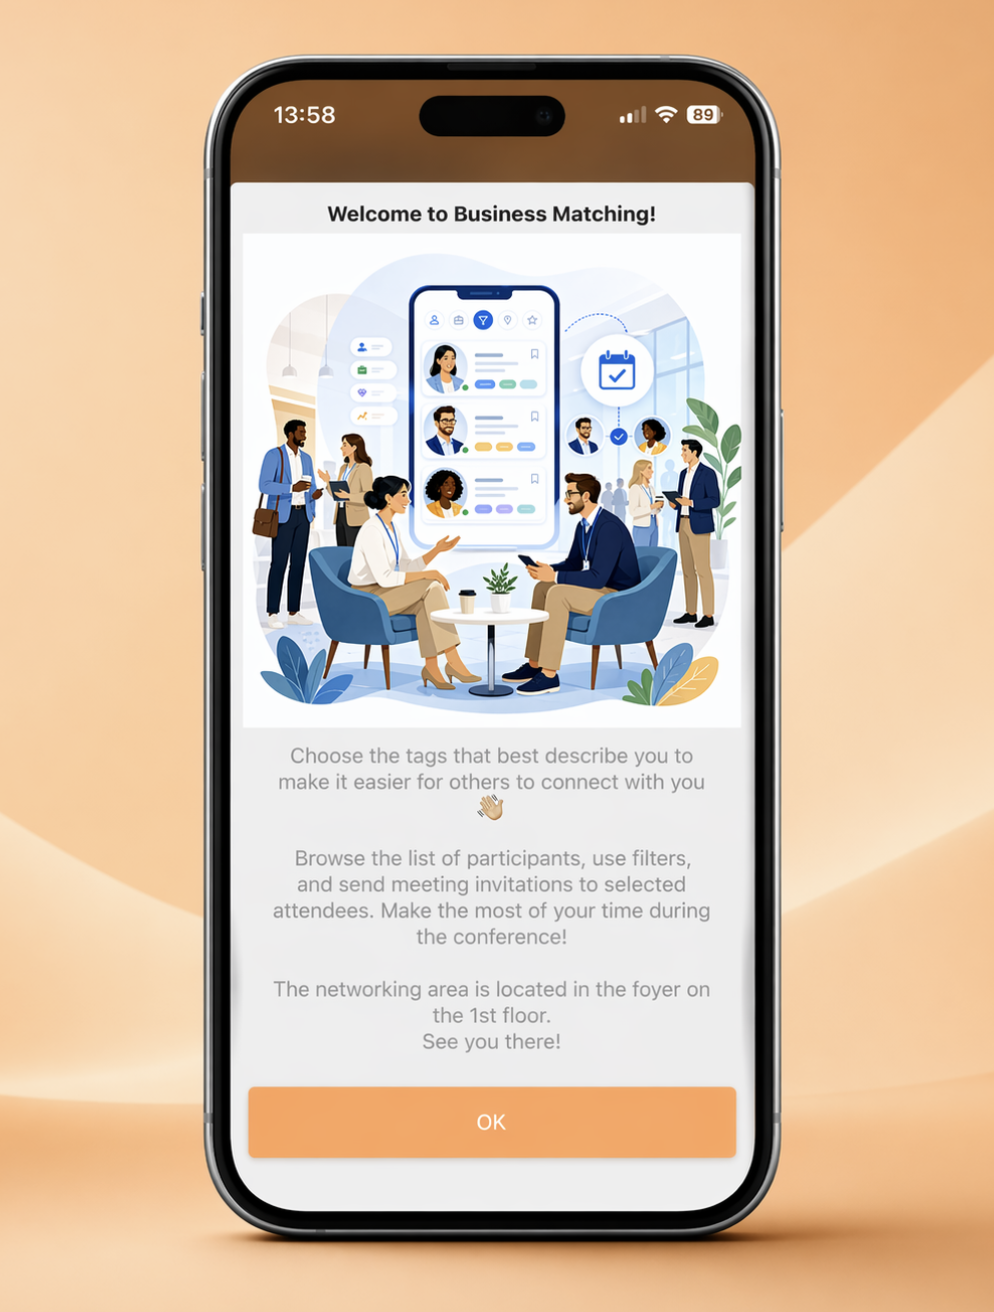
This section appears in the App when the module is launched for the first time, and you can bring it up again by choosing the “i” button in its top right corner. Add a message for participants here to encourage them to use this tool and attach instructions on how they can do it.
Complete it with an eye‑catching photo to grab their attention
Photo on the welcome screen when entering the module:
Size: 1080 × 1920 px or 1024 × 1024 px
Format: JPG, PNG
Resolution: 72 ppi
FYI: this size displays the photo/banner in full screen height; if you add a title and description, we recommend a 1:1 ratio to make sure the whole graphic is visible regardless of text length
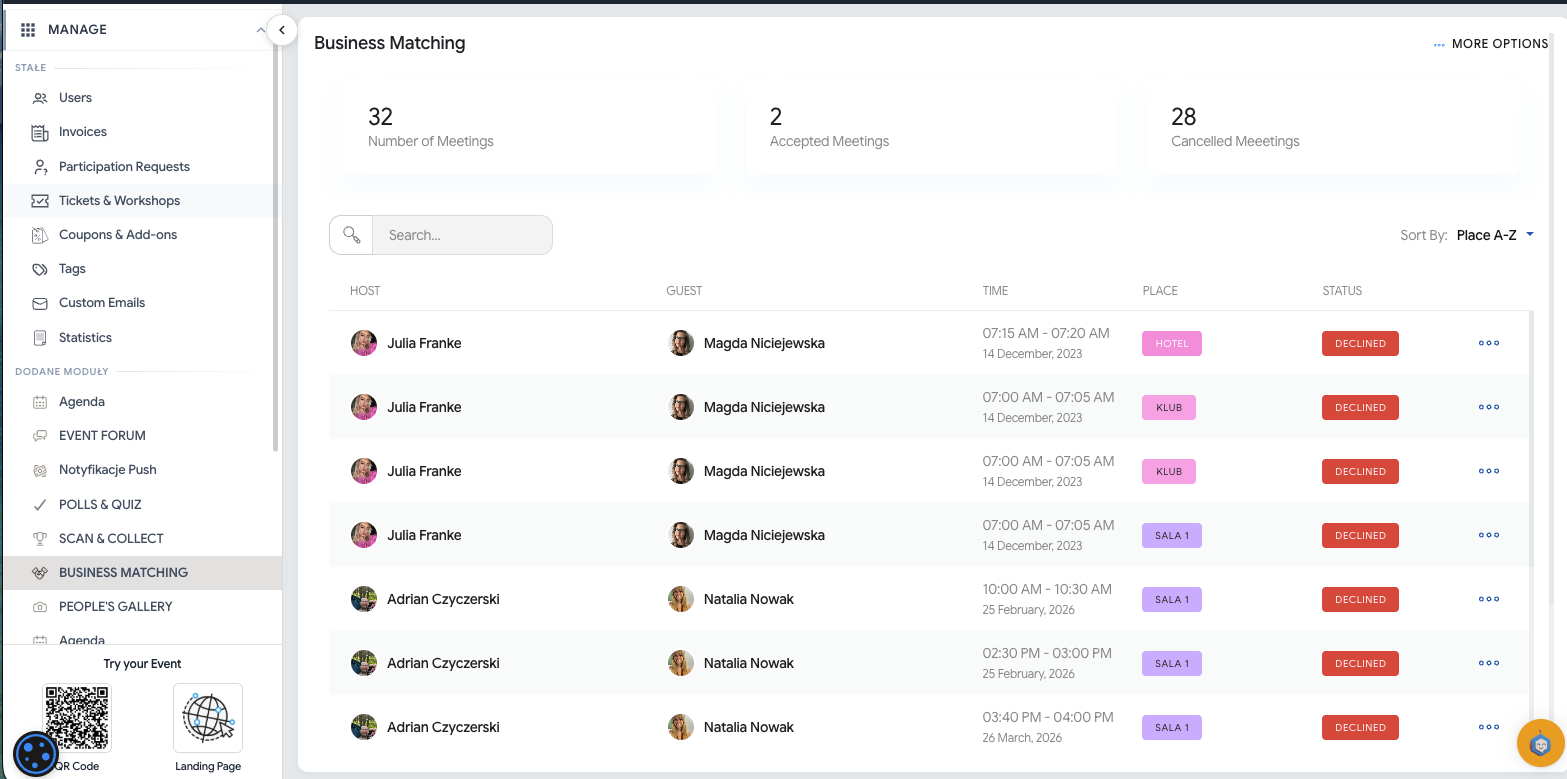
After the event ends, in the MANAGE → BUSINESS MATCHING tab you can check basic stats about meetings arranged in the app. Here you’ll see the total number of all created meetings, as well as the number of accepted and cancelled meetings. This way you can easily see how much interest there was in the Business Matching module and what the actual networking activity of participants looked like.
After adding sessions, you let users schedule business meetings in the Schedule meetings component.
When entering the module for the first time, a logged-in user will see a welcome screen:
After clicking the pencil icon in the top right corner, the app user will choose the tags that describe them best:
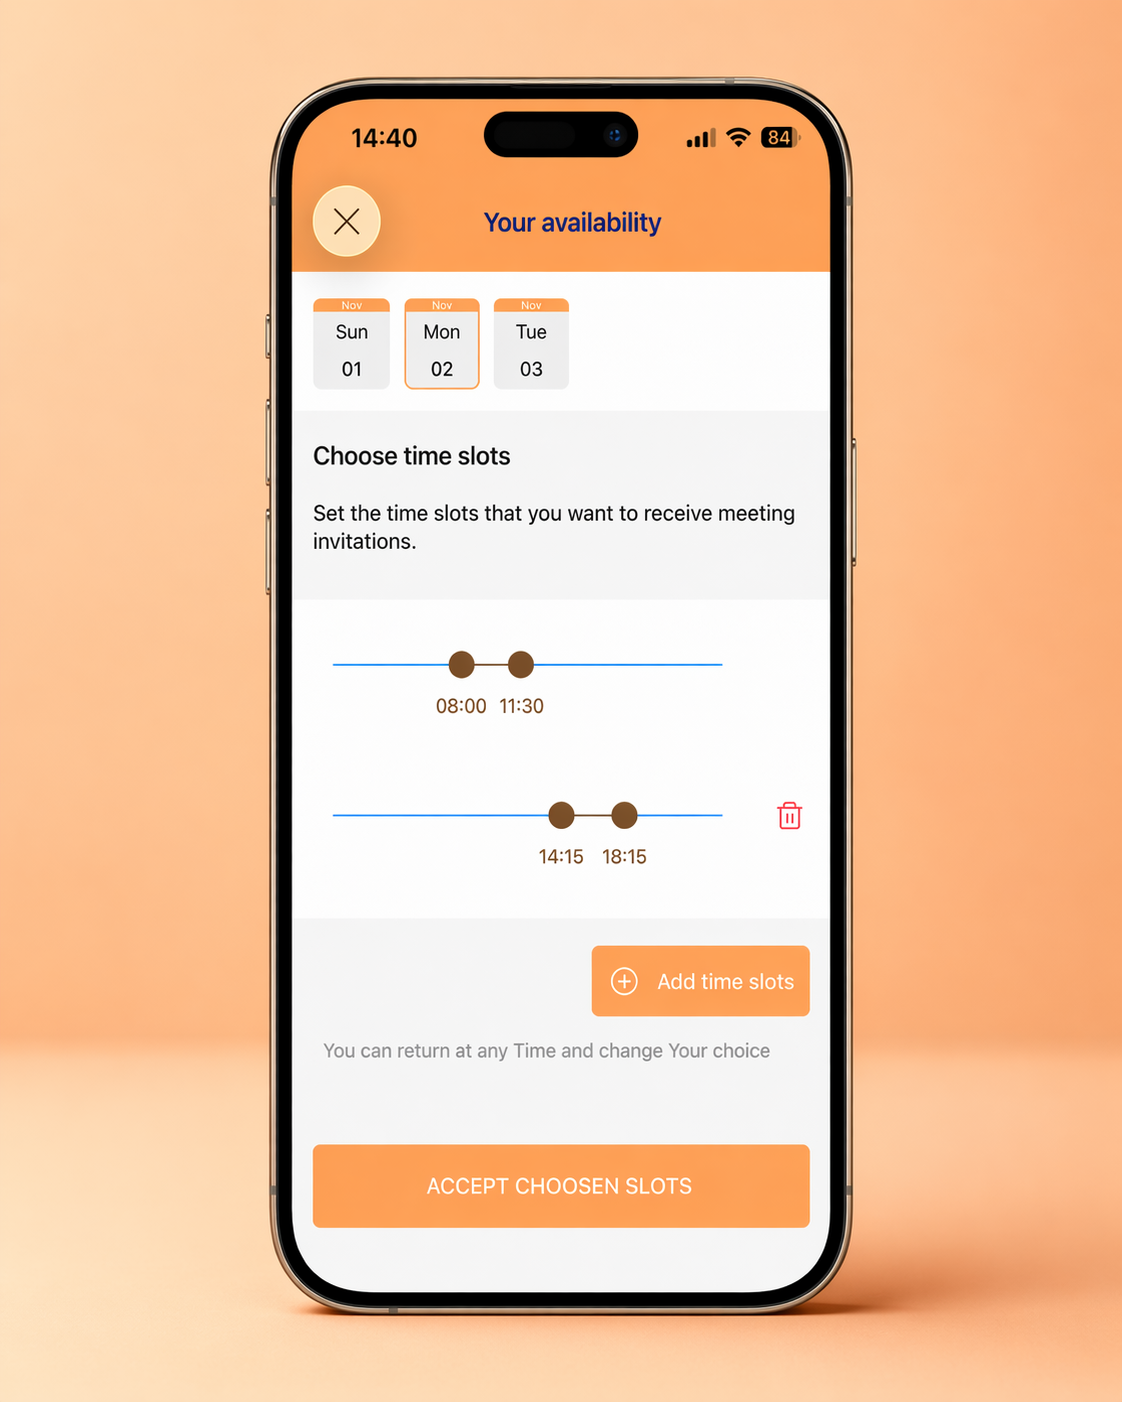
Each user can set their availability period so the app can suggest to guests who want to send them an invitation what times are convenient for meetings with that participant:
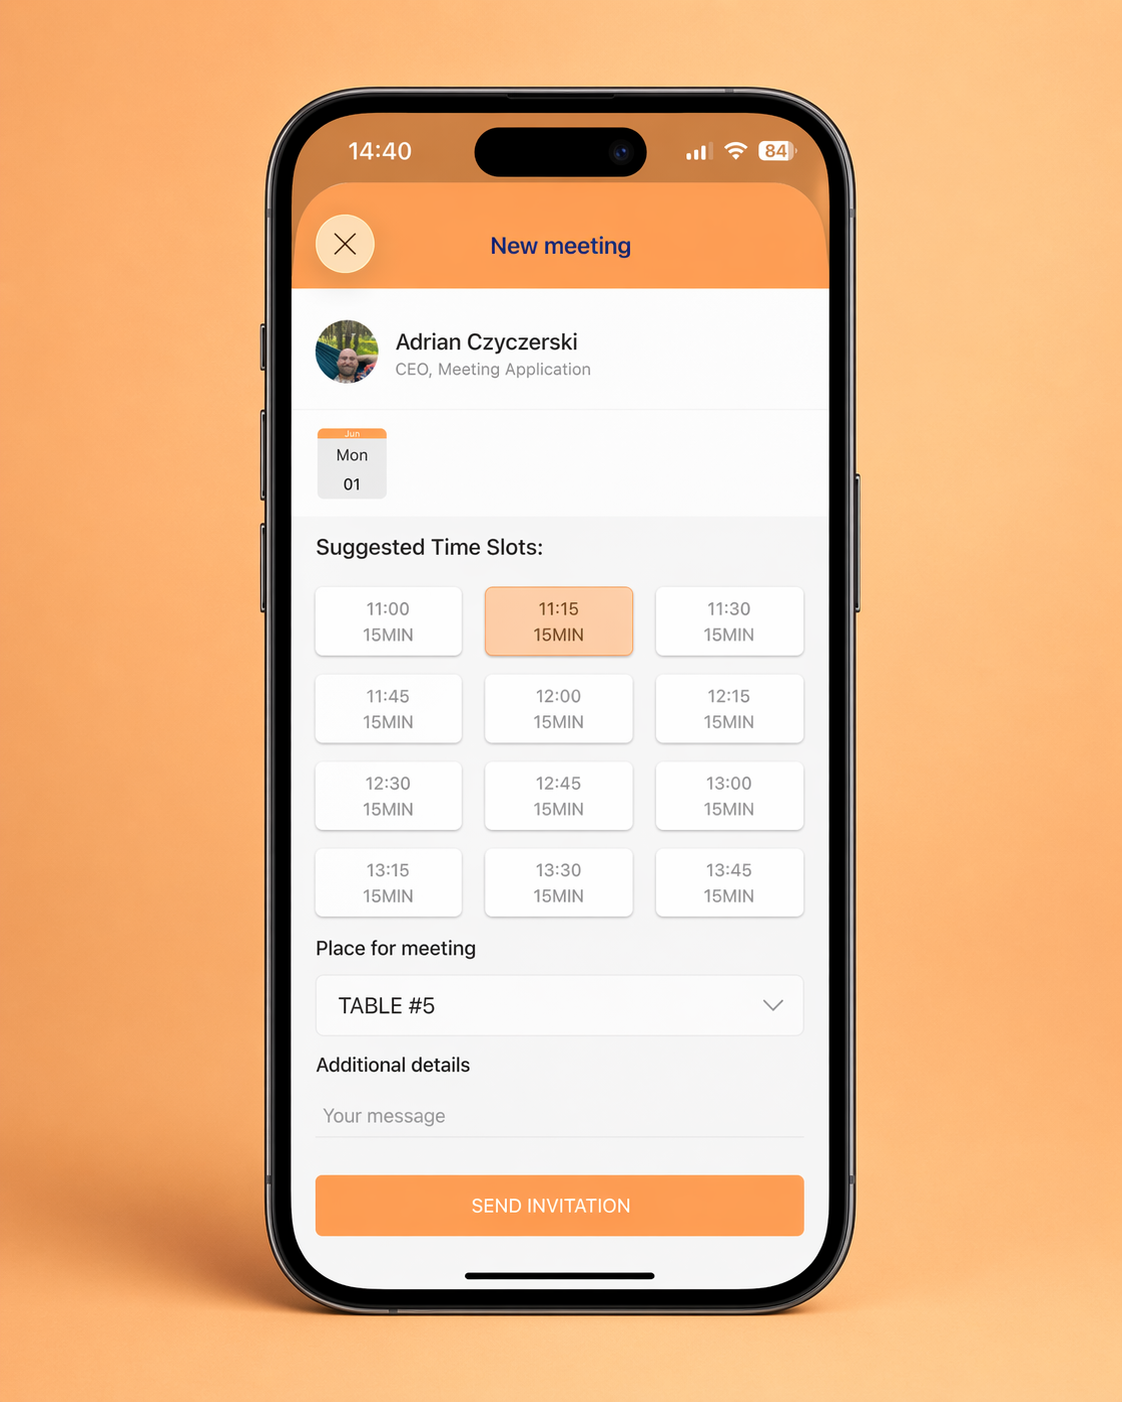
When scheduling a meeting with a given participant, you choose the time, place and you can also leave an additional comment with information about why you actually want to meet:
The sent invitation will appear on the invitee’s phone as a PUSH notification, and will also be visible in the Schedule meetings component, in the pending section. From there, users can accept, reject or reschedule the meeting:
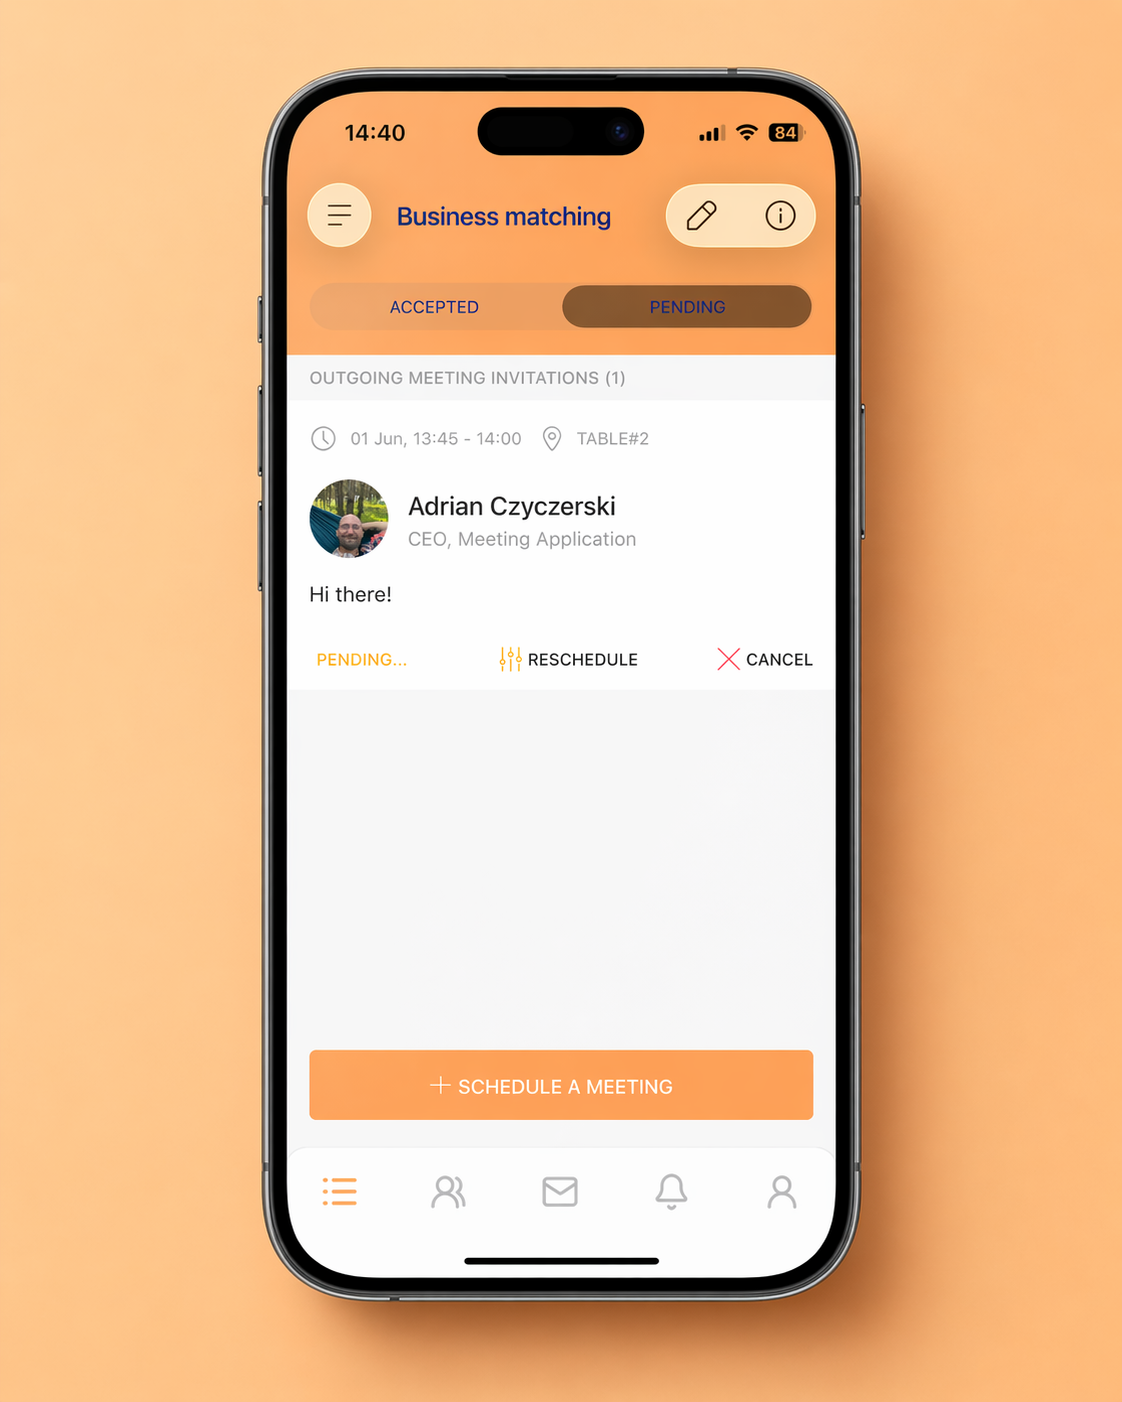
Accepted meetings are saved in the component and are also visible in the agenda in the “my plan” section.