Catch your users’ attention with the most important info, guide them to where you want them to go, and keep them posted about changes to your event.
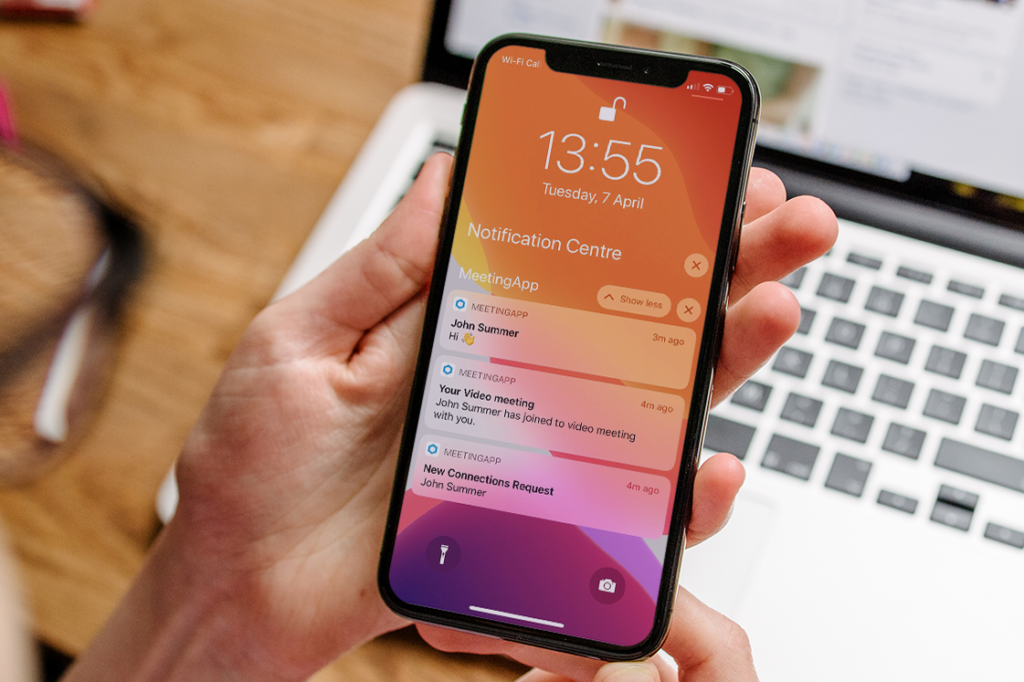
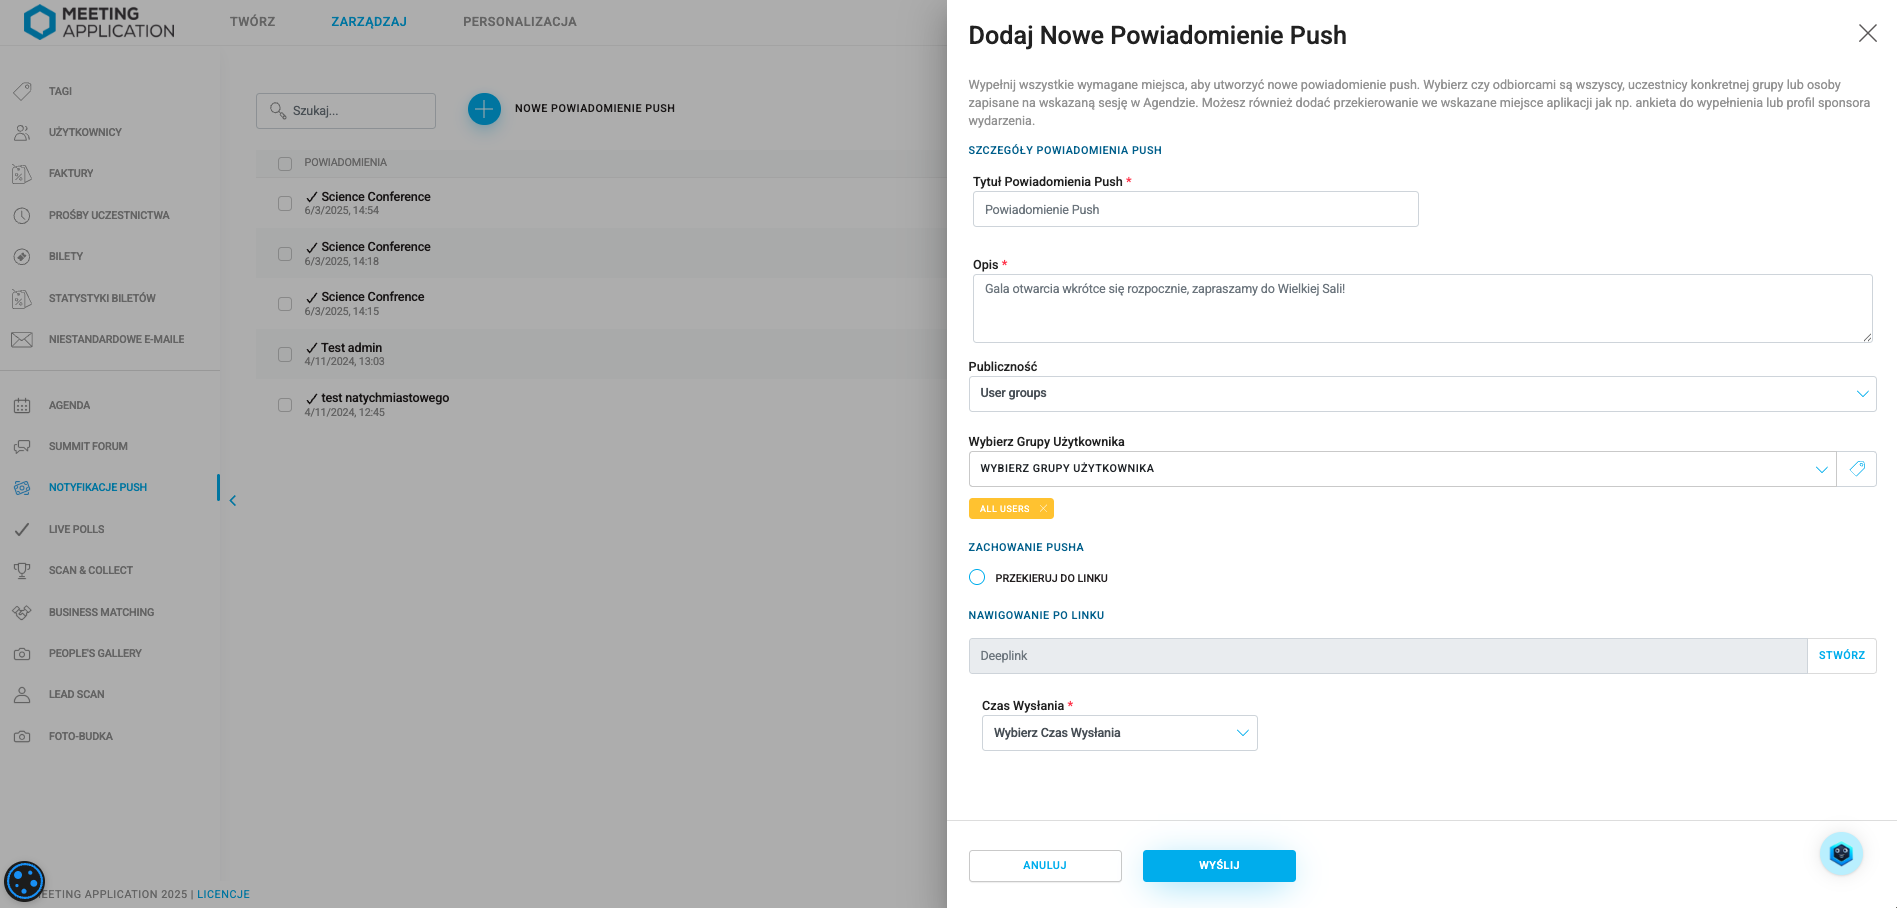
To make a PUSH notification, go to the PUSH Notification module and click (+), then fill in all the fields marked with (*). The notification needs a short title (summary of your message) and a description.
PUSH notifications can go to a selected group of users, folks signed up for a specific session in your agenda, or to every guest at your event.
If you want to send a PUSH notification to a selected group of users, in the Select User Groups field pick the tag that matches the group of recipients you want. At the same time, you need to remove the All Users tag under the tag selection field using the (x) button. The All Users tag is added by default to every new notification:
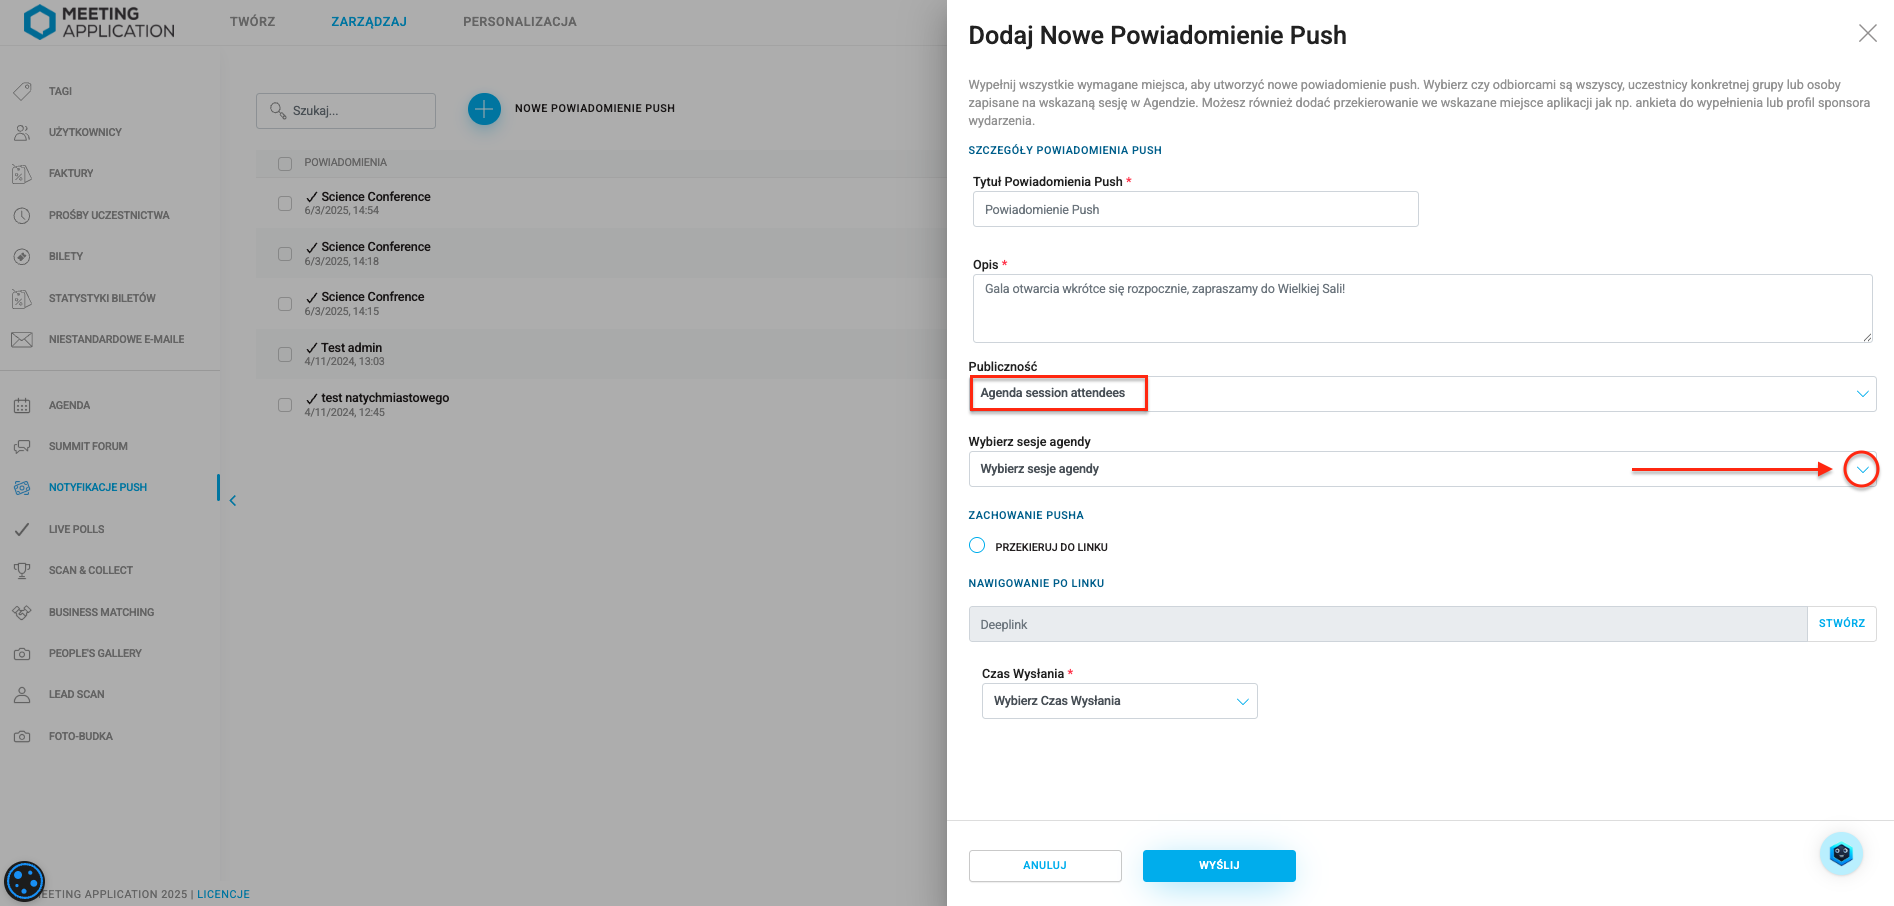
Alternatively, instead of sending a PUSH notification to a specific group of participants, you can also just send it to those who have added a specific session from the agenda to their schedule.
If you want to use this method, in the Audience section, pick Agenda session attendees, and a new field will show up below: Select agenda session. From the dropdown, pick which session you want to send the notification out to the attendees connected with it.
A PUSH can redirect users to a chosen spot in the App, bringing their attention to the most important parts of the event. Selecting the REDIRECT TO LINK option means the person who taps the PUSH on their screen will be sent straight to the target location of that link.
Without this option, the participant who taps the PUSH will be sent to the  NOTIFICATIONS section in the App, where they'll see a Redirect button—a tap on that will send them to the right section in the event:
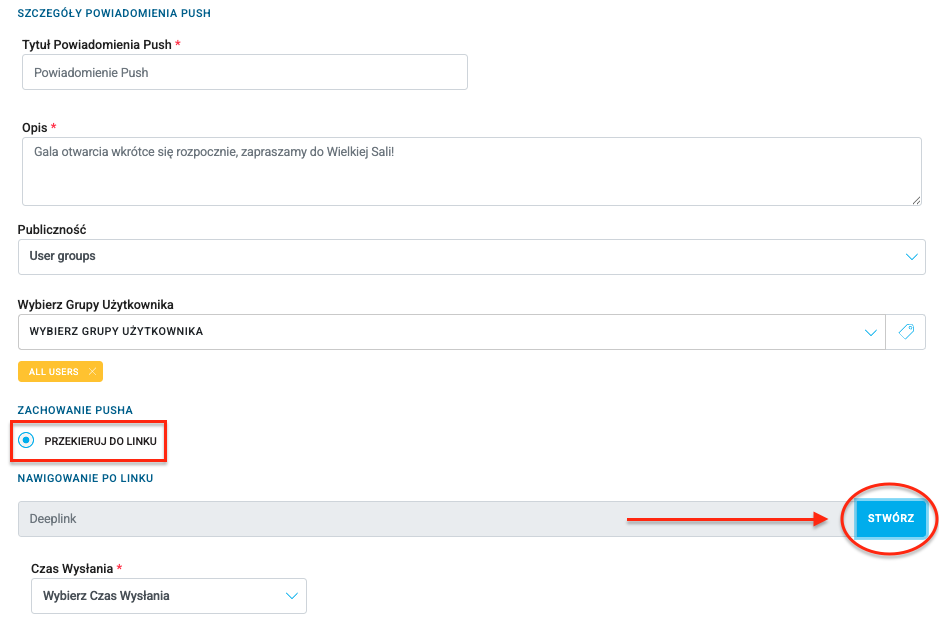
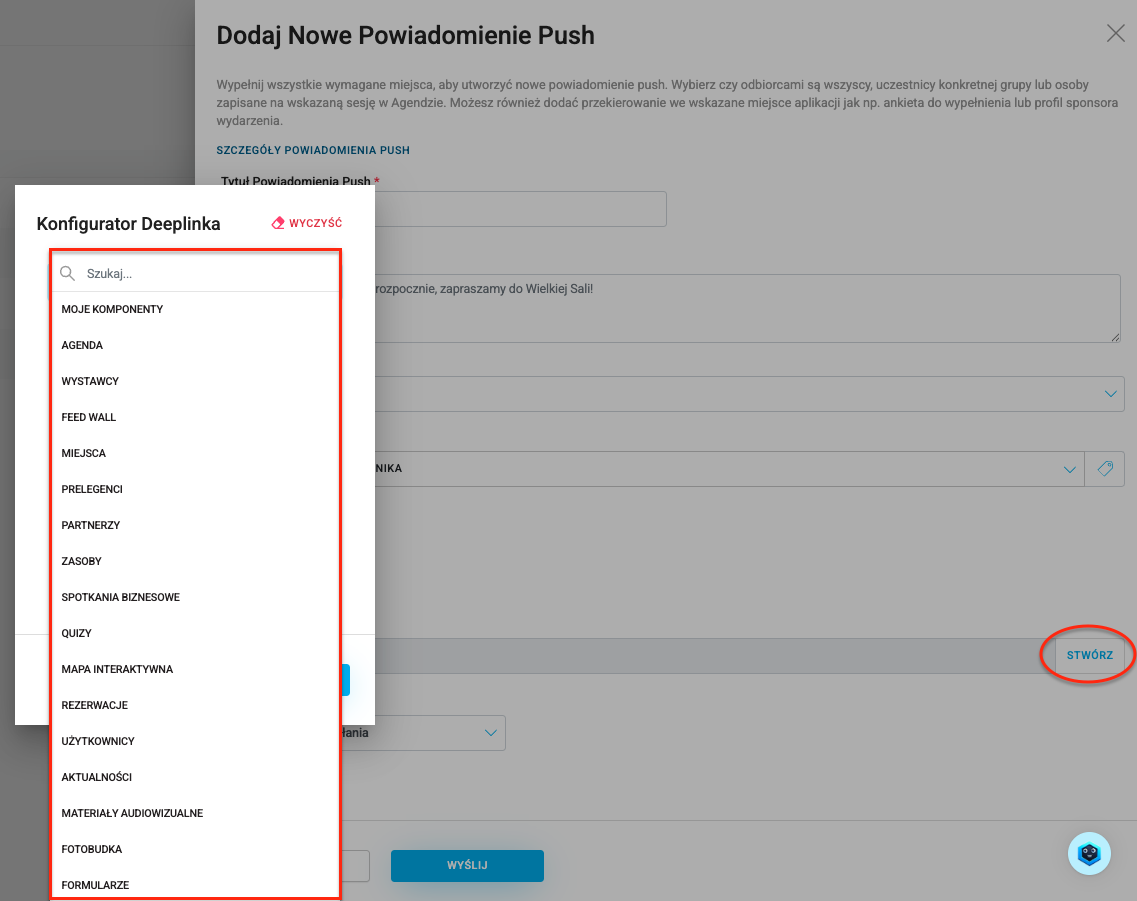
To pick where to redirect, hit Create under the Link navigation section—this opens a menu where you can set the exact destination.
First, you need to choose which kind of module you're creating a redirect for, or limit the list to just those modules that have already been added by picking My components.
Next, you need to pick a specific module, for example: Agenda or Quizzes. If you want to make your user redirects as precise as possible, in the next steps you can target a specific element within the selected module, like a chosen session in the agenda or a particular quiz.
A PUSH notification can be sent in real time, or scheduled for later. Choose Now to send it right away. If you want to plan the send, pick Send later and type in the right date.
Scheduled PUSH notifications are sent by the system, which means there could be a few minute delay (1-5 min) between the actual send time and the planned one.
Have a great event with Meeting Application!