
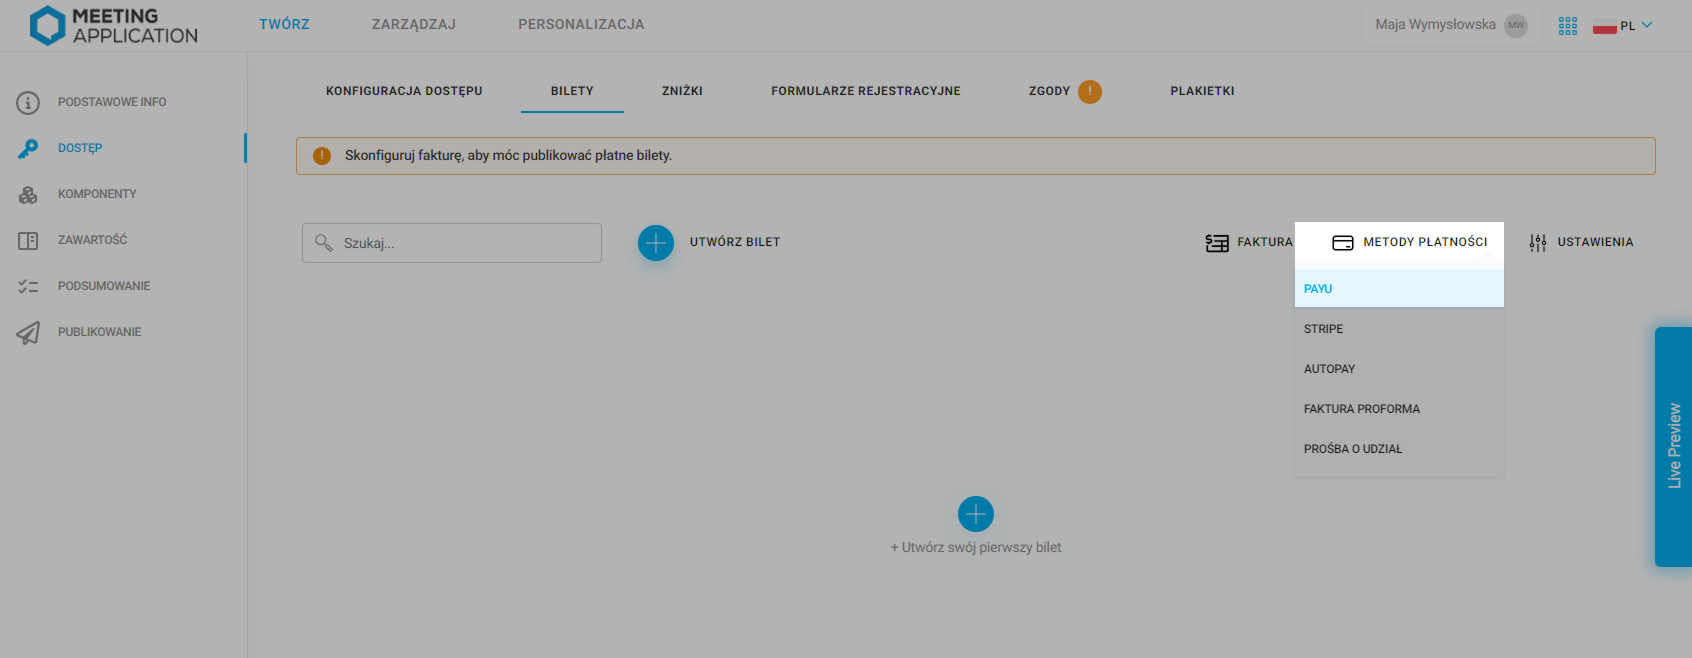
When you’re buying a ticket, you can pick different payment methods. To do that, go back to the Tickets tab. The first payment method is PayU, which lets you make transactions fast and securely. To add this payment option to a ticket for your event, click Payment methods in the upper right corner and pick PayU from the dropdown:
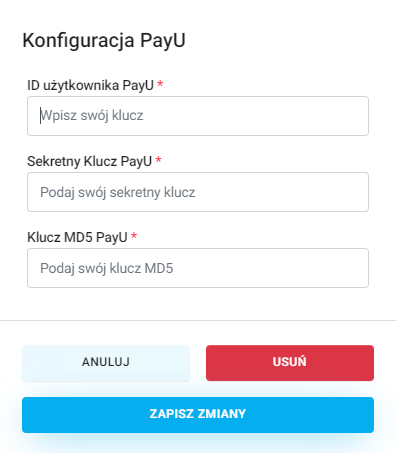
Next, enter your PayU User ID, PayU Secret Key and PayU MD5 Key:


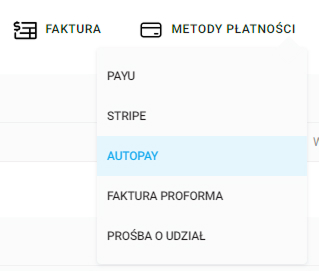
Another payment option is Stripe. In Payment Methods pick the Stripe option.
To set up your account in Stripe and fill in the necessary information, follow these steps:
Log in to your Stripe account.
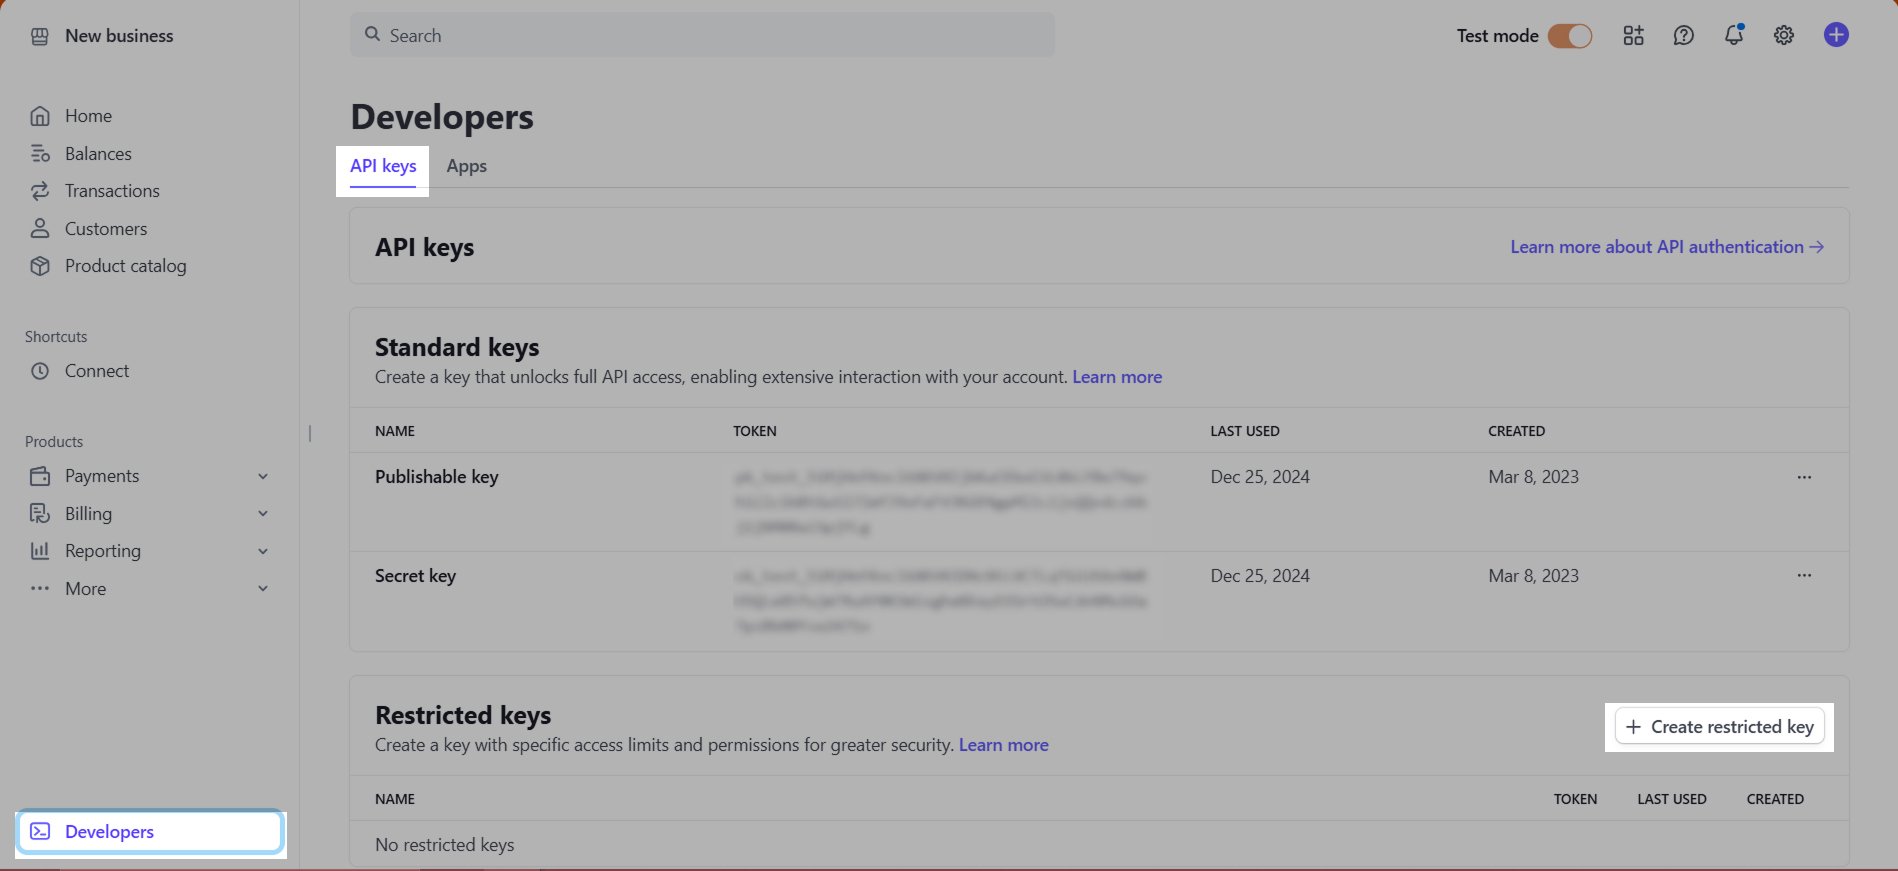
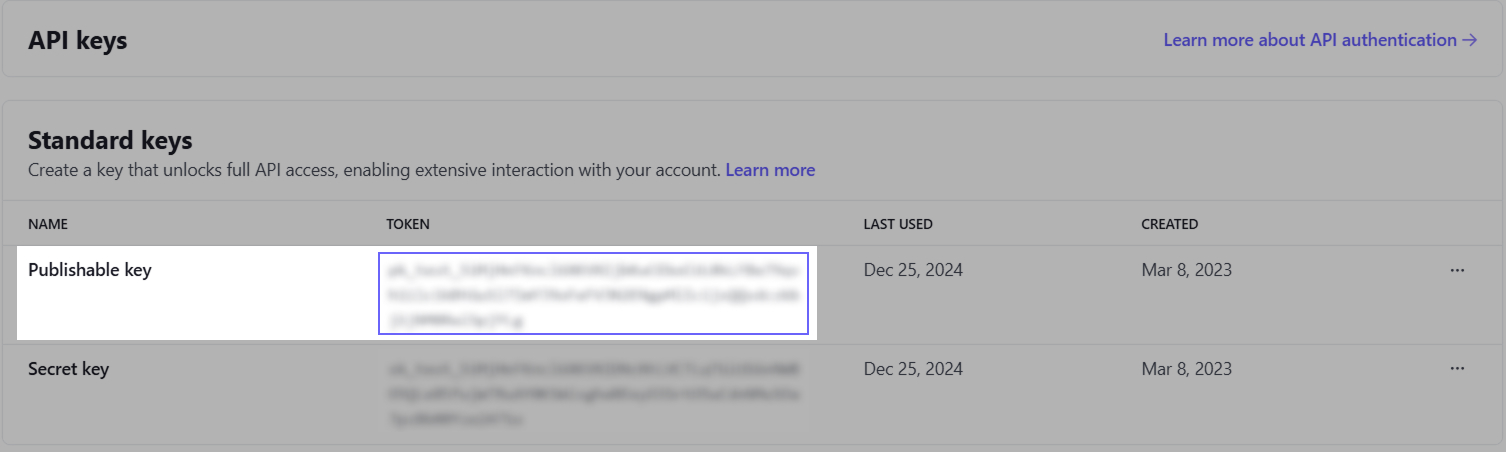
Go to the Developers (bottom left), and then the API Keys tab.
Create a new Restricted Key:
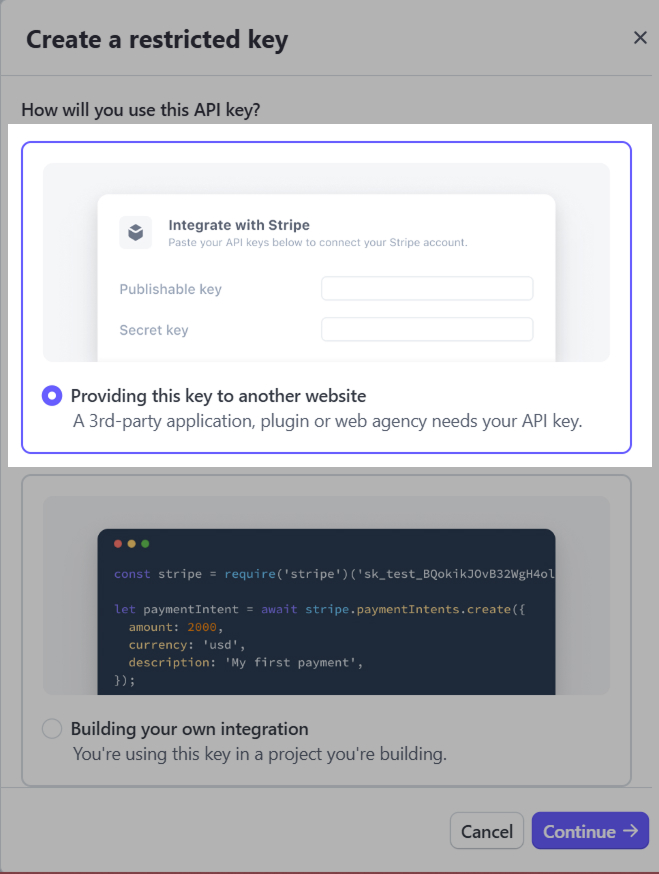
Tick the option Providing this key to another website
In the Name field, enter: Meeting Application sp. z o.o.
In the URL field, add: https://meetingapplication.com
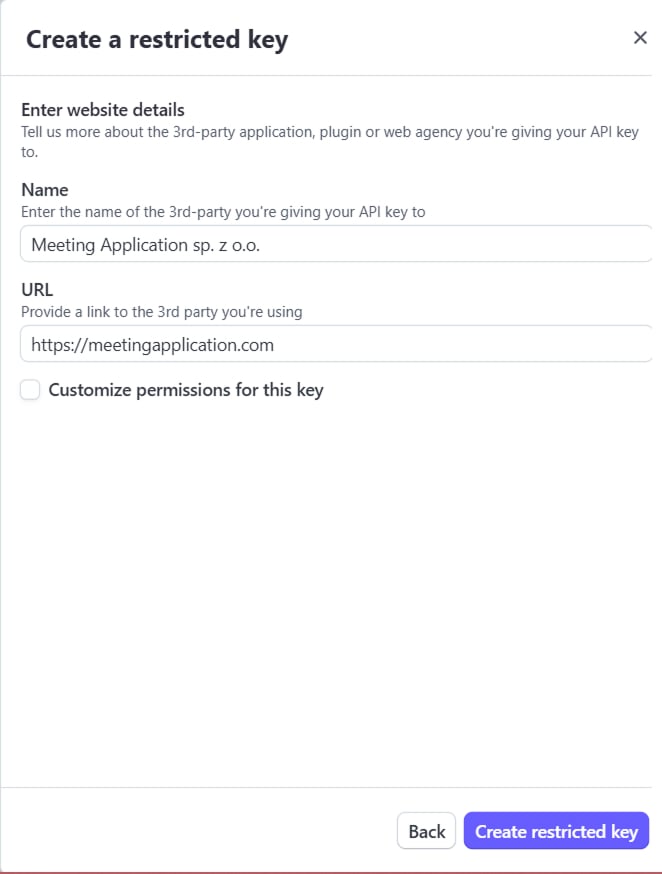
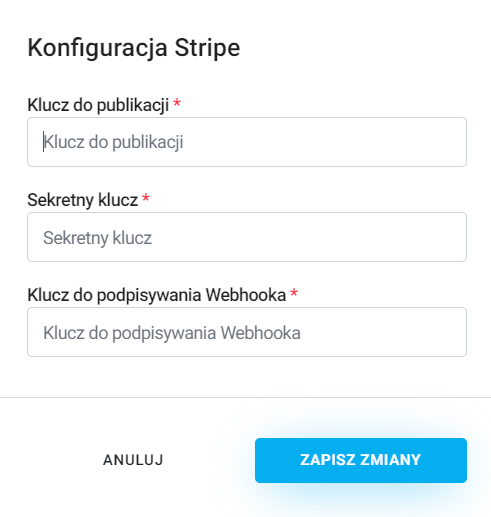
Copy the generated key and paste it into the Secret key field in the admin panel

From the list of keys, copy the value of the Publishable Key and paste it into the Publish Key field in the admin panel
Go to the Webhooks
If you're using the Developers Dashboard view:
a. Start adding a new endpoint by clicking the Add Endpoint:

In the Endpoint URL field, enter: https://payment.meetingapplication.com/api/v1/events/ID_WYDARZENIA/webhooks/stripe
replace ID_WYDARZENIA with your event number, which you will find in the page address bar in your browser while in the Meeting Application panel (as shown in the screenshot below)

Tick the option Listen to events in your account
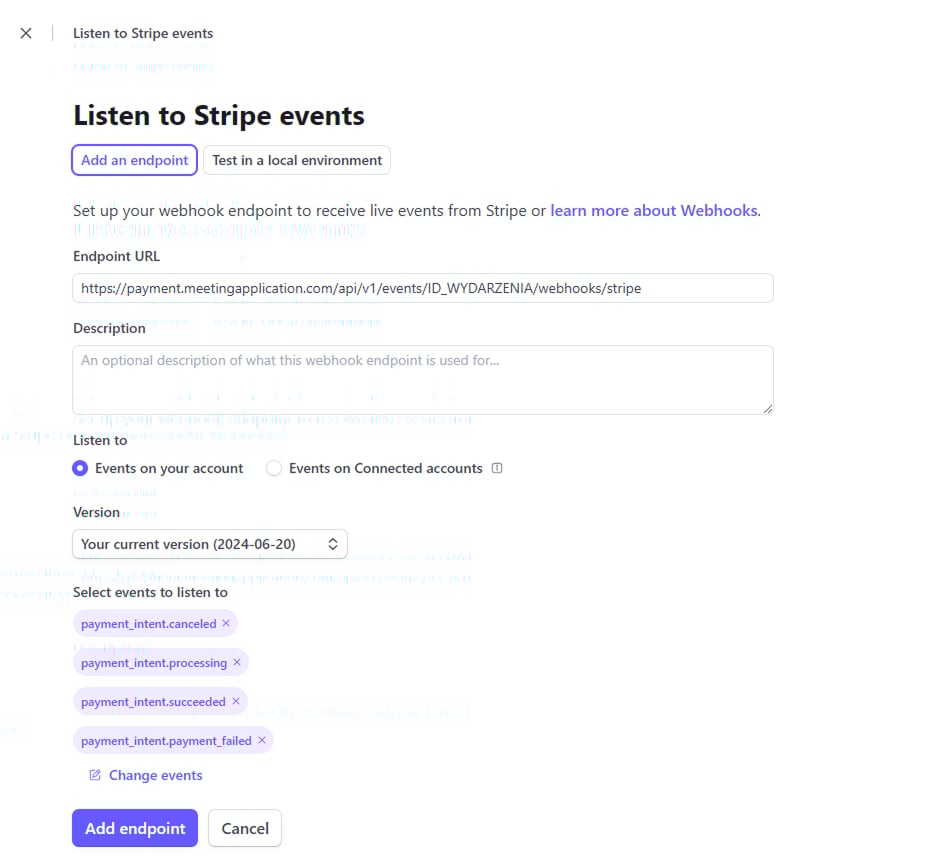
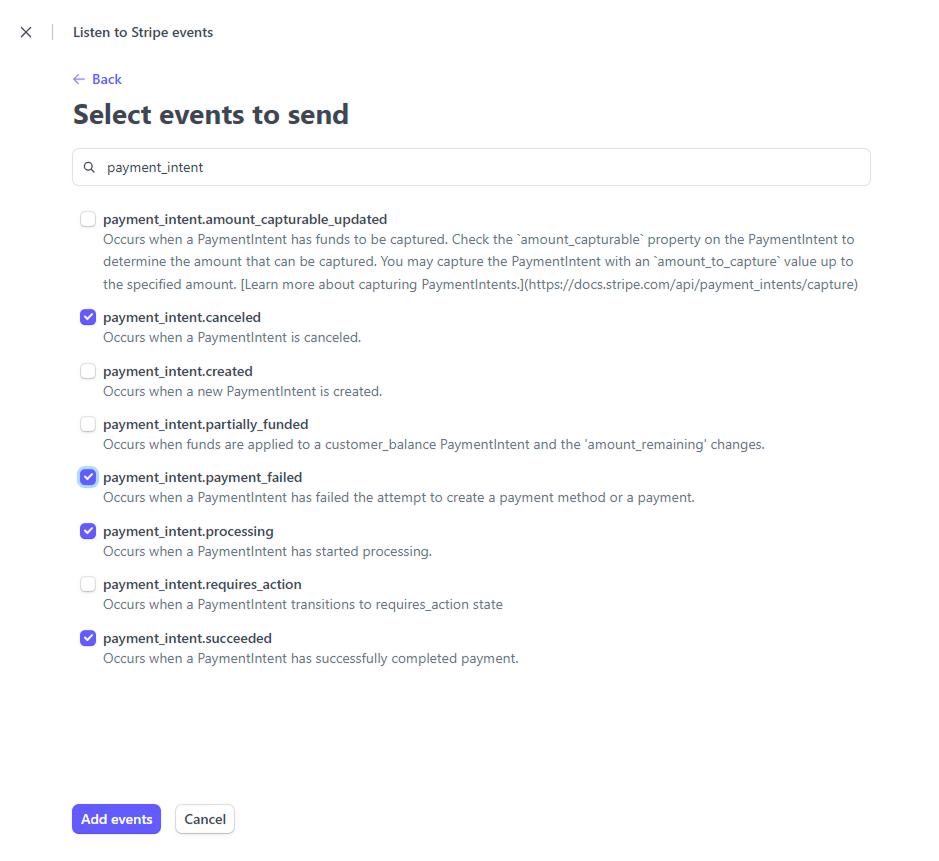
a. By clicking the Select events, button, pick the following events:
Payment Intent ➝ payment_intent.succeeded
Payment Intent ➝ payment_intent.payment_failed
Payment Intent ➝ payment_intent.processing
Payment Intent ➝ payment_intent.canceled
a. Save the entered info
a. From the list, pick the newly added endpoint
a. Click the Reveal button under Signing Secret:

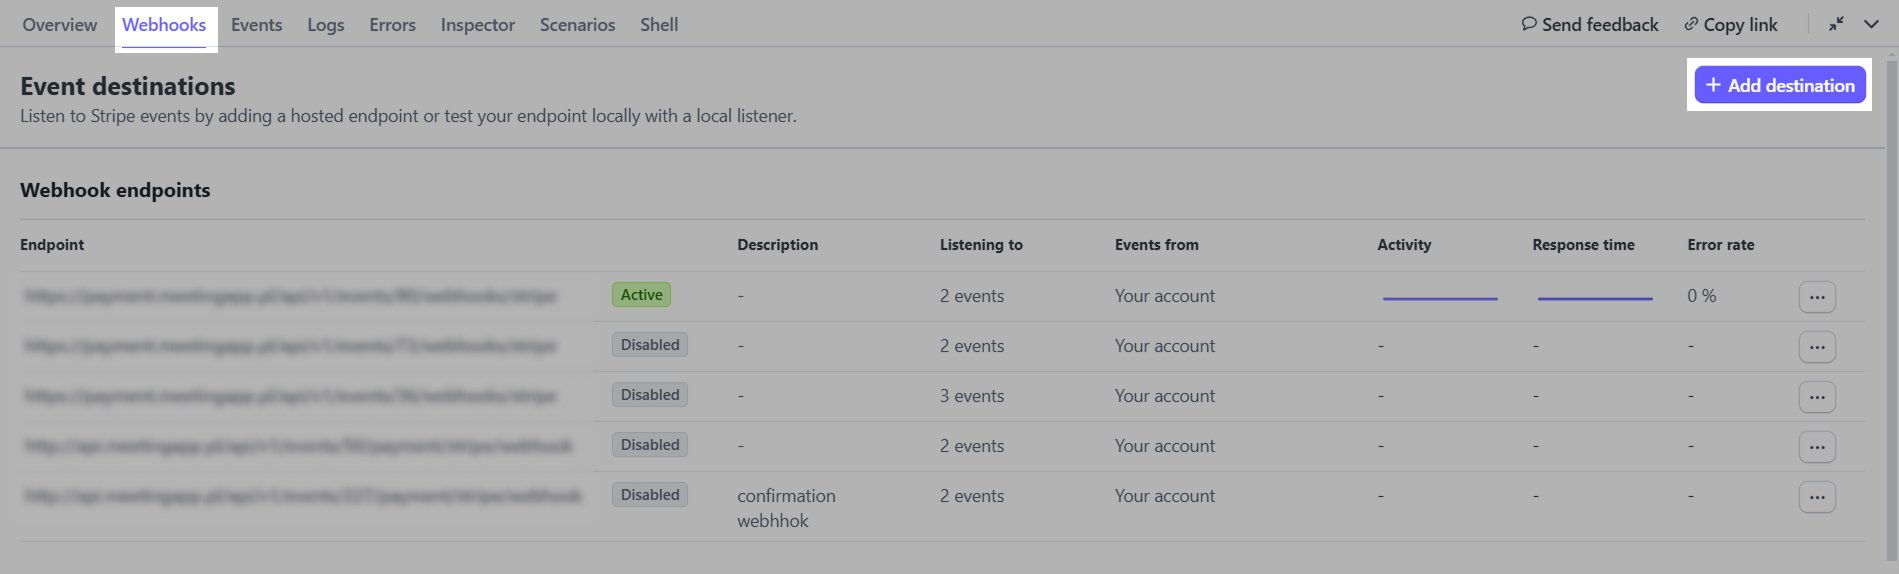
If you're using the Workbench view:
b. Start adding a new endpoint by clicking the Add destination:
Check Events from: Your account
Pick the following Events to listen to by typing them into the search list:
Payment Intent ➝ payment_intent.succeeded
Payment Intent ➝ payment_intent.payment_failed
Payment Intent ➝ payment_intent.processing
Payment Intent ➝ payment_intent.canceled
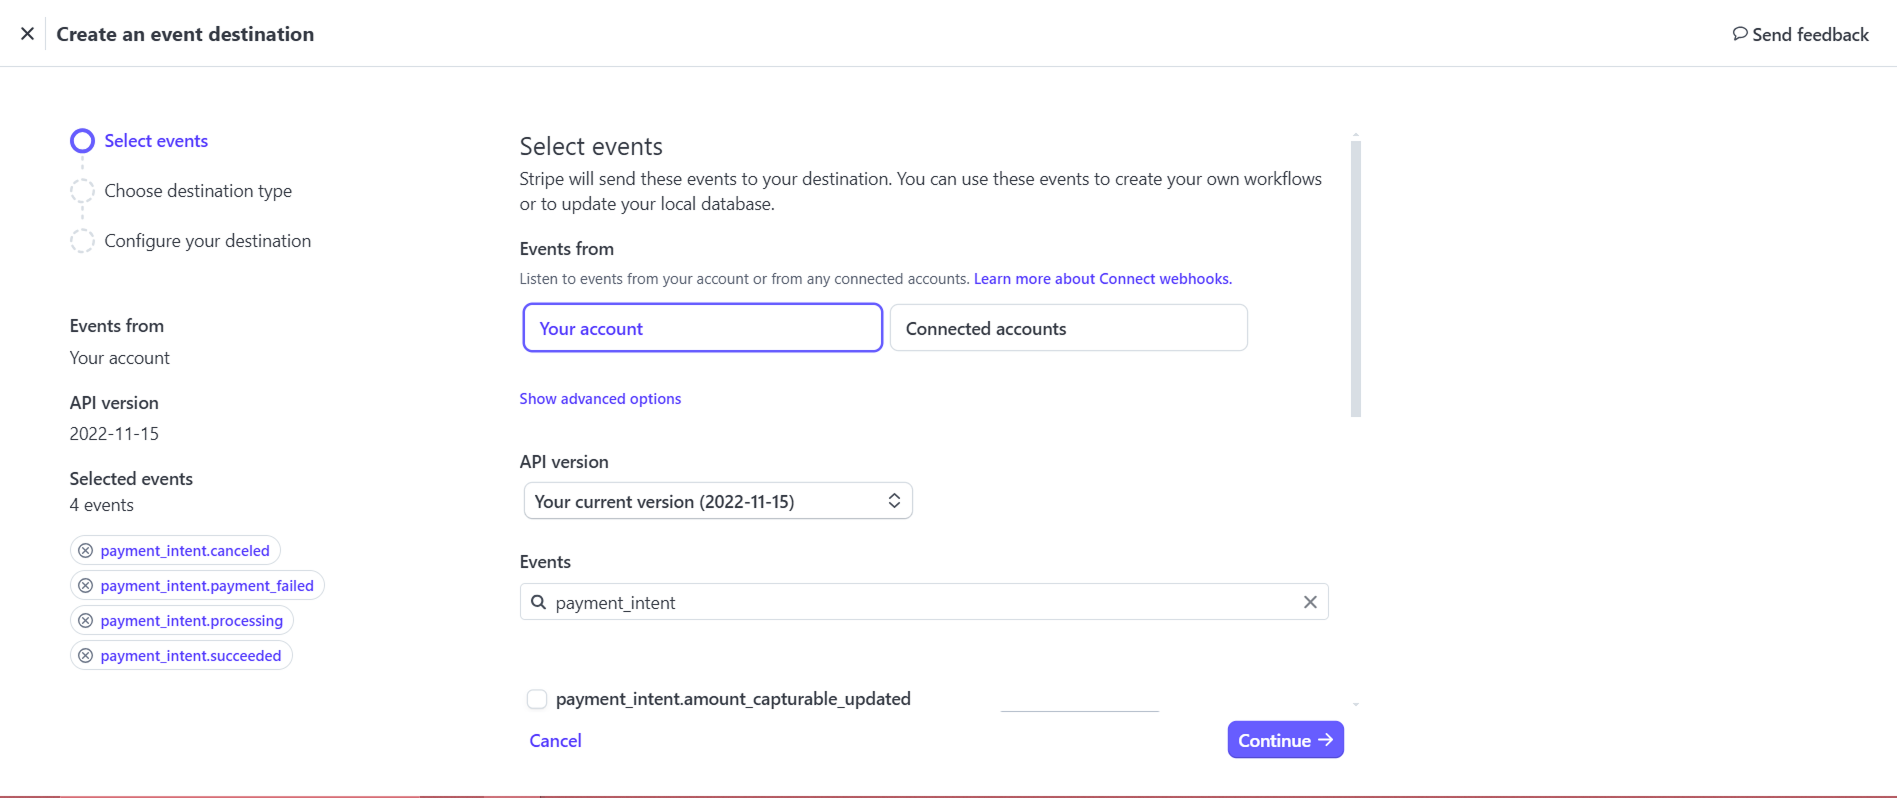
Click Continue
b. Pick Destination type: Webhook endpoint
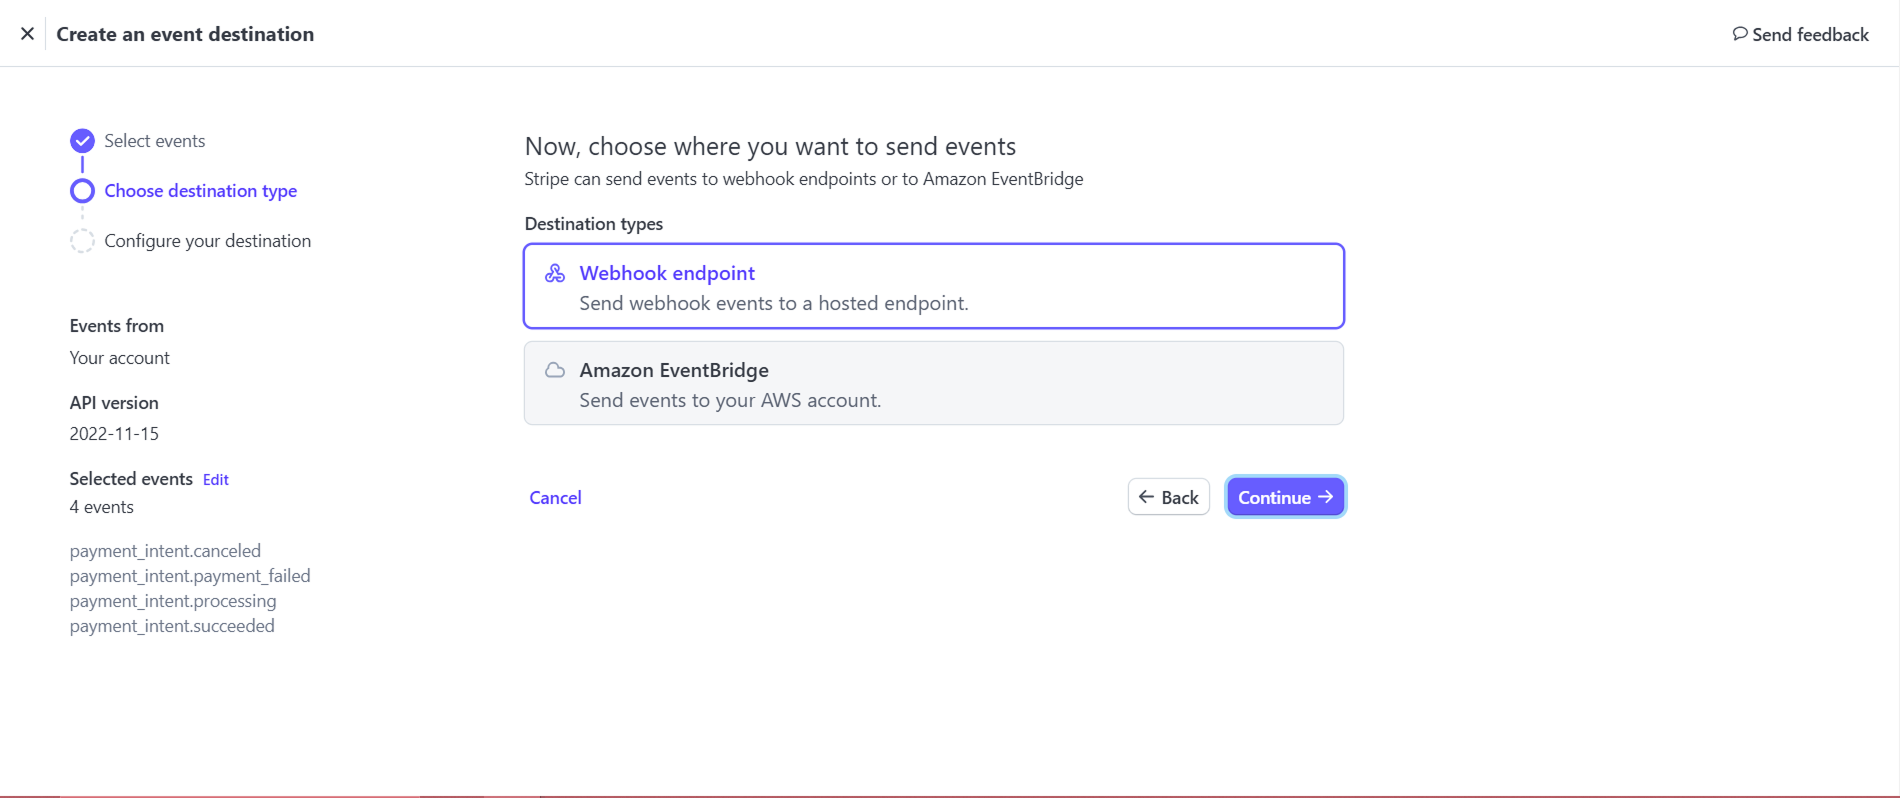
b. Click Continue
b. In the Endpoint URL field, enter: https://payment.meetingapplication.com/api/v1/events/ID_WYDARZENIA/webhooks/stripe
replace ID_WYDARZENIA with your event number, which you will find in the page address bar in your browser while in the Meeting Application panel (as shown in the screenshot below)
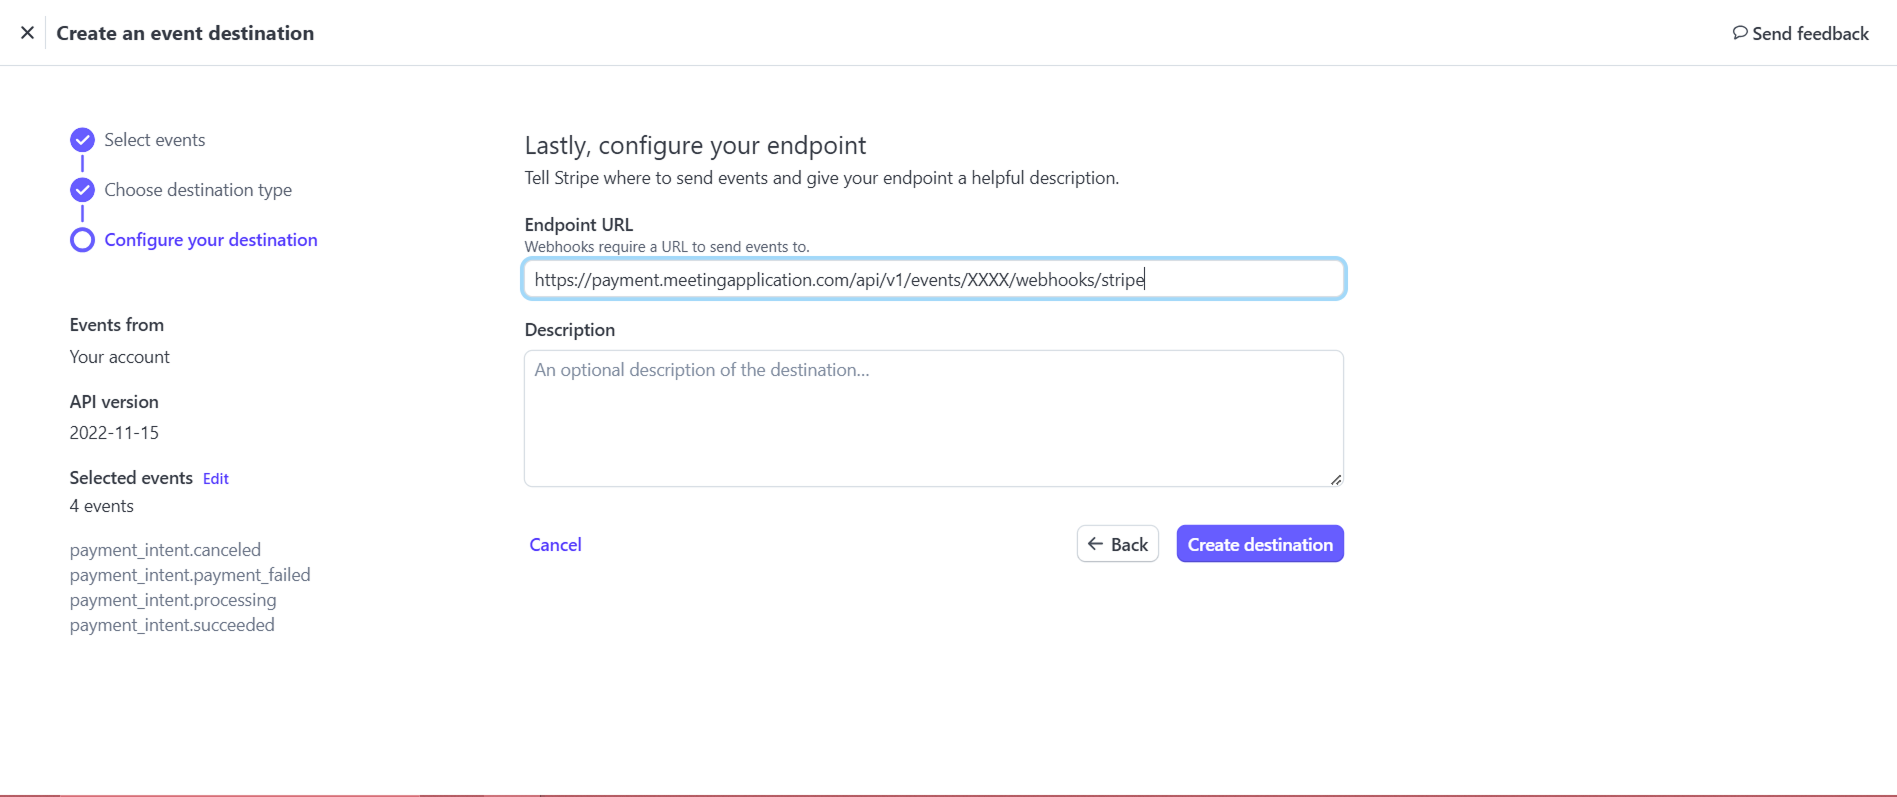
b. Click Create destination
b. Click the Reveal button next to Signing secret:
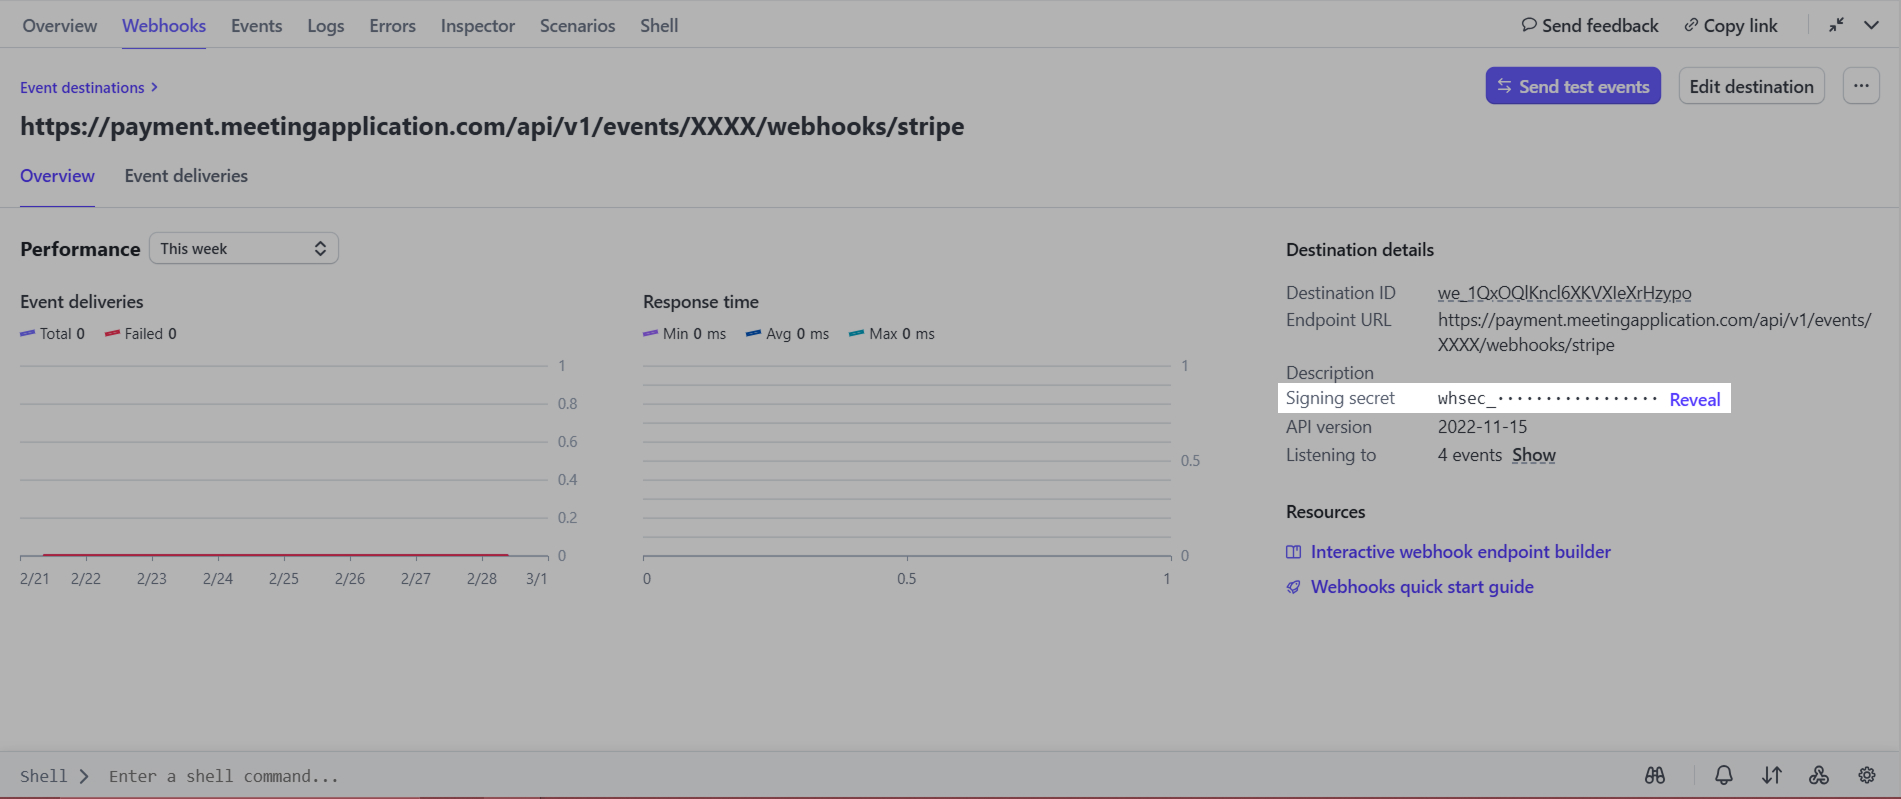
12. Copy its value and paste it in the admin panel in the Webhook Signing Key
13. Save the changes in the panel:
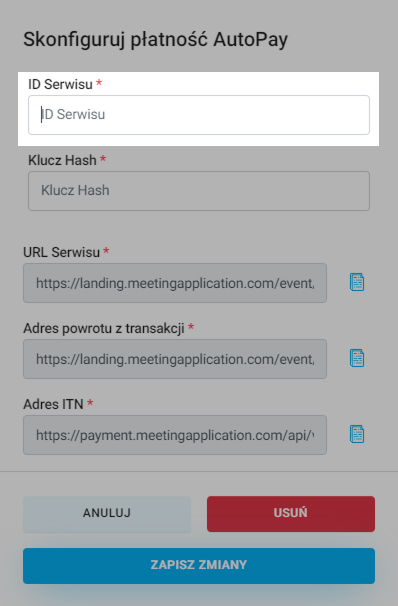
The last payment method is Autopay. To add this option, in Payment Methods select the option, click Autopay:
To set up an account click here and get the following info ready:
Your tech contact (email address).
Your complaint contact (email address).
The email address where reports will be sent.
Access to the PAYBM panel (email, phone number).
Service URL – that's the Landing Page address in Meeting Application, copy it from the Autopay payment config window in the Panel
Transaction return URL, copy it from the Autopay payment config window in the Panel
ITN address, copy it from the Autopay payment config window in the Panel
Log in to your Autopay account.
Go to the Service Settings
Copy your service ID:
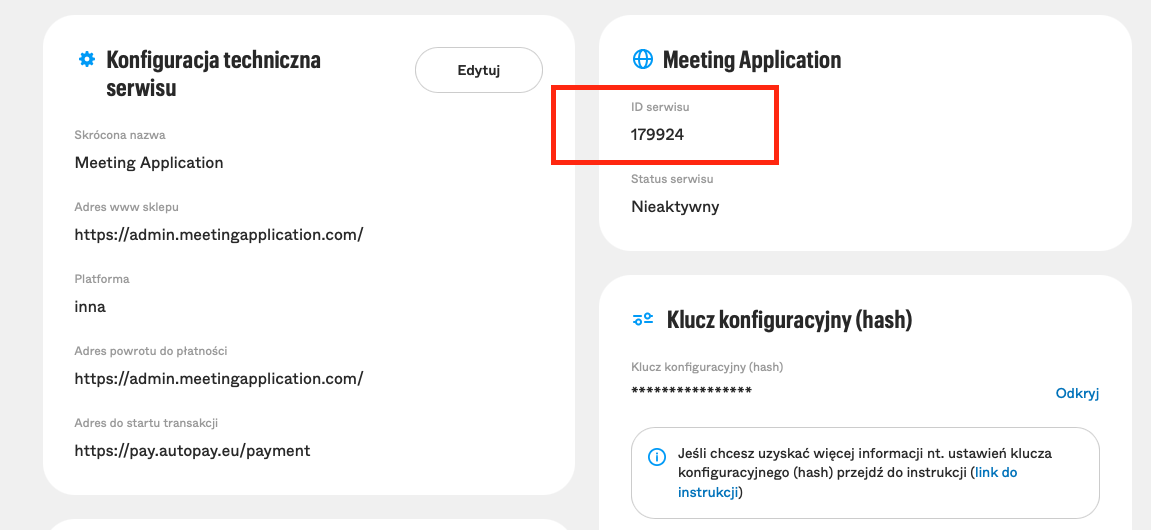
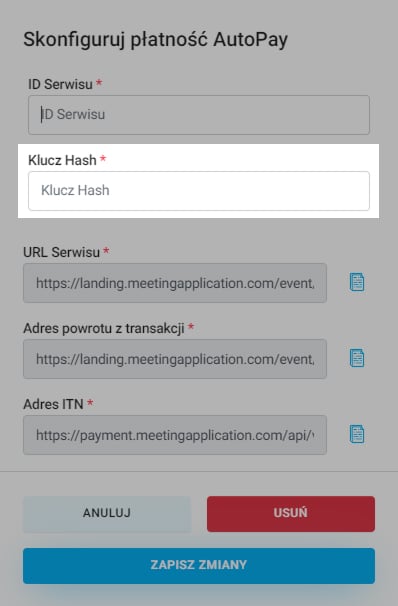
Paste the copied number into the Service ID field in the admin panel.

In the same section of the Autopay panel, get the Configuration Key ready
To generate the Service Key click the Reveal button, then authorize the operation.
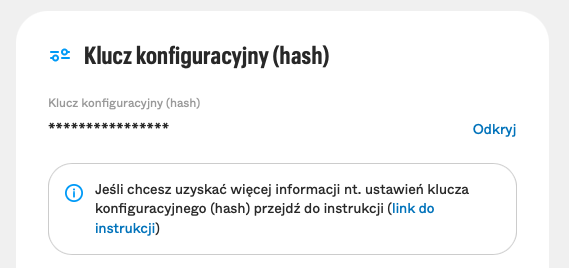
Copy the generated key and paste it in the Hash Key field in your Meeting Application admin panel:
Next, paste the links we’ve prepared for you into the MA Admin Panel in the right spots under the Technical Configuration of the Site section in the Autopay panel:
Service URL → Store’s website address
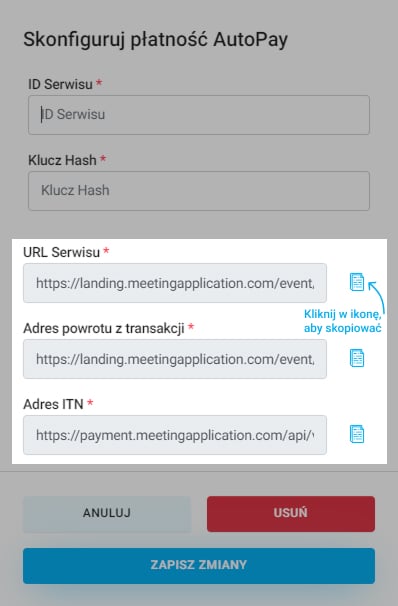

Next, in the Technical configuration of the service section, click Edit and paste from the MA admin panel:
Transaction Return Address
ITN Address

Log in to your Autopay account.
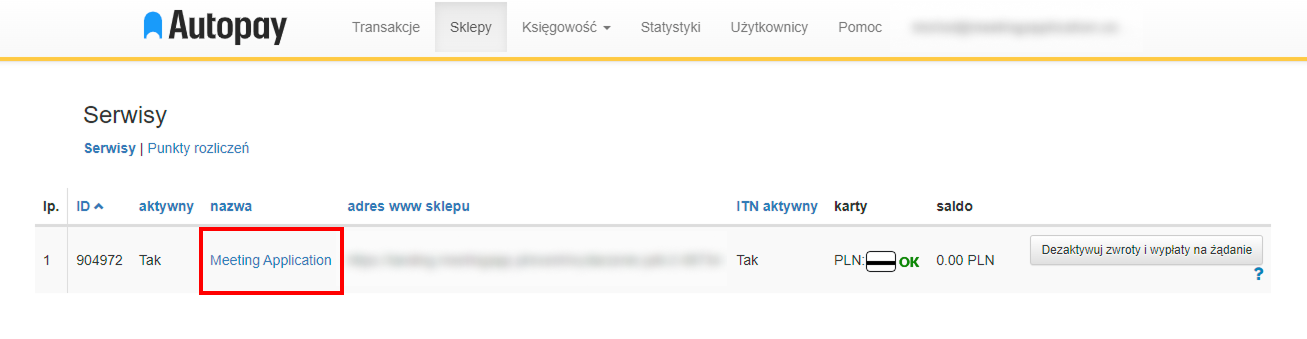
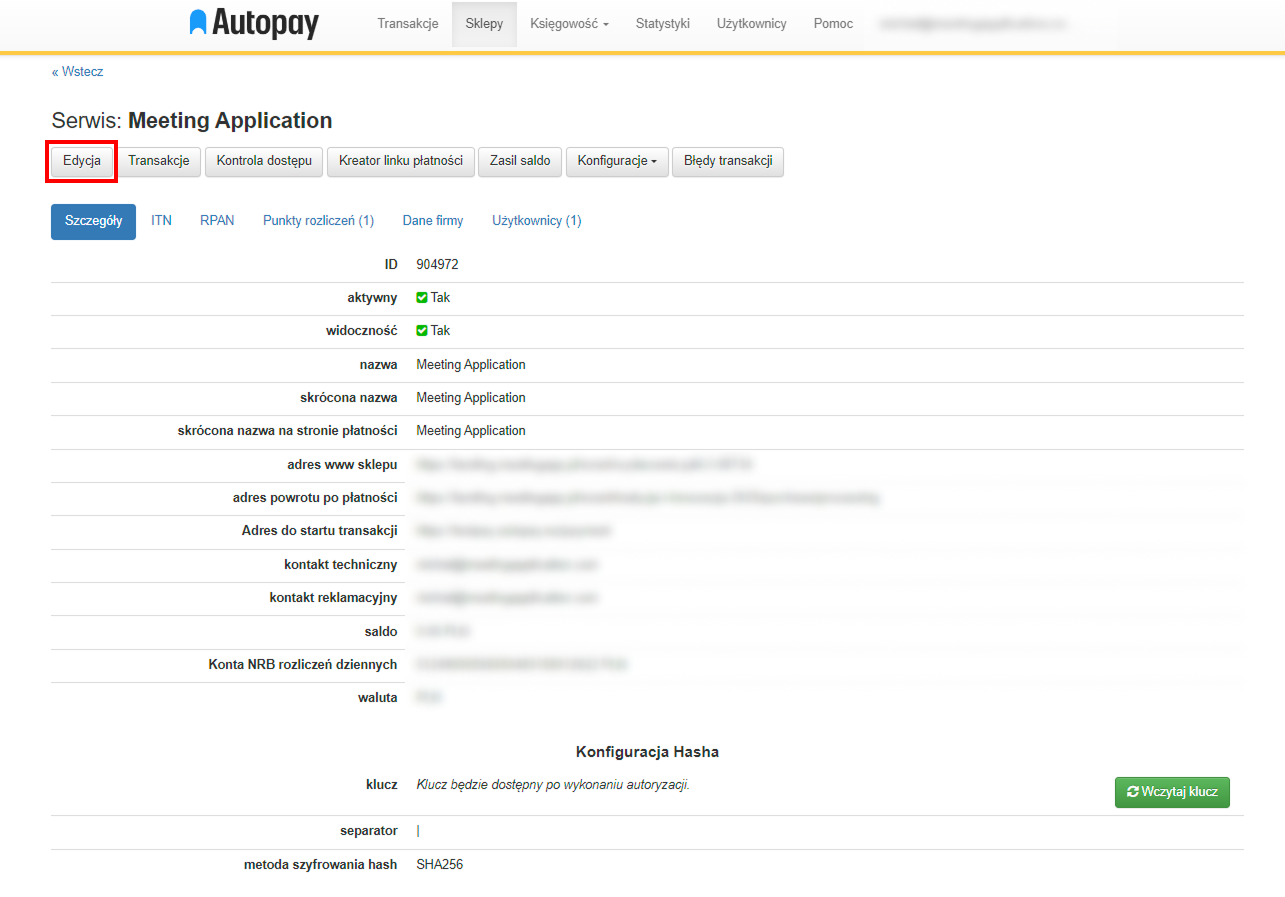
Go to the Shops
Copy your service ID:
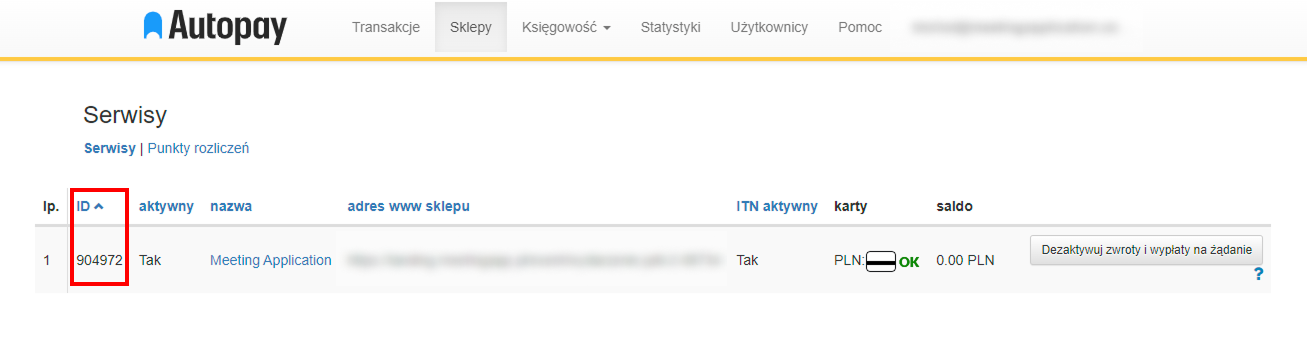
Paste the copied number into the Service ID field in your admin panel.
In the same section of the Autopay panel, get the Configuration Key; go to Service Details by clicking the service name
To generate the Service Key click the Load key button and then authorize the operation.
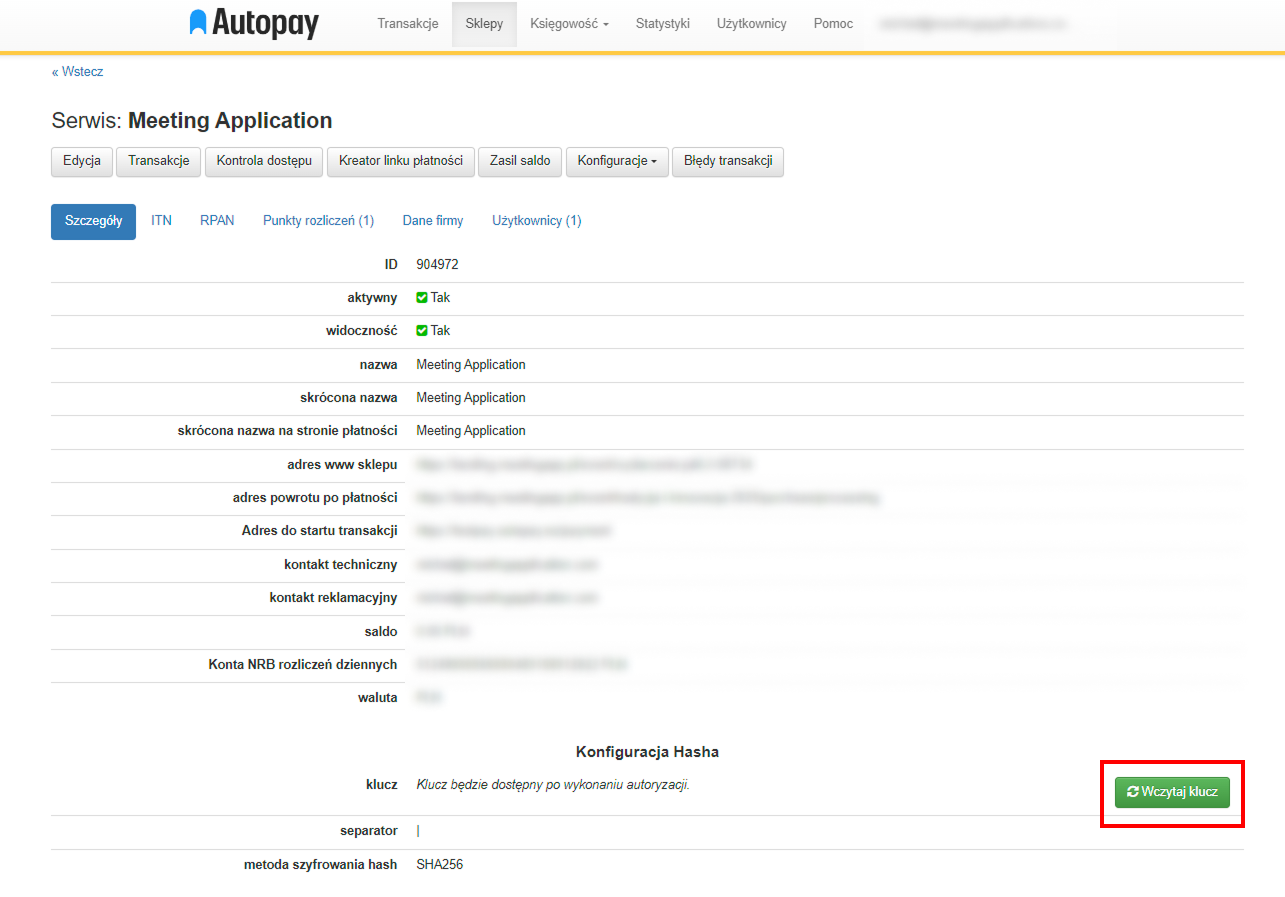
Copy the generated key and paste it in the Hash Key field in the Meeting Application admin panel:

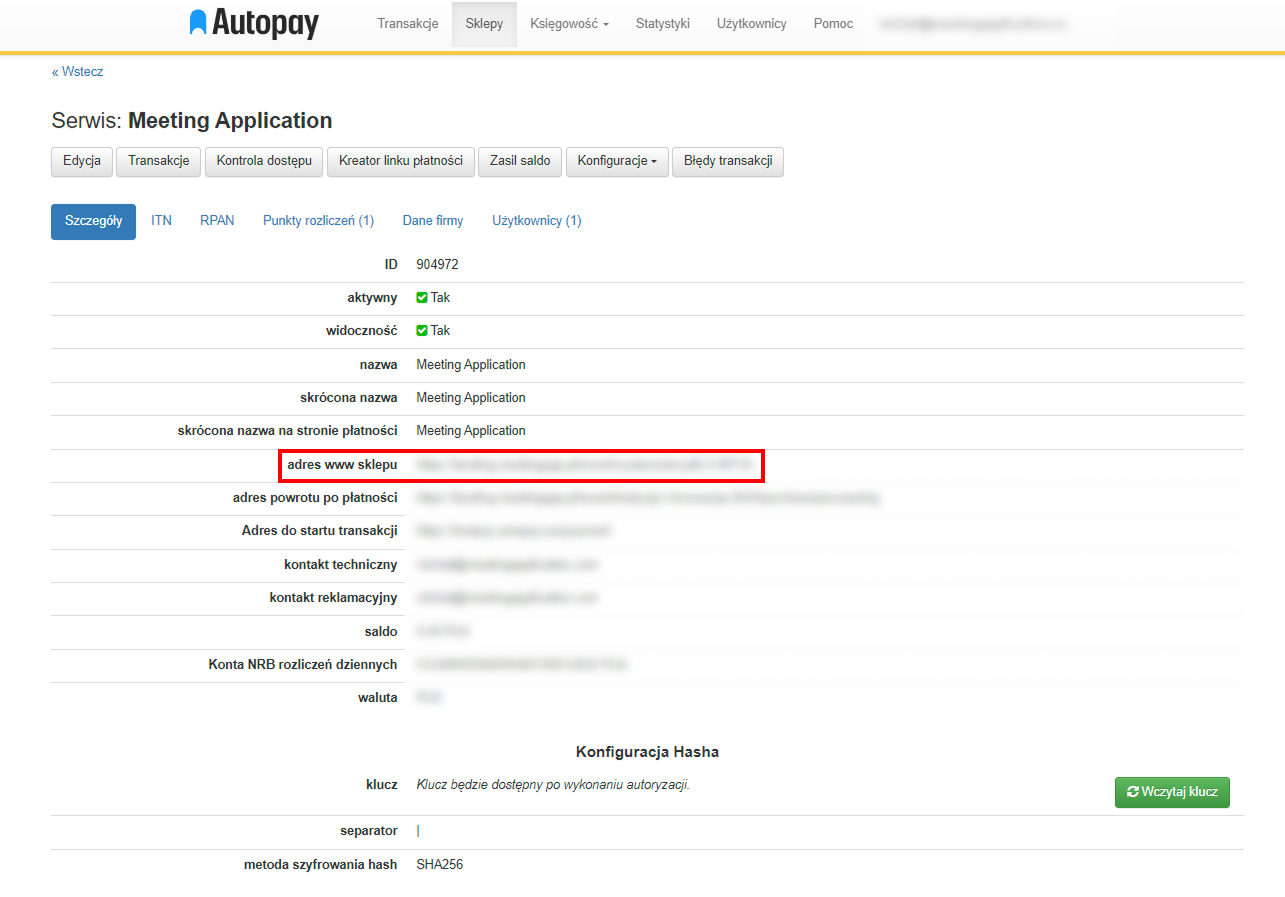
Next, paste the links we prepared for you in the MA Admin Panel into the right spots in the Autopay panel:
Service URL → Store website address
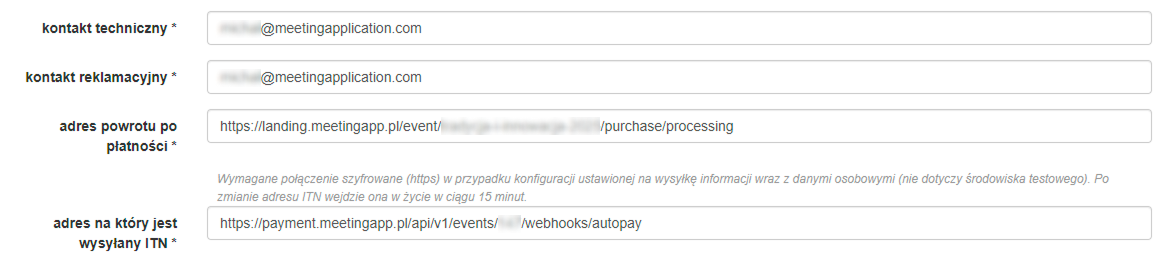
then click Edit and paste from the MA admin panel:
Return Address from Transaction → Address after payment
ITN Address → Address where ITN is sent
Have a great event with Meeting Application!
