Meeting Application is a system integrated with the following gateways: PayU, Autopay, Strip. It’s also possible to pay based on a proforma invoice, provided that you use our system for issuing invoices. You can learn more about invoice configuration from THIS ARTICLE.

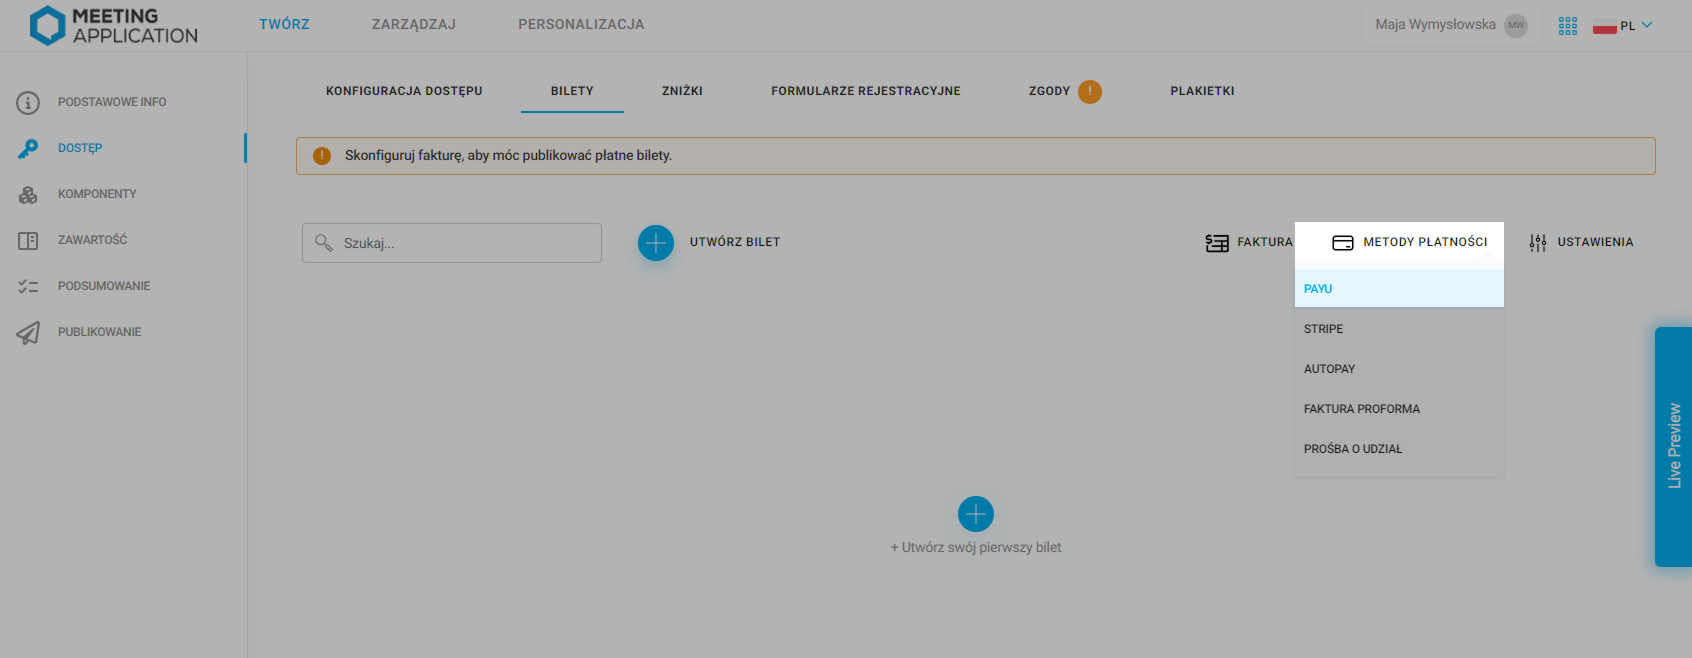
When buying a ticket, you can choose different payment methods. To do this, go back to the Tickets tab. The first payment method is PayU, which allows you to make fast and secure transactions using blik payments, bank transfers, or cards – according to the settings in your PayU panel. To add this payment option to the ticket for your event, click Payment methods in the top right corner and select PayU from the dropdown list:
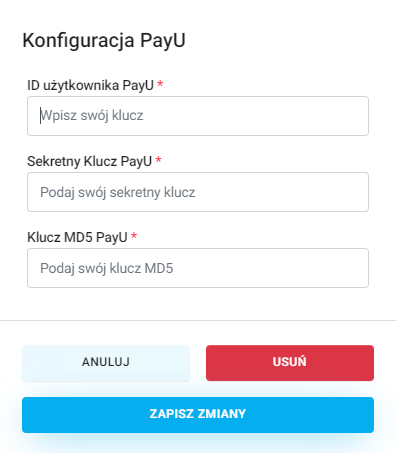
Next, enter your PayU User ID, PayU Secret Key and PayU MD5 Key:


Another payment option is Stripe, which supports credit card payments. In Payment methods select the Stripe option.
To set up your account in Stripe and fill in the required information, follow the instructions below:
Log in to your Stripe account.
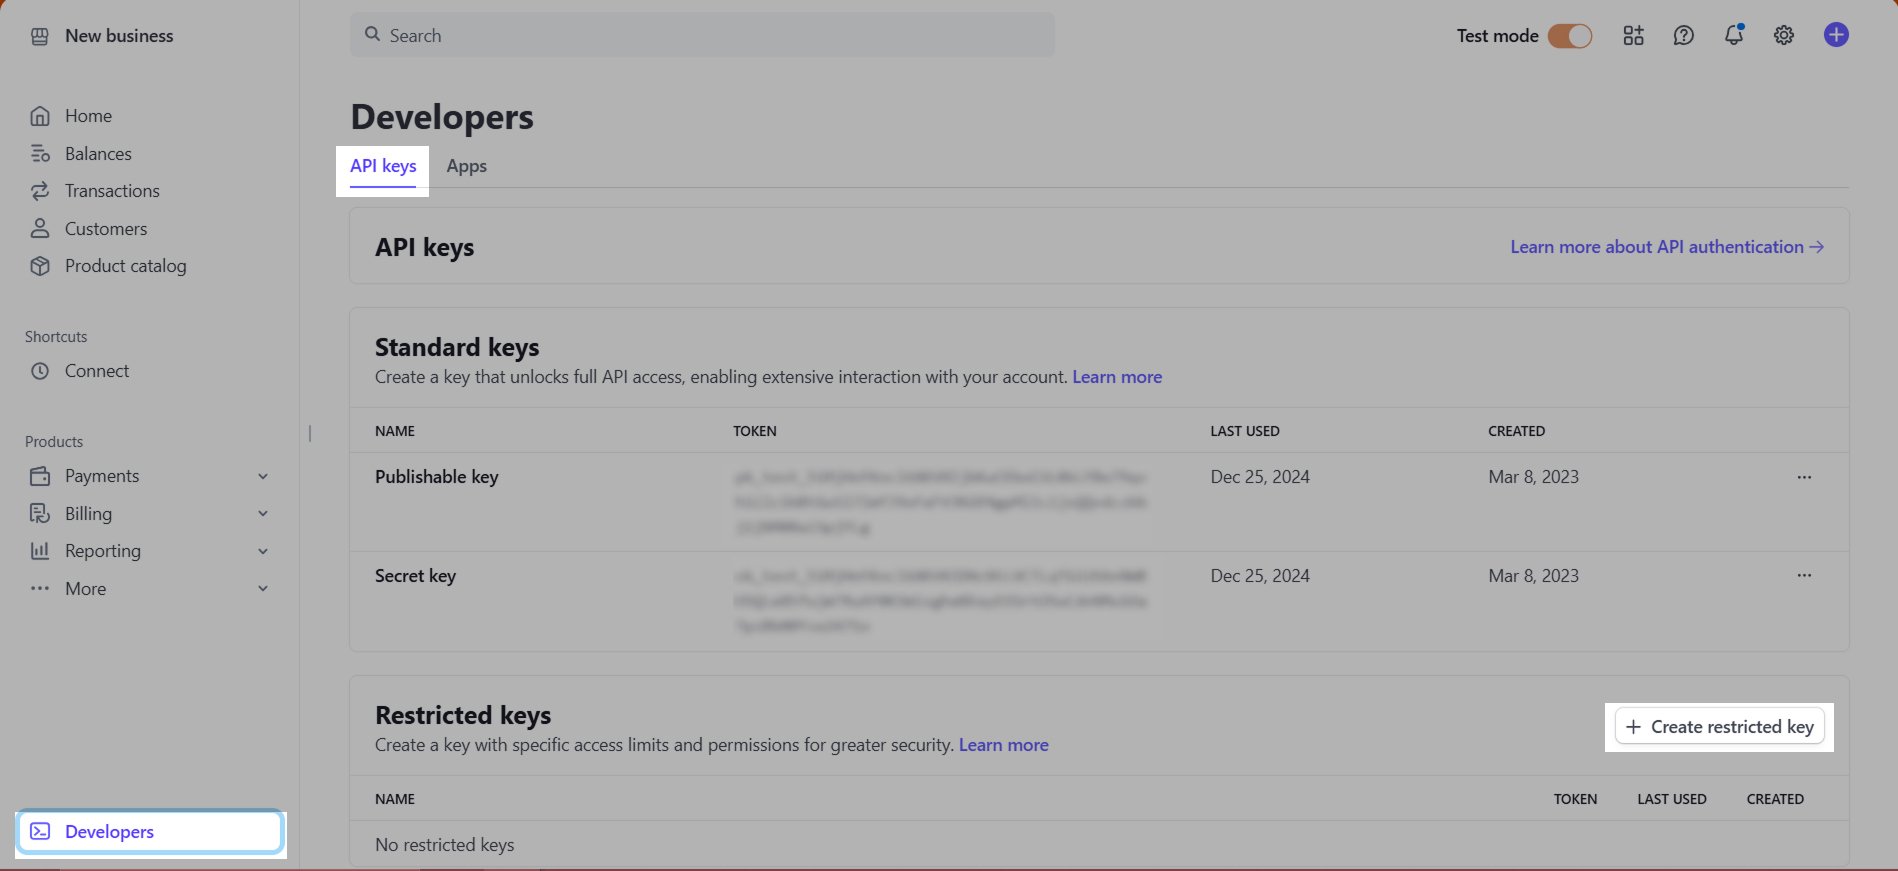
Go to the Developers section (bottom left corner), then to the API Keys tab.
Create a new Restricted Key:
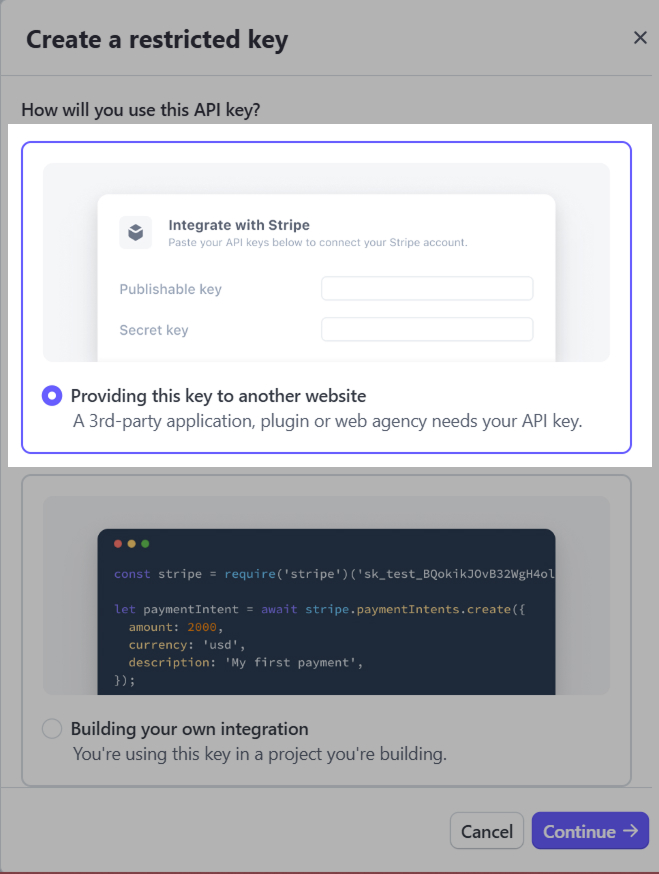
Check the option Providing this key to another website
In the Name field, enter: Meeting Application sp. z o.o.
In the URL field, enter: https://meetingapplication.com
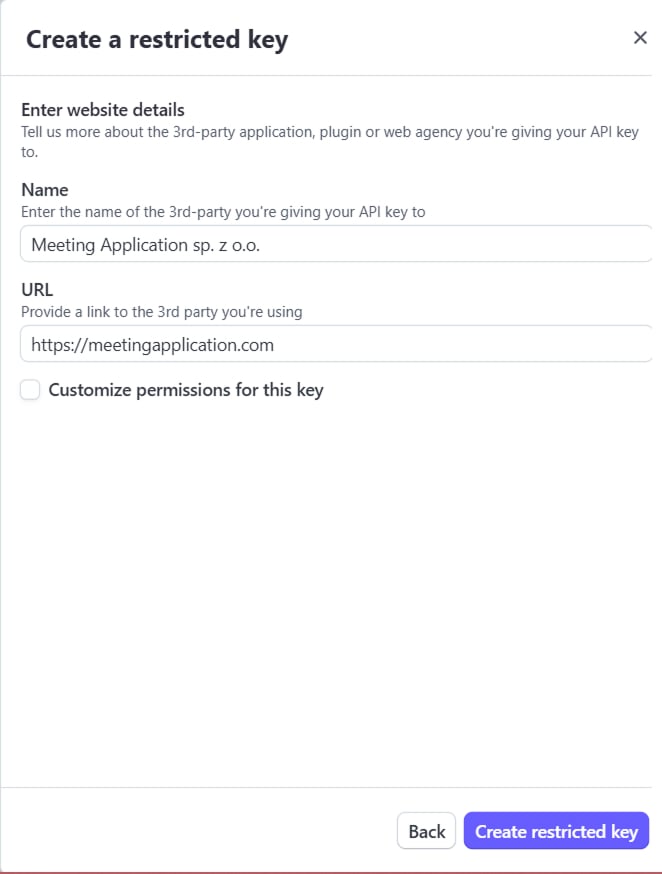
Copy the generated key and paste it into the Secret key field in the admin panel

From the list of keys, copy the value of Publishable Key and paste it into the Publishable key field in the admin panel
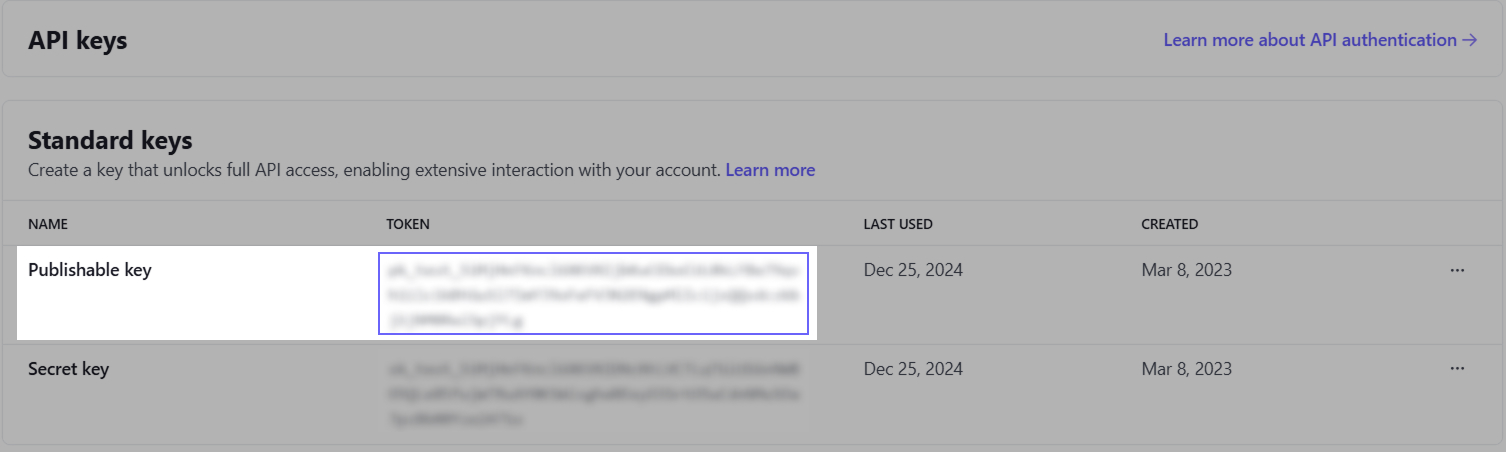
Go to the Webhooks tab
If you’re using the Developers Dashboard view:
Start adding a new endpoint by clicking the Add Endpoint button:

In the Endpoint URL field, enter: https://payment.meetingapplication.com/api/v1/events/ID_WYDARZENIA/webhooks/stripe
replace ID_WYDARZENIA with your event number, which you’ll find in the page address in your browser’s address bar while you’re in the Meeting Application panel (as in the screenshot below)

Check the option Listen to events in your account
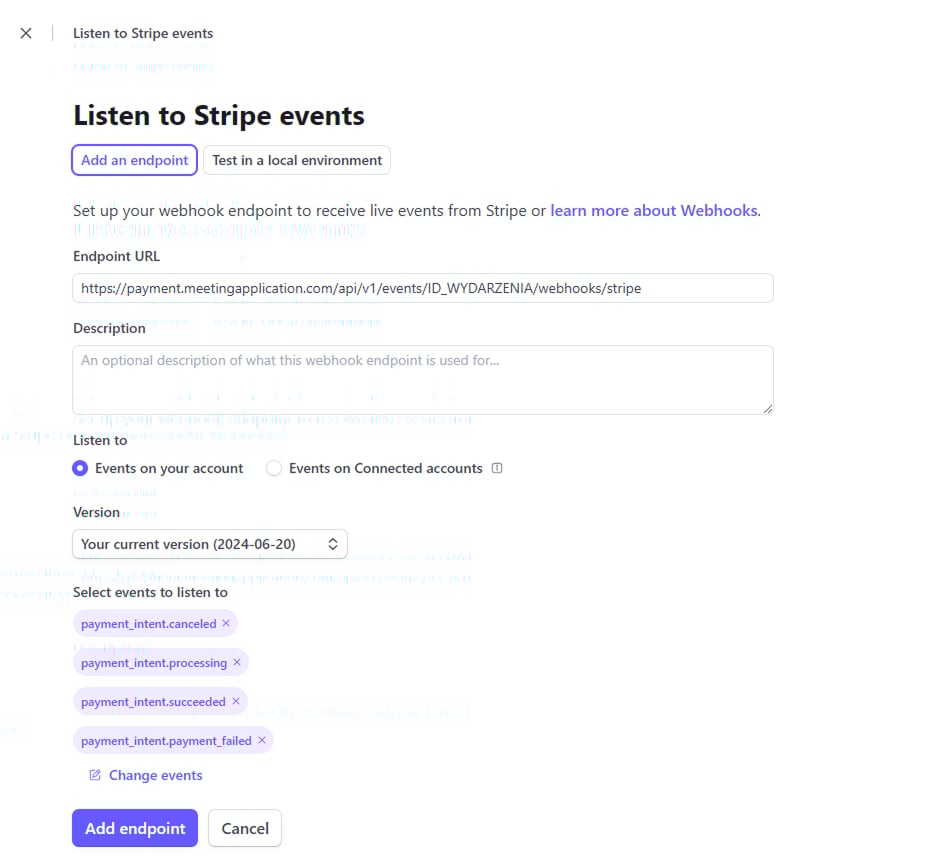
By clicking the Select events button, choose the events to listen to:
Payment Intent ➝ payment_intent.succeeded
Payment Intent ➝ payment_intent.payment_failed
Payment Intent ➝ payment_intent.processing
Payment Intent ➝ payment_intent.canceled
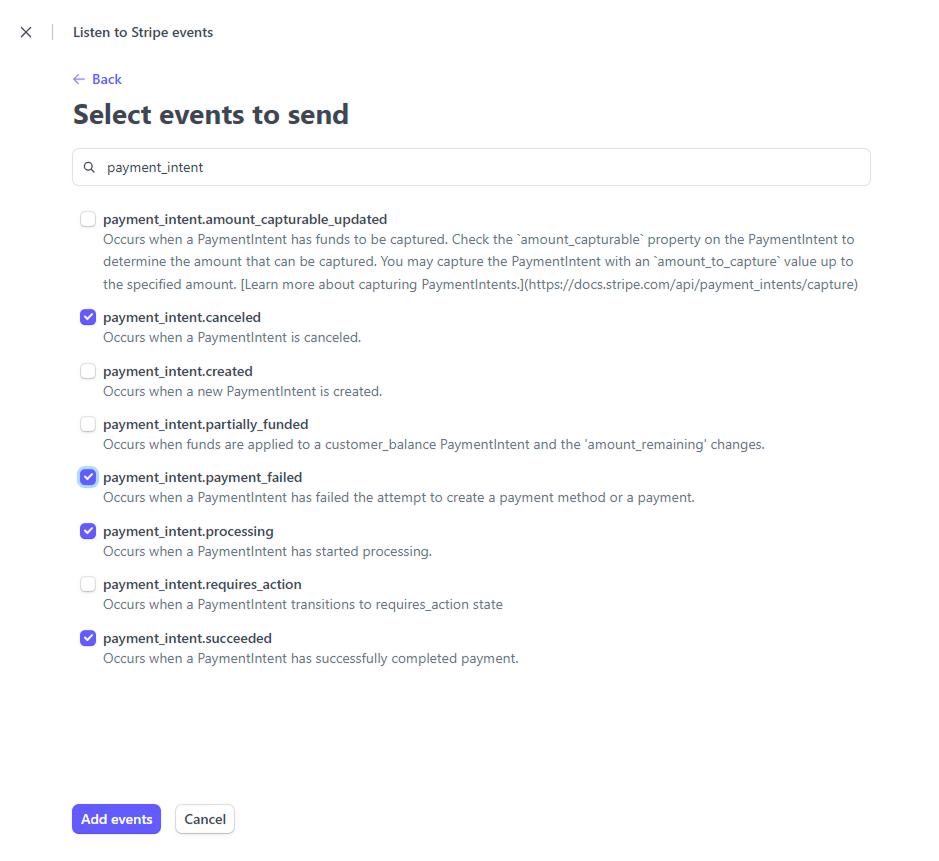
Save the entered data
From the list, choose the newly added endpoint
Press the Reveal button under Signing Secret:

If you are using the Workbench view:
Start adding a new endpoint by pressing the Add destination:
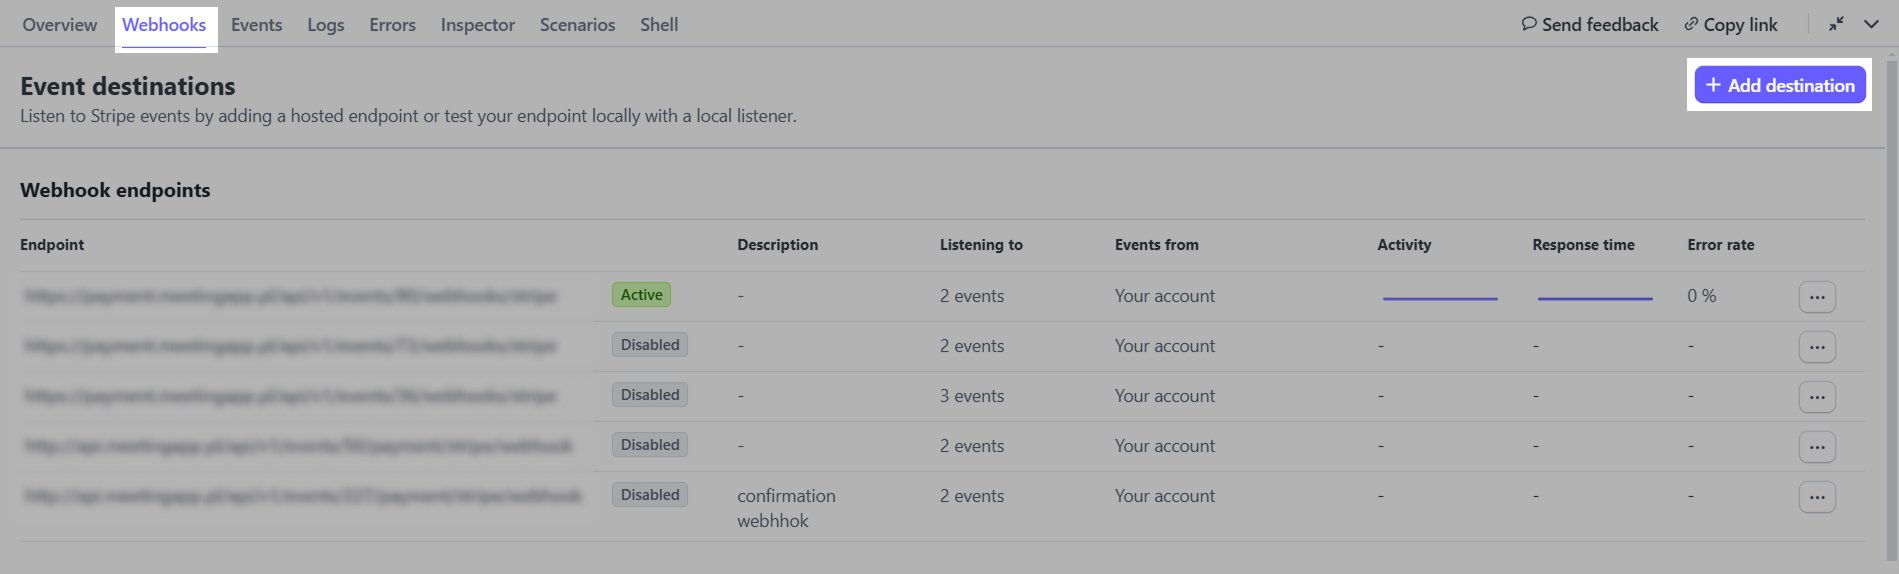
Check the option Events from: Your account
Choose the following Events to listen to by typing them into the search list:
Payment Intent ➝ payment_intent.succeeded
Payment Intent ➝ payment_intent.payment_failed
Payment Intent ➝ payment_intent.processing
Payment Intent ➝ payment_intent.canceled
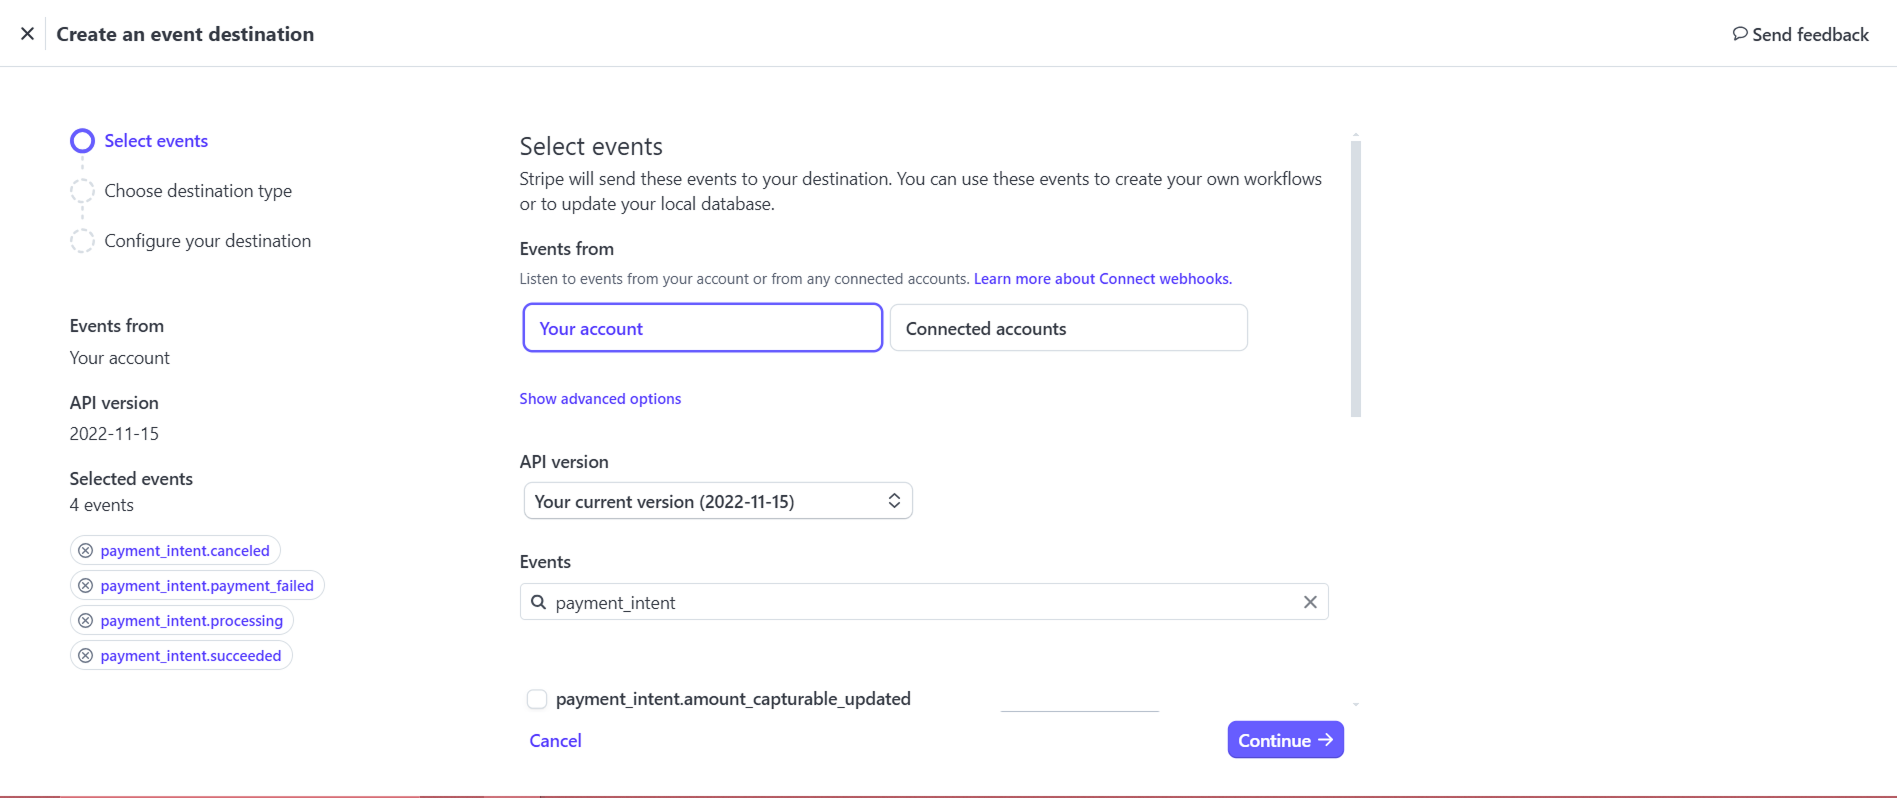
Click Continue
Choose Destination type: Webhook endpoint
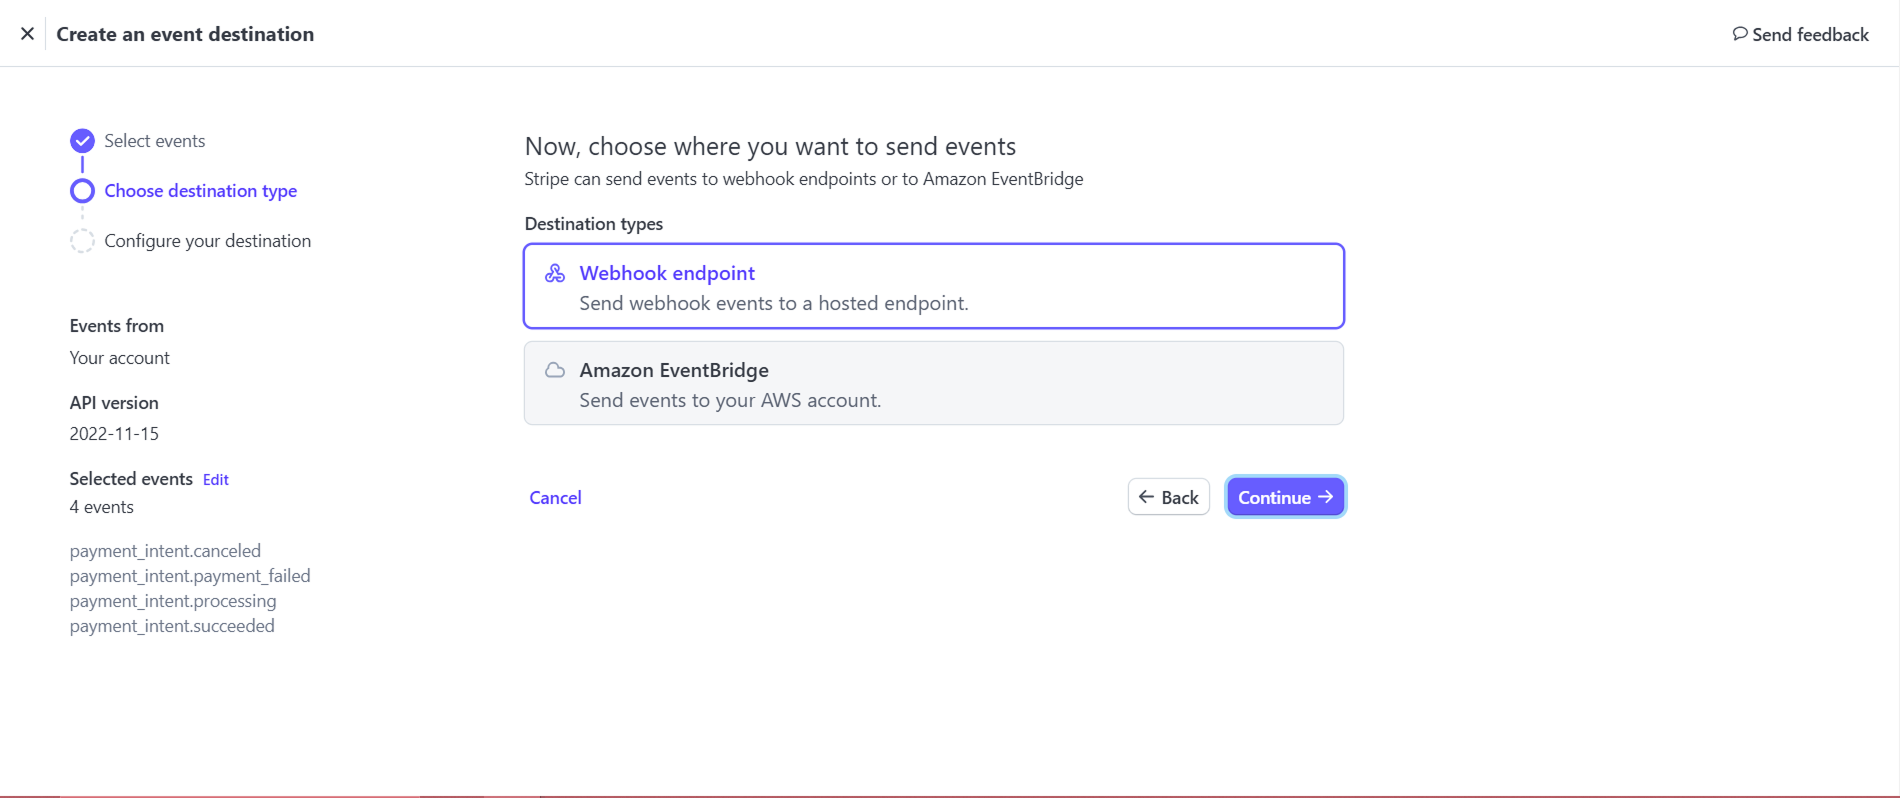
Click Continue
In the Endpoint URL field, enter: https://payment.meetingapplication.com/api/v1/events/ID_WYDARZENIA/webhooks/stripe
replace ID_WYDARZENIA with your event number, which you can find in the page URL in your browser’s address bar when you’re in the Meeting Application panel (as in the screenshot below)
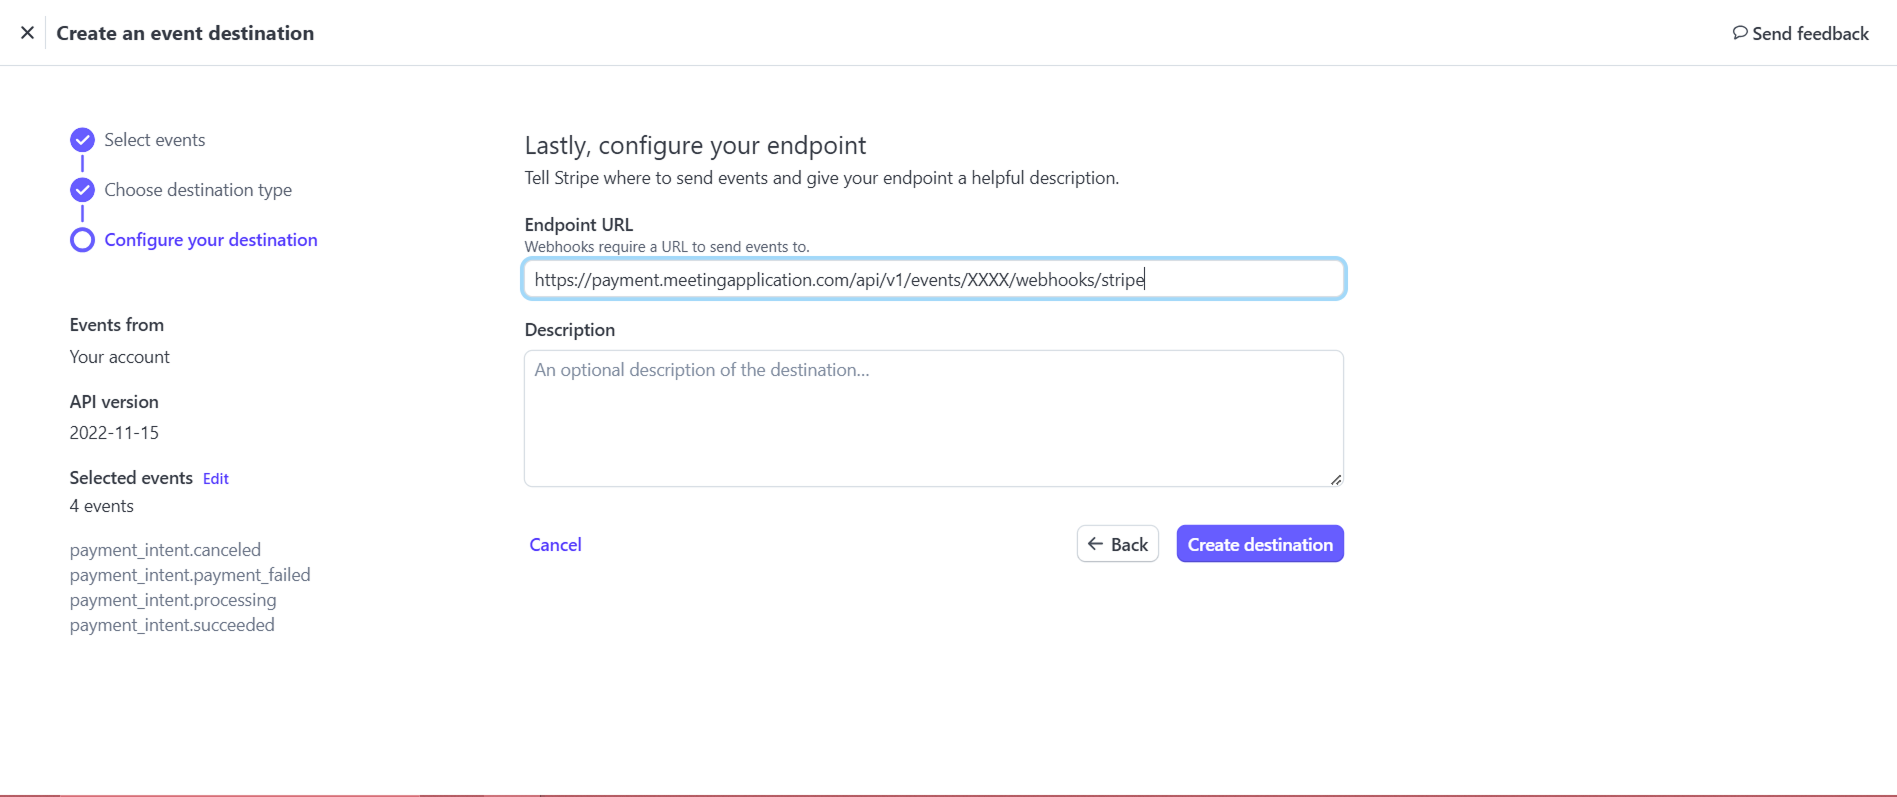
Click Create destination
Press the Reveal button next to Signing secret:
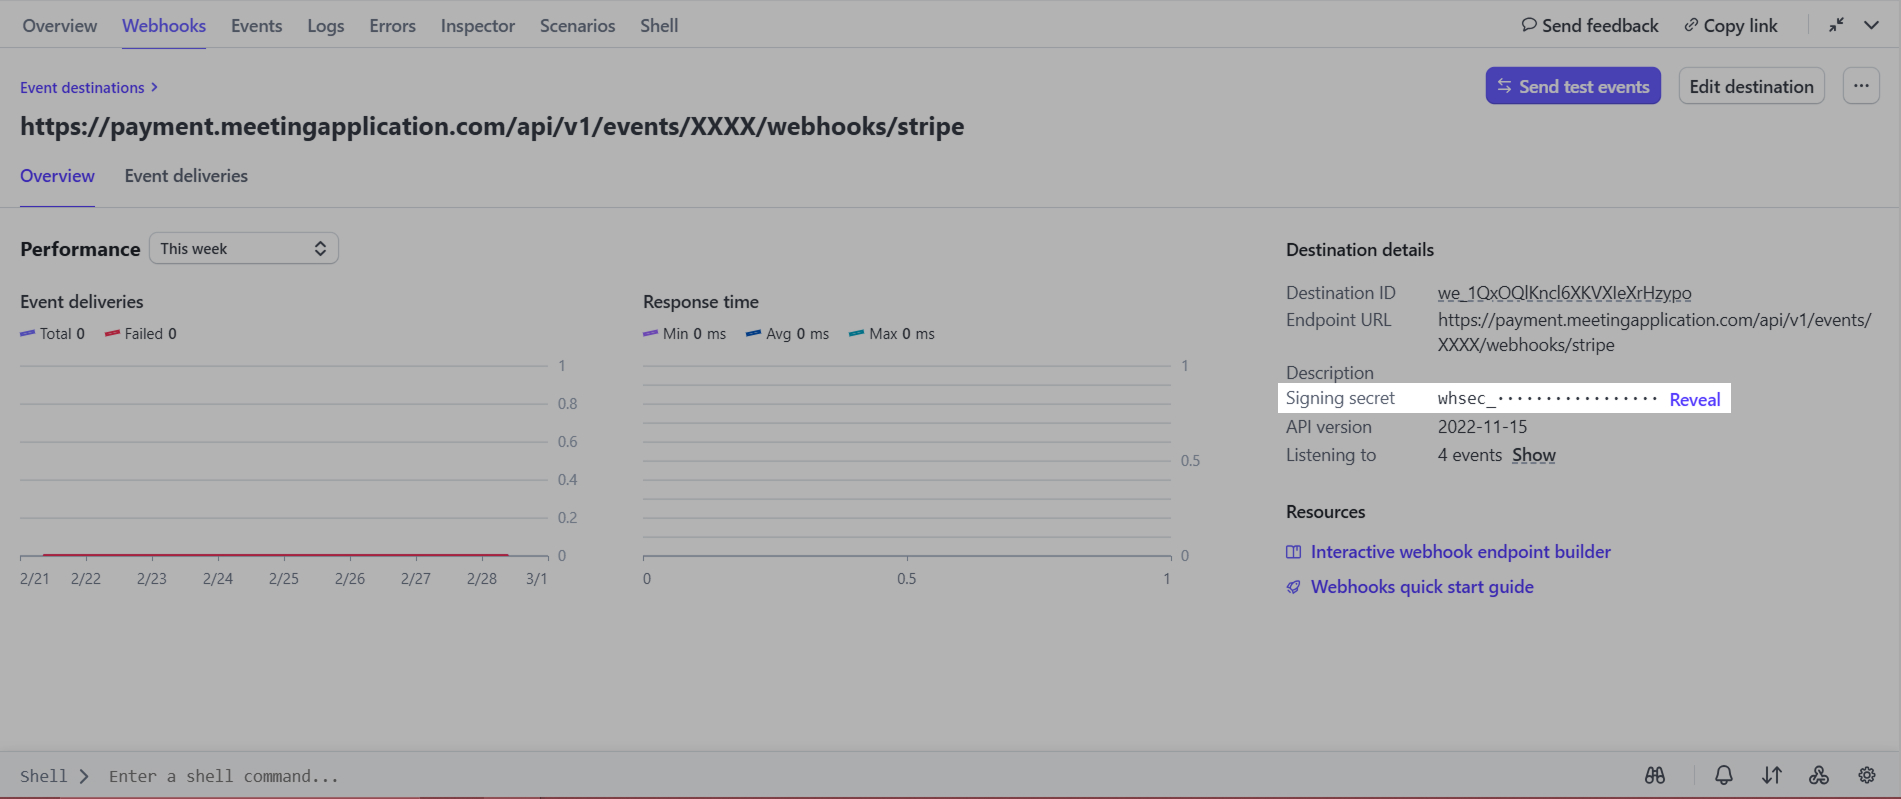
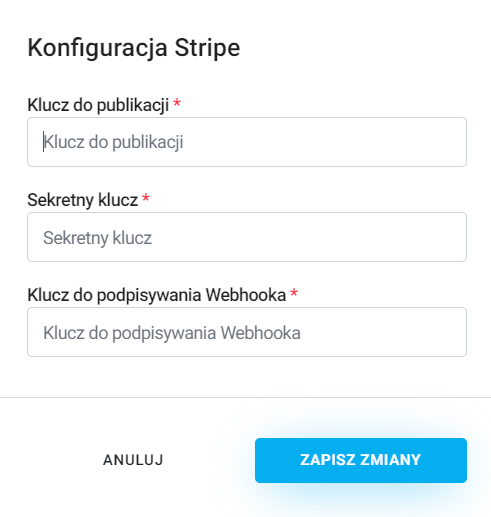
Copy its value and paste it in the admin panel in the field Webbook signing key
Save the changes in the panel:
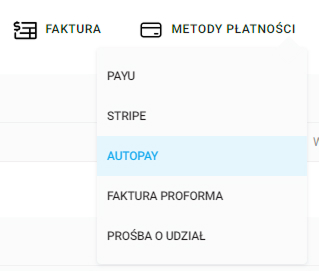
The last payment method is Autopay. To add this option, in Payment methods choose the option click Autopay:
To create an account click here and prepare the following information:
Technical contact on your side (email address).
Complaints contact on your side (email address).
Email address where reports will be sent.
Access to the PAYBM panel (email, phone number).
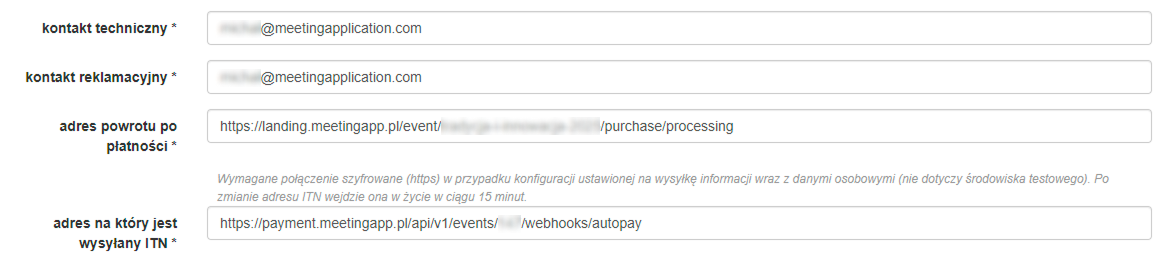
Service URL - that is, the address of the Landing Page in Meeting Application, to be copied from the Autopay payments configuration window in the Panel
Transaction return URL, to be copied from the Autopay payments configuration window in the Panel
ITN address, to be copied from the Autopay payments configuration window in the Panel
Log in to your Autopay account.
Go to the Service Settings tab
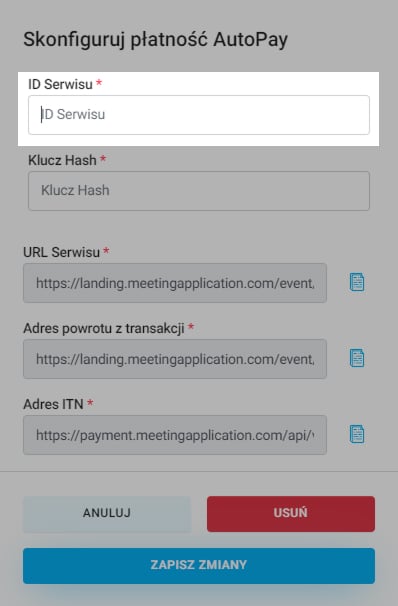
Copy the service ID:
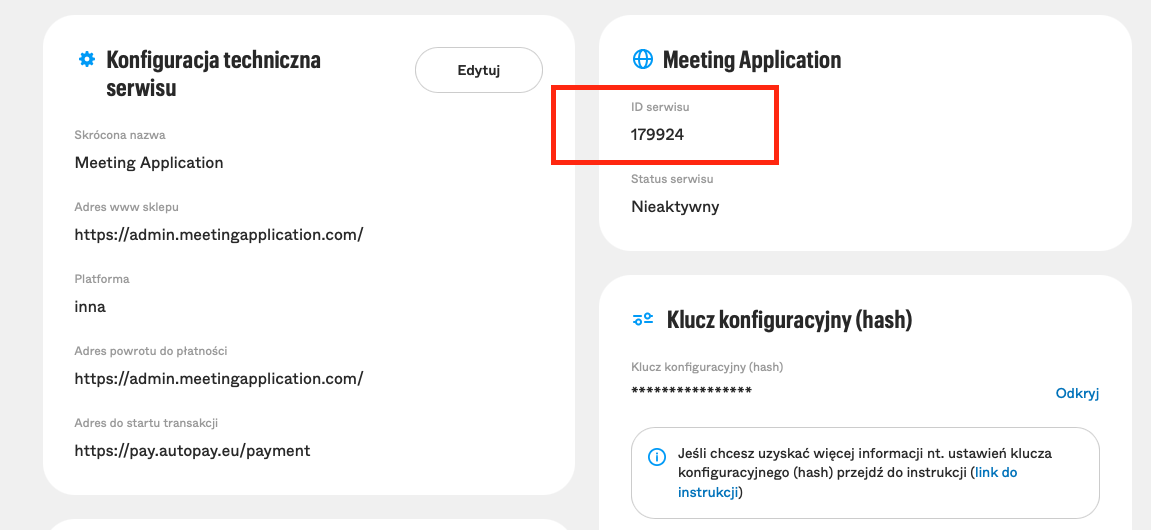
Paste the copied number into the Service ID field in the admin panel.
In the same section of the Autopay panel, prepare the Configuration Key
To generate the Service Key click the Reveal button, then authorize the operation.
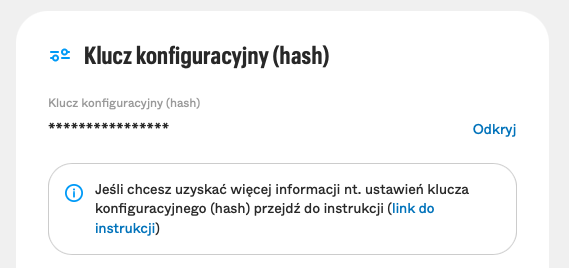
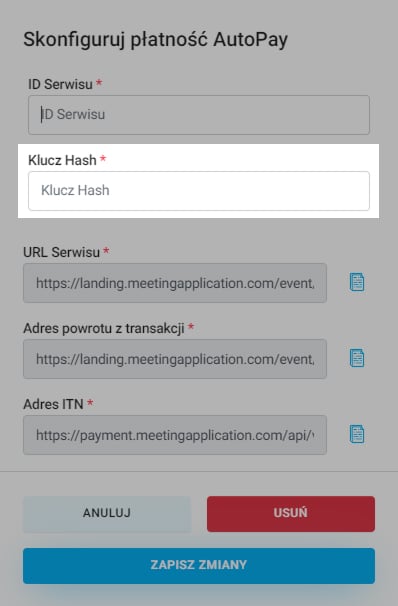
Copy the generated key and paste it in the Hash key field in the Meeting Application admin panel:
Then paste the links we prepared in the MA Admin Panel into the right places in the Service technical configuration section in the Autopay panel:
Service URL → Store website address
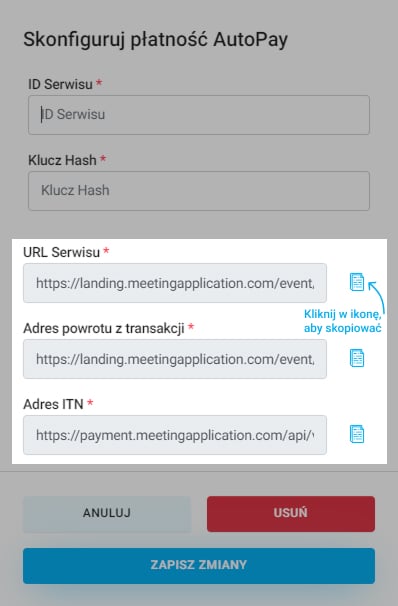

Then in the Technical service configuration section click Edit and paste from the MA admin panel:
Return Address from Transaction
ITN Address
Log in to your Autopay account.
Go to the Stores tab
Copy the service ID:
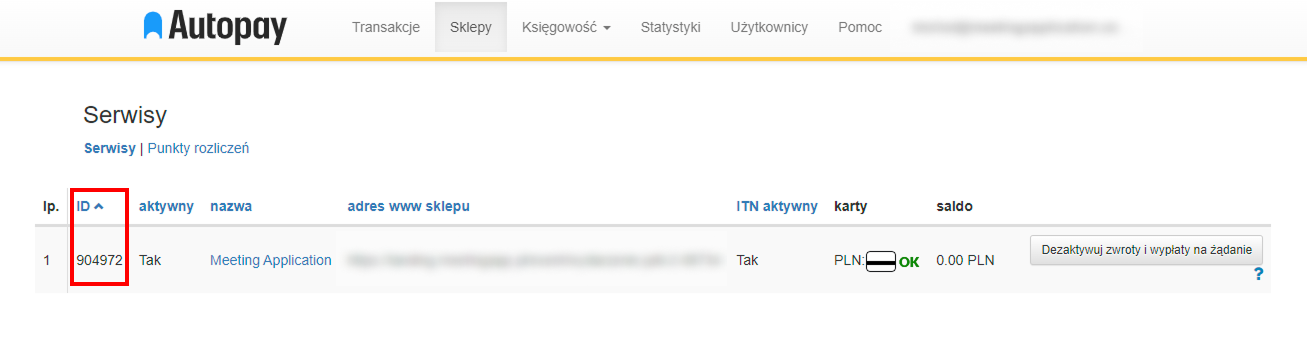
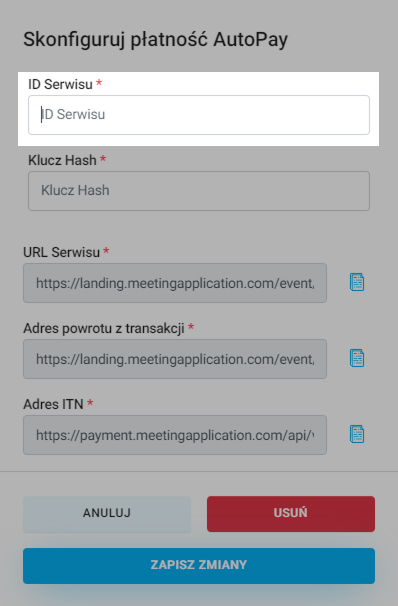
Paste the copied number into the Service ID field in the admin panel.
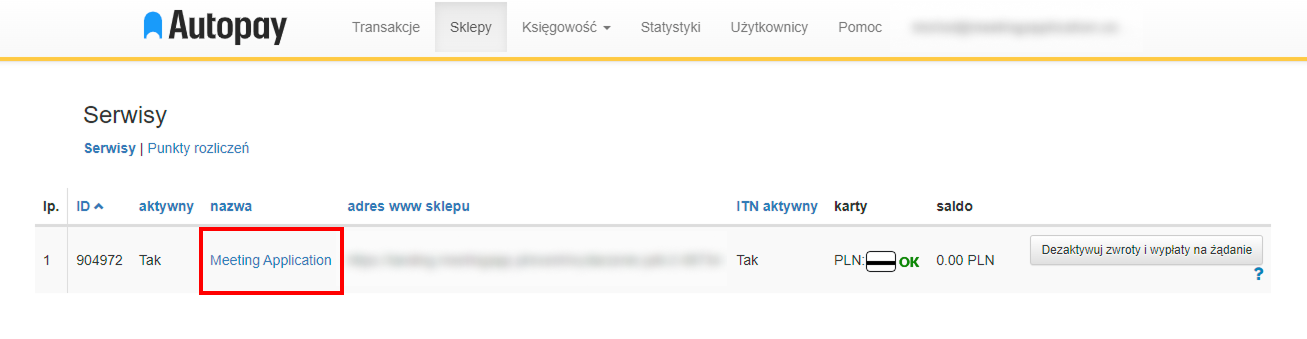
In the same section of the Autopay panel, prepare the Configuration Key; go to the Service Details by clicking on the Service name
To generate the Service Key, click the Load key button, and then authorize the operation.
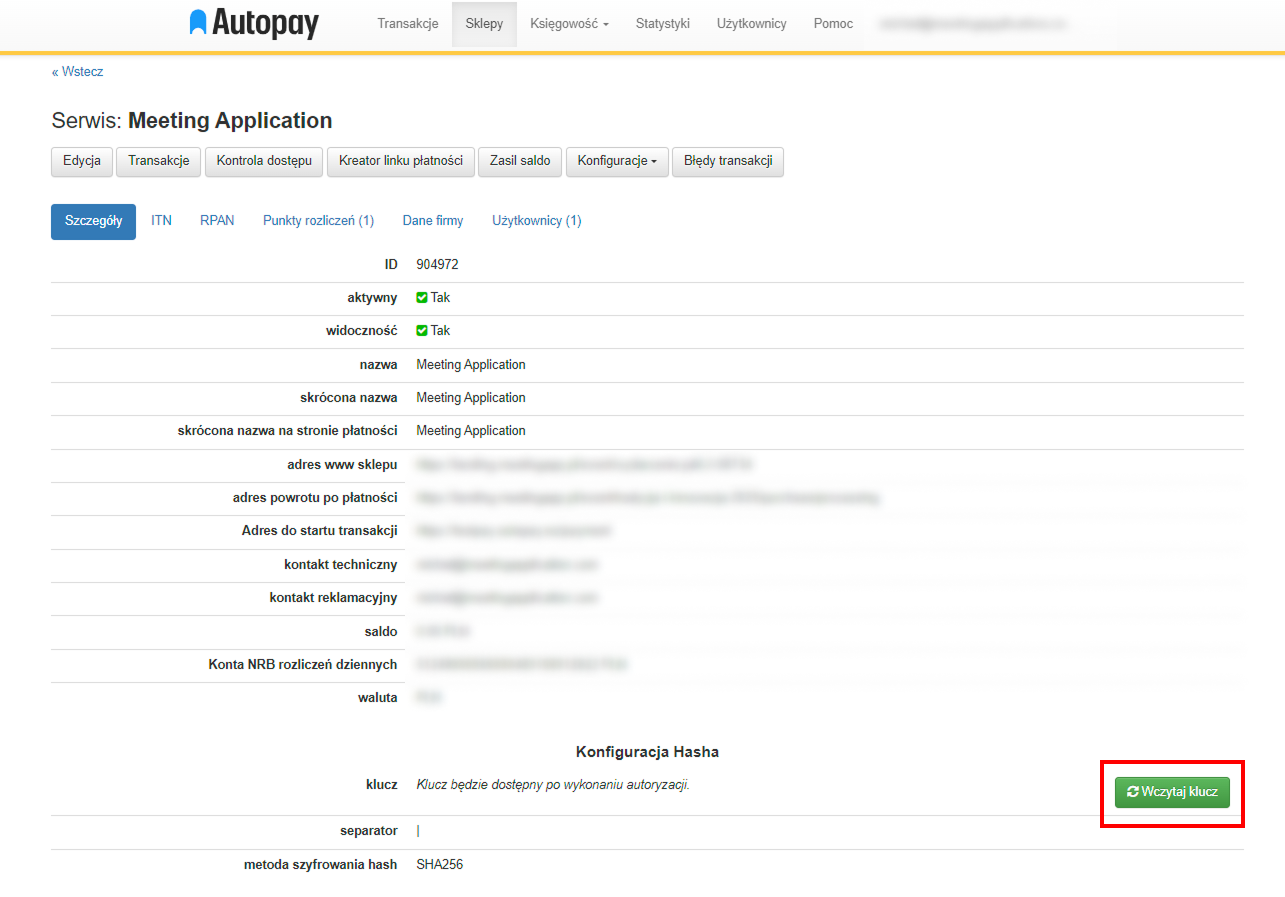
Copy the generated key and paste it into the Hash Key field in the Meeting Application admin panel:
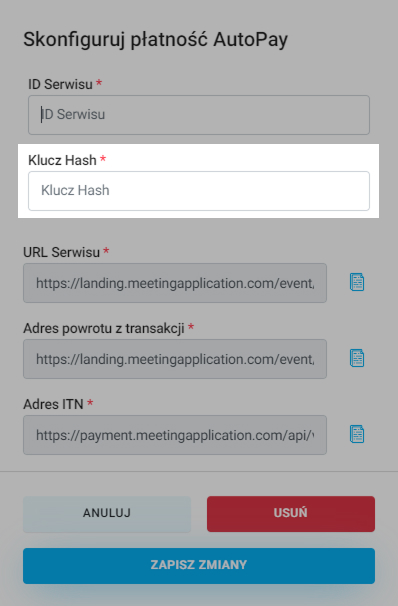
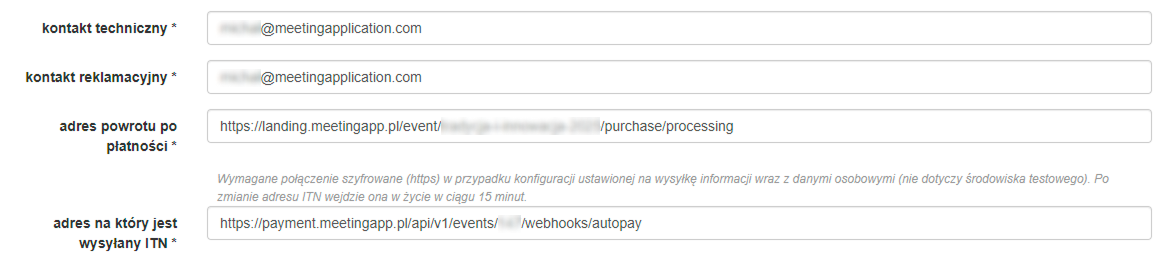
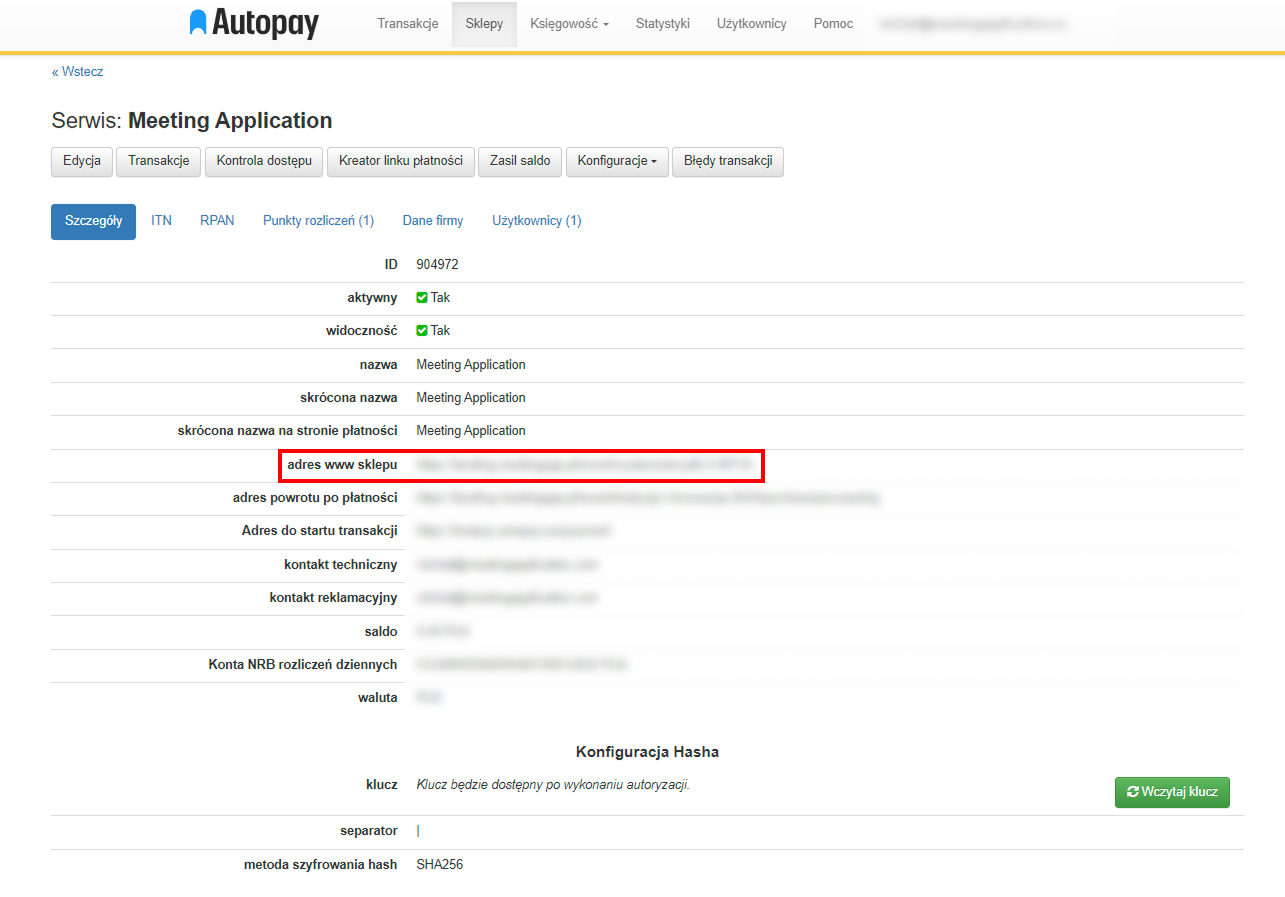
Next, paste the links we prepared in the MA Admin Panel into the appropriate places in the Autopay panel:
Service URL → Store website address
then click Edit and paste from the MA admin panel:
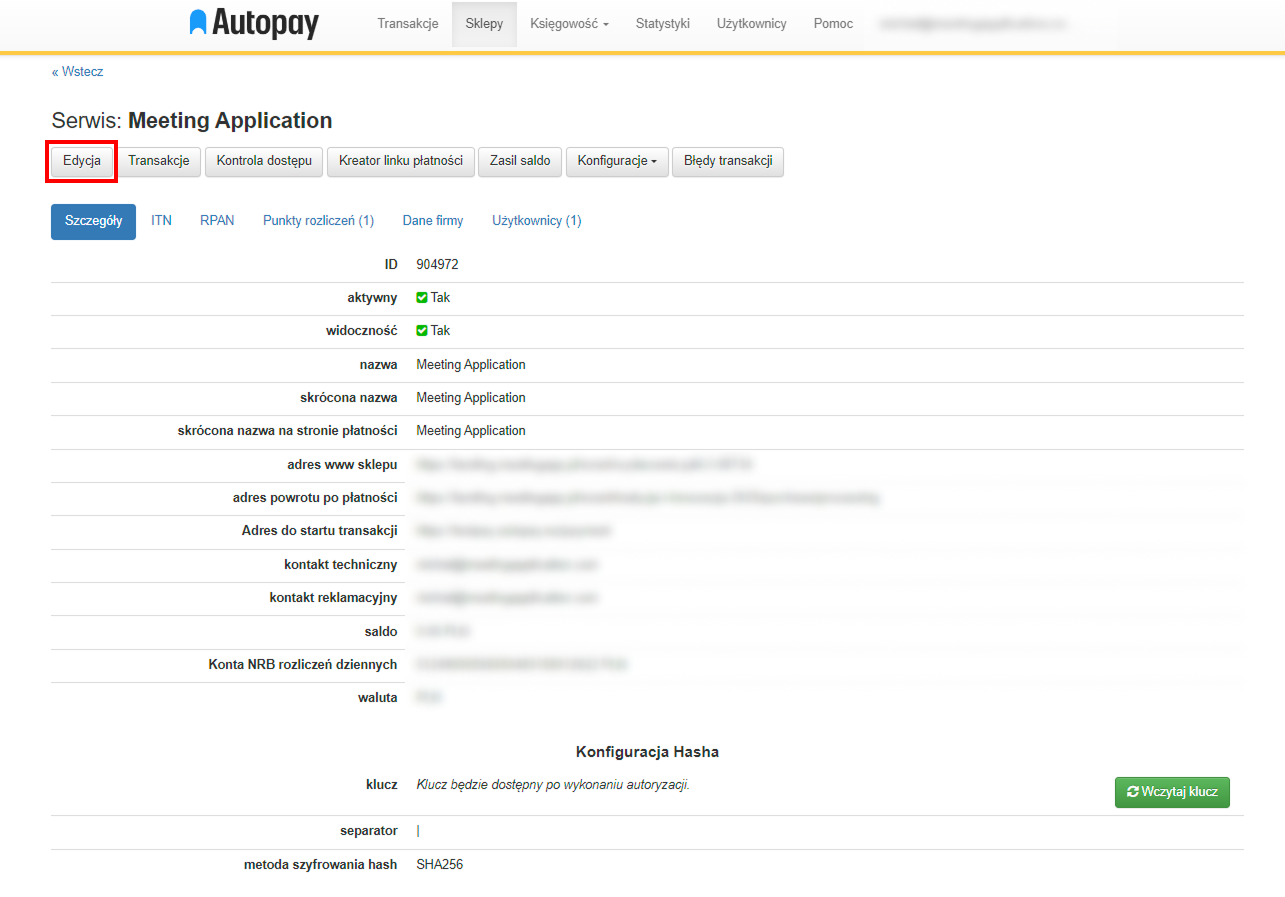
Return Address from Transaction → Return address after payment
ITN Address → Address to which the ITN is sent

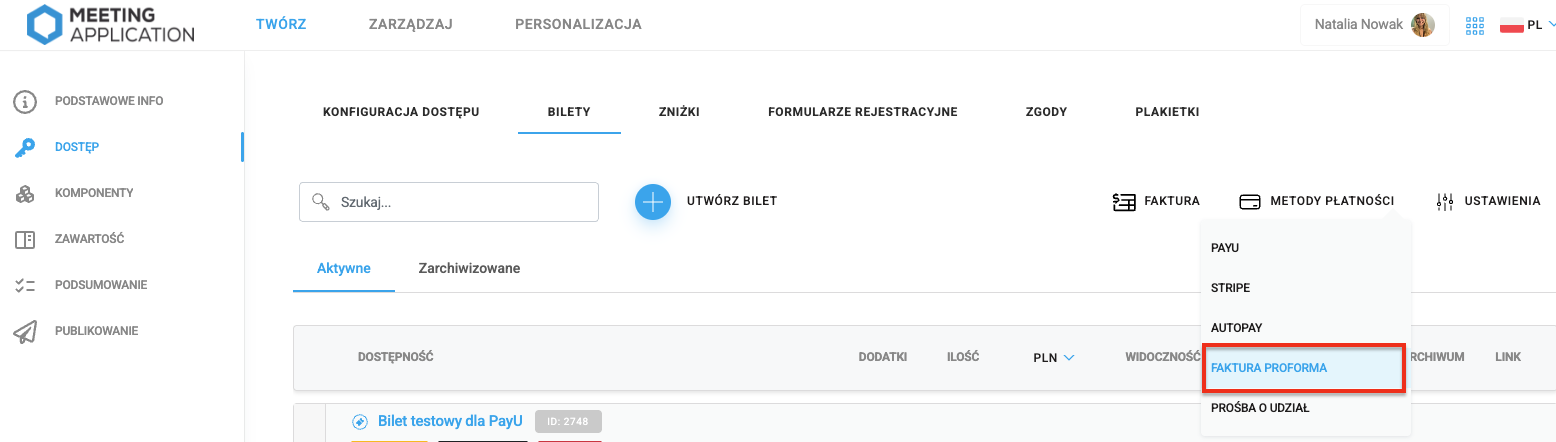
To let participants of your event pay based on a proforma invoice, you need to add the bank account number where ticket payments will be sent in the CREATE → ACCESS → TICKETS → PAYMENT METHODS tab.
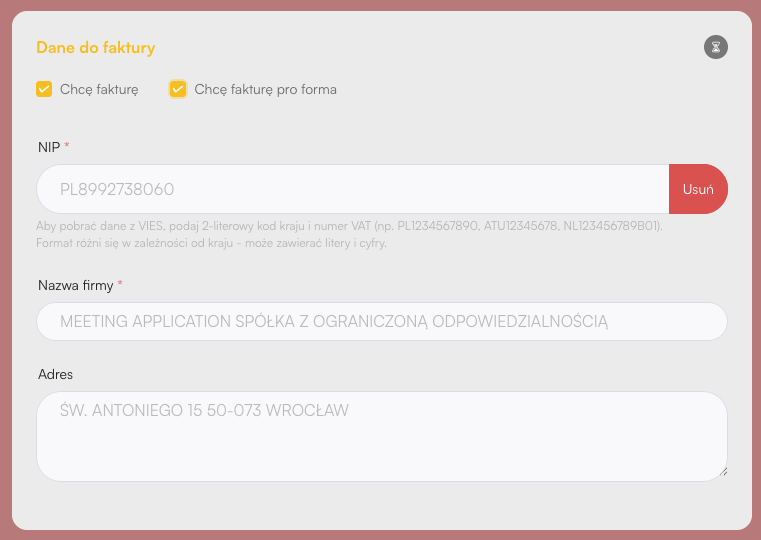
For a participant buying a ticket to the event, at step 3 of the purchase cart, after clicking “I want an invoice”, the proforma invoice option will appear. Once all required fields are filled in and the purchase process is completed, the system will send the proforma invoice to the payer’s email address.
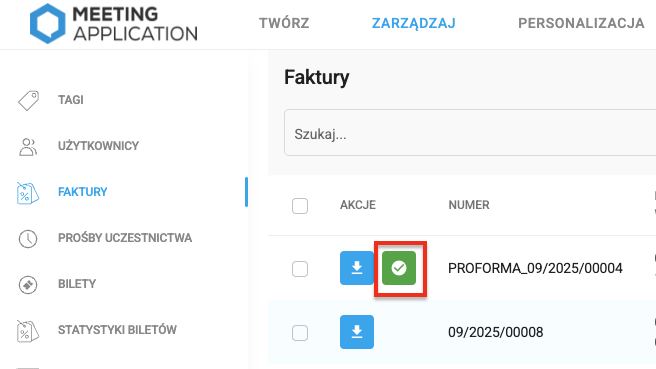
After receiving the transfer:
log in to the panel
go to the ZARZĄDZAJ → FAKTURY tab
accept the payment
The system will automatically generate the correct invoice linked to the paid pro forma, and will also send the ticket for the event.
Have a great event with Meeting Application!