Are you going to an event and planning to collect business contacts? Then it's great that you have the opportunity to use a special tool for conveniently saving and easily editing them!
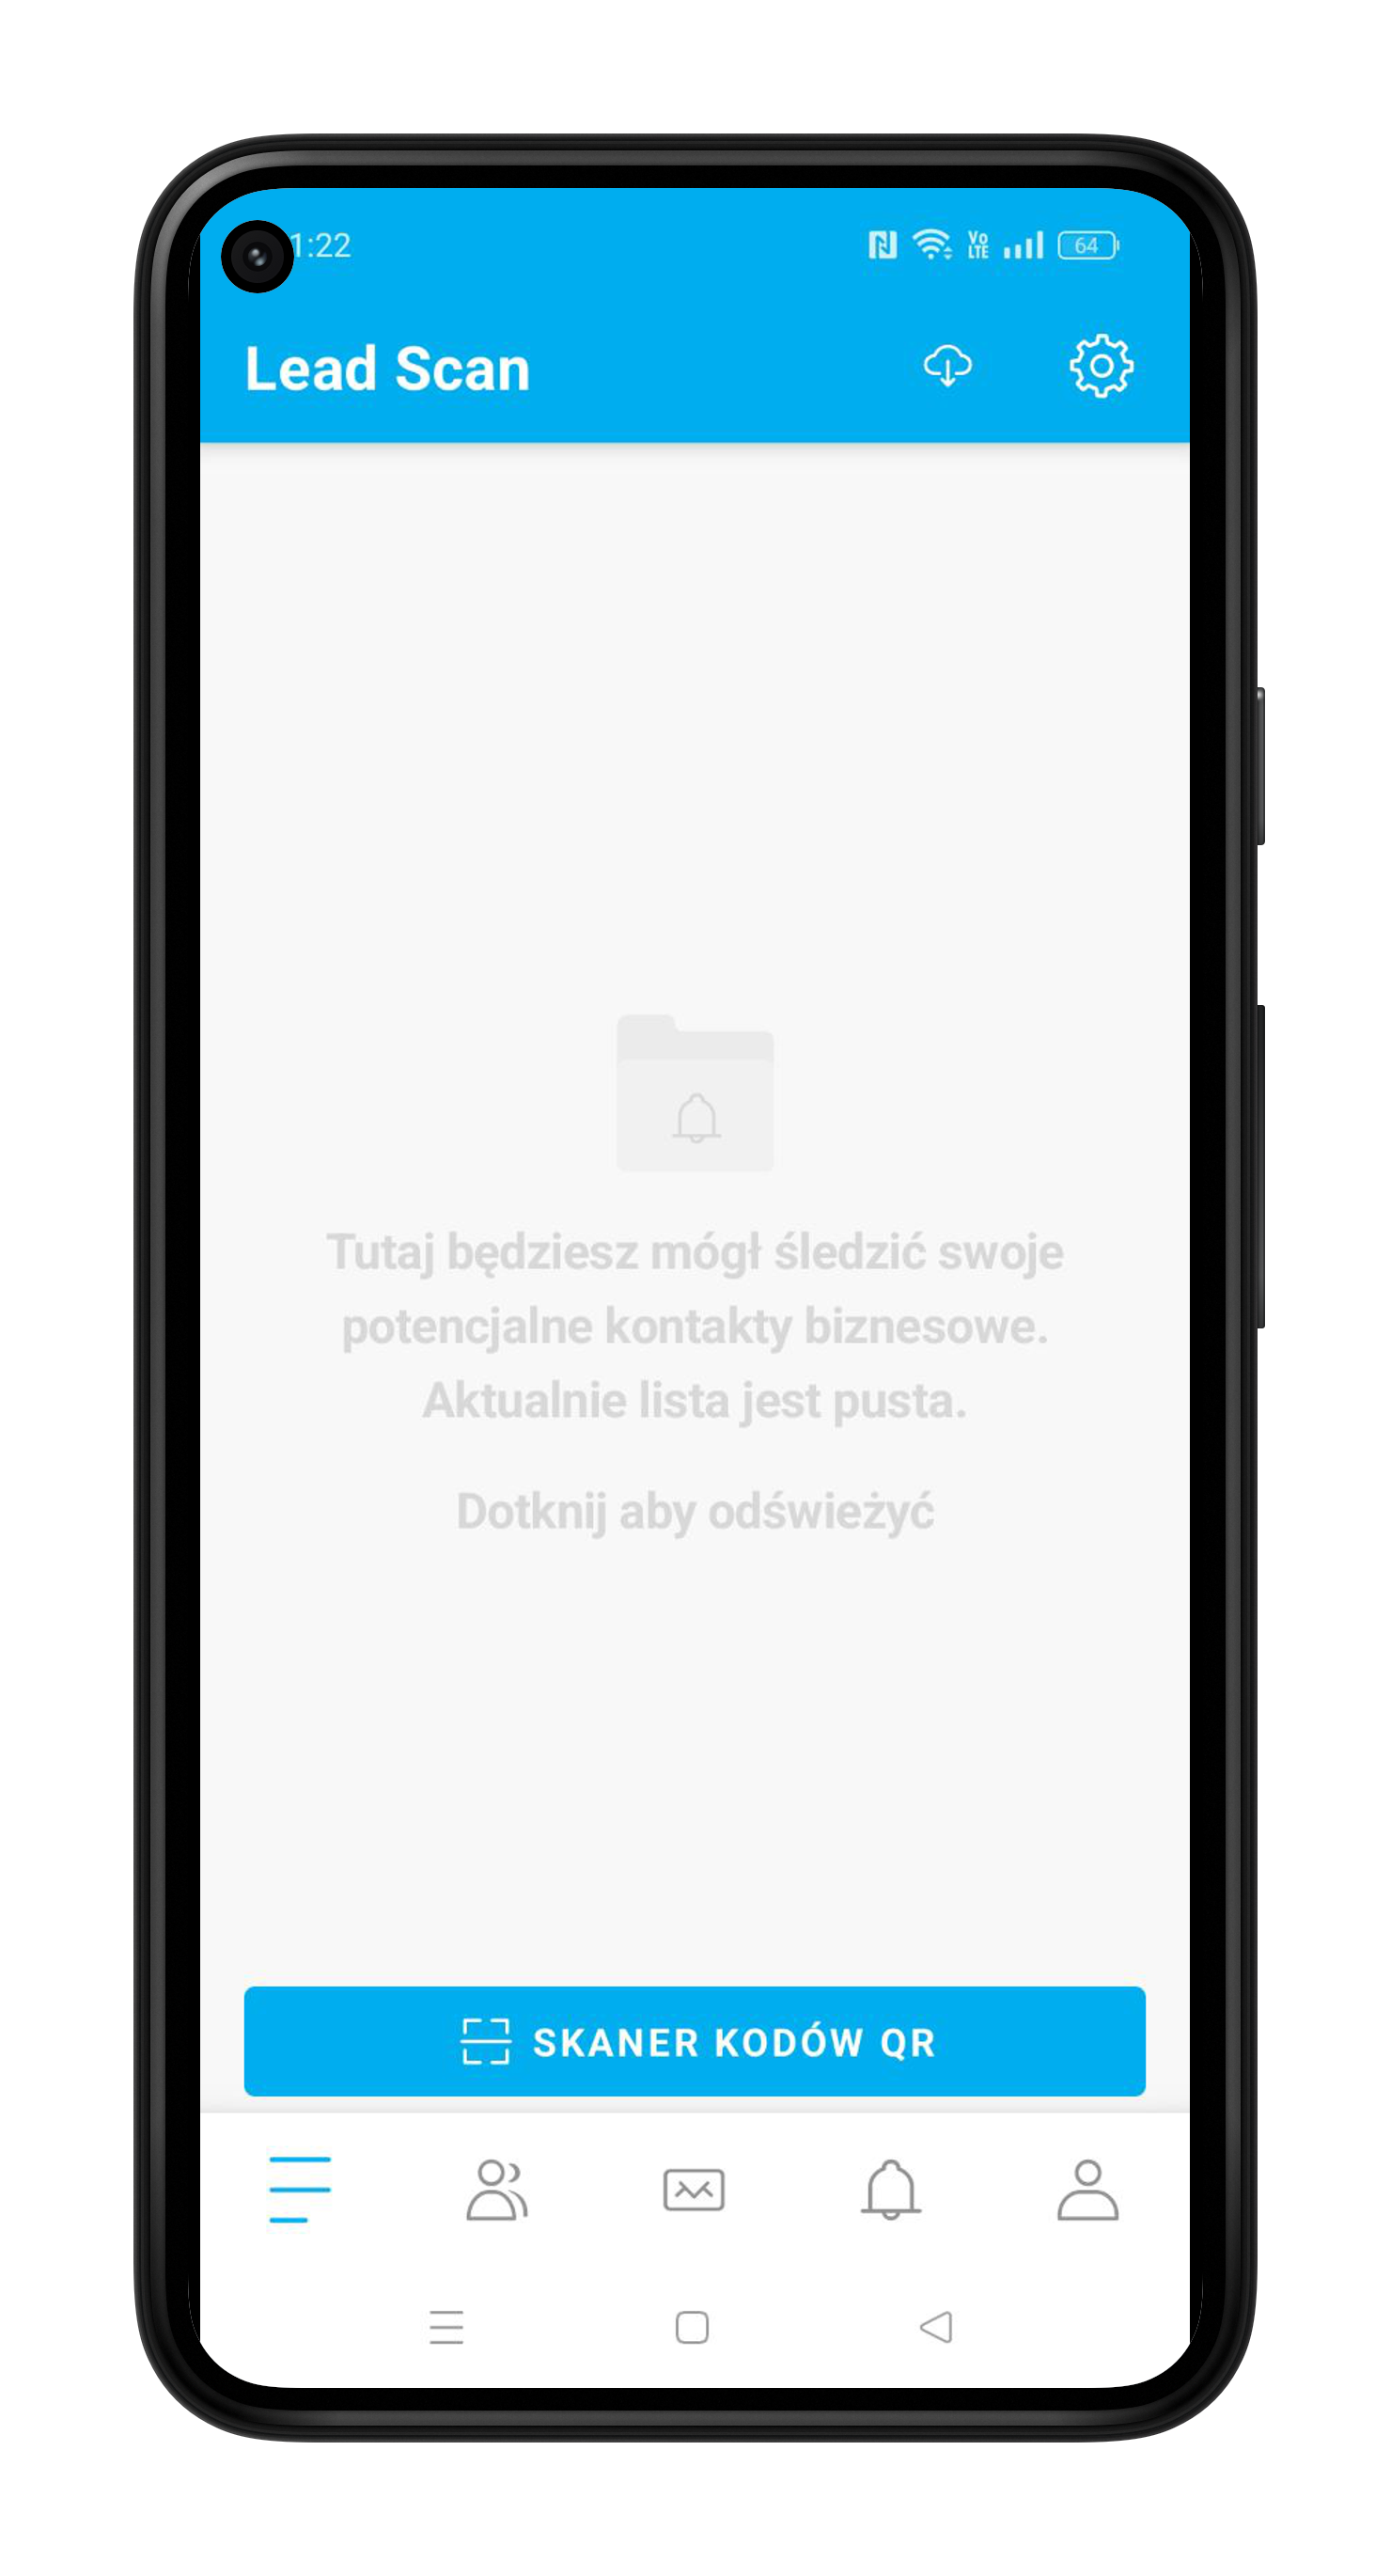
Enter the Lead Scan module, which may have a different name assigned by the organizer. First, you will see the screen below, where you will soon start gathering your contacts.

Click the gear icon in the top right corner of the screen. This will take you to your forms menu. You can create many different templates here and switch between them.
We will start by creating the first template - to do this, click the “+” button.
Form title - allows you to name the form in a way that is most convenient for you.
Switch Default is used to indicate which of the created forms will open by default after scanning or starting editing.

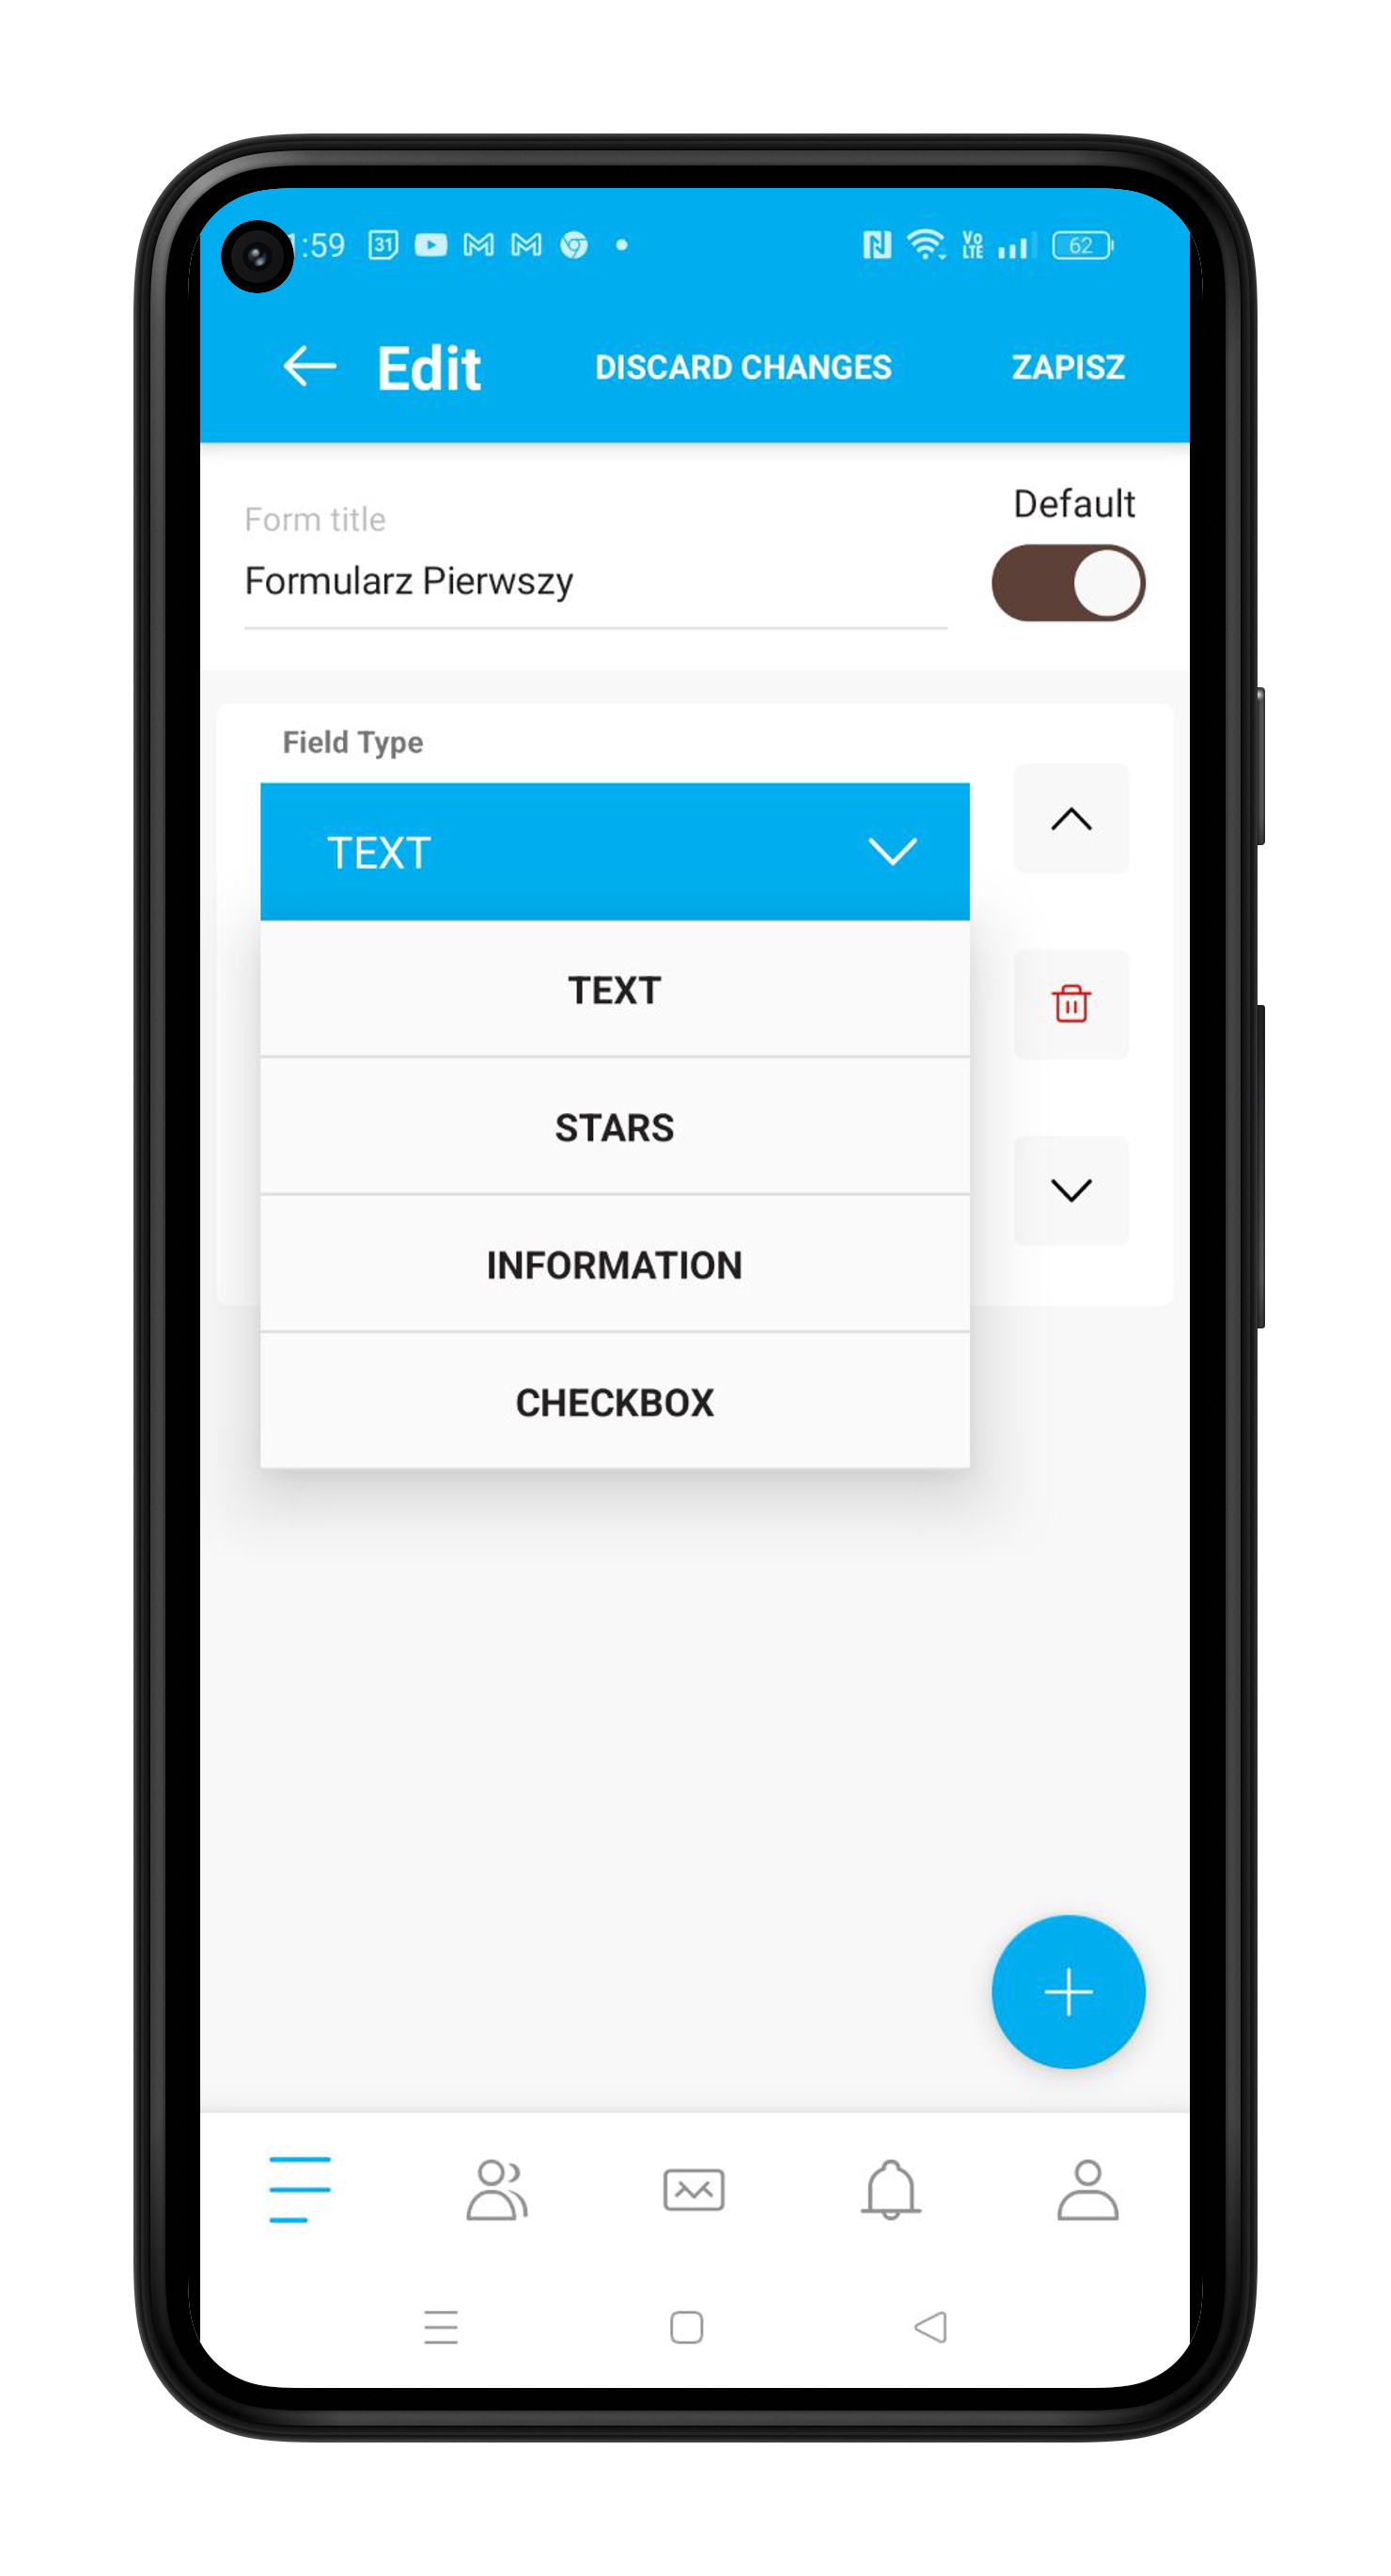
Click the “+” button to add a new question to the form. Under the “field type” label, select the blue rectangle with the word TEXT to see other data collection options.
TEXT - is a space for entering text information
STARS - creates a 1-5 star scale to choose from
INFORMATION - is informational text for you. You can include tips intended for yourself.
CHECKBOX - is a field with space for text, where you can check a box.
Column name in export file - is the name of the column where you will find the answers to this question after downloading the file with the collected results. This name cannot contain spaces or capital letters.
NOTE! Some participants may have hidden contact information on their accounts. Make sure that after scanning you see the email address or phone number, and if they are not there, enter this information in the pre-prepared contact information field of your form.
Sample questions for the form:
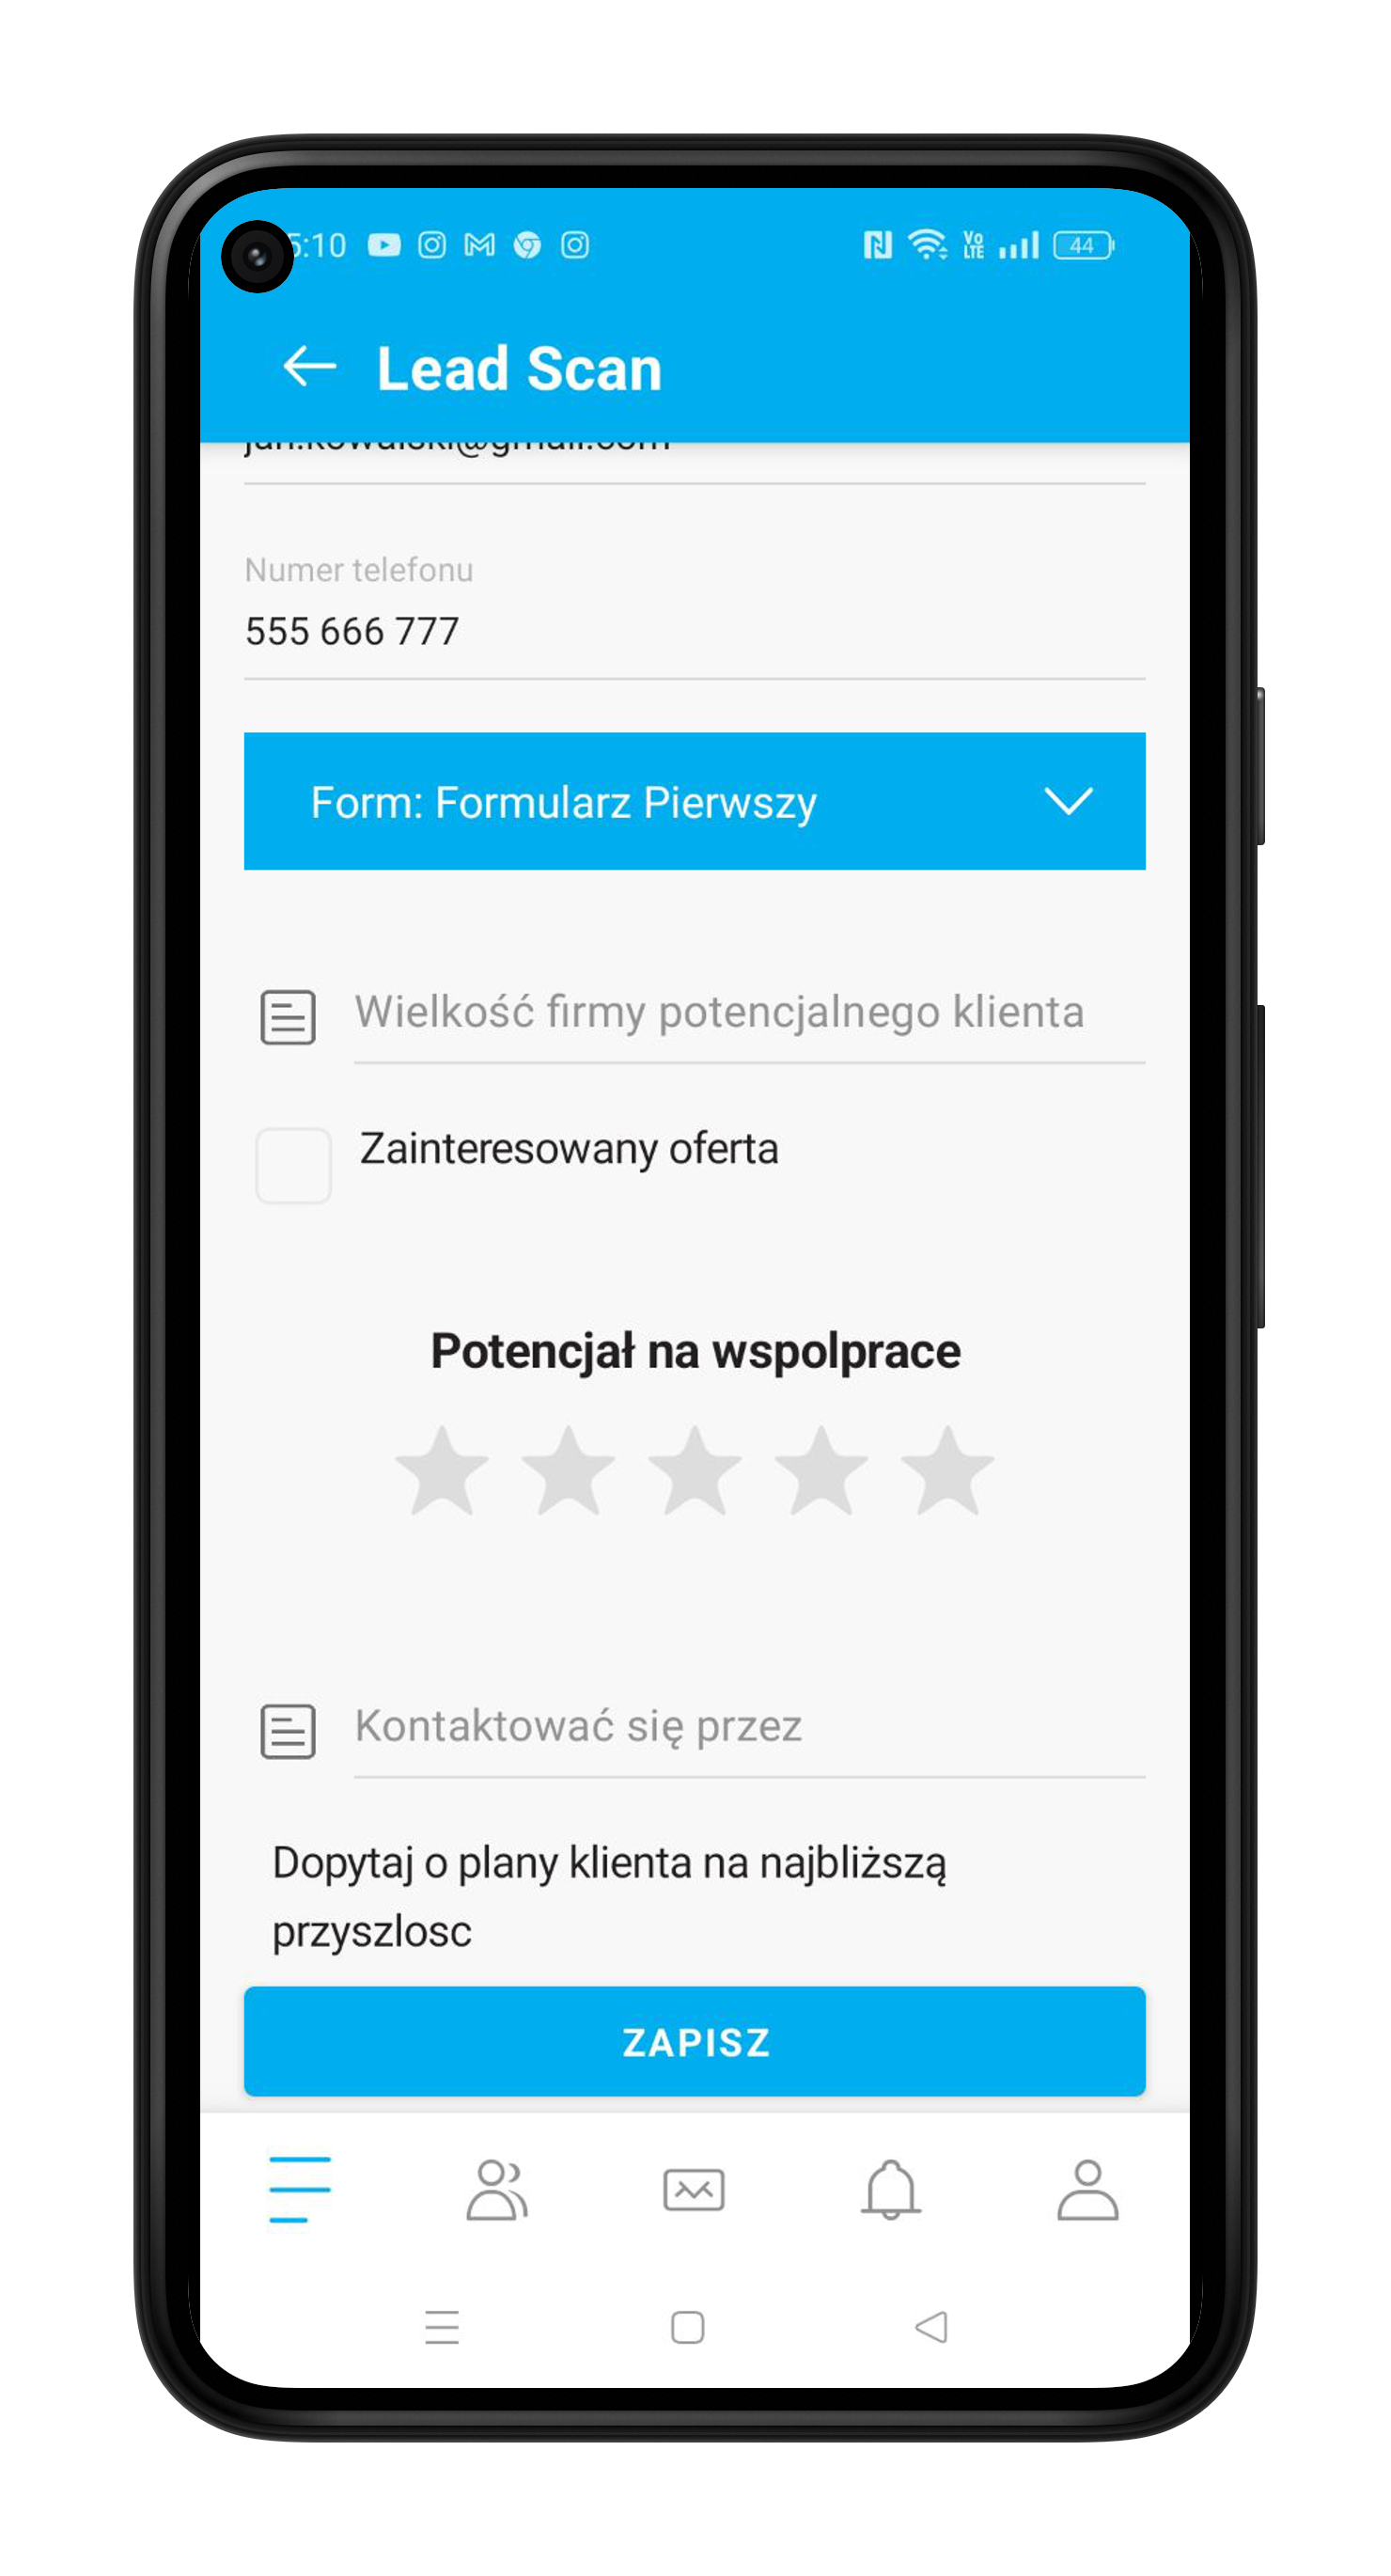
TEXT - size of the potential client's company
CHECKBOX - interested in the offer
STARS - potential for cooperation
TEXT - contact through…
INFORMATION - Ask about the client's plans for the near future
Effect after scanning the participant:

The red trash can icon allows you to delete a question.
You can change the order of questions using the arrows.
Status Draft - if you make changes but do not click the Save button, the form will be in draft mode. This means that during scanning, you are still using the last saved configuration because the new one has not yet come into effect. You can also undo the changes made by clicking Discard changes to return to the last saved configuration. After clicking Save while editing a draft, the term "draft" will disappear from the form.
Regardless of whether you approach the event participant or they come to you - the first step to recording information is to scan the participant's individual QR code.
Ask if the participant agrees to be scanned.
Enter the Lead Scan module.
Launch the QR Code Scanner and aim it at the participant's QR.
On the screen that appears, select Save as lead.
You will then see a set of questions from the default form - you can choose a different form at this point.
Start filling in the data - this will be your private note about potential cooperation.
Note! You can only fill in one form at a time!
Filling in all fields is not mandatory - it's your private note.
Click Save.
The result of the above actions will be that the Lead will appear on your private list. Even if this participant deletes their account now, the collected data remains with you.
You can update the collected lead information at any time by clicking the edit button. When you have several prepared forms, you can complete each of them for a given person, but remember to click Save before moving on to the next one.
In the upper right corner, select the icon with a cloud from which an arrow points down. This way, you will save the collected data in a spreadsheet file in CSV format.
PRO TIP - if you are working with other people from the company who collect the same information, make sure that the field Column name in export file has the same name. This will allow you to easily merge the downloaded data into a common file if that is your goal.
Have a successful event with Meeting Application!