This guide will help you set up Google's tools for analyzing your website and managing cookie consent (cookies), including tracking sales (eCommerce), step by step.

What are we going to do?
We’ll set up or check your Google Analytics 4 (GA4) account – the tool for tracking site traffic.
We’ll configure Cookiebot through GA4 – to manage user cookie consents.
We’ll set up or check your Google Tag Manager (GTM) account – a tool that makes adding tracking codes to your site easier.
We’ll connect GA4 and GTM, and set up Consent Mode – so tracking runs according to the user’s choices.
We’ll set up eCommerce tracking – so GA4 collects data on purchases.
We’ll check eCommerce reports settings in GA4.

Let's get started!
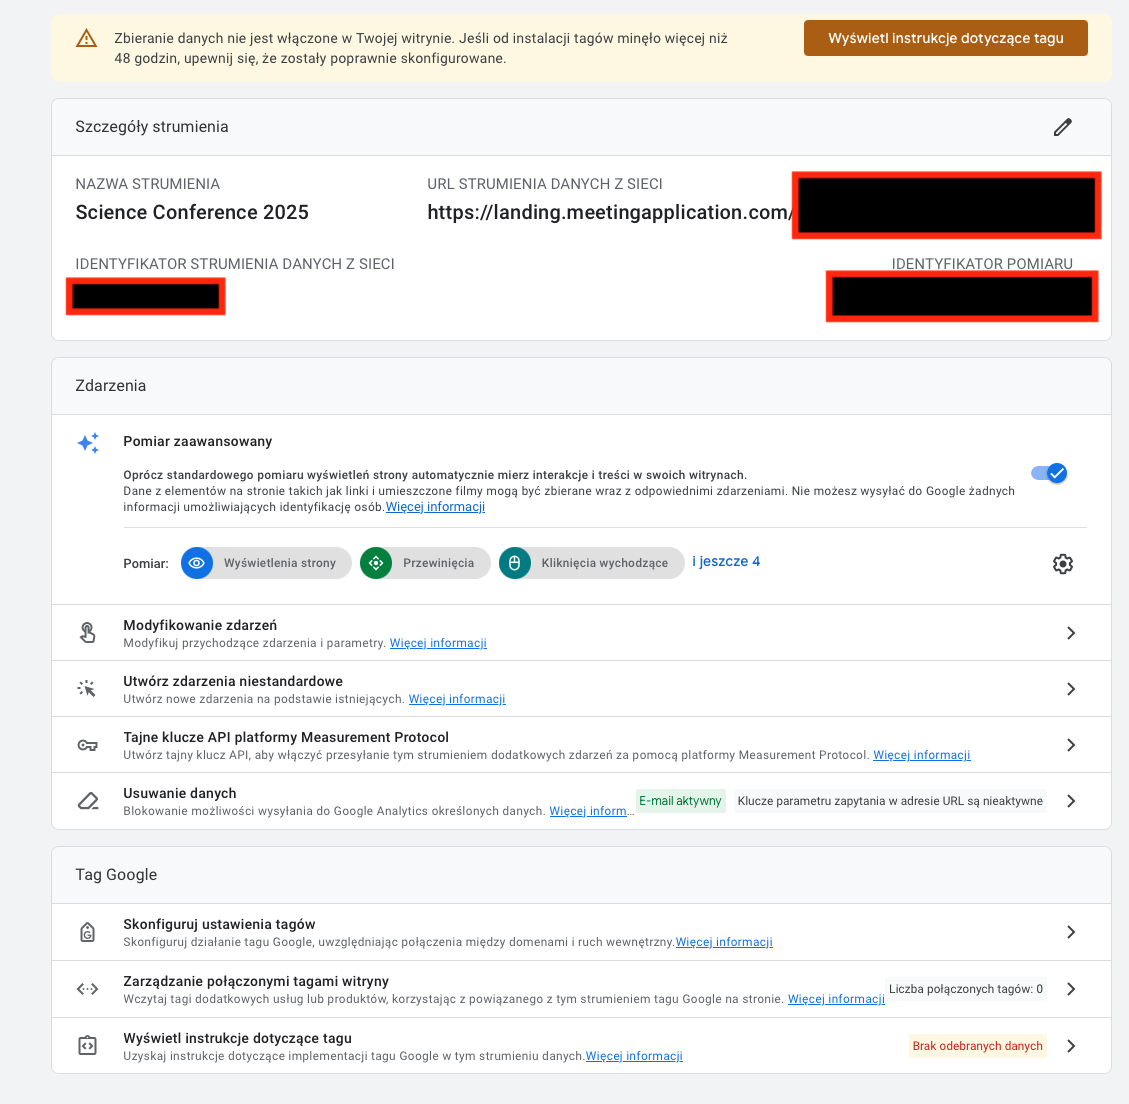
Goal: You need a GA4 account and a special code (Measurement ID), so Google knows where to send data from your site.
How to do it:
Go to analytics.google.com and log in with your Google account.
If you don’t have a GA4 account, click "Start measuring" and follow the instructions (enter account name, property name e.g. "My Website", time zone, currency).
During setup, choose the platform "Web" and enter your site’s address.
After creating the so-called "data stream", you’ll see the Measurement ID in the format G-XXXXXXXXXX. Save it, you’ll need it later.
If you already have an account, you’ll find this ID in the Admin section -> Data Streams -> click the name of your stream (the ID will be visible in the top right corner).
Goal: Connect GA4 with Cookiebot so Google tools know which cookies the user agreed to.
How to do it (in GA4 settings):
In GA4 go to Admin -> Data Streams and click your stream.
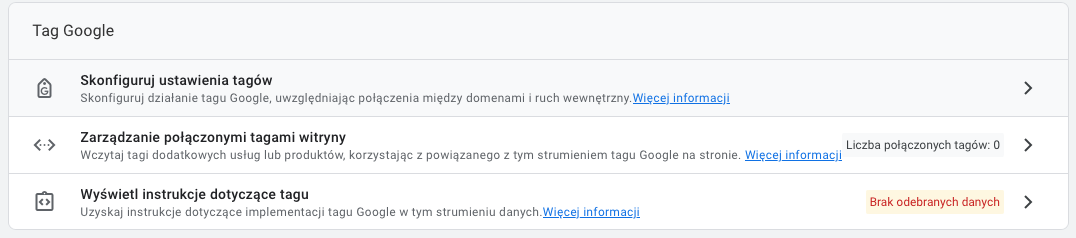
Scroll down to the "Google Tags" section and click "Configure tag settings":
Go into the "Admin" section and look for the settings about "Consent mode setup":
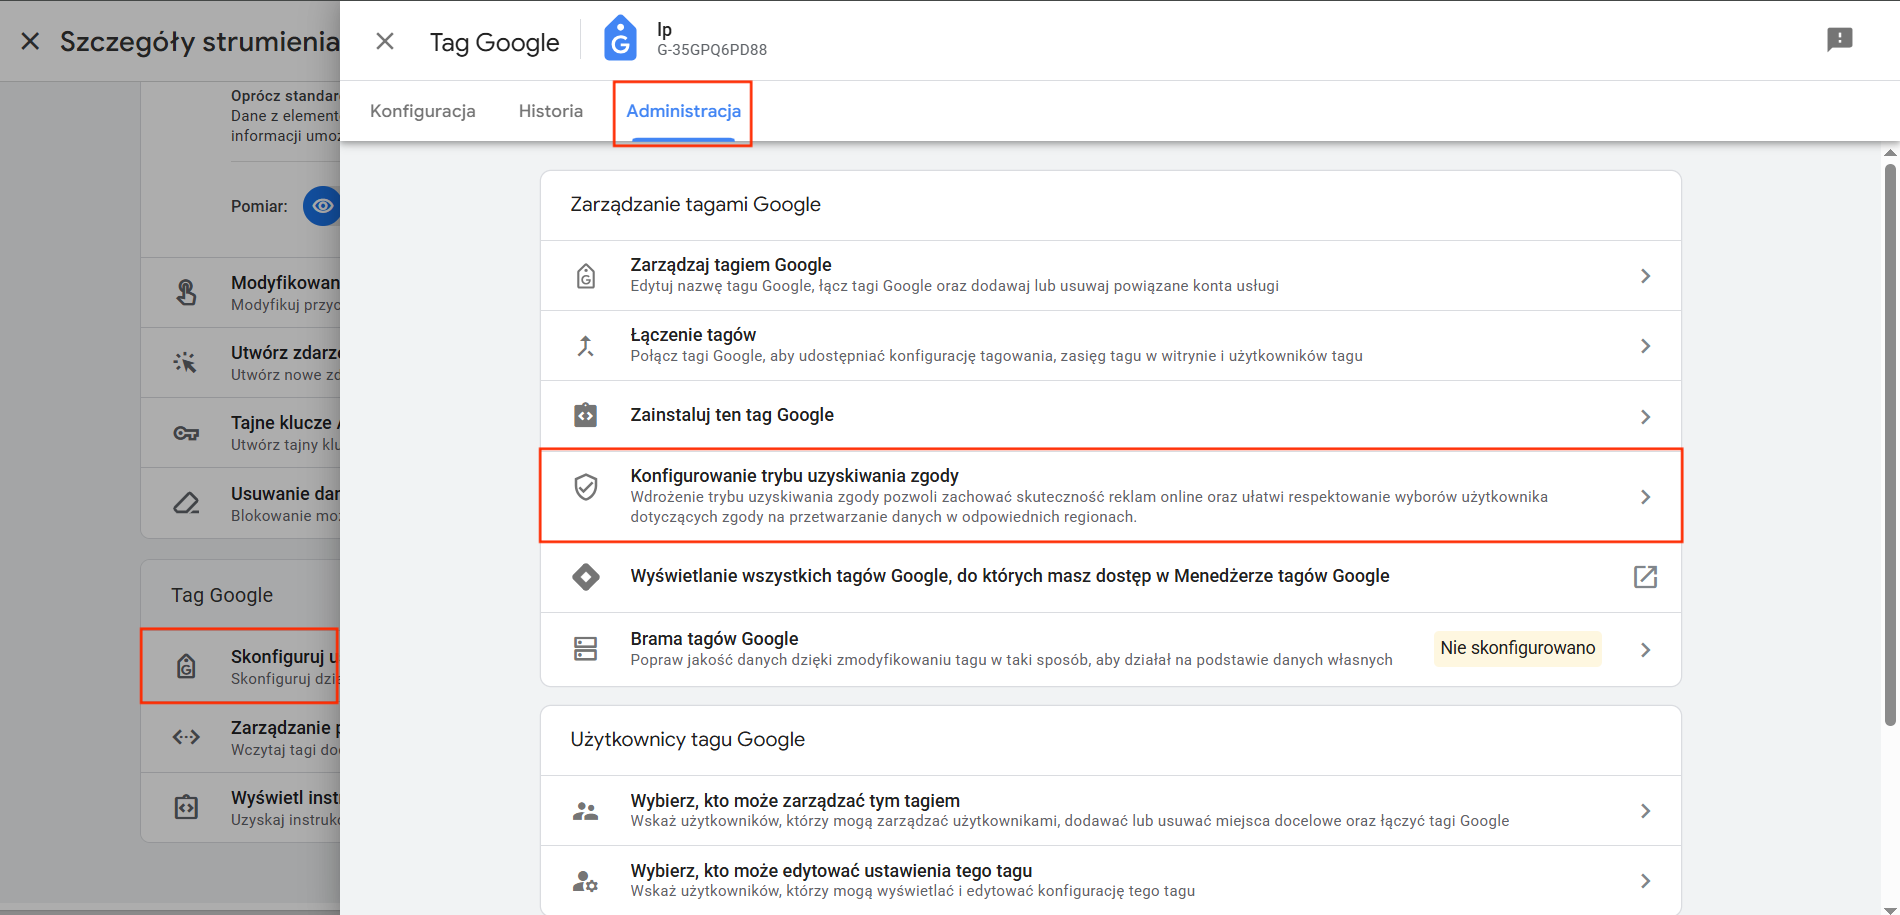
When you see the consent management platform options, choose I don't have a banner asking for consent to process data.
After filling in the survey, pick cookiebot as the platform you want to use.
Just follow the instructions and create your account.
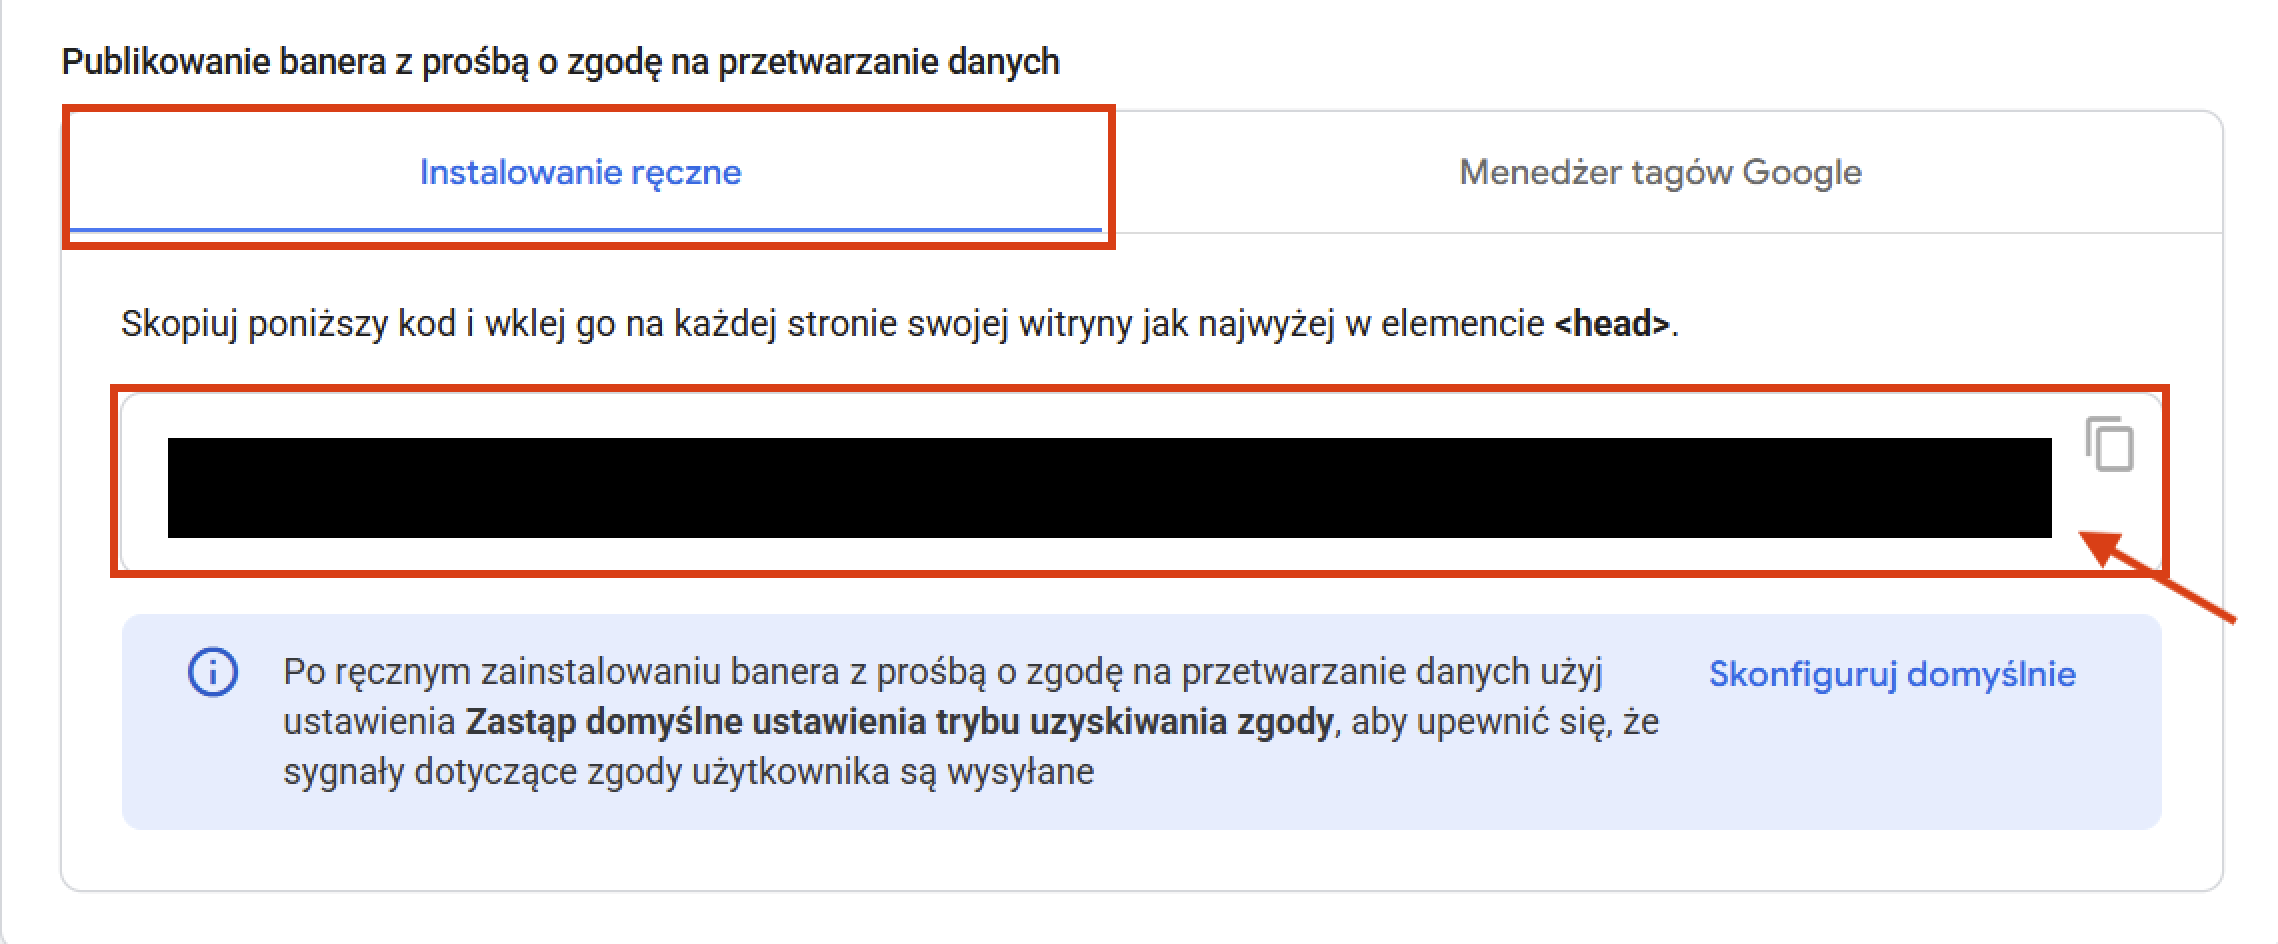
In the "Publishing the banner asking for consent to process data" section, under "Install manually", from the id=Cookiebot save the value data-cbid (it should have the format 00000000-0000-0000-0000-000000000000), which will be your Cookiebot ID.
Goal: Set up a GTM account that will act as a middleman for managing tracking codes on your site.
How to do it:
Go to tagmanager.google.com and sign in with your Google account.
If you don't have an account, click "Create Account" (enter your company name, country).
Next you'll need to create a "Container". It's like a folder for your site's codes. Enter a name (e.g. "Homepage"), choose the platform "Web" and click "Create". Accept the terms.
If you already have an account and container for this site, just pick them from the list.
Goal: Create a "variable" in GTM that will store info about what the user agreed to (taken from Cookiebot/your site).
How to do it (in GTM):
Make sure you're in the right GTM container.
In the menu on the left, click "Variables".
In the "User-Defined Variables" section click "New".:
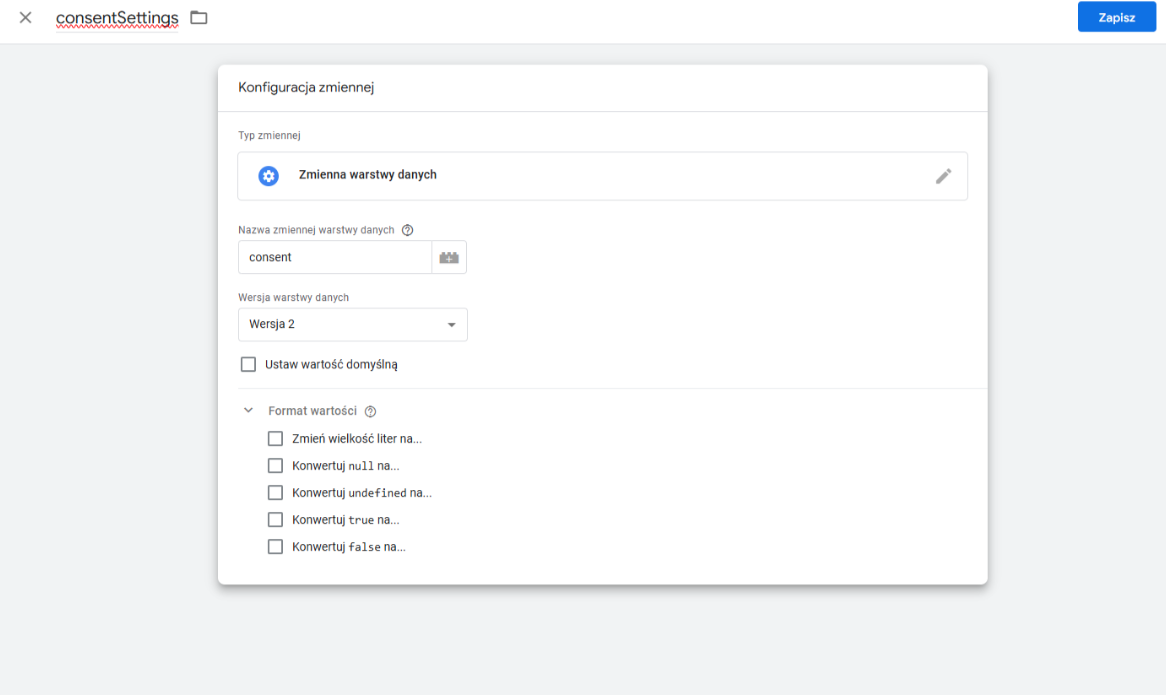
Name the variable: consentSettings.
Click the "Variable Configuration" section and choose the type "Data Layer Variable".
In the "Data Layer Variable Name" field enter: consent.
Make sure the data layer version is "Version 2" and the rest of the options (default value, format) are empty/unchecked.
Click "Save".
Goal: Add the main GA4 code to GTM, so GTM can send data to GA4, keeping user consent in mind.
How to do it (in GTM):
In the left menu click "Tags" and then "New".
Name the tag, e.g. "GA4 - Main Config".
Click on the "Tag Configuration" section and pick the type "Google Tag".
In the "Tag ID" field, paste your GA4 tracking code (that G-XXXXXXXXXX from Step 1, in GA it's called Measurement ID)).
Expand the "Config Settings" section. Click "Add parameter".
In the "Config parameter" field, type consent. In the "Value" field, enter {{consentSettings}} (a suggestion will show up after clicking the block icon). Click Save.
Click on the "Rules" section below. Pick the rule "All Pages" (All pages).
Click "Save":
Goal: Set up GTM so it sends info about purchase events (like add to cart, purchase) to GA4.
How to do it (in GTM):
In the "Tags" section, click "New".
Name the tag, e.g. "GA4 - eCommerce Events".
Click "Tag Configuration" and pick "Google Analytics: GA4 Event".
Paste your GA4 Measurement ID.
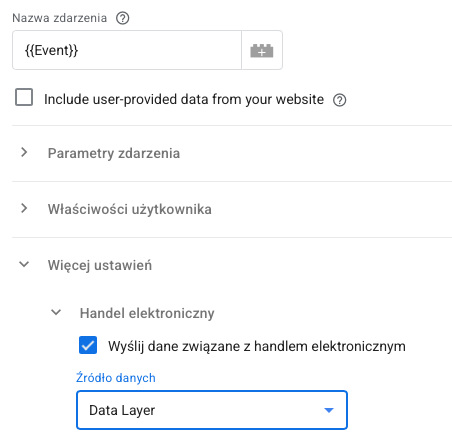
In the "Event Name" field, enter {{Event}} (GTM will auto-detect the event name from your site).
In More Settings check the box "Send eCommerce data". Make sure the data source is "Data Layer":
Click the "Triggers" section. Click "+" in the top right corner to add a new trigger.
Name the trigger, e.g. "eCommerce Trigger".
Pick the trigger type "Custom Event".
In the "Event Name" field, type .* (dot and asterisk) and check the "Use regex matching" option. This means the trigger will react to all sorts of eCommerce events:

Save the trigger, then pick it for your eCommerce tag.
Save the whole tag "GA4 - eCommerce Events".

How to do it (go to Google Analytics GA4):
Go to Admin.
Go to Data Streams and pick your stream.
Check the "Enhanced measurement" section – make sure it’s on (it usually is by default).
On the main menu on the left, go to Reports -> E-commerce purchases and any other reports you see in GA on your site.
Important: After making changes in GTM, remember to click the "Submit" button (in the top right corner of GTM) to publish changes to your site. It's also a good idea to use the "Preview" mode in GTM before publishing to test if everything works correctly.
Have a great event with Meeting Application!
