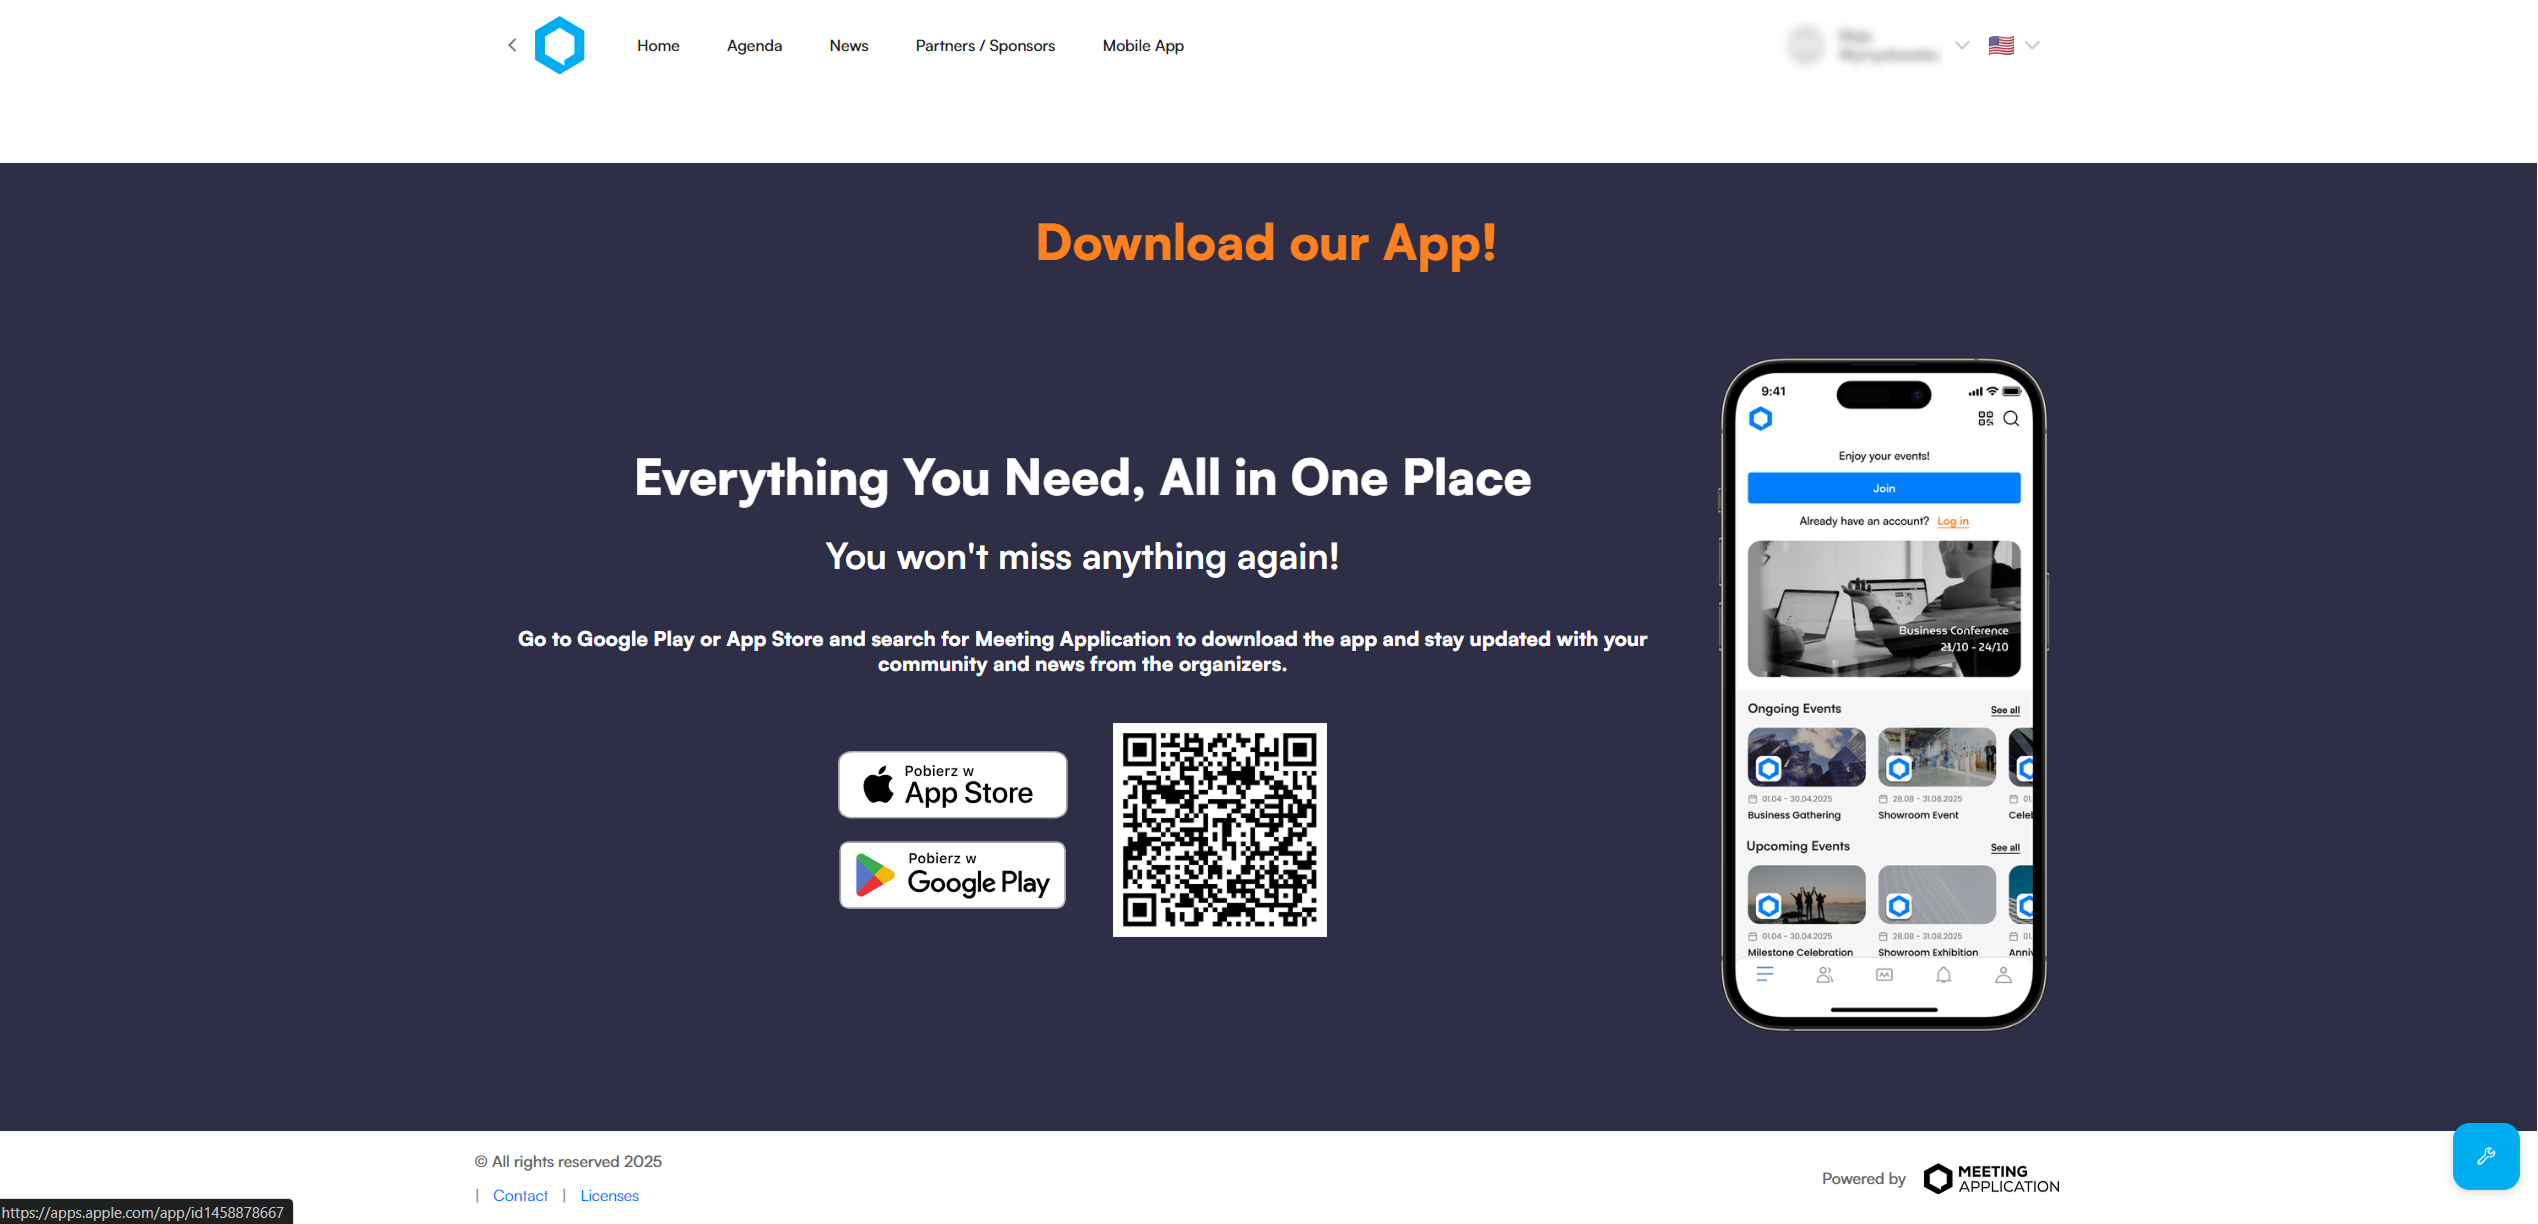
The “Download the app” module is a special section you can add to your event page (Landing Page) in the Meeting Application system. It shows a short message encouraging people to download the mobile app, with links to the App Store and Google Play, plus a QR code — so it’s easy to scan and grab the app on your phone. There’s also an app preview on a smartphone, which you can swap out as you like.

This way, participants can quickly and easily download the Meeting Application, then join your event through the app — giving them access to all the event features like agenda, networking, push messages, maps, attendee profiles, and more.
More mobile app adoption
People often visit the event page before the event — it's a perfect moment to encourage them to download the app.
Better attendee experience
The more people who use the app, the better the social and communication features work (chat, notifications, meetings, feedwall).
Easier access to the app
The QR code helps attendees jump from the LP to the app fast — no need to look for the event or app on their own.
Consistent communication
By adding this module, you show attendees that the mobile app is a core part of your event.
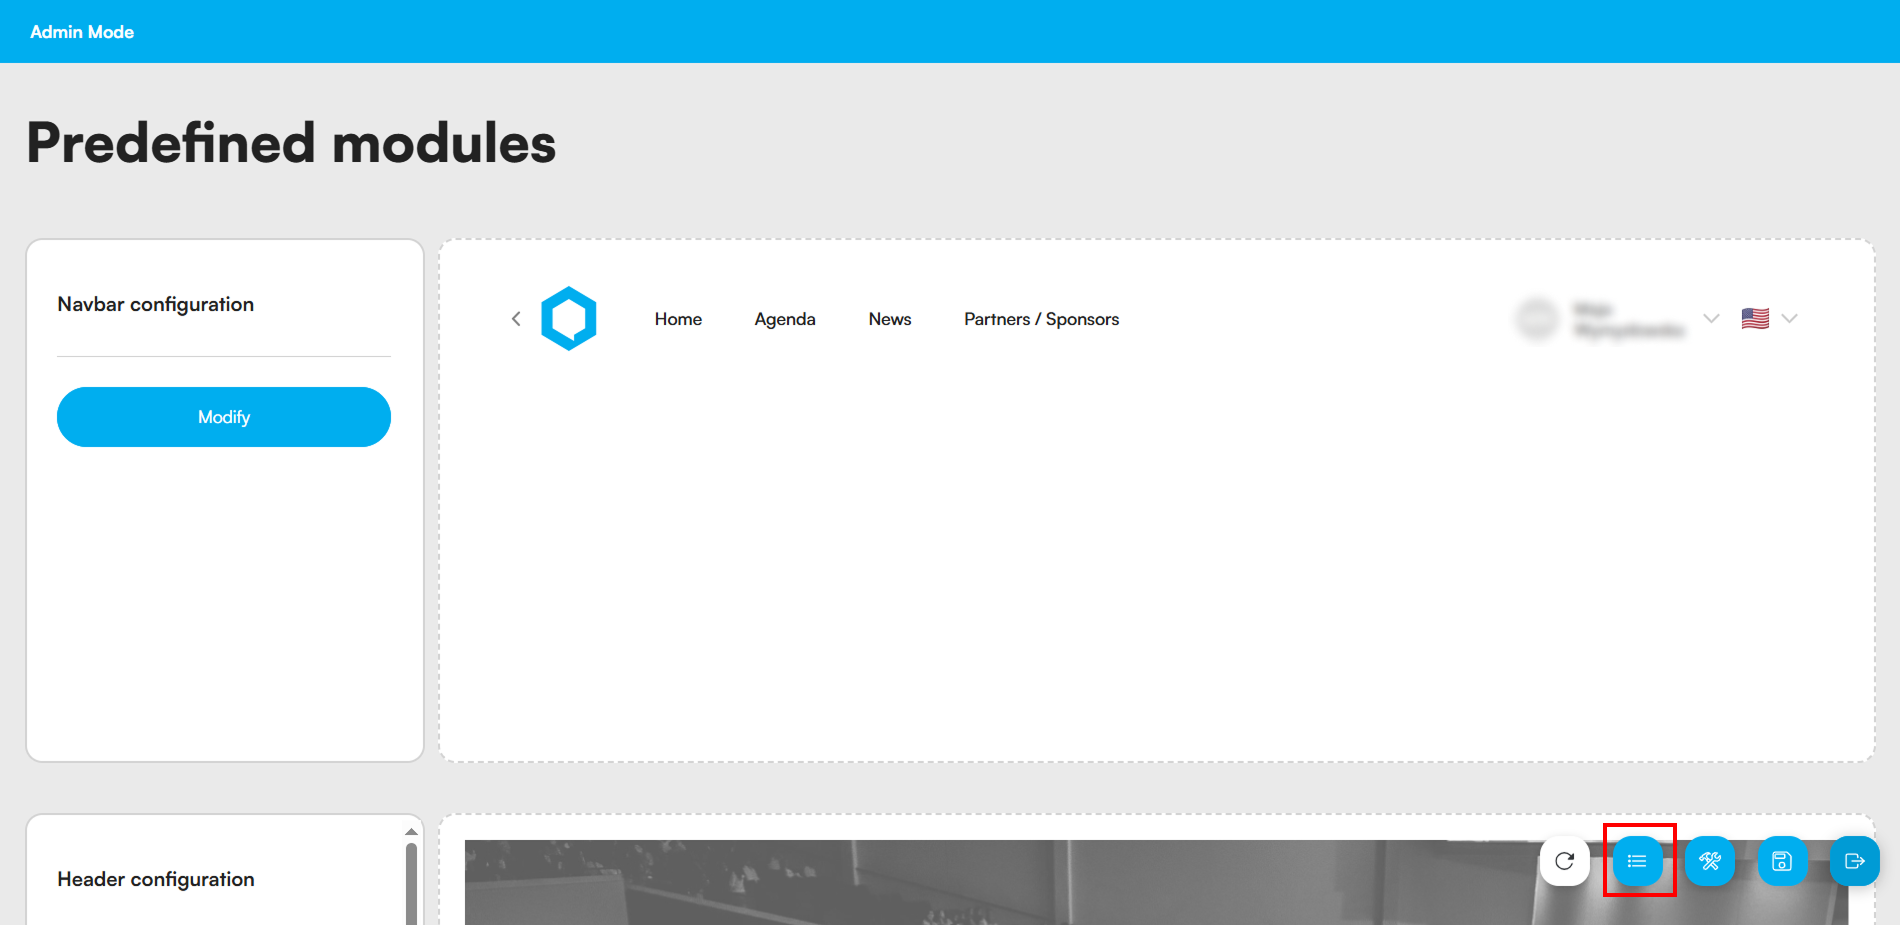
You can add the module from the event page editor (Landing Page Editor). After you open the editor (the button with a wrench icon in the bottom right corner of the Landing Page, when you're logged in as an admin):
Go to module editing: In the admin panel, go to the module management section on the homepage (like in the first image, after switching to edit mode).
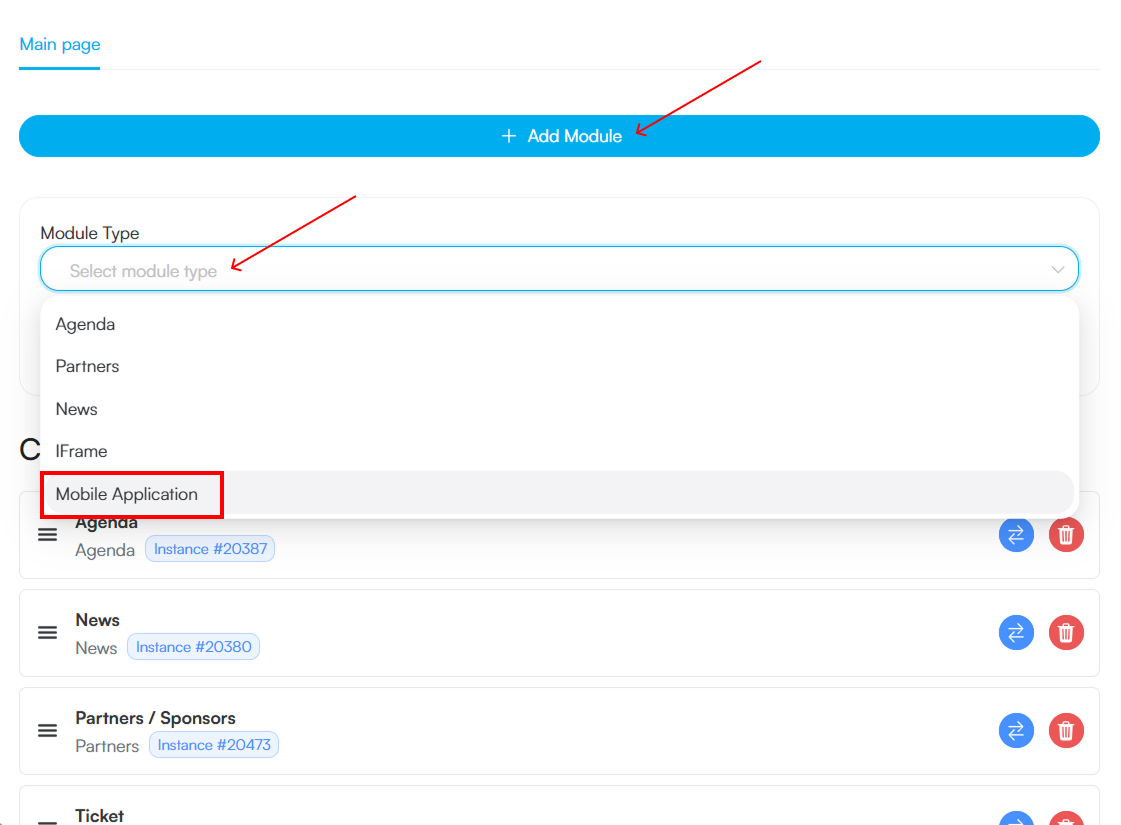
Start adding: Click the blue button "+ Add module" to open the list of modules you can add.
Choose module type: From the "Module type" dropdown, pick "Mobile App".
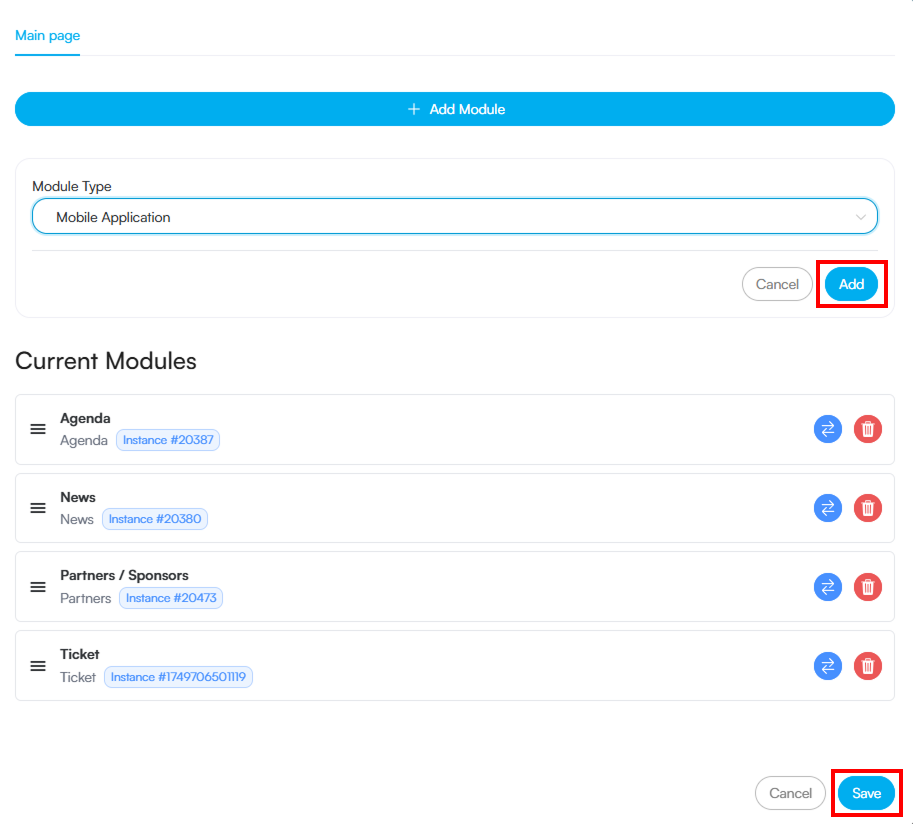
Add the module: Click the "Add" button to confirm your choice. The module will show up in the "Current modules" list.
Save changes: At the very bottom of the page, hit "Save" so all your changes stick.
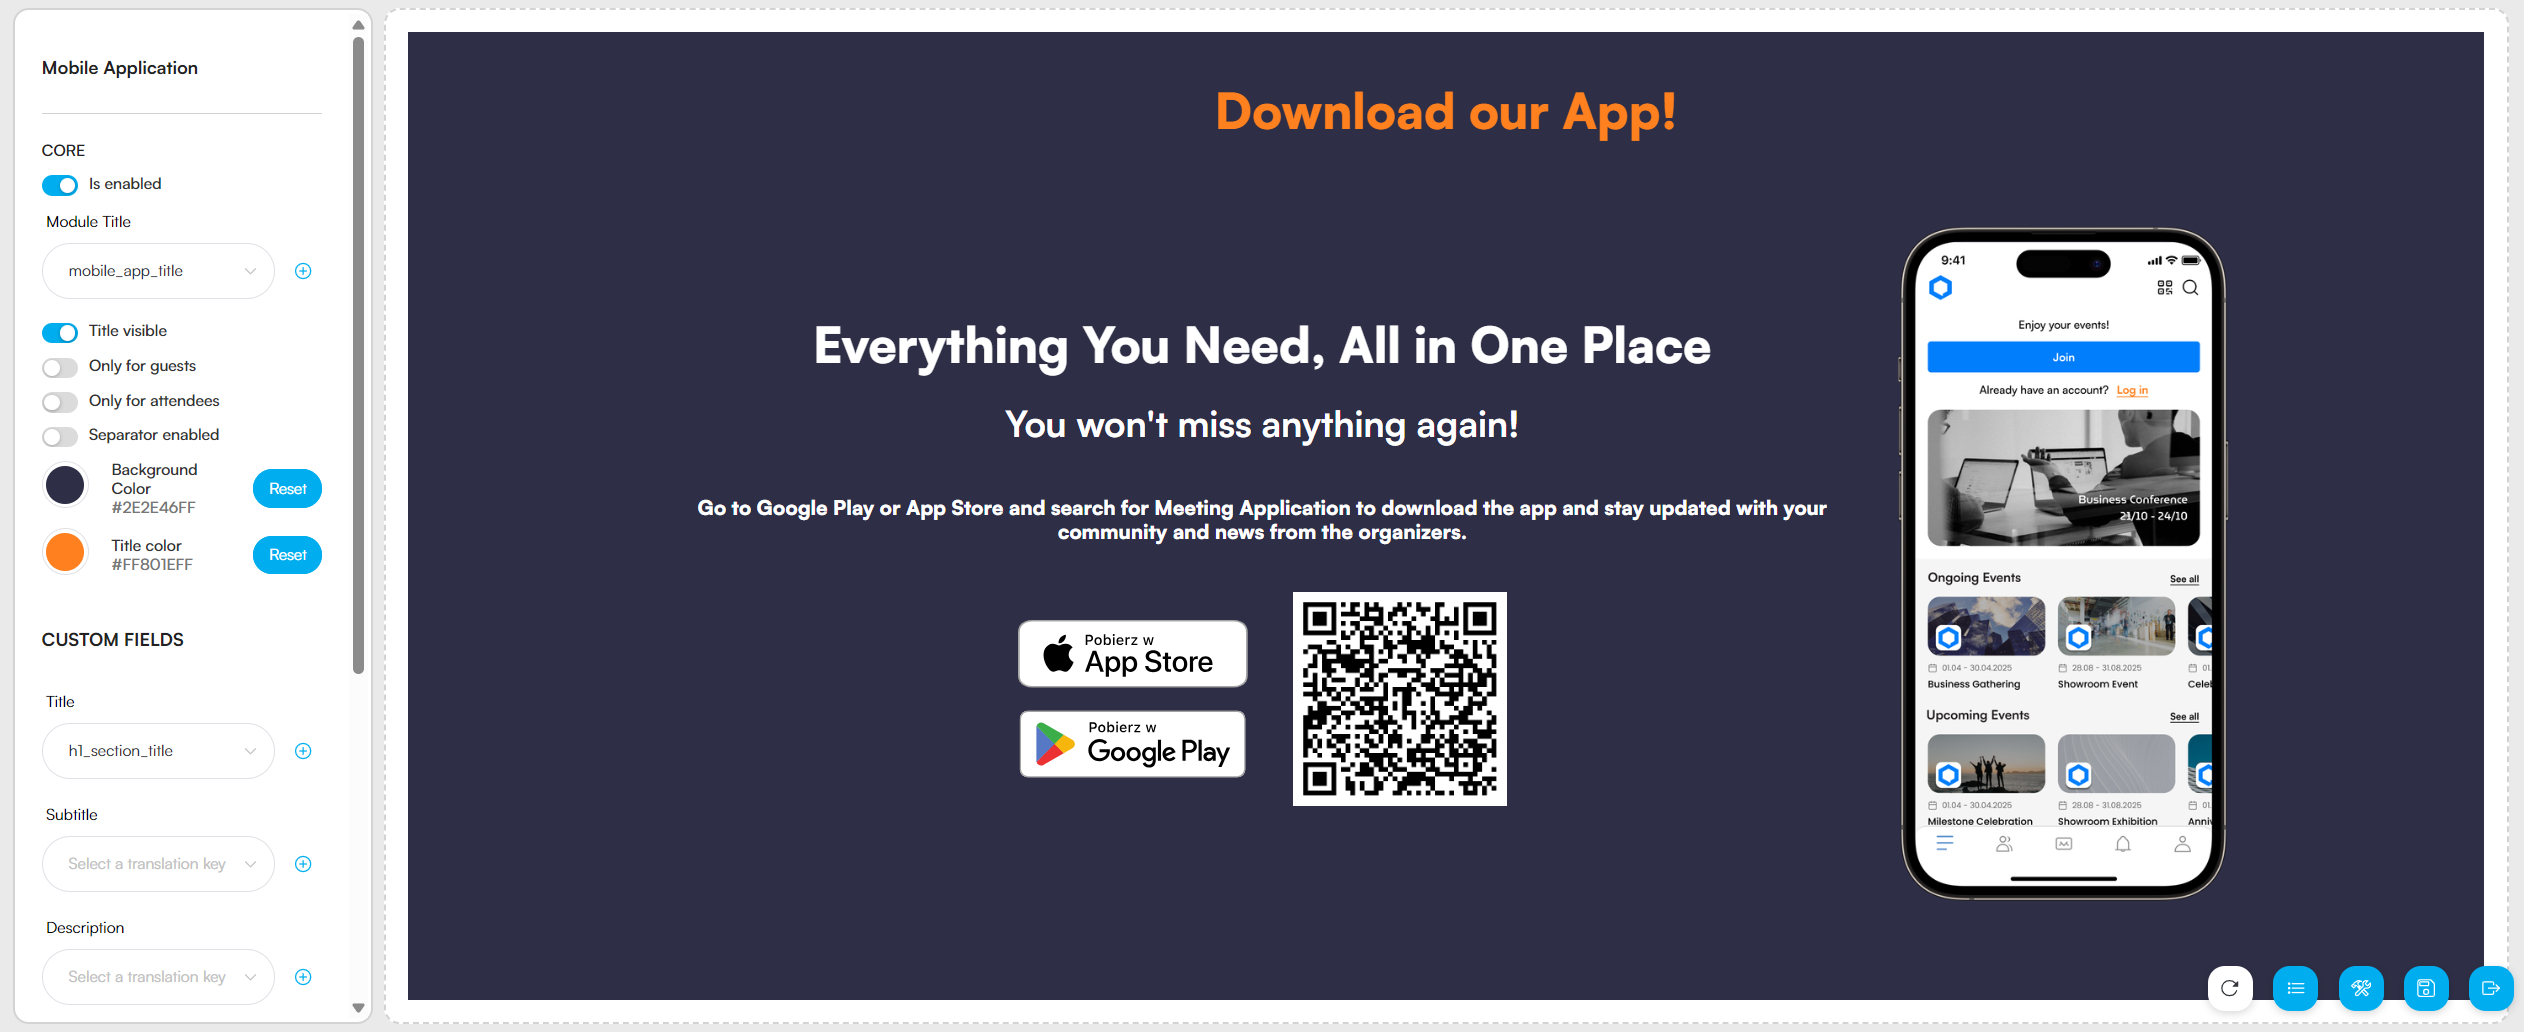
Scroll down to the newly added section; on the left panel, you'll see the Mobile App.
Switch "Is on” makes this section visible on the Landing Page.
In the Landing Page Editor, you'll find options for setting up the look and content of this module.
In this section, you manage the basic visibility and appearance of the whole module.
Is enabled: The module's main switch. Use it to activate (blue position) or hide the whole module in the app.
Module title: Enter a name that will identify this module, for example in the navigation menu. You can use predefined "translation keys."
Visible title: Decide if the module title should show up directly above its content.
Guests only / Participants only: Limit the module’s visibility to a selected group of users. If both options are off, everyone can see it.
Separator enabled: Turn on to add a visual line separating this module from others on the list.
Background color / Title color: Set custom colors for the whole module’s background and for its title (the one from the "Module title" field).
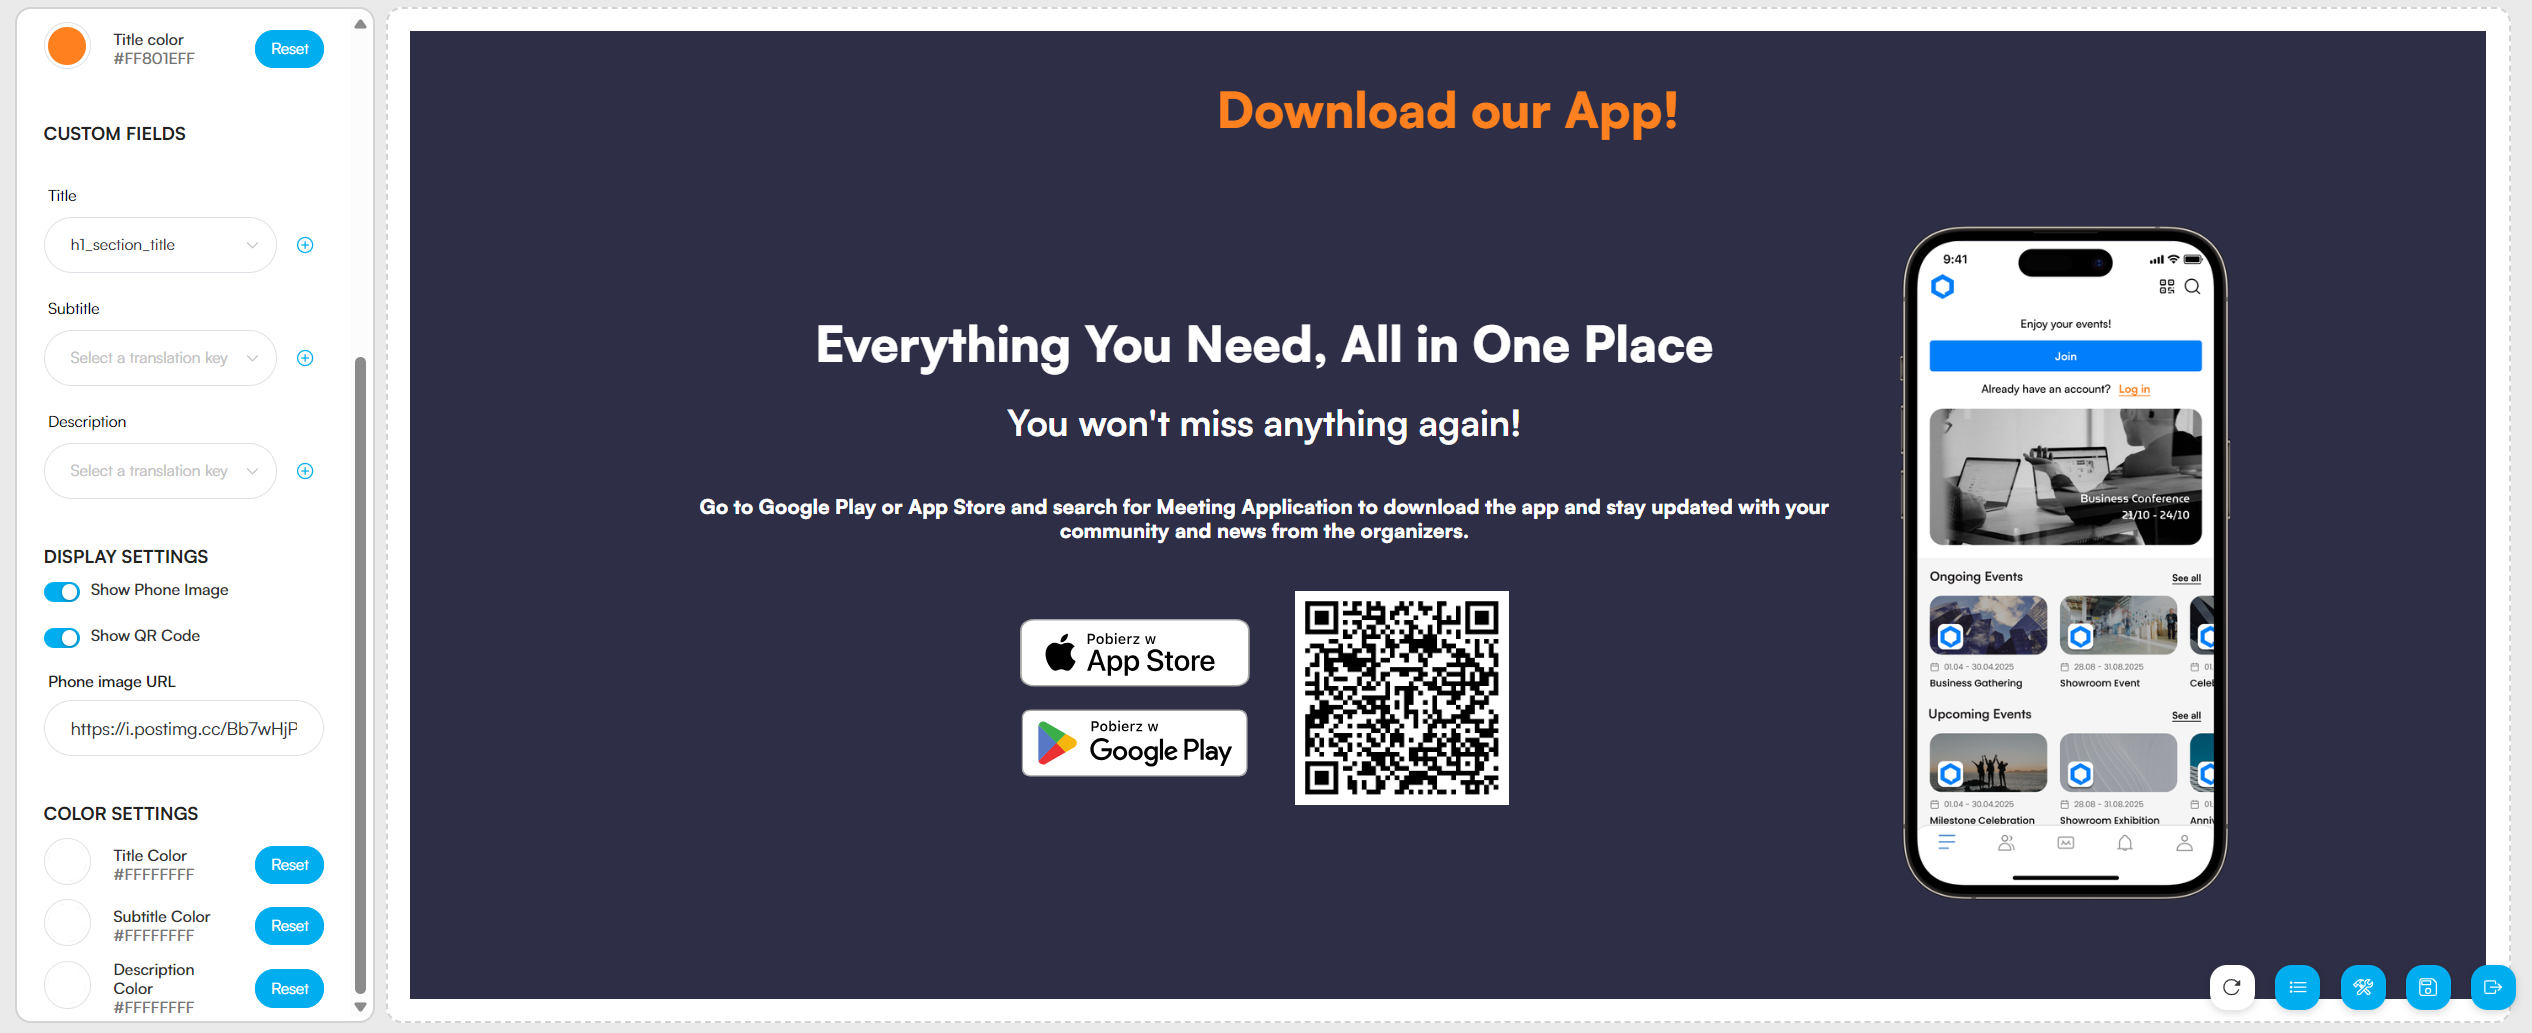
Here you enter texts that users will see inside the module.
Title: Enter the main headline, e.g. "Download our app!".
Subtitle: Add a helper text under the title, e.g. "Always stay up to date with the agenda".
Description: Put a short description that explains the benefits of the app or some instructions on how to download it.
This section controls extra graphic elements.
Show Phone Image: Turn this on to show a smartphone image next to the content. It makes the module look more visually appealing.
Show QR Code: Turn this on to show a QR code. Users can scan it to quickly go to the store and download the app.
Phone image URL: If you’ve enabled the "Show Phone Image" option, you have to paste a direct link (URL) to the graphic file you want to use here.
Adjust the colors of the texts entered in the "Custom Fields" section.
Title Color: Pick a color for the main title.
Subtitle Color: Pick a color for the subtitle.
Description Color: Pick a color for the description text.
It's always a good idea to add the "Download the app" module whenever you're using the Meeting Application mobile app for your event.
Remember to add this module, especially when:
the nature of your event puts a big focus on networking and interaction;
you organize conferences where the agenda and notifications are updated often;
you run events where you want to make the most of mobile features.
Adding this module to your event page is a simple move that can really boost app adoption among participants. The more people use the app, the more value your whole digital event experience brings.
Have a great event with Meeting Application!