The navigation bar is the menu at the top of the event page. From this article you’ll learn how to:
change the order of items on the bar,
change tab names,
highlight selected items,
add new items: subpage, external redirect, iFrame and the Download the app module.

Log in to the Landing Page with an account that has Administrator permissions.
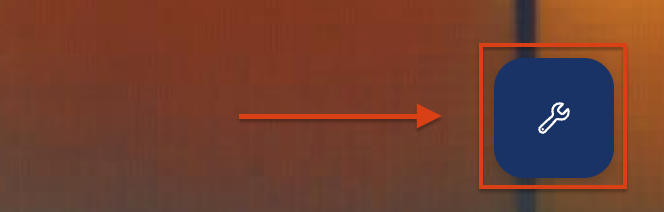
Click the wrench icon in the bottom right corner of the page.
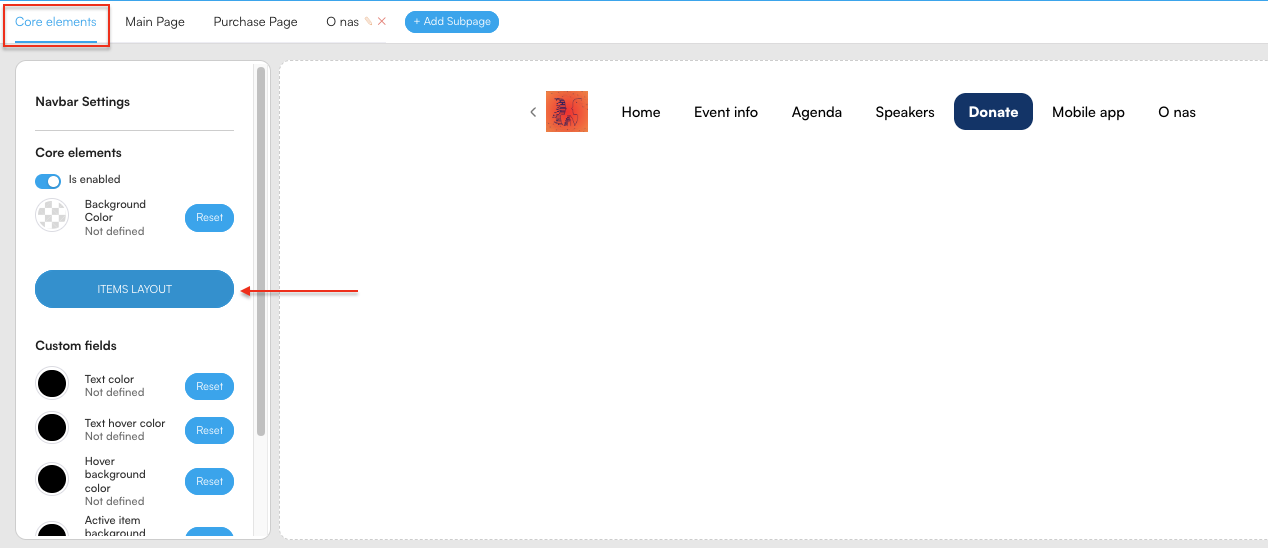
In the editing panel, in the Core Elements section, click ITEMS LAYOUT.
The Navigation bar settings window will open.
After entering the editor you can see all the modules that were previously added in the admin panel and are handled on the Landing Page (the globe icon with www).
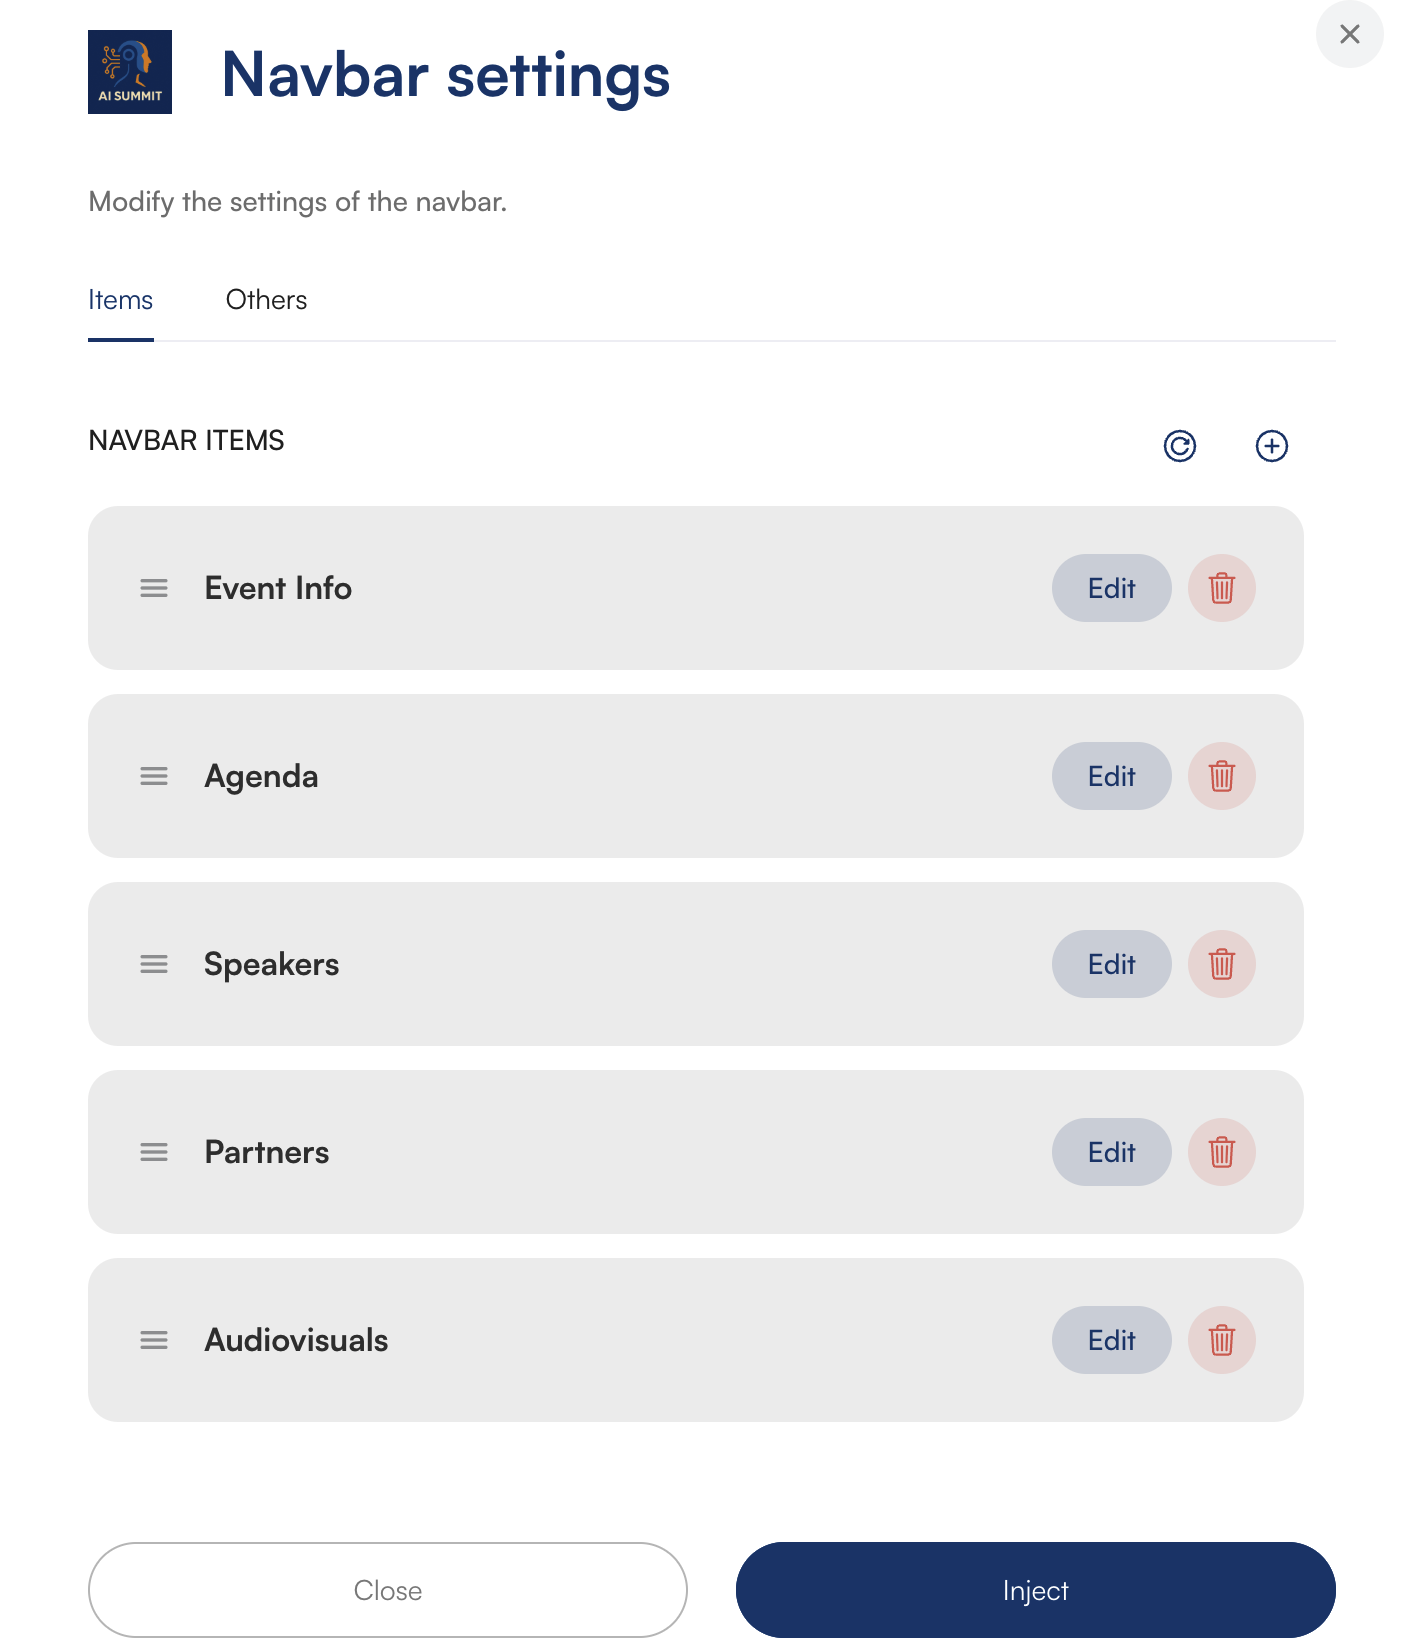
To change the order of tabs on the navigation bar, stay in the items tab and then:
Grab the hamburger (≡) icon next to the selected item.
Drag the item up / down, to set the display order.
Select the item whose name you want to change and click Edit.
In the Custom title section, click the plus “+” icon to open the Translation library.
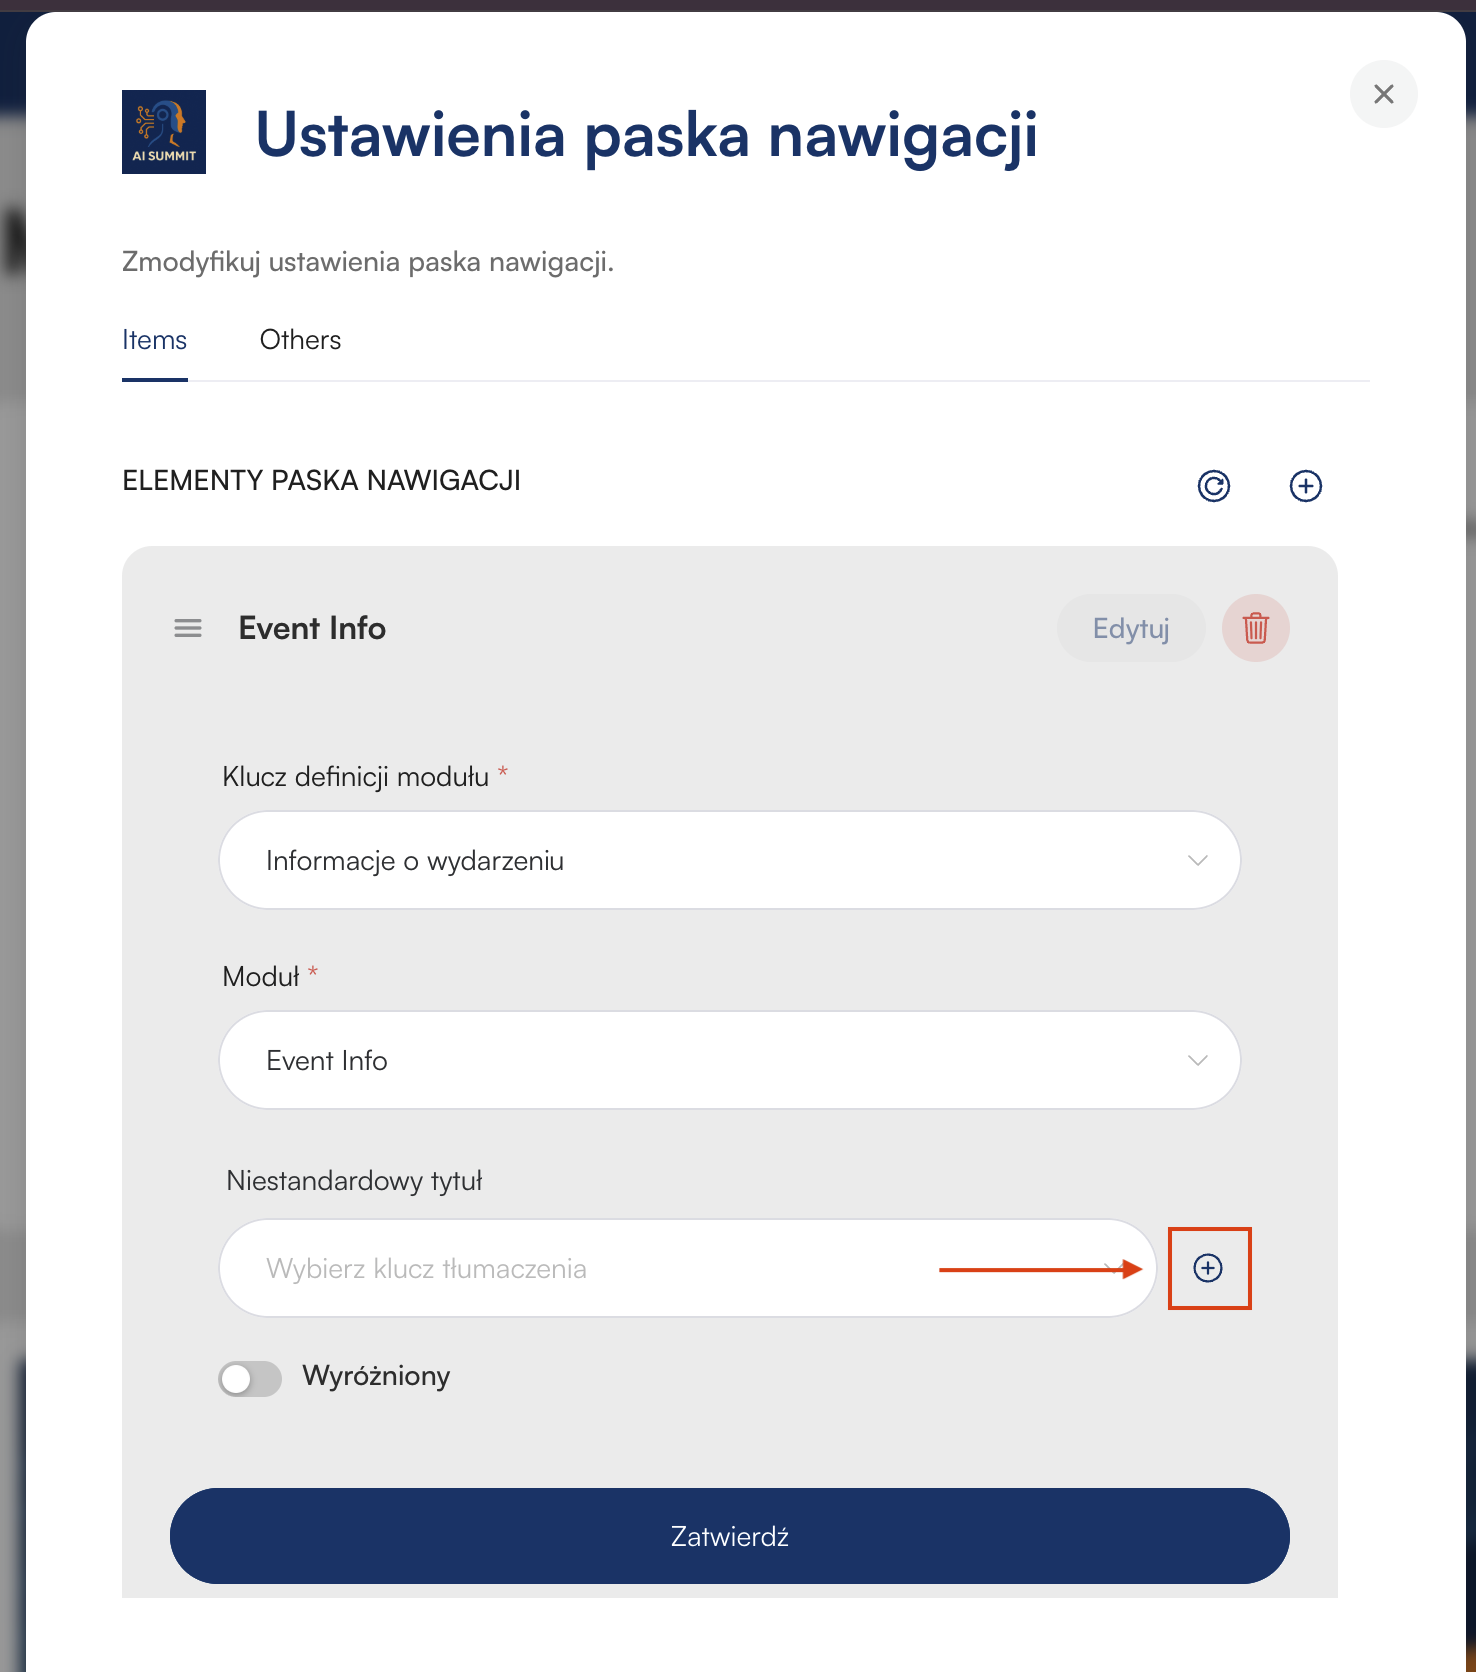
In the “Custom translations” window, create a pair of a technical name with the component name that will be displayed on your event page:
New Translation Key – the technical name of the key, e.g. agenda_main or event_info
value – enter the text that will be visible to people visiting the Landing Page.
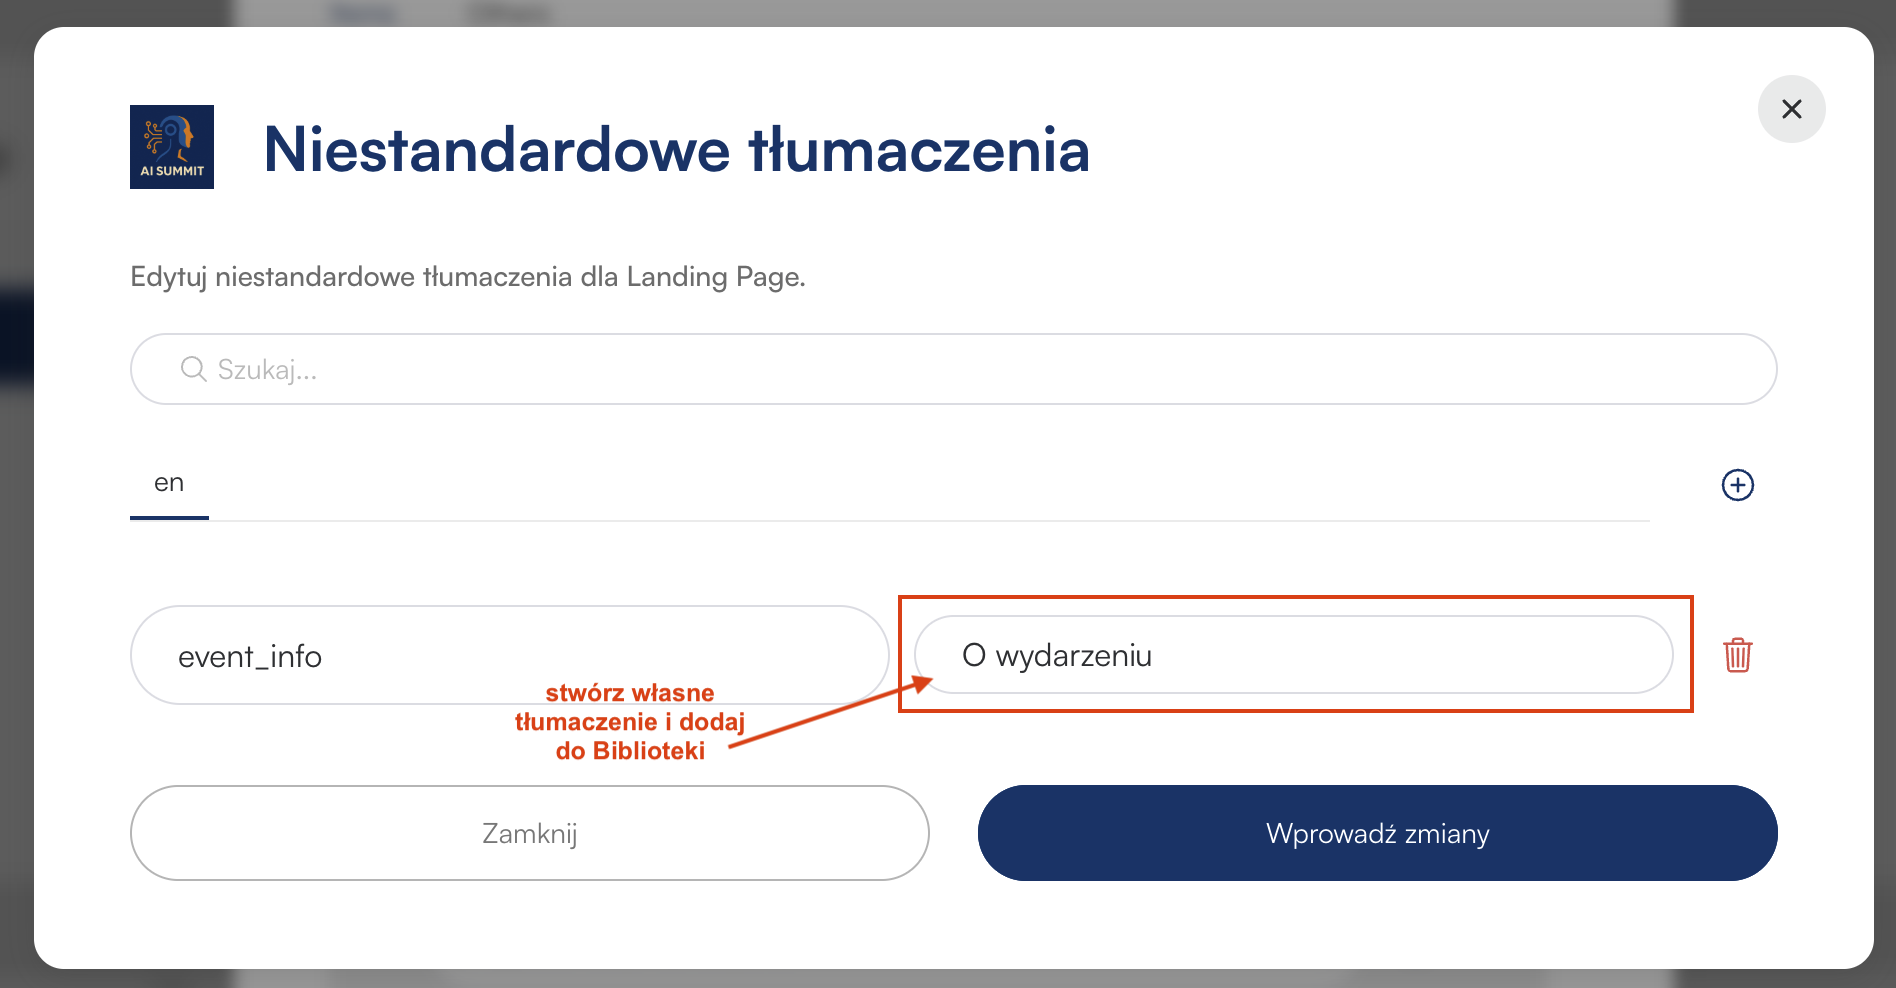
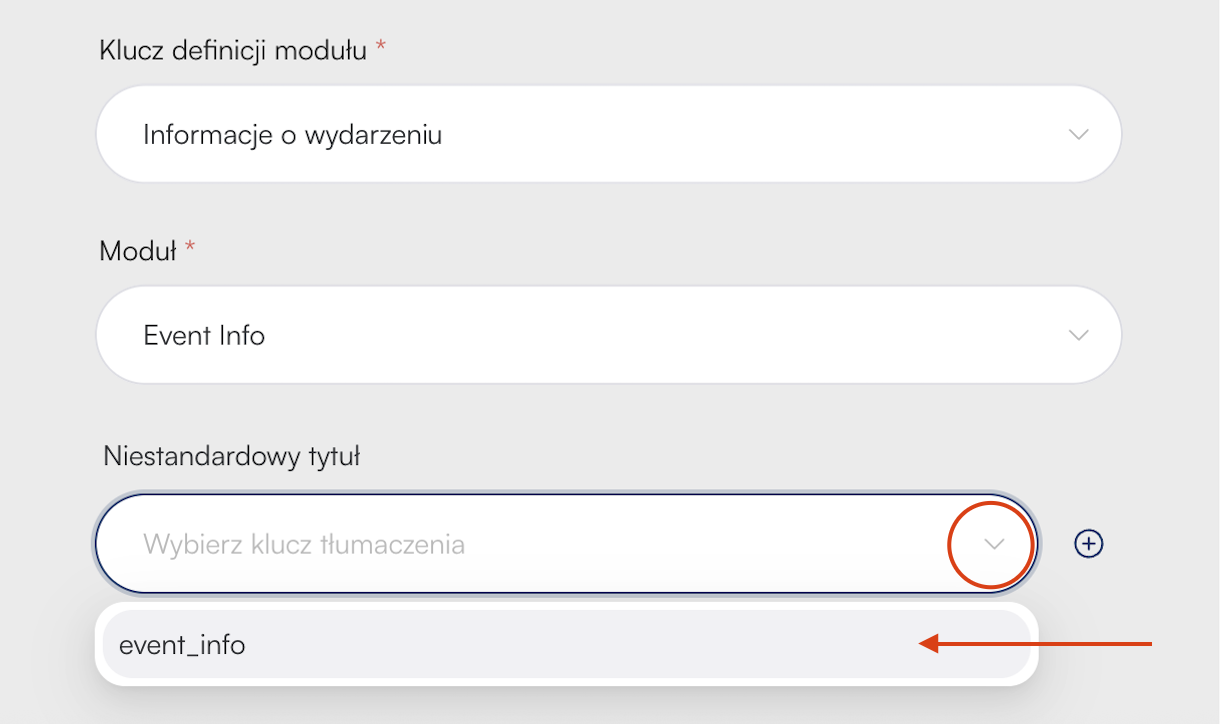
Add it to the Translation library by clicking Apply changes, go back to editing the element and from the list select from the drop-down list the key you just created in the Custom title field.

In the item editing, turn on the Highlighted switch.
The selected item on the navigation bar will be highlighted with the main event color.

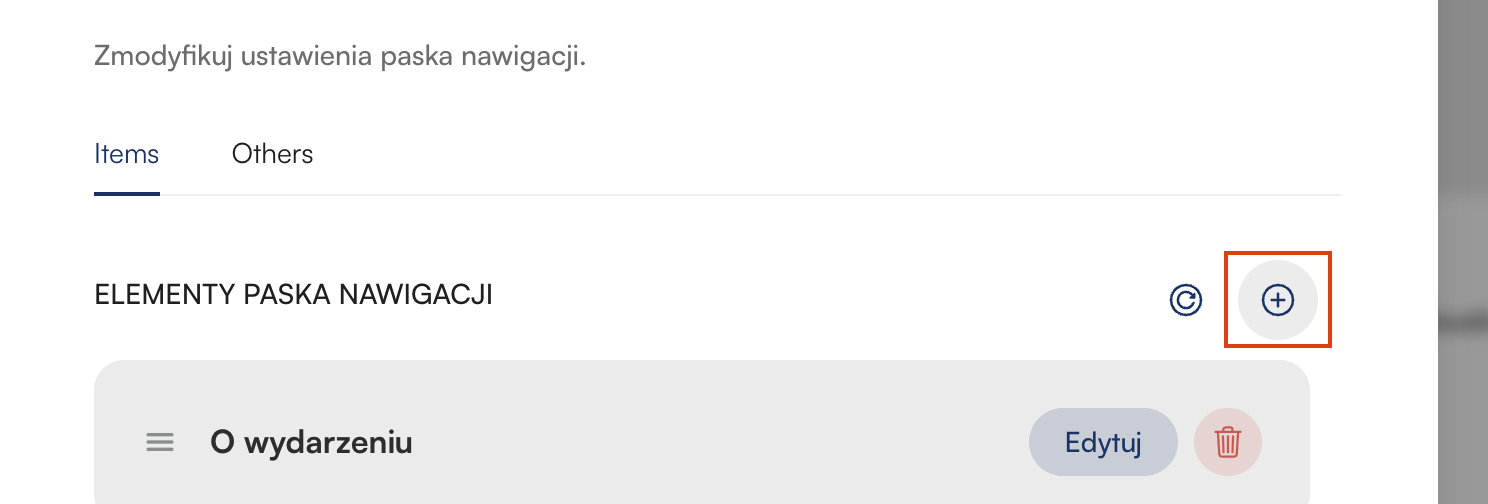
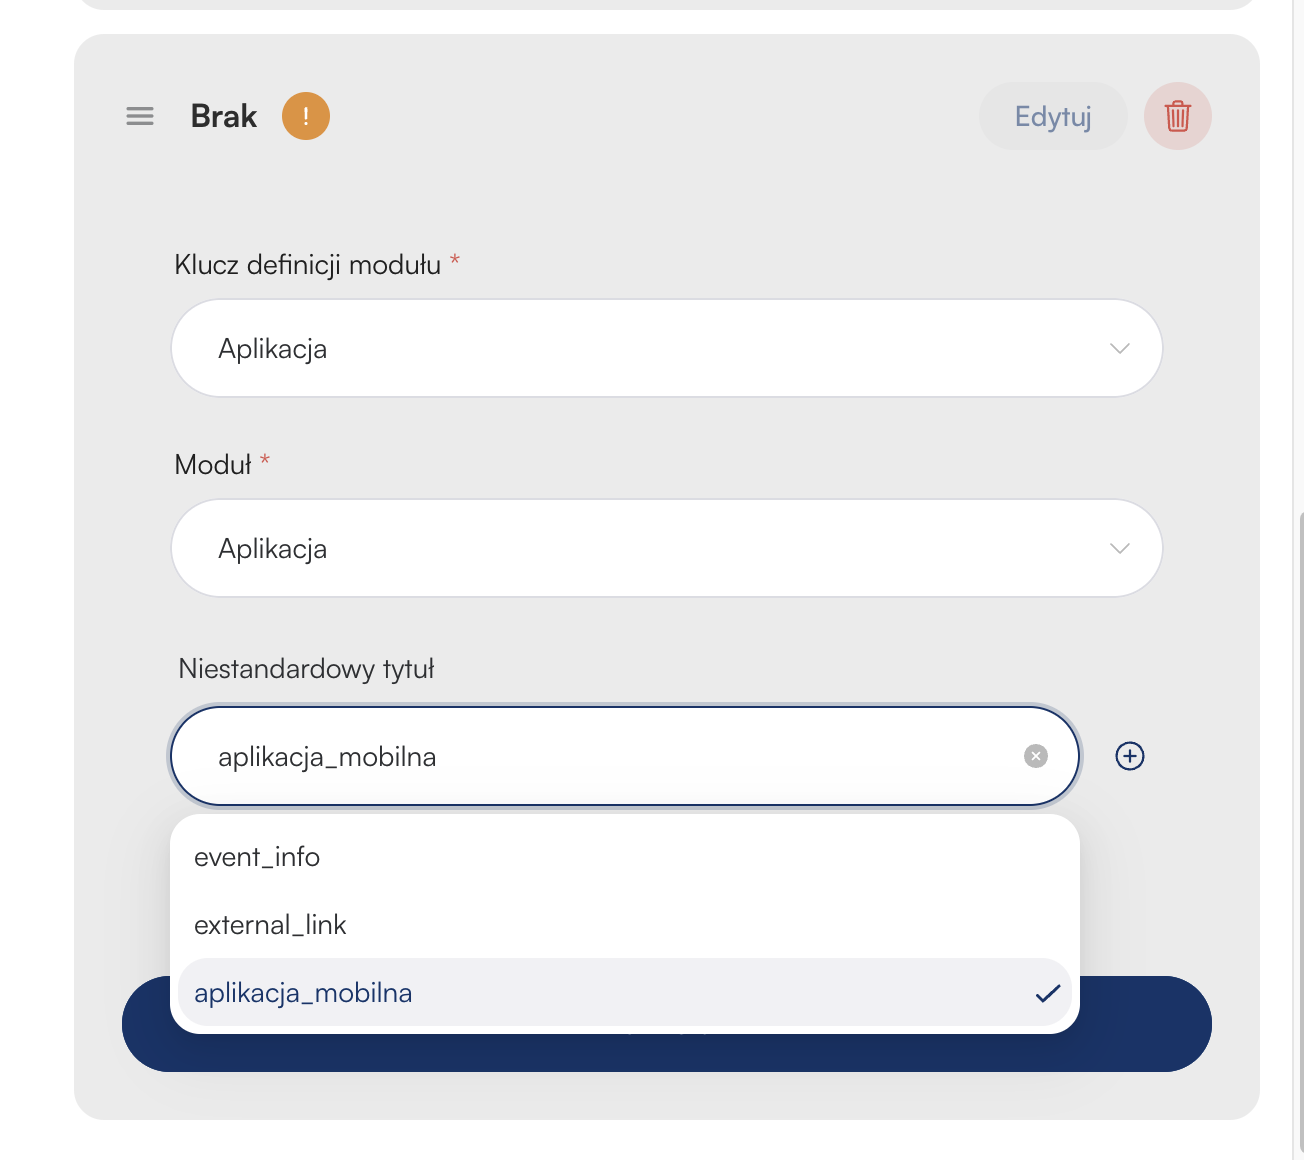
By default, the list shows only components enabled in the event admin panel (also supported in the mobile app), but you can add additional items visible on the page:
Click ➕ in the top right corner of the Navigation bar items section (➕)
Module definition key → choose Subpage.
Fill in the URL path (e.g. o-nas) → this element will be added at the end of the link to your LP
Set a Custom title through the Translation library.
Confirm.

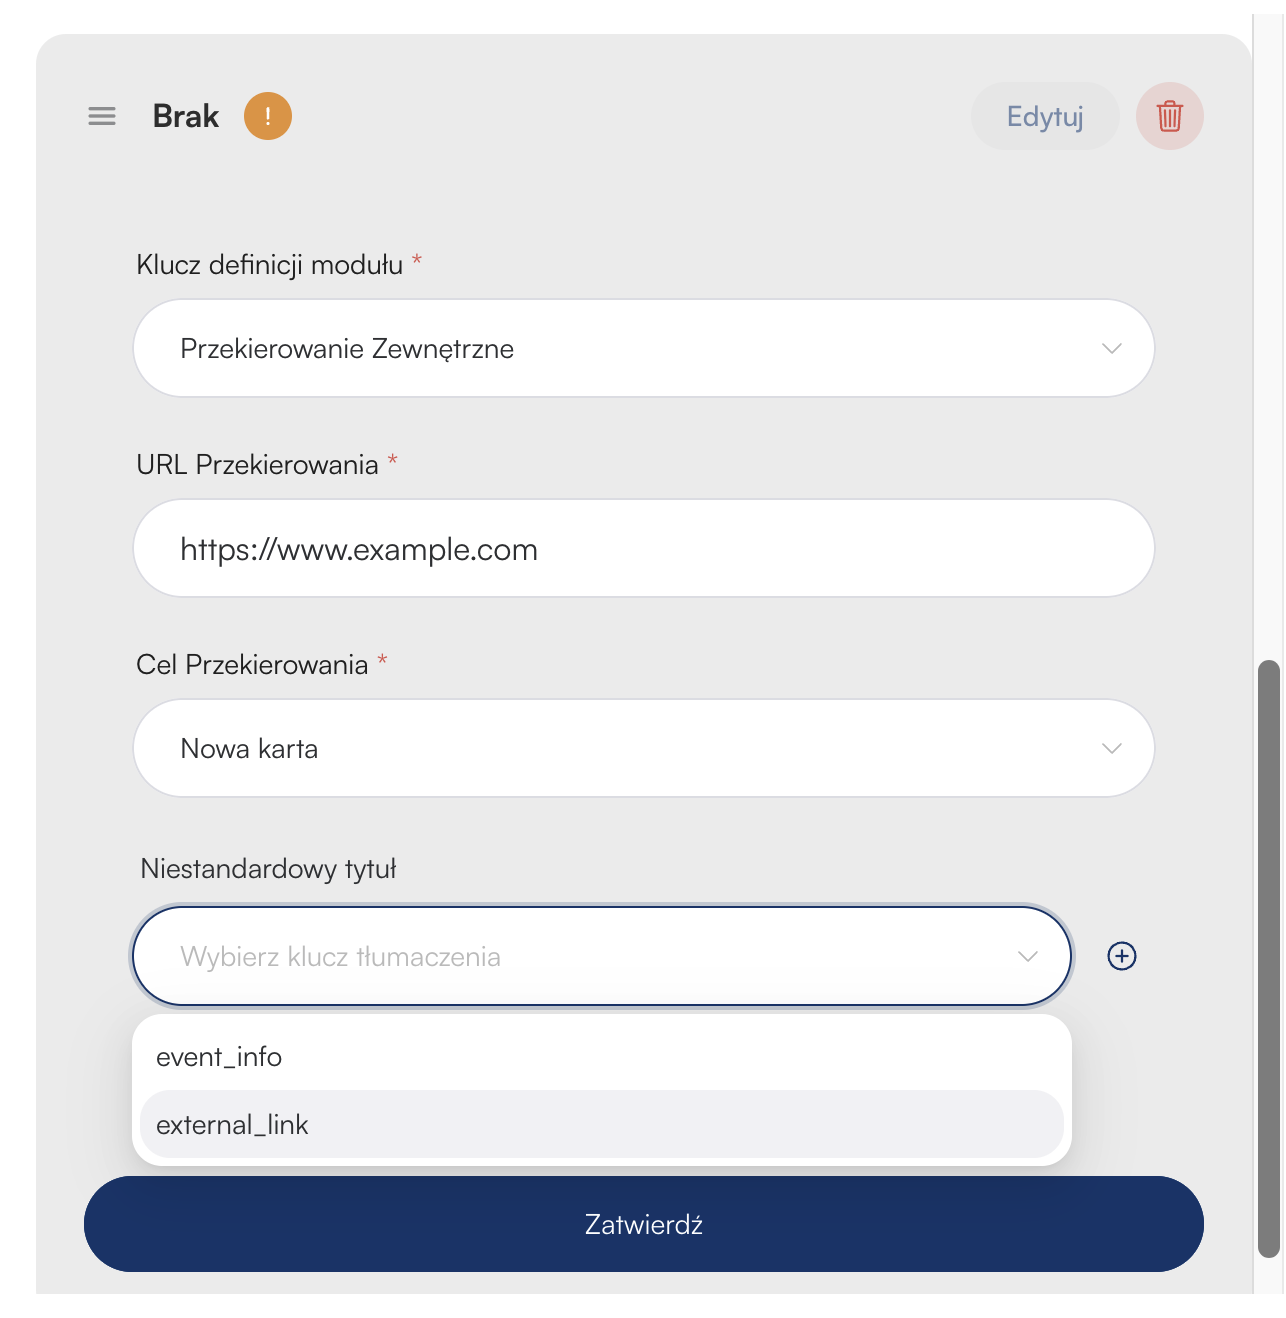
Module definition key → select External redirect.
Enter the redirect URL – it has to start with https:// (e.g. https://partner.com).
Choose the Redirect target: New tab or Same tab.
Set a Custom title (Translation library).
Confirm.
Add the iFrame module following the instructions from THIS ARTICLE, and then in the navigation bar editing window choose:
Module definition key → choose iFrame.
Set a Custom title and Confirm.
This is a free component that lets you place a section with a QR code leading to your event in the mobile app – you can learn more from THIS ARTICLE.
To add a redirect to the App section on your event page, in the Navbar editor:
Module definition key → Application
Module → Application
Choose a name from the Translation library
Confirm

Apply changes

And save before leaving the Landing Page configurator
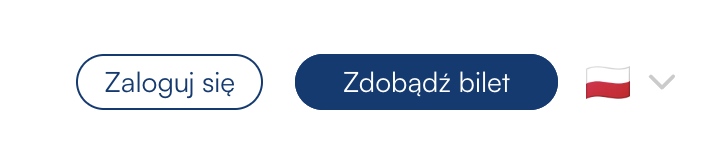
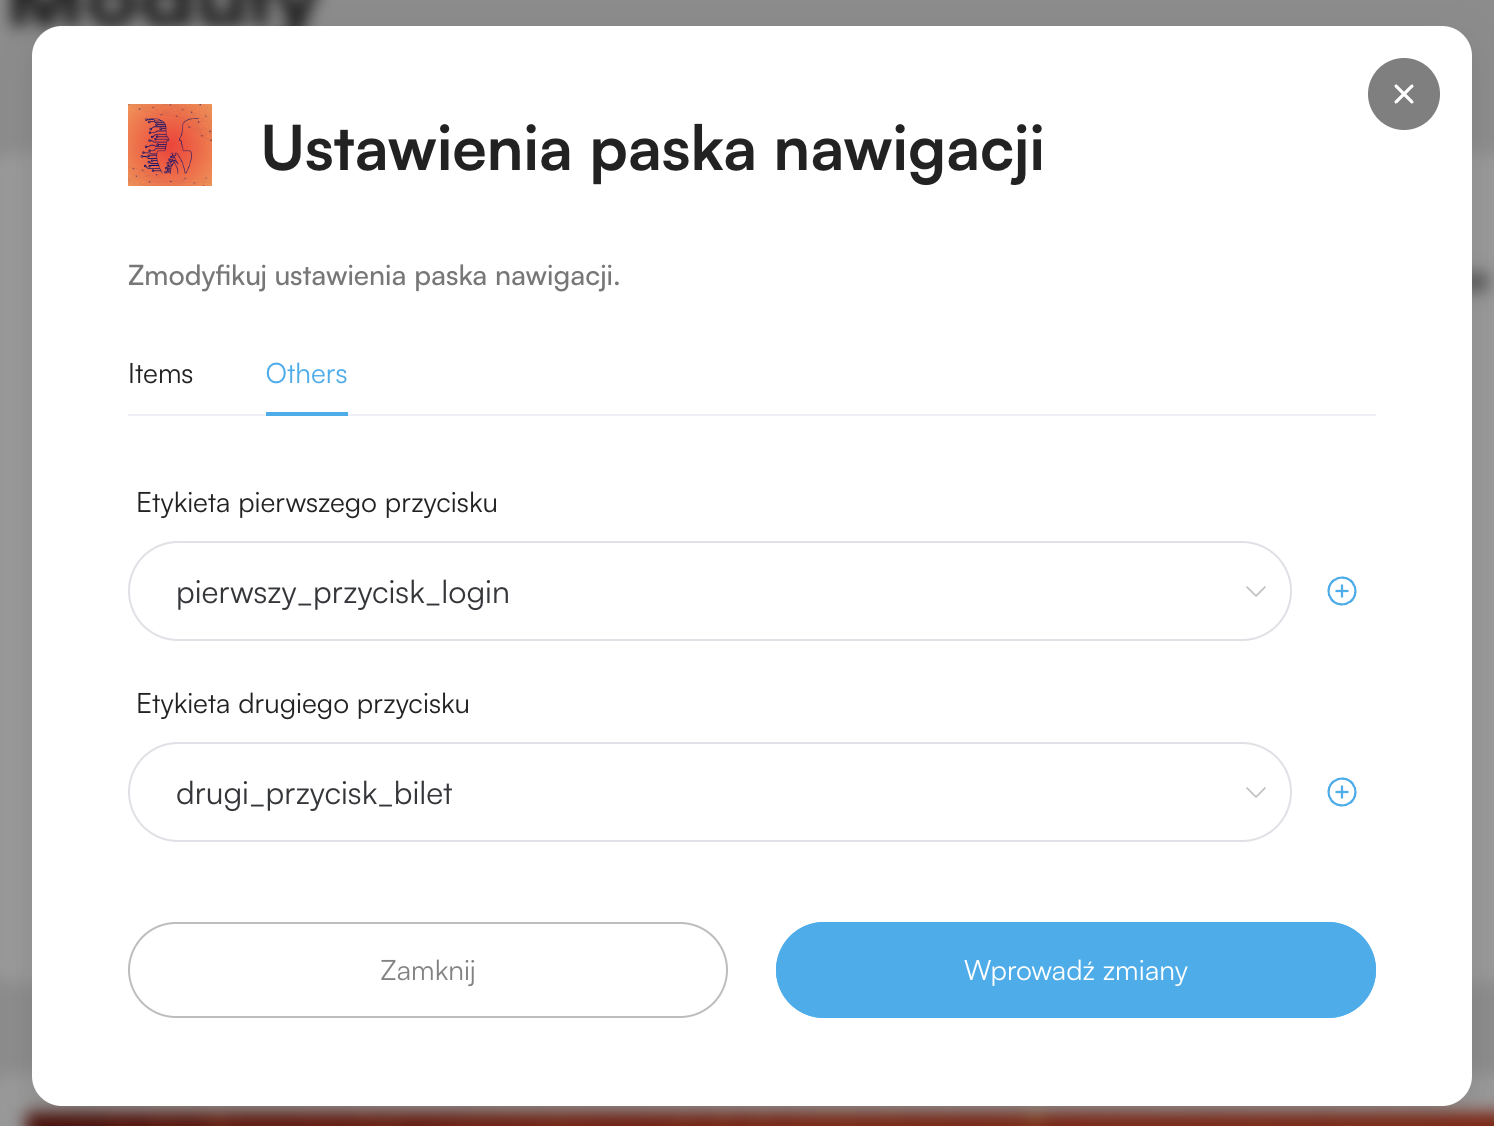
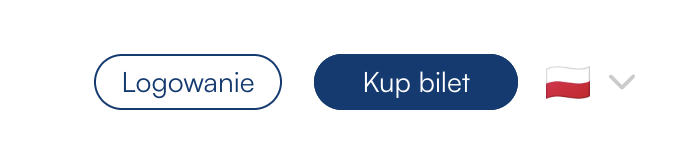
To change the names of the system buttons, go to the navigation bar configurator and then open the “others” tab. In the translation library, add the texts that will replace the system names of the function buttons.
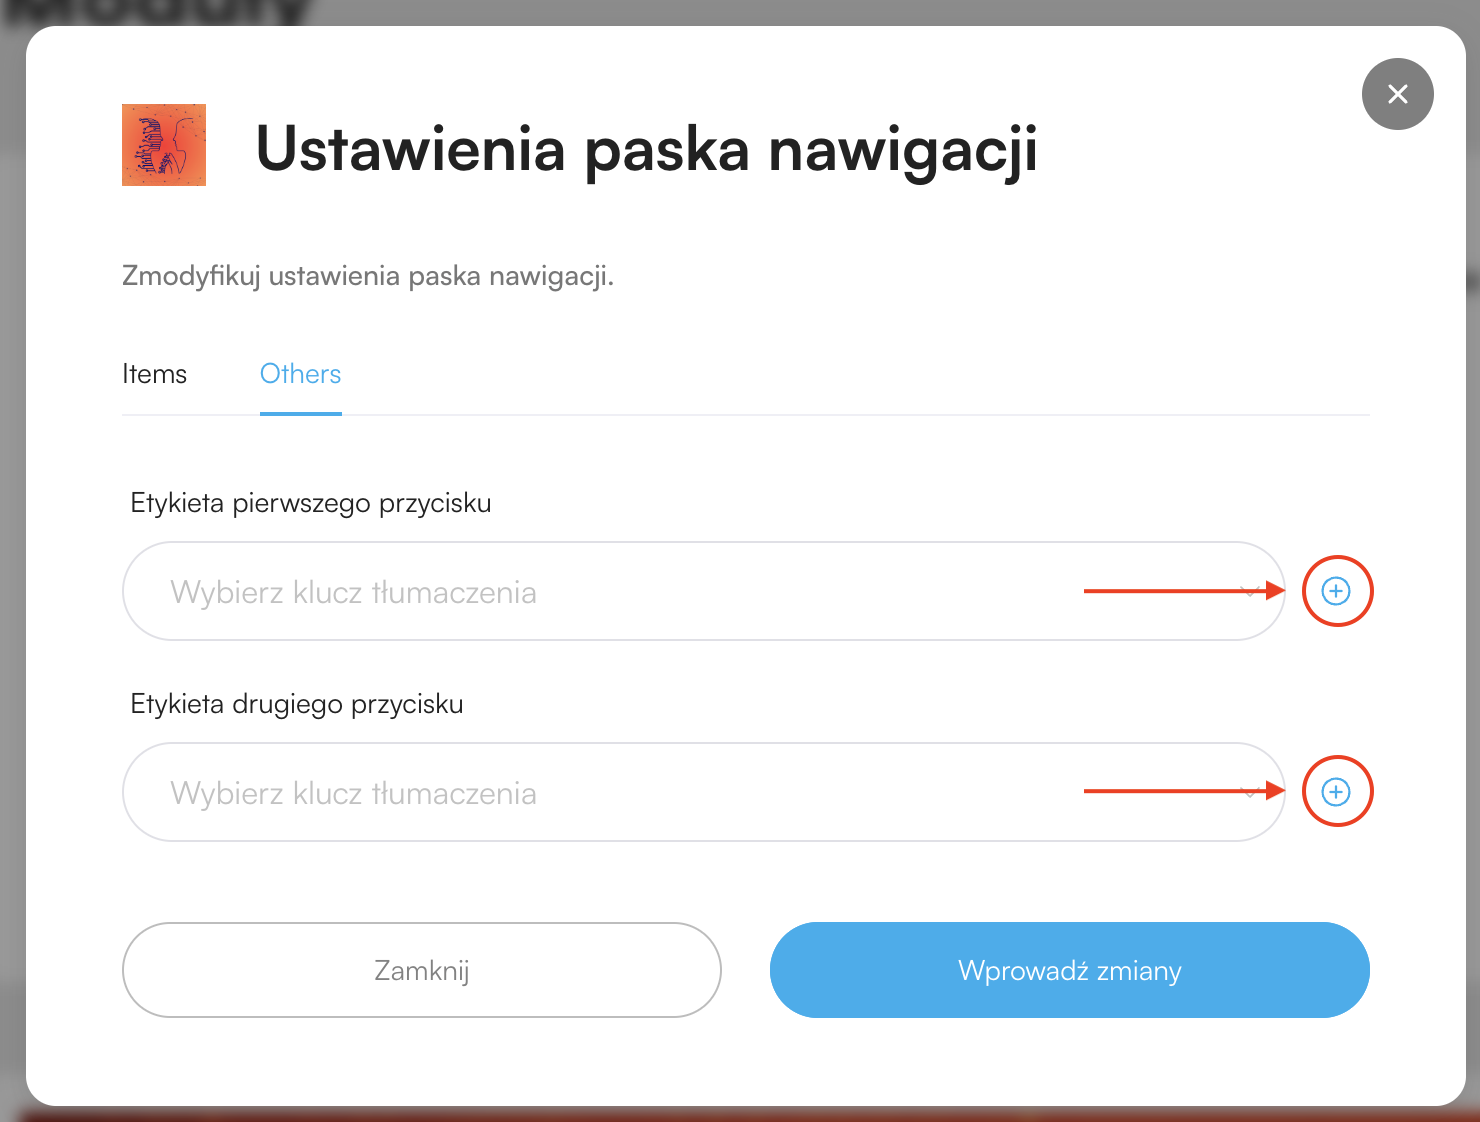
Remember that:
The first button will ALWAYS open the login window
The second button will ALWAYS take you to the tickets section

Then choose your own names and put them in place of the first and/or second button.
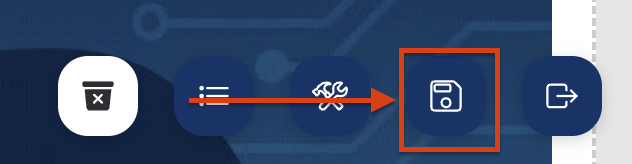
Click Apply changes:
and then click the floppy disk icon in the bottom right corner:
After that, the changes will be visible on the event page.
You can edit the navigation bar at any time, so if you’re not happy with the final result or the concept of this element changes later on while working on the event – no worries! You can make changes whenever you want.

Have a great event with Meeting Application!
