Meta Pixel allows you to track user actions on your event's Landing Page in Meeting Application and send Meta information about subsequent stages of the purchase journey — from entering the page, through adding a ticket to the cart, to the purchase.
You can connect Meta Pixel to your event's Landing Page in two ways:
Path A — Meta Pixel embedded in the Landing Page — we configure the integration on the Meeting Application side.
Path B — Meta Pixel via your Google Tag Manager — you configure the Pixel yourself in your GTM container.

Path A — Built-in Pixel | Path B — Pixel via Your GTM | |
Who configures Meta Pixel? | Meeting Application | You or a specialist / agency managing your GTM |
Where does the configuration work? | Directly in the Landing Page code | In your Google Tag Manager container |
Pixel ID | You pass it to us | You use it exclusively in your own GTM — you do not pass it to Meeting Application |
Later changes | Require a change on the Meeting Application side | You can make them yourself in GTM |
Scope of basic events | Full purchase funnel + | Full purchase funnel |
eventID at Purchase | Handled automatically | You configure it according to the instructions below |
If you do not manage Google Tag Manager independently, the simpler option is Path A.
If you have your own GTM specialist or agency and want to manage the Meta Pixel configuration independently, choose Path B.
Both options use the same basic elements.
Create a Pixel in your Meta Events Manager:
Connect data sources → Web
In the data set settings you will find Pixel ID — a string of 15–16 digits.
Meta currently also uses the term data set — dataset. Dataset ID and Pixel ID refer to the same identifier here.
You will need the Pixel ID in the further configuration:
in Path A you will pass it to Meeting Application,
in Path B you will use it independently during tag configuration in your GTM.
Cookiebot is required in both paths.
Landing Page runs marketing scripts according to the consent provided by the user. Without proper Cookiebot configuration, Meta Pixel will not work according to the intended consent mechanism.
Prepare:
Cookiebot account and configuration,
Cookiebot identifier,
the domain of the Landing Page event added in your Cookiebot panel.
📌 Before you proceed
If you have not yet configured Cookiebot and Google Tag Manager for your event's Landing Page, start with this configuration. You will find detailed instructions in the article: Sales Analysis via Google Analytics — Google Tag Manager and Cookiebot
Your event's Landing Page must have your Google Tag Manager container connected.
Its identifier has the format:
GTM-XXXXXXX
Please provide us with:
GTM container ID,
Cookiebot identifier.
On our end, we will connect both identifiers to your event's configuration.
Ta konfiguracja pozwala Landing Page załadować Twój kontener GTM oraz przekazywać do dataLayer zdarzenia i sygnały zgody.

W Meta Events Managerze, w ustawieniach Pixela, rekomendujemy wyłączenie:
„Śledź zdarzenia automatycznie bez kodu”
Track events automatically without code
Konfiguracje opisane w tym artykule korzystają z konkretnie zdefiniowanych zdarzeń.
Wyłączenie automatyki pomaga uniknąć dodatkowych zdarzeń generowanych samodzielnie przez Meta i utrzymać czytelne dane.

You do not need to manually map Meta events in Google Tag Manager.
After preparing the joint configuration, please provide us with:
Pixel ID,
confirmation that your GTM container does not trigger Meta Pixel tags for this Landing Page.
⚠ If you already have Meta Pixel in your GTM
Before we launch the built-in integration, disable Meta Pixel tags running in your GTM for the event's Landing Page.
If both sources are active at the same time, events may be counted twice.
After receiving the necessary information, we will configure Meta Pixel for your event.
Subsequent changes to this integration require modification on the Meeting Application side.
Meta Event | When is it sent? | Key parameters |
| Landing page entry and every page change | — |
| Just before adding an item to the cart |
|
| Adding a ticket, add-on or workshop to the cart |
|
| Payment initiation |
|
| Payment method selection |
|
| Confirmed payment | gross value, currency, |
| Free event registration without cart |
|
Pixel:
does not send events before obtaining marketing consent,
does not duplicate PageView while navigating the Landing Page,
has Meta automatic events disabled,
can handle more than one Pixel, e.g. organizer and agency Pixel,
passes eventID during purchase, which prepares the event for potential future deduplication with Conversions API.
If a participant obtains a free ticket through the cart, they go through the standard purchase process and complete it with an event: Purchase with value: 0
CompleteRegistration applies to free participation in an event taking place without a cart.
Landing Page Meeting Application provides a ready-made dataLayer with e-commerce events and consent signals.
Your task is to map these events to the appropriate Meta Pixel events.
Provide us with:
GTM container ID in the format GTM-XXXXXXX,
Cookiebot identifier.
Also make sure that the Landing Page event domain has been added in your Cookiebot panel.
In this path, you do not share your Pixel ID with us. You use it exclusively in your own Meta Pixel tags configured in GTM.
Events use GA4 naming and structure with an object:
ecommerceBefore each e-commerce event, the following is also sent:
{ ecommerce: null }This way, previous e-commerce data is cleared before the next event.
Event | Ecommerce parameters |
|
|
|
|
|
|
|
|
|
|
|
|
|
|
|
|
|
|
|
|
|
|
|
|
Each element of the items array contains:
item_id,
item_name,
item_category,
price,
quantity,
and optionally:
discount,
coupon.
ecommerce.value passed by the Landing Page is a net value. Tax is located separately in: ecommerce.tax.Purchase event, Meta requires a gross value. Therefore, during configuration you will create a separate variable that will sum: value + taxBasic mapping looks as follows:
dataLayer GA4 | Meta Pixel | Notes |
|
| Landing Page does not have a separate product page. |
|
|
|
|
| — |
|
| — |
|
| Use gross value, currency, |
In Google Tag Manager, go to:
Variables → User-Defined Variables → New → Data Layer Variable
Create the following variables:
DLV - ecommerce.value
DLV - ecommerce.tax
DLV - ecommerce.currency
DLV - ecommerce.transaction_id
DLV - ecommerce.items
DLV - consent.ad_storage
For each one, select: Data Layer Version → Version 2
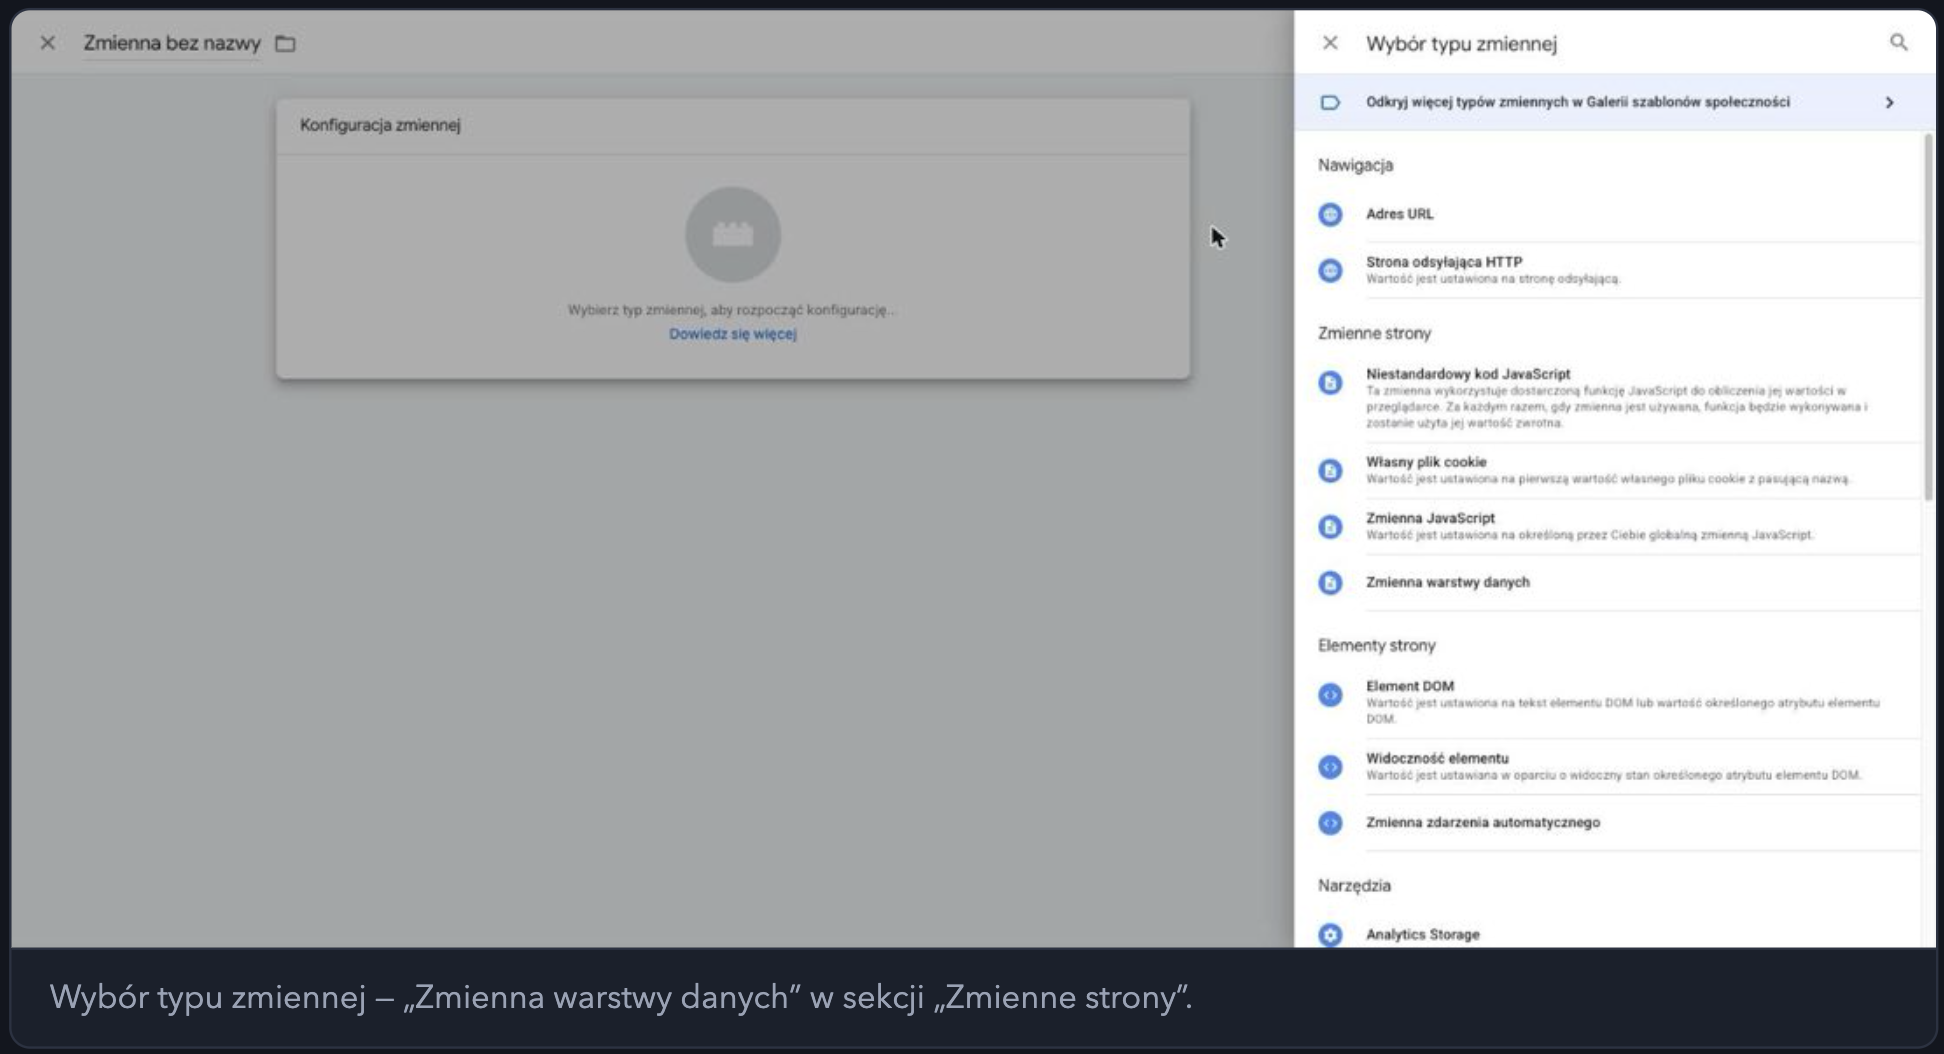
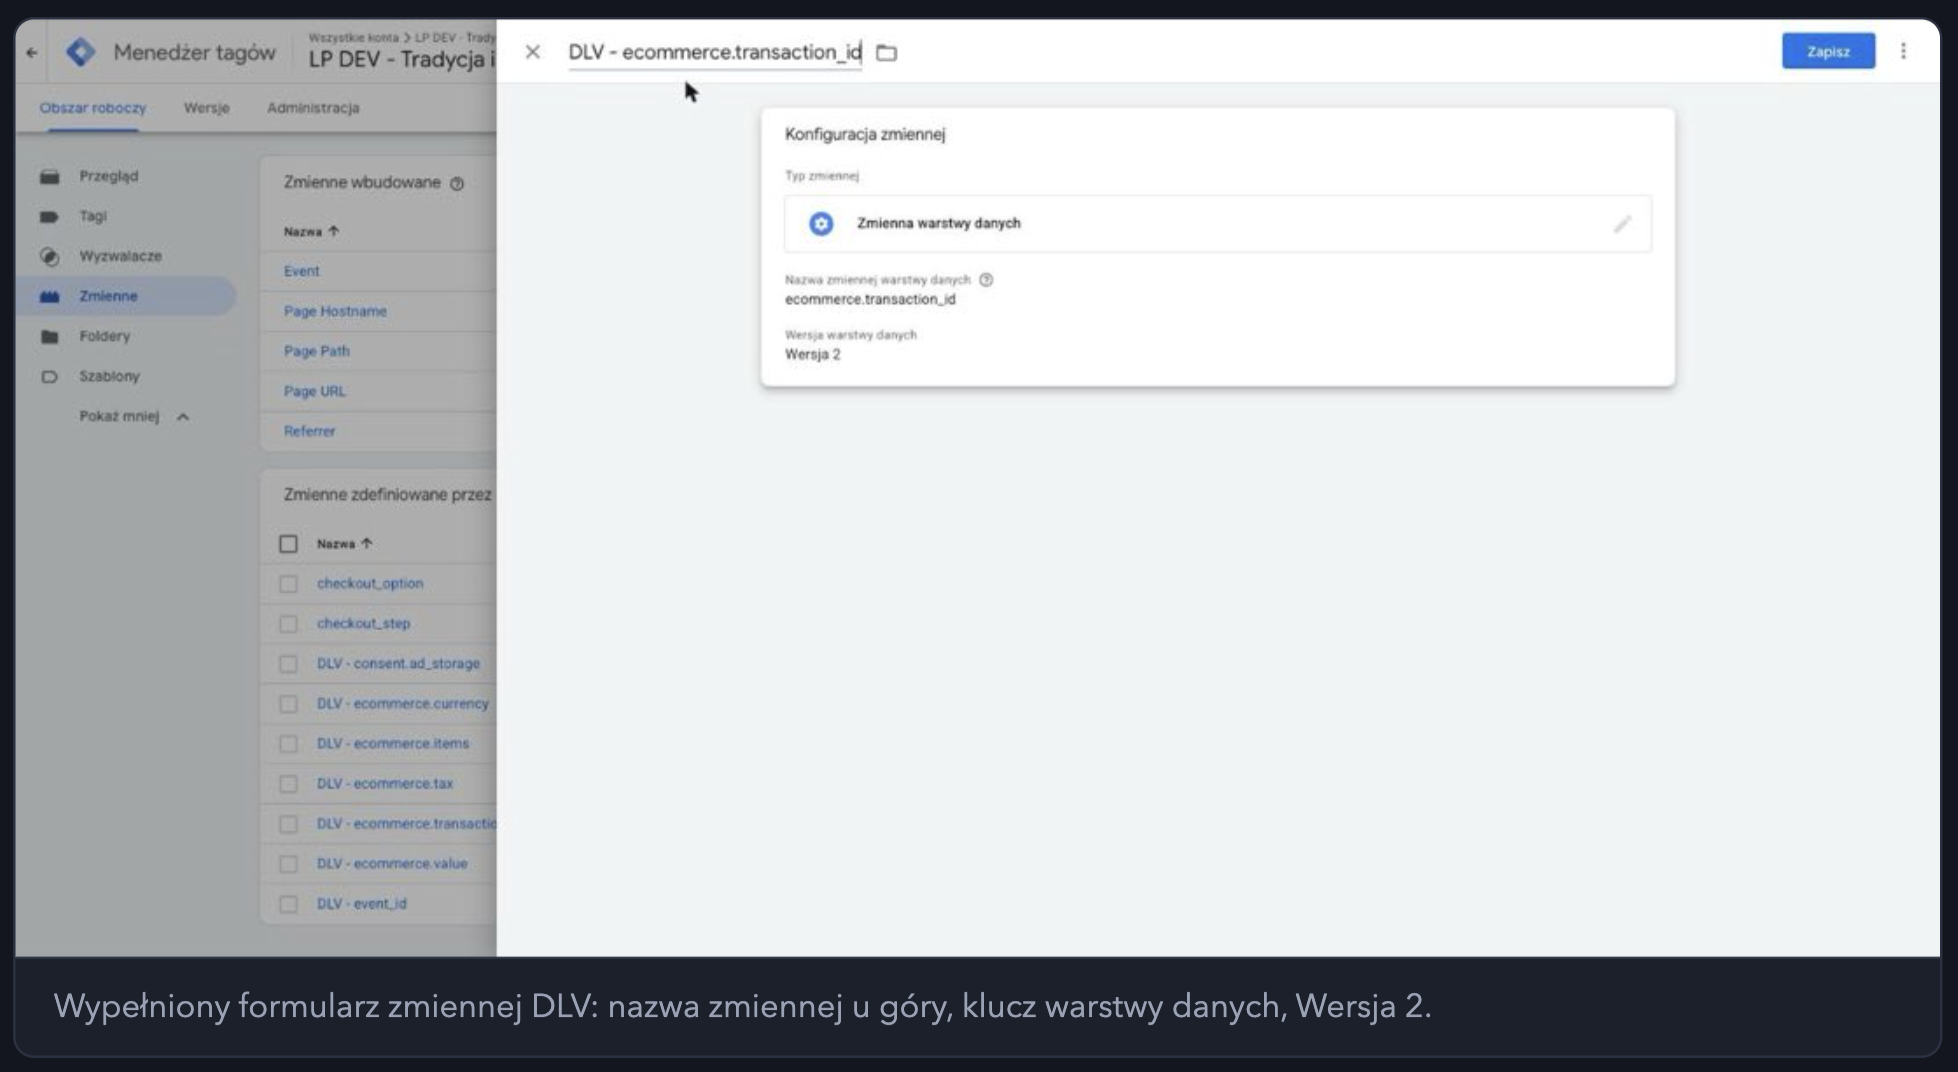
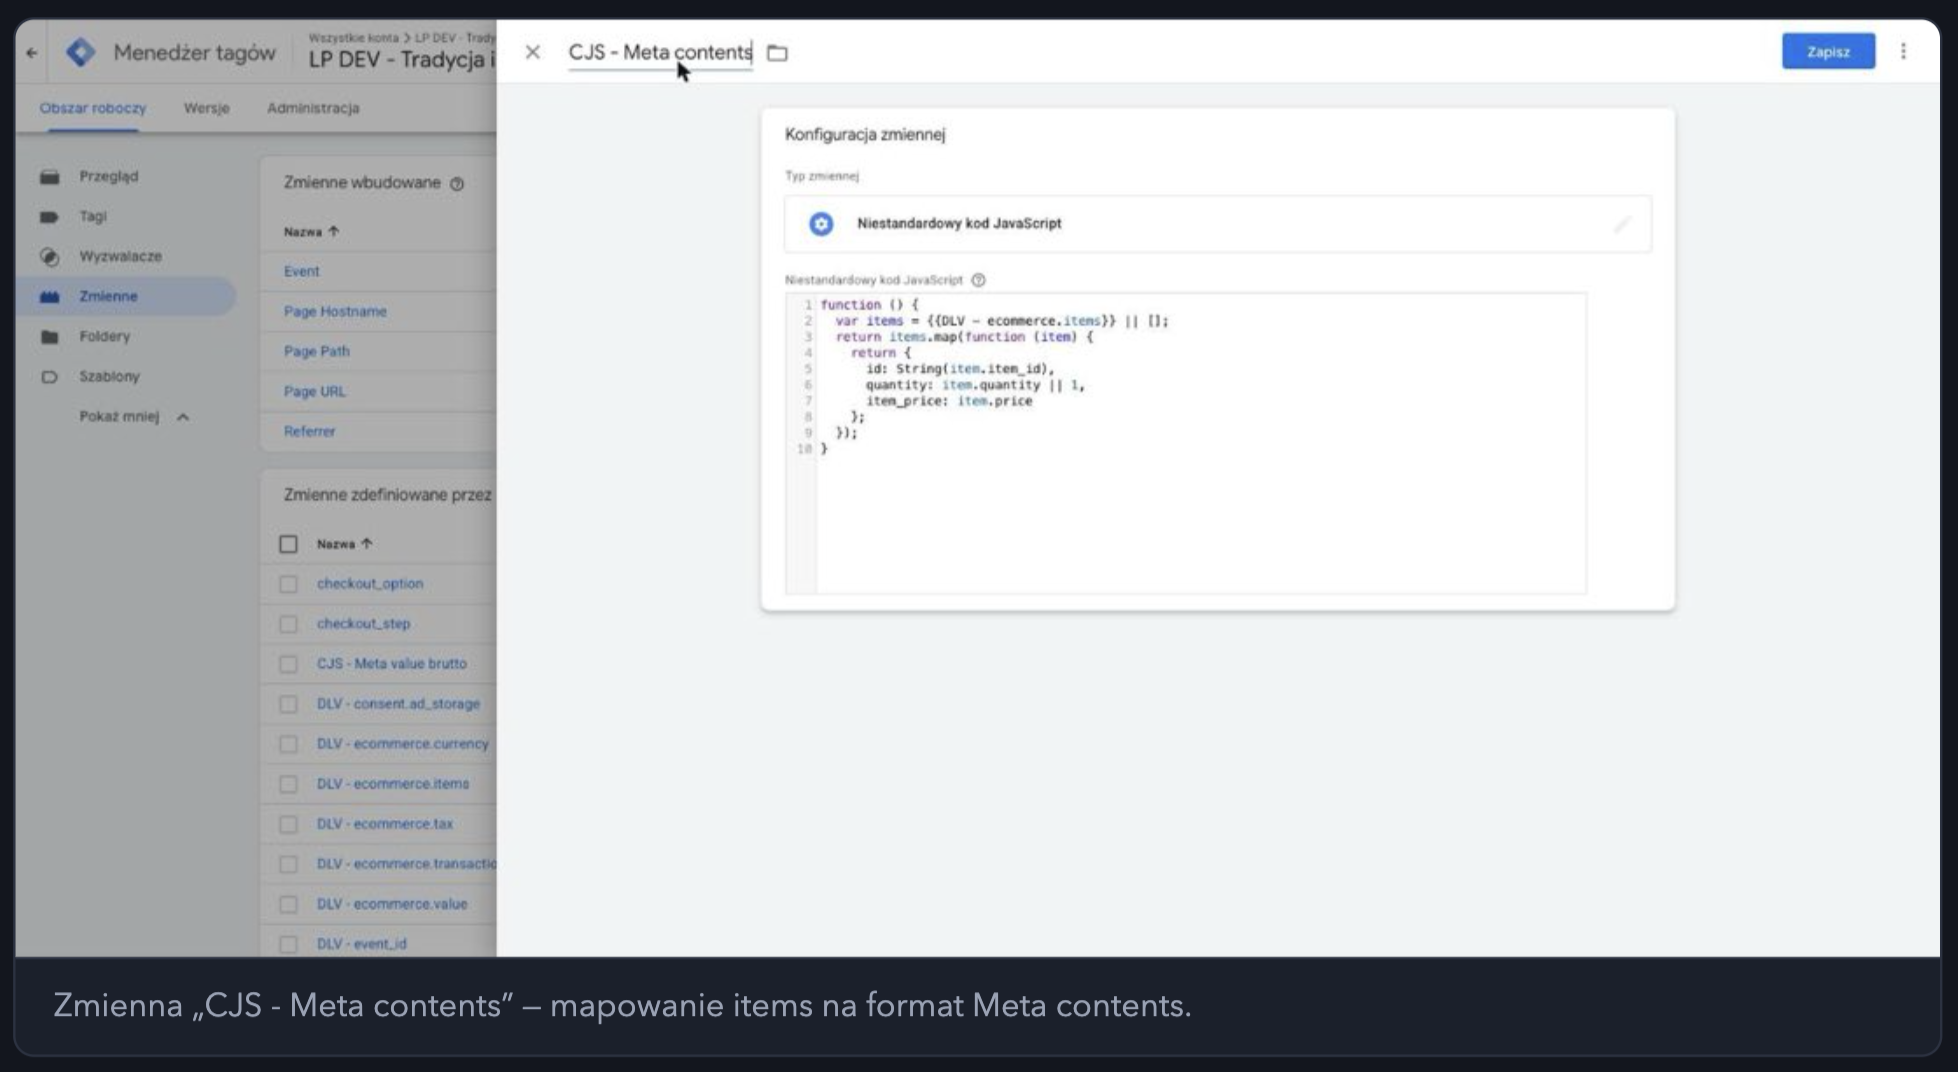
Then create two variables of type: Custom JavaScript Code — Custom JavaScript
function () {
  var net = Number({{DLV - ecommerce.value}}) || 0;
  var tax = Number({{DLV - ecommerce.tax}}) || 0;
  return Math.round((net + tax) * 100) / 100;
}
This variable calculates the gross value: net value + tax
function () {
  var items = {{DLV - ecommerce.items}} || [];
  return items.map(function (item) {
    return {
      id: String(item.item_id),
      quantity: item.quantity || 1,
      item_price: item.price
    };
  });
}
This variable maps the items array from the Landing Page to the contents format required by Meta.
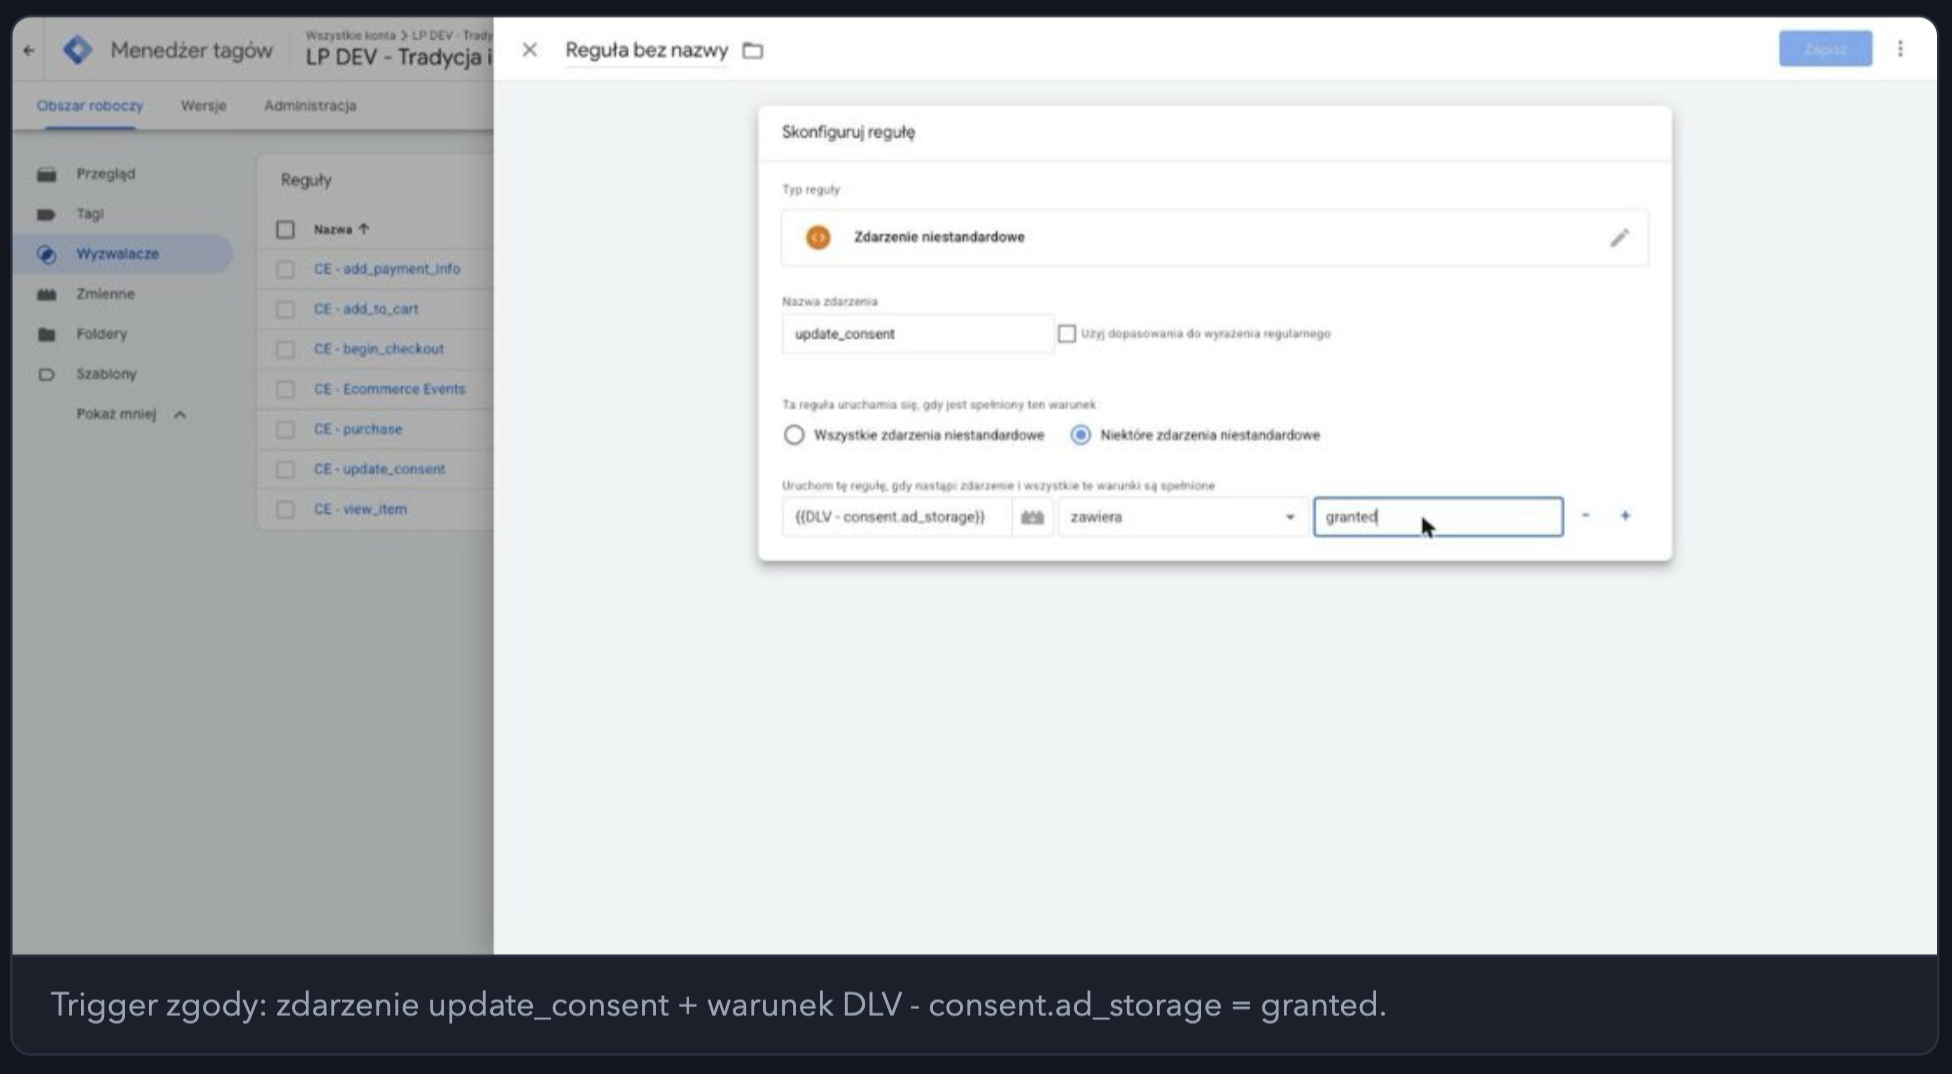
Create triggers of type: Custom Event
The event name must be exactly the same as the name sent by the Landing Page to dataLayer.
Create:
CE - view_item
CE - add_to_cart
CE - begin_checkout
CE - add_payment_info
CE - purchase
Additionally, create:
CE - update_consent (marketing granted)
Set:
event name: update_consent,
trigger: Some custom events,
condition: DLV - consent.ad_storage equals granted
Landing Page Meeting Application works as an SPA application — the URL can change without a full page reload.
Therefore, for subsequent PageView create a trigger of type: History Change — History Change ((History Change; HC - all history changes, without conditions), without additional conditions.
Create a tag of type: Custom HTML
Set as trigger: CE - update_consent (marketing granted)
Then go to: Advanced settings → Tag firing options and select: Once per page
Paste the code below:
<script>
!function(f,b,e,v,n,t,s){if(f.fbq)return;n=f.fbq=function(){n.callMethod?
n.callMethod.apply(n,arguments):n.queue.push(arguments)};
if(!f._fbq)f._fbq=n;n.push=n;n.loaded=!0;n.version='2.0';
n.queue=[];t=b.createElement(e);t.async=!0;
t.src=v;s=b.getElementsByTagName(e)[0];
s.parentNode.insertBefore(t,s)}(window, document,'script',
'https://connect.facebook.net/en_US/fbevents.js');

fbq.disablePushState = true;
fbq('set', 'autoConfig', false, 'TWOJ_PIXEL_ID');
fbq('init', 'TWOJ_PIXEL_ID');
fbq('trackSingle', 'TWOJ_PIXEL_ID', 'PageView');

window.__maLastPvPath = location.pathname;
</script>
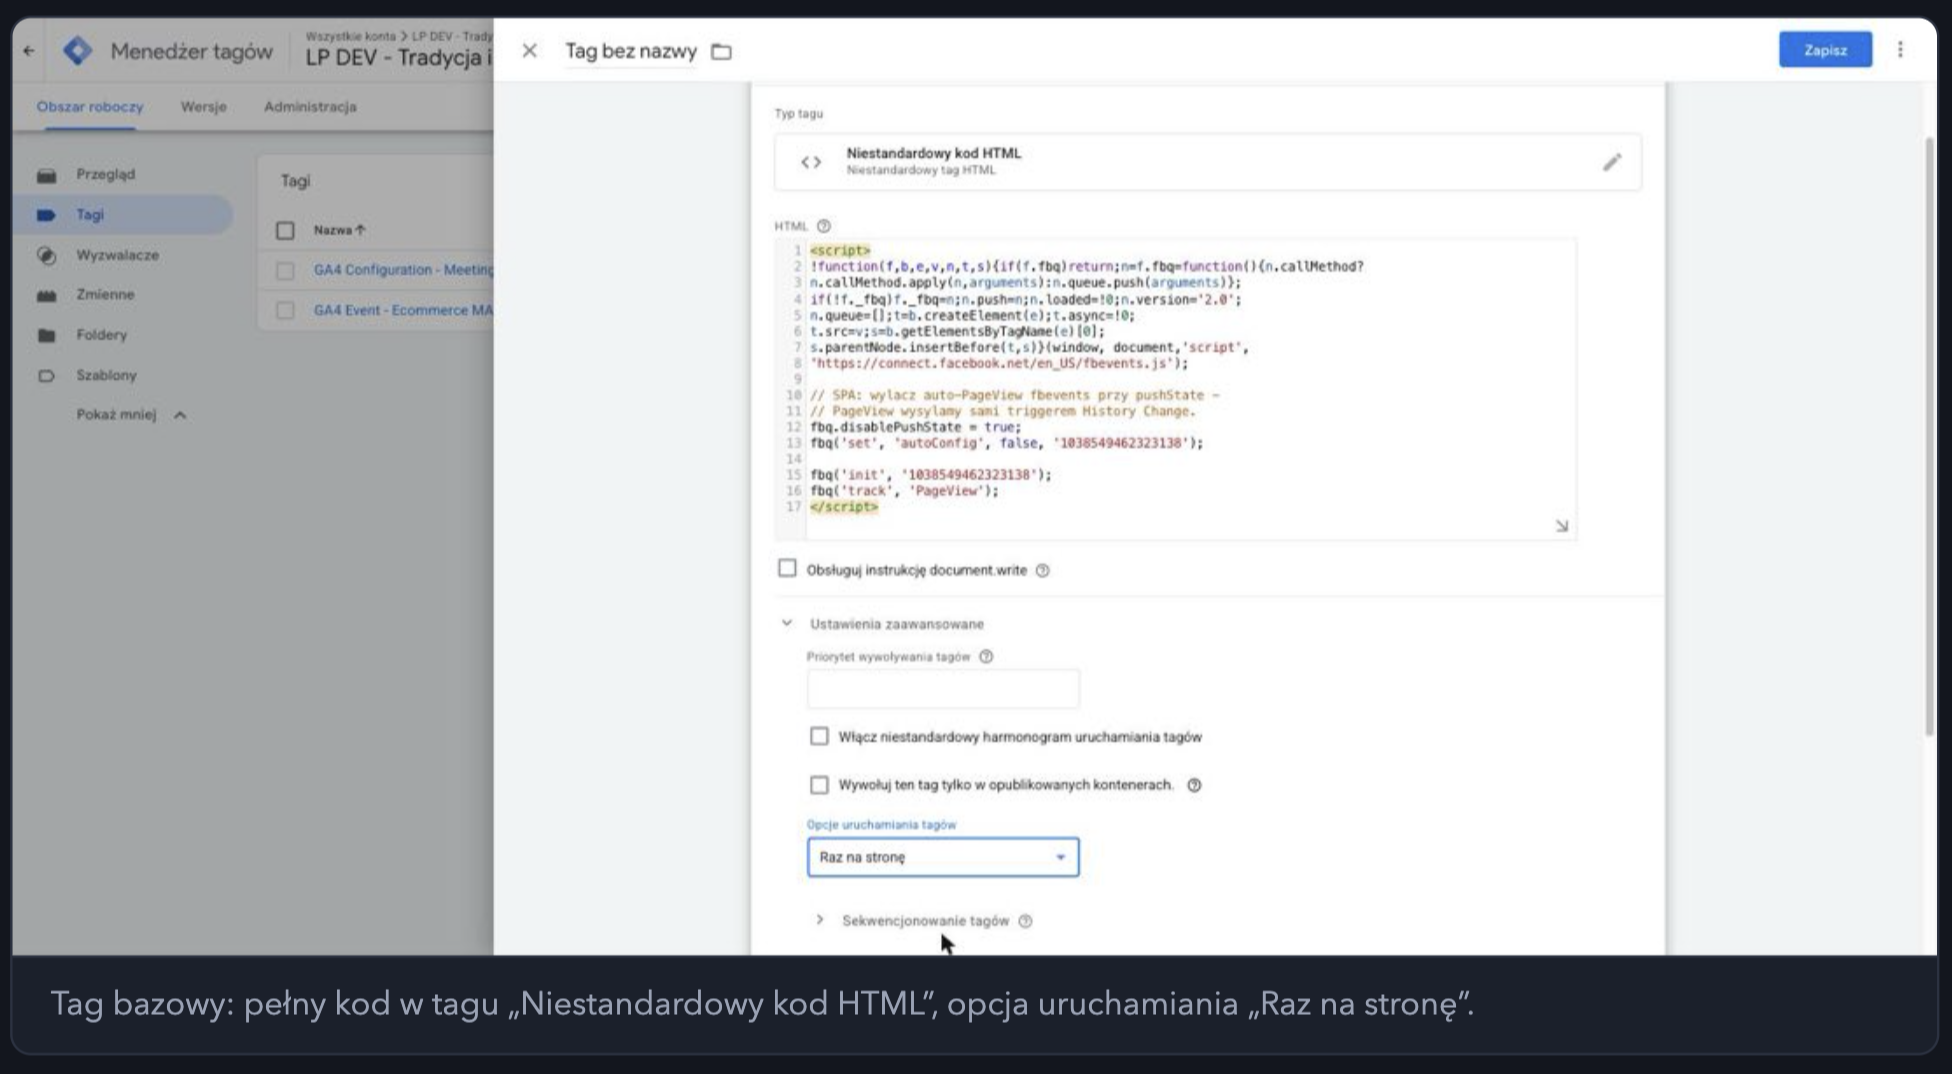
Replace: TWOJ_PIXEL_ID with your correct Pixel ID.
autoConfig=false disables automatic Meta events.
disablePushState = true disables automatic PageView sent by fbevents.js during URL changes in your SPA application.
You will configure PageView during navigation yourself in the next step.
What happens before marketing consent?
The base tag only launches after receiving the signal:
consent.ad_storage = grantedEvents occurring earlier — including the first
PageViewbefore accepting Cookiebot — will not be sent to Meta.
Create each of the following tags as: Custom HTML
In the code, replace: TWOJ_PIXEL_ID with your correct Pixel ID.
Trigger: HC - all history changes
<script>
if (window.fbq && window.__maLastPvPath !== location.pathname) {
  window.__maLastPvPath = location.pathname;
  fbq('trackSingle', 'TWOJ_PIXEL_ID', 'PageView');
}
</script>
The condition comparing location.pathname protects against sending two PageView events if the Landing Page changes history in more than one step.
Trigger: CE - view_item
<script>
if (window.fbq) {
  fbq('trackSingle', 'TWOJ_PIXEL_ID', 'ViewContent', {
    contents: {{CJS - Meta contents}},
    content_type: 'product',
    value: {{DLV - ecommerce.value}},
    currency: '{{DLV - ecommerce.currency}}'
  });
}
</script>
Trigger:
CE - add_to_cart
<script>
if (window.fbq) {
  fbq('trackSingle', 'TWOJ_PIXEL_ID', 'AddToCart', {
    contents: {{CJS - Meta contents}},
    content_type: 'product',
    value: {{DLV - ecommerce.value}},
    currency: '{{DLV - ecommerce.currency}}'
  });
}
</script>
Trigger: CE - begin_checkout
<script>
if (window.fbq) {
  fbq('trackSingle', 'TWOJ_PIXEL_ID', 'InitiateCheckout', {
    contents: {{CJS - Meta contents}},
    content_type: 'product',
    value: {{DLV - ecommerce.value}},
    currency: '{{DLV - ecommerce.currency}}',
    num_items: {{CJS - Meta contents}}.length
  });
}
</script>
Trigger: CE - add_payment_info
<script>
if (window.fbq) {
  fbq('trackSingle', 'TWOJ_PIXEL_ID', 'AddPaymentInfo', {
    contents: {{CJS - Meta contents}},
    content_type: 'product',
    value: {{DLV - ecommerce.value}},
    currency: '{{DLV - ecommerce.currency}}'
  });
}
</script>
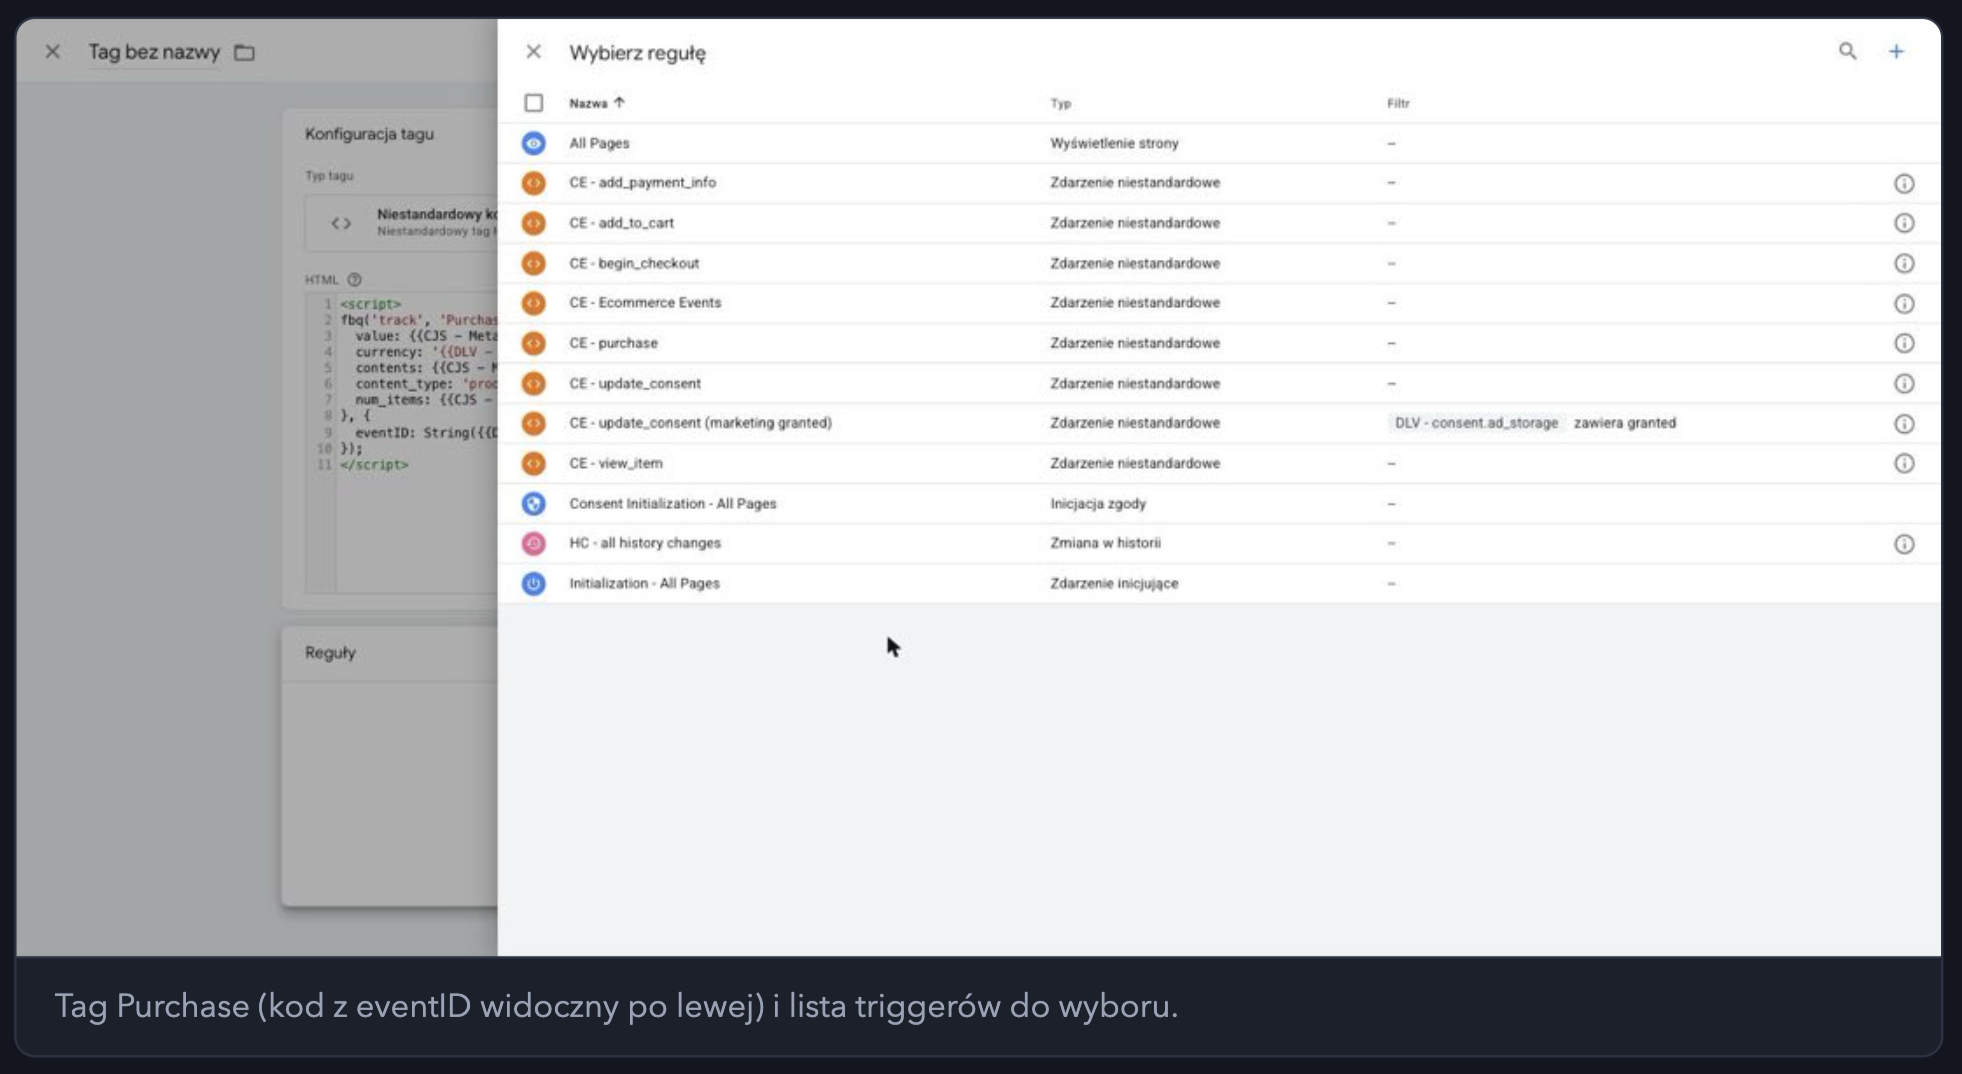
Trigger: CE - purchase
<script>
if (window.fbq) {
  fbq('trackSingle', 'TWOJ_PIXEL_ID', 'Purchase', {
    value: {{CJS - Meta value brutto}},
    currency: '{{DLV - ecommerce.currency}}',
    contents: {{CJS - Meta contents}},
    content_type: 'product',
    num_items: {{CJS - Meta contents}}.length
  }, {
    eventID: String({{DLV - ecommerce.transaction_id}})
  });
}
</script>
In this event:
value is the gross value,
currency specifies the currency,
contents contains items from the cart,
eventID uses transaction_id.
The same eventID can be used for deduplication if you implement server-side Conversions API in the future.
⚠ Do not use tag sequencing
Do not set the base Meta Pixel tag as the trigger for subsequent event tags.
The base tag works with the "Once per page" setting. On the next GTM trigger attempt, it may block its re-execution, and as a result, also block the event tag.
In the codes above, a condition is used instead:
if (window.fbq)If the user has not given consent and the base Pixel has not been triggered, subsequent events will not be sent.
⚠ Use
trackSingle, nottrackFor
PageViewon Landing Page SPA use:
fbq('trackSingle', ...)Regular
fbq('track', 'PageView')can be deduplicated byfbevents.js, which means subsequent PageView calls triggered by History Change will not be sent correctly.
trackSingleadditionally specifies a specific Pixel ID.
Instead of Custom HTML tags, you can use the template: Facebook Pixel from Community Template Gallery, publisher: facebookincubator
The template supports:
base code,
standard events,
Object Properties,
Event ID.
Parameter mapping remains the same as in the configuration described earlier.
Remember
The template does not set
disablePushState.If you choose this variant, during testing verify in particular whether duplicate
PageViewevents do not appear during navigation on the Landing Page.
The basic configuration includes events that have direct equivalents among Meta standard events.
You can use other events from dataLayer as custom events.
dataLayer Event | Standard Meta Event | Possible Mapping |
| none |
|
| none |
|
| none |
|
| none | skip - in Meeting App this is a technical step "Email", not an actual shipment |
| none |
|
You can send custom events via: fbq('trackSingleCustom', ...).
They do not power standard campaign optimization the way Purchase or AddToCart do — Meta doesn't know what they mean.
They are used to build custom audiences — for example, retargeting people who reached step 2 of checkout (CheckoutProgress with checkout_step ≥ 2), but don't have Purchase. This is their main value.
You can define custom conversions based on them in Events Manager and then optimize your campaign on such a conversion.
Format limitations: name up to 50 characters, parameter keys without spaces.
Trigger: CE - remove_from_cart
<script>
if (window.fbq) {
  fbq('trackSingleCustom', 'TWOJ_PIXEL_ID', 'RemoveFromCart', {
    contents: {{CJS - Meta contents}},
    content_type: 'product',
    value: {{DLV - ecommerce.value}},
    currency: '{{DLV - ecommerce.currency}}'
  });
}
</script>
First, create an additional Data Layer Variable: DLV - checkout_step
Key: checkout_step
Then use:
<script>
if (window.fbq) {
  fbq('trackSingleCustom', 'TWOJ_PIXEL_ID', 'CheckoutProgress', {
    checkout_step: {{DLV - checkout_step}}
  });
}
</script>
Just like in basic events, use: if (window.fbq) instead of tag sequencing.
If a participant obtains a free ticket through the basket on the Landing Page Meeting Application, they still go through the standard flow:
basket → checkout → finalization
Therefore, registration ends with the event: Purchase with: value: 0
You do not need to create an additional registration event for such a process.
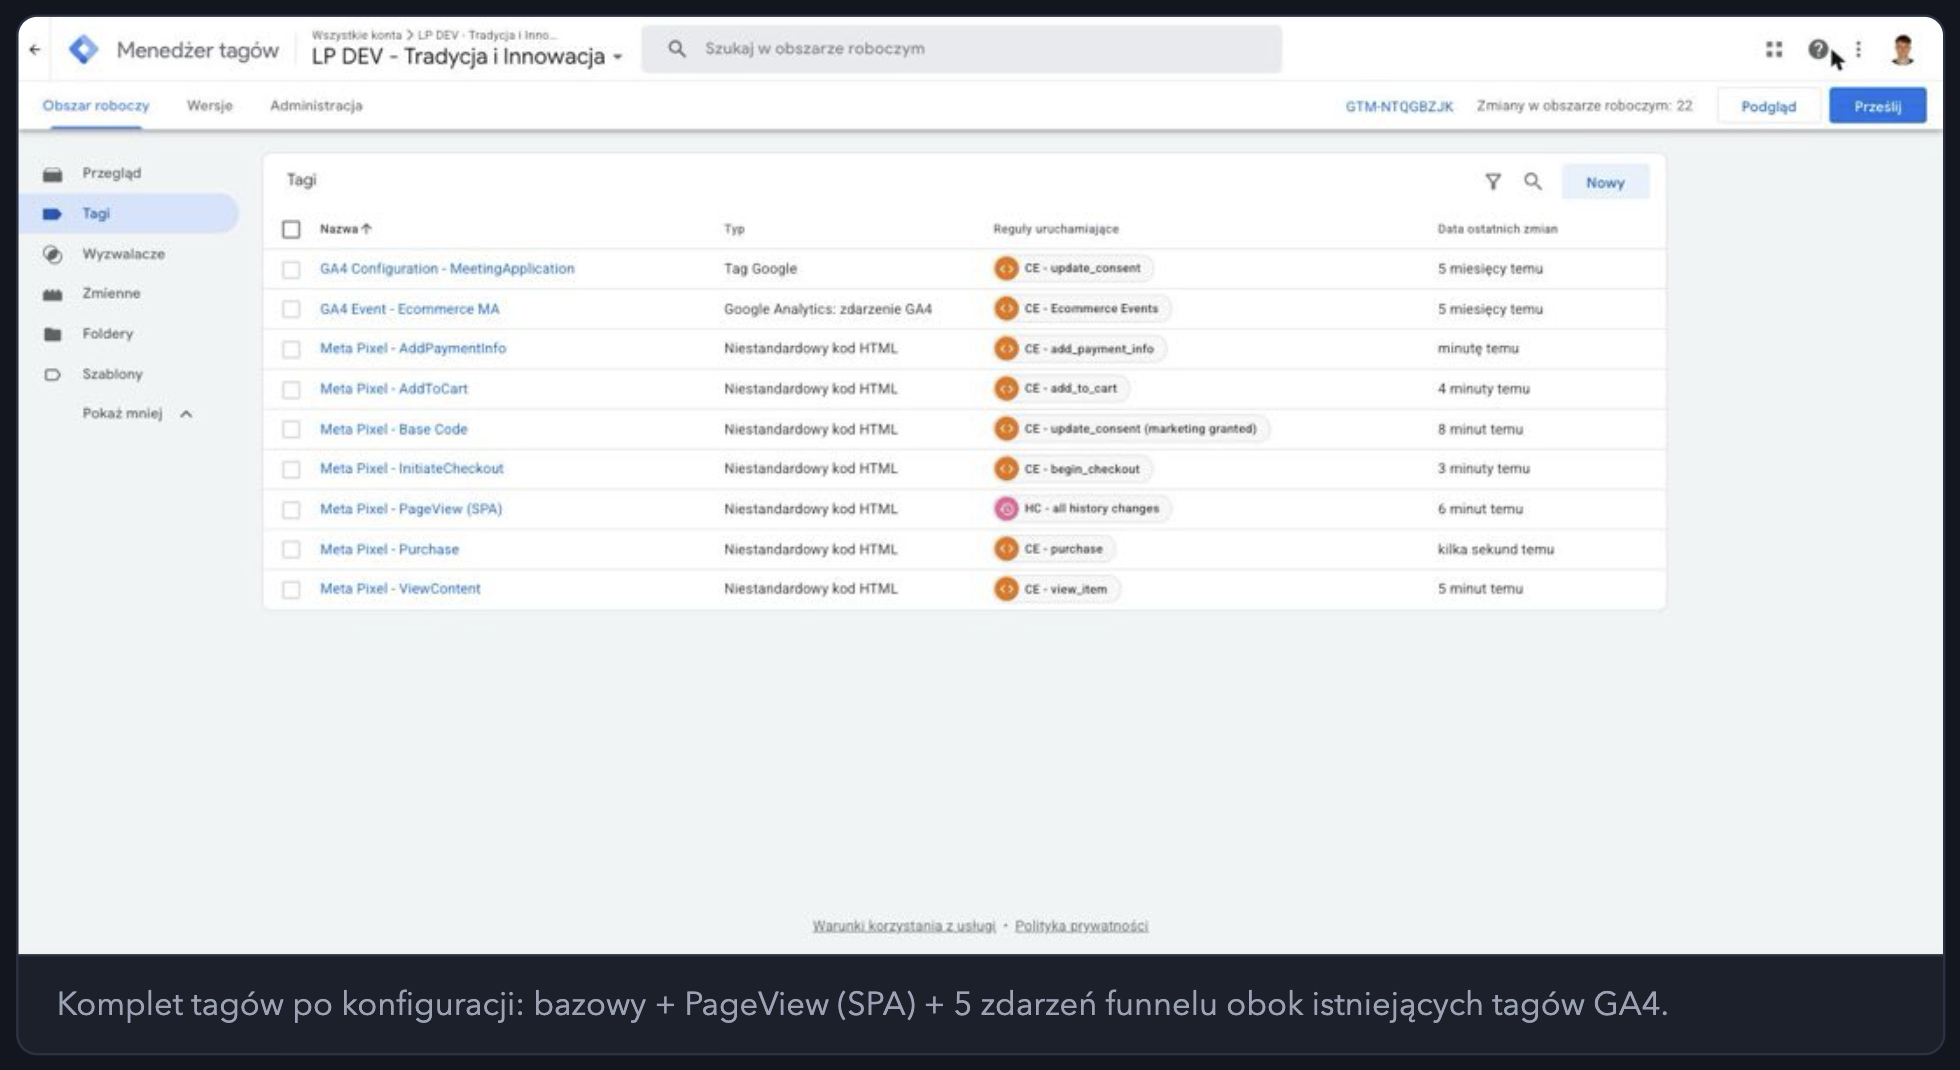
Before launching your campaign, perform a full test.
If you are using Path B, open simultaneously:
GTM Preview,
Meta Events Manager → Test Events.
Then go through the user process on the Landing Page.
What are you doing? | What should happen? |
You open the Landing Page before accepting Cookiebot | No requests to Meta to |
You accept marketing consent | A |
You navigate between subpages | Exactly one |
You add a ticket to your cart |
|
You start checkout |
|
You select a payment method |
|
You finalize your purchase |
|
You reject marketing consent | No traffic to |
For purchase events, also check the following parameters:
value,
currency,
contents.
For Purchase additionally check:
gross value,
Event ID.
First, check whether both of the following are active simultaneously for your Landing Page:
built-in Meta Pixel from Path A,
Meta Pixel tags in your GTM.
One event should use one Meta event source.
Do not use directly: ecommerce.value as the value of Purchase.
ecommerce.value is the net value.
For Purchase use: CJS - Meta gross value which is: ecommerce.value + ecommerce.tax
Check if the base code contains: fbq.disablePushState = true
Without this fbevents.js may independently send PageView when the URL changes, in parallel with your tag triggered by History Change.
contents does not contain quantityMeta requires id and quantity for each item.
Variable: CJS - Meta contents ensures their correct mapping.
currency should contain the currency code, e.g.: PLN not the symbol: zł
Landing Page passes the currency code in the correct format.
Make sure that:
you are using only one Meta Pixel path,
Cookiebot is properly configured,
the Landing Page domain has been added in Cookiebot,
the correct GTM container is connected to the event,
automatic Meta events are disabled,
you have completed a full user path test,
Purchase passes the correct value, currency, and Event ID.
If you are unsure which Meta Pixel configuration is active for your event, contact us before publishing tags or launching a campaign.
Successful event with Meeting Application!