If you're organizing a trade fair event, be sure to prepare an Interactive Map for your audience! It is a tool that will allow users to quickly find the appropriate exhibitor booths within the trade fair venue.
For the module to work properly, it is necessary to add at least one location.
In the Component section, add the Interactive Map module to your application by clicking the plus next to the name of this element, or by dragging it to the right column. Then proceed to the next step – Content. In the sidebar menu, select the Interactive Map module, and to create your first map, click (+) Add New Interactive Map. In the editing window that appears, enter a name – this will be especially important if you plan to add more than one map. The name can be a floor number, e.g. floor I, floor II, or a building name if the event is located in several different locations.
Next, in the Map Editor field, insert a photo showing the floor plan of the building. Confirm the file addition using the Save Changes button.
Recommended map image sizes:
JPG or PNG format,
optimal resolution is 1920 px by 1080 px,
image orientation is flexible; we recommend portrait layout,
file size should not exceed 10MB.


Select the ellipsis in the map row where you want to make changes, then click Edit map.
Map navigation – you can zoom in and out of the map view using the mouse wheel. By selecting the pencil icon on the top bar of the window, you can move the map using the left mouse button, while using the right mouse button you can move the map regardless of the selected icon.
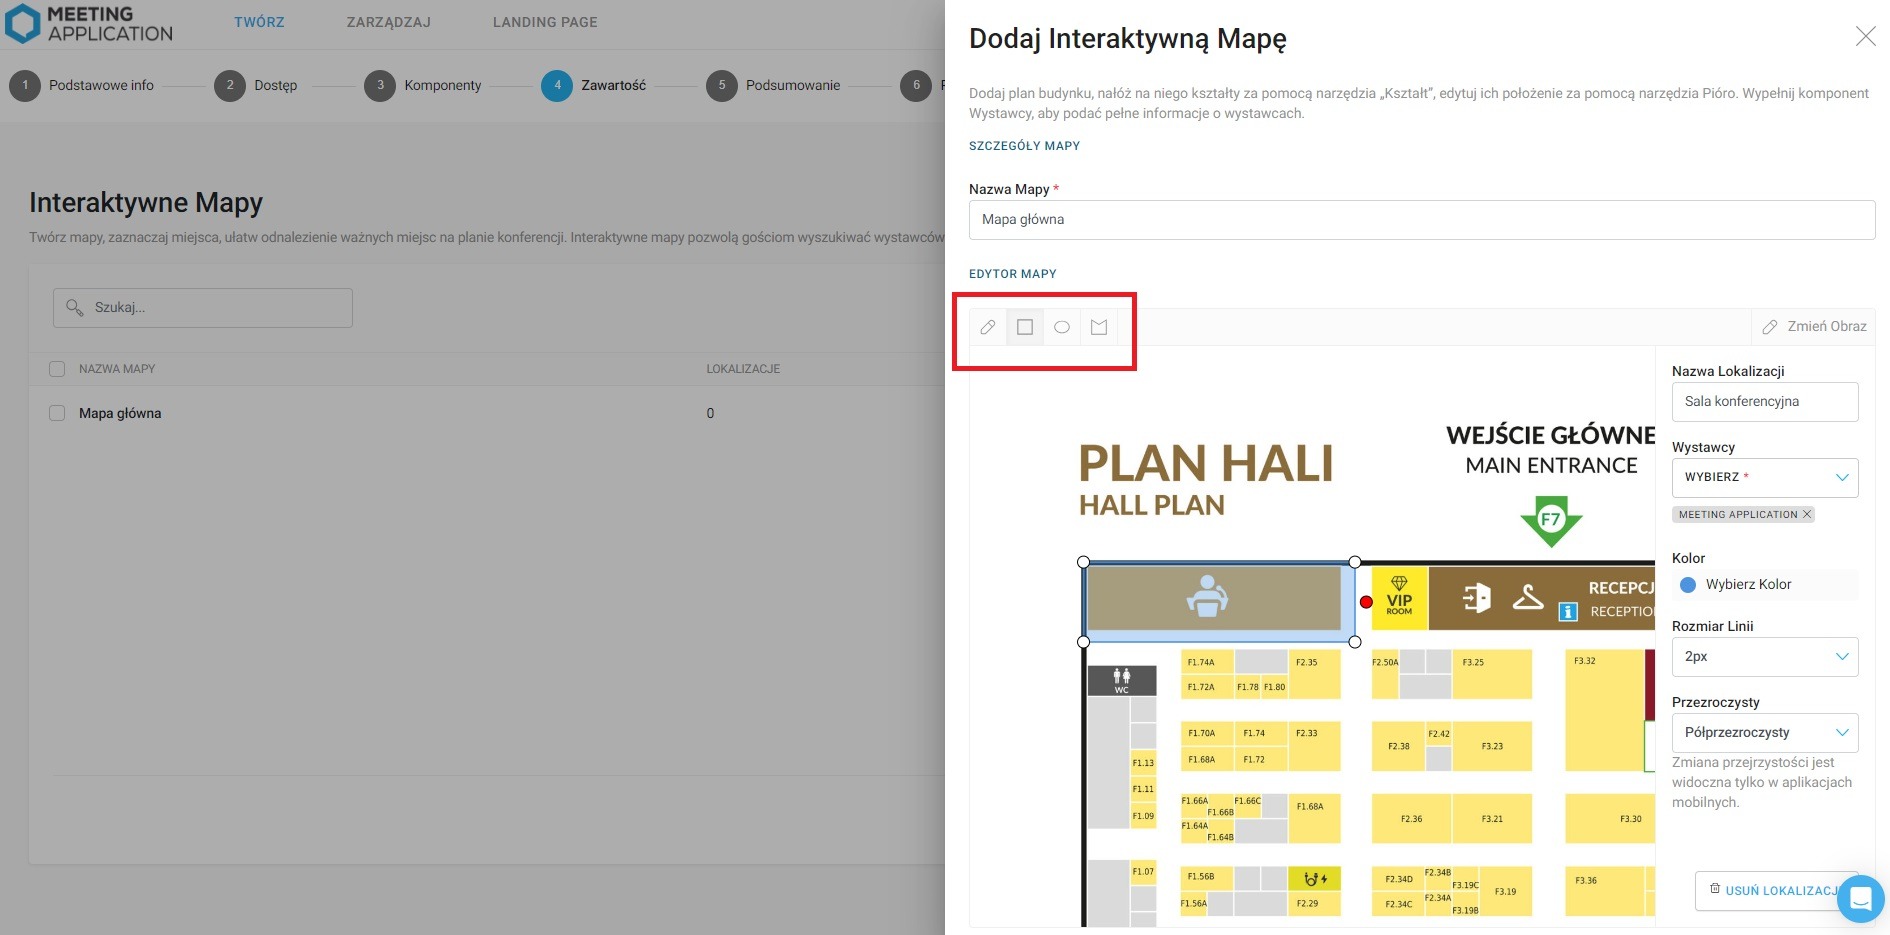
Drawing objects on the map – on the top bar of the window, select the shape of the object you want to draw – a square, ellipse, or polygon. To draw an ellipse or rectangle, click the left mouse button and drag the cursor to achieve the desired size of the shape. To draw a polygon, place individual points in space, which will automatically connect to each other with lines, creating the desired shape. Complete the last move by clicking on the starting point (turquoise dot), which will close the perimeter of the drawn figure.
Thanks to the above, application users will be able to zoom in/out of the map and click on the elements you've drawn on it. These, in turn, when pointed to, will show a list of exhibitor profiles pinned to them.
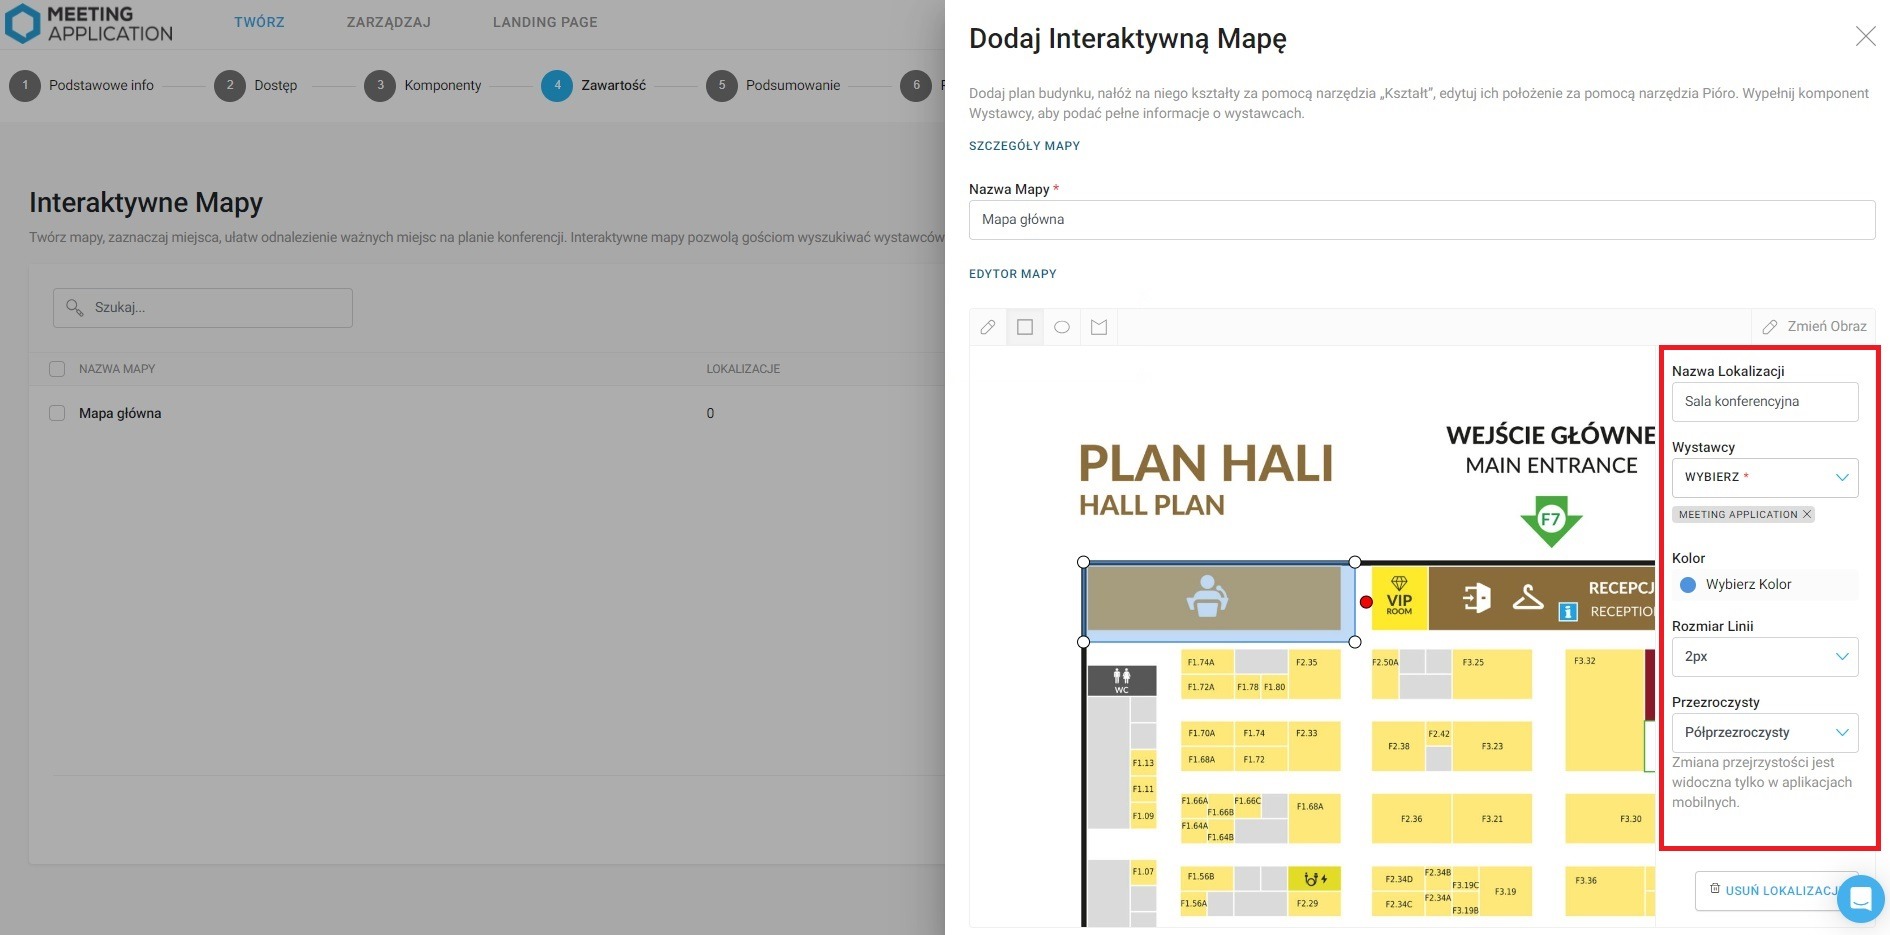
You can change the color of the drawn booth by selecting a suggestion from the palette or entering a HEX color code. You can also change the thickness of the object's edge from 1 - 3 pixels. The Transparent field allows you to specify whether the booth should be filled with color (Semi-transparent) or only its edges should be visible (edge only). The effects of these settings are visible only in the mobile app on your phone:
After drawing a figure, you can still change its shape and position on the map. Select the pencil icon, then click on the drawn figure to enter its settings. Adjust its shape by grabbing one of the vertices marked with white dots. Change the position of the figure by clicking the left mouse button in its area and dragging it across the map. To rotate the selected figure, click on it with the left mouse button, then find the red dot that appeared outside the figure's outline. Grab it and move your cursor to rotate the shape.
Click the drawn object to enter edit mode. The Location Name field is best filled in by entering the booth number. Then, in the Exhibitors field, select from the dropdown list the exhibitor who will be available at this booth. This connection will create a button in the app that allows a participant to navigate from the interactive map to the exhibitor's profile and vice versa - from the exhibitor's profile to the booth on the map.
You can delete a single element on the map that is being edited by clicking Delete location below the individual edit fields. Below the field for adding a new location is a list of previously added elements on the interactive map. Each of them has a Delete location button.
Create exhibitor profiles in the Exhibitors module before you start creating an interactive map. This will help you mark exhibitors on the map more efficiently. Learn how to create exhibitor profiles from this article.
Good luck with your event with Meeting Application!
