Learn how to correctly import event participants, assign tickets to them, and manage their data in Meeting Application.
You can add your event participants to the MANAGE → USERS tab in two ways: individually (via the admin panel) or in bulk (by importing a CSV file). The article below explains how to flawlessly prepare the data file and successfully upload it to the system.
Learn more about users in the event 👉IN THIS ARTICLE.

It’s best to work on your participant database in a spreadsheet (Excel, Google Sheets). Only when the file is complete, export it to .csv format.
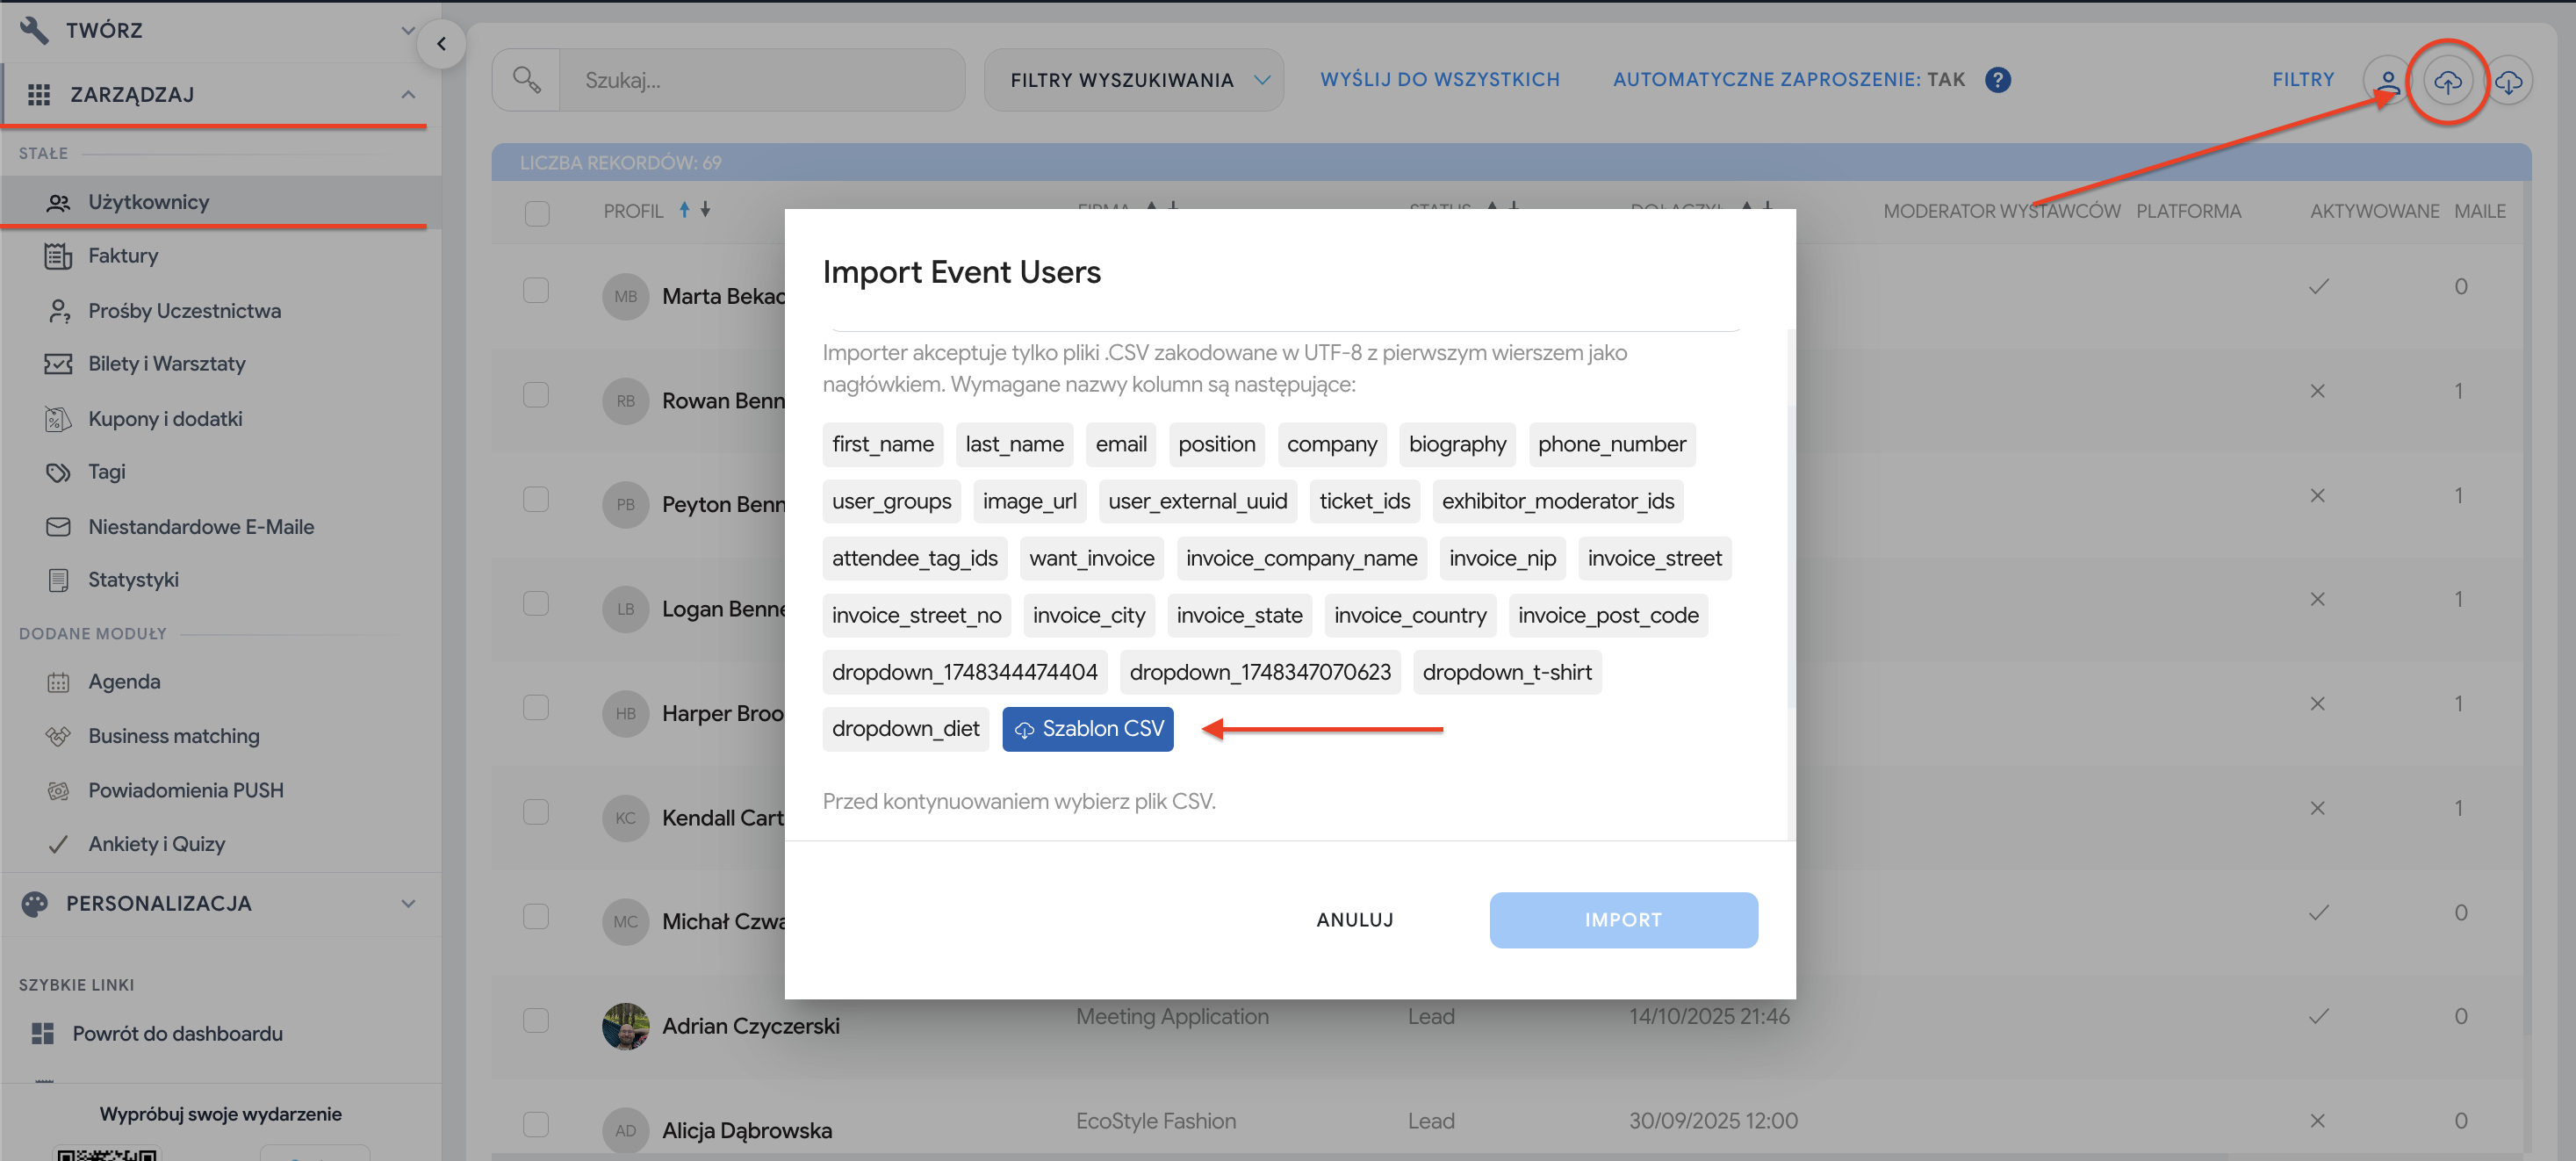
Go to the MANAGE → USERS tab (Manage -> Application Users).
Click the cloud icon with an upward arrow (in the top right corner).
Download the ready-made template by clicking the Template button.
Fill in the downloaded file with your data and save it as .csv (make sure the file is saved in the Unicode UTF-8 encoding system to avoid errors with Polish characters).
If you’re doing a re-import (e.g. you want to update data or add a new group of people), the CSV file must keep exactly the same structure. This means it has to include all the columns required and visible in your event, in the same order as originally. The new file for import does not have to include the list of people who are already in your event.
For the import to run successfully, the file must contain headers for all columns from the template, even if you don’t fill some of them in. A typo in a header or skipping a column will result in an import error.
You’ll get the import file template from the MANAGE → USERS tab:
first_name (first name) Every cell in these columns must contain at least 3 characters.
last_name (last name) Every cell in these columns must contain at least 3 characters.
email (email address) Every cell in these columns must contain at least 3 characters.
position – participant's job title. The information is added to the user's profile for people without an active account on the Meeting Application platform.
company – name of the company or organization. The information is added to the user's profile for people without an active account on the Meeting Application platform.
country – two-letter country code according to the international standard (e.g. PL for Poland, US for the United States). The information is added to the user's profile for people without an active account on the Meeting Application platform.
biography – short description (bio) displayed in the user's profile. The information is added to the user's profile for people without an active account on the Meeting Application platform.
phone_number – phone number. Remember to enter it as one string, without spaces and without the "+" sign at the beginning (e.g. for a Polish number: 48999888777). Otherwise, the system may not display it. The information is added to the user's profile for people without an active account on the Meeting Application platform.
image_url – link to a square profile picture. Make sure the picture is publicly available on any hosting service and that the pasted link ends with a graphic file extension (e.g. .jpg or .png). The information is added to the user's profile for people without an active account on the Meeting Application platform.
user_groups (User Groups) – enter a tag defining the group (it allows content segmentation). You can add several groups by separating them with a comma (no spaces).
Important: If you add new groups in the file that didn’t exist before, the system will add them to the pool of groups already present in the admin panel in the CREATE → CONTENT → TAG DATABASE tab.
user_tags (User Tags) – tags visible to all participants in the Business Matching and Participants modules, making networking easier. The rule for adding new tags works exactly the same as for user_groups. Learn more 👉IN THIS ARTICLE.
user_external_uuid – every user automatically gets an individual QR code from our system. If you want to assign participants QR codes from your own database, put their IDs in this section. This feature is available only in dedicated apps. If you want to use it, we recommend contacting our representatives to arrange the details.
ticket_ids – if you want to assign a ticket to a participant that was previously set up in our system, you can do it here by assigning the ID of the given ticket, available in the panel; you can enter several IDs separated by commas. You’ll find the ticket ID next to each ticket type in the CREATE > ACCESS > TICKETS tab. Learn more from 👉THIS ARTICLE.
exhibitor_moderator_ids – if you want to add one of your participants as an exhibitor moderator, type true in this field and an empty exhibitor profile to be filled in will be created. You can find out more about the exhibitor moderator in the Exhibitor Moderator article.
If you’re moving a participant database from an external system and want to keep their billing data, you can use the columns below (leave them empty if you don’t collect this data at the import stage):
want_invoice (e.g. true/false)
invoice_company_name
invoice_nip
invoice_street
invoice_street_no
invoice_city
invoice_state
invoice_country
invoice_post_code
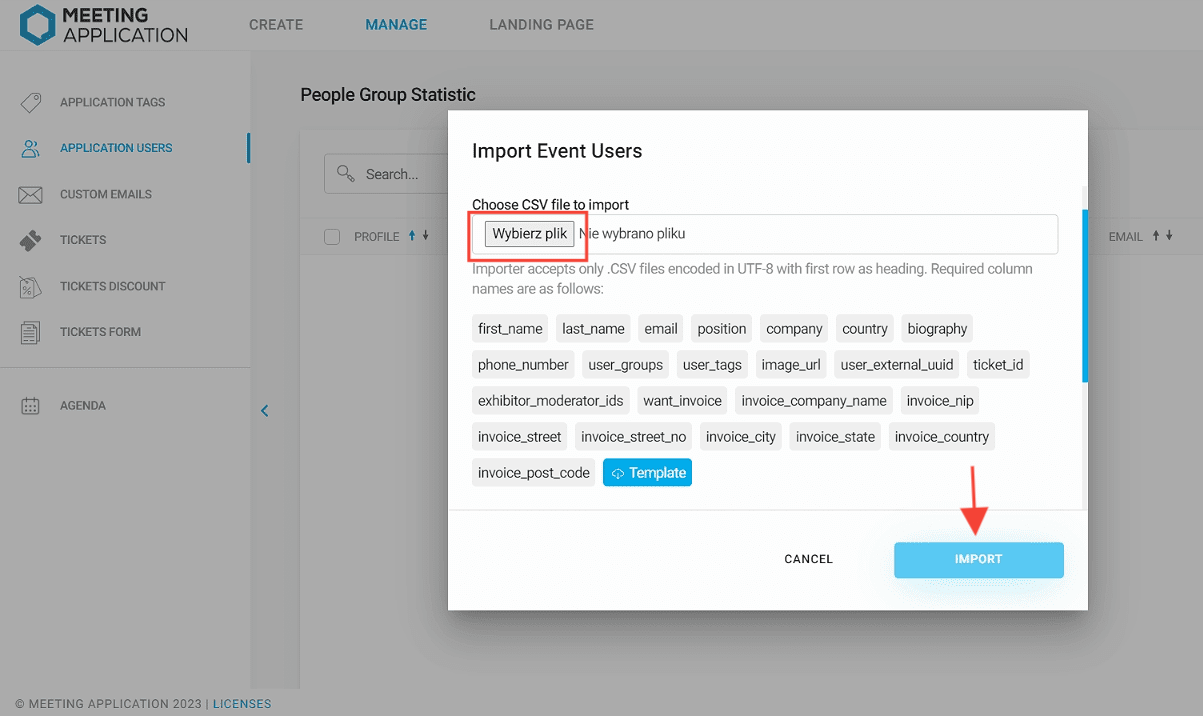
If you already have a csv file ready to import, click the Choose file button and upload the document you prepared earlier. Then click Import, and all users will be uploaded to the system:
If a given email address doesn’t have an account in our system yet. By uploading an import file, you start the process of opening an account on behalf of the user. Any data you upload (first name, last name, position, company, etc.) will be suggested as part of their profile.
What happens after the account is activated? The moment the user logs in and activates their account, they gain full rights and become the full rightful owner of their profile. From that moment on, you as the event admin lose the ability to edit the information displayed in their profile (such as last name or position). The right to manage their personal data is fully transferred to the participant.

To add a single user and assign a ticket, go to the MANAGE tab → USERS → person icon in the top right corner.
Enter the required information:
first name
last name
email address
and then in the TICKET field, from the dropdown list choose the pass that should be assigned to this specific person.
After importing the User with a ticket, the following will be sent to the provided email address: a welcome mail (as long as you have checked: Automatic invitation: YES) and an email with the event ticket.

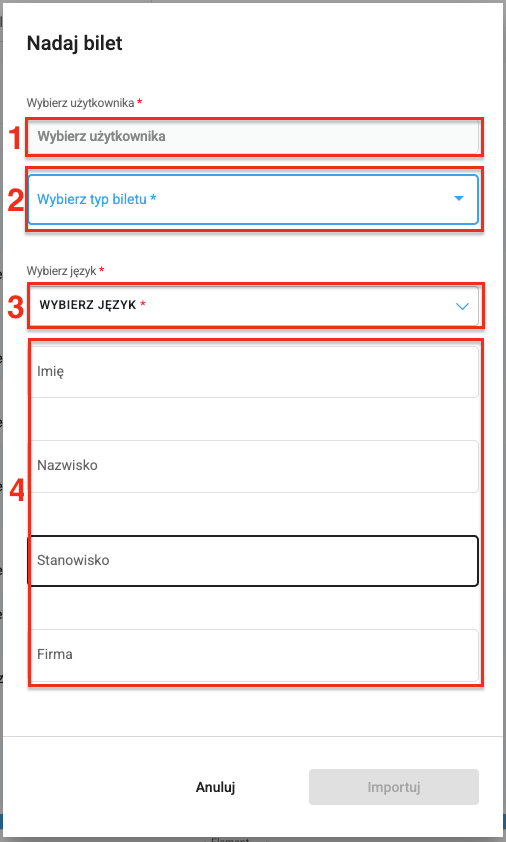
Go to the TICKETS tab, choose Assign ticket, and then:
Choose the User who should get the ticket
Choose the ticket that should be assigned
Choose the language
Fill in the data printed on the badge
If you prefer to watch the instructions as a video, below you’ll find a tutorial on how to import users to your event:
Have a great event with Meeting Application!
