You can add exhibitors present at your event to the Exhibitors module in two ways. One by one via the admin panel (you can learn more about adding exhibitors in the article 👉Exhibitors) or by importing all exhibitors using a bulk file. This article explains how to correctly create a file with data of all exhibitors and how to import it into your event.
Data for import should be saved in a file with the csv extension. Programs like Excel, Numbers (an app for iOS users) and Google Sheets let you export to this format.
Before exporting the data, make sure the file is saved in the Unicode UTF-8 encoding system. If the file is saved in a different encoding system and an error pops up when importing it in the panel, you should convert the file using a free online tool.
To import exhibitor data into the admin panel, go to the Exhibitors module in the Create tab and click the cloud icon with an upward arrow in the top right corner:
Then, using the Template XLSX or Template CSV button, download the ready-made template
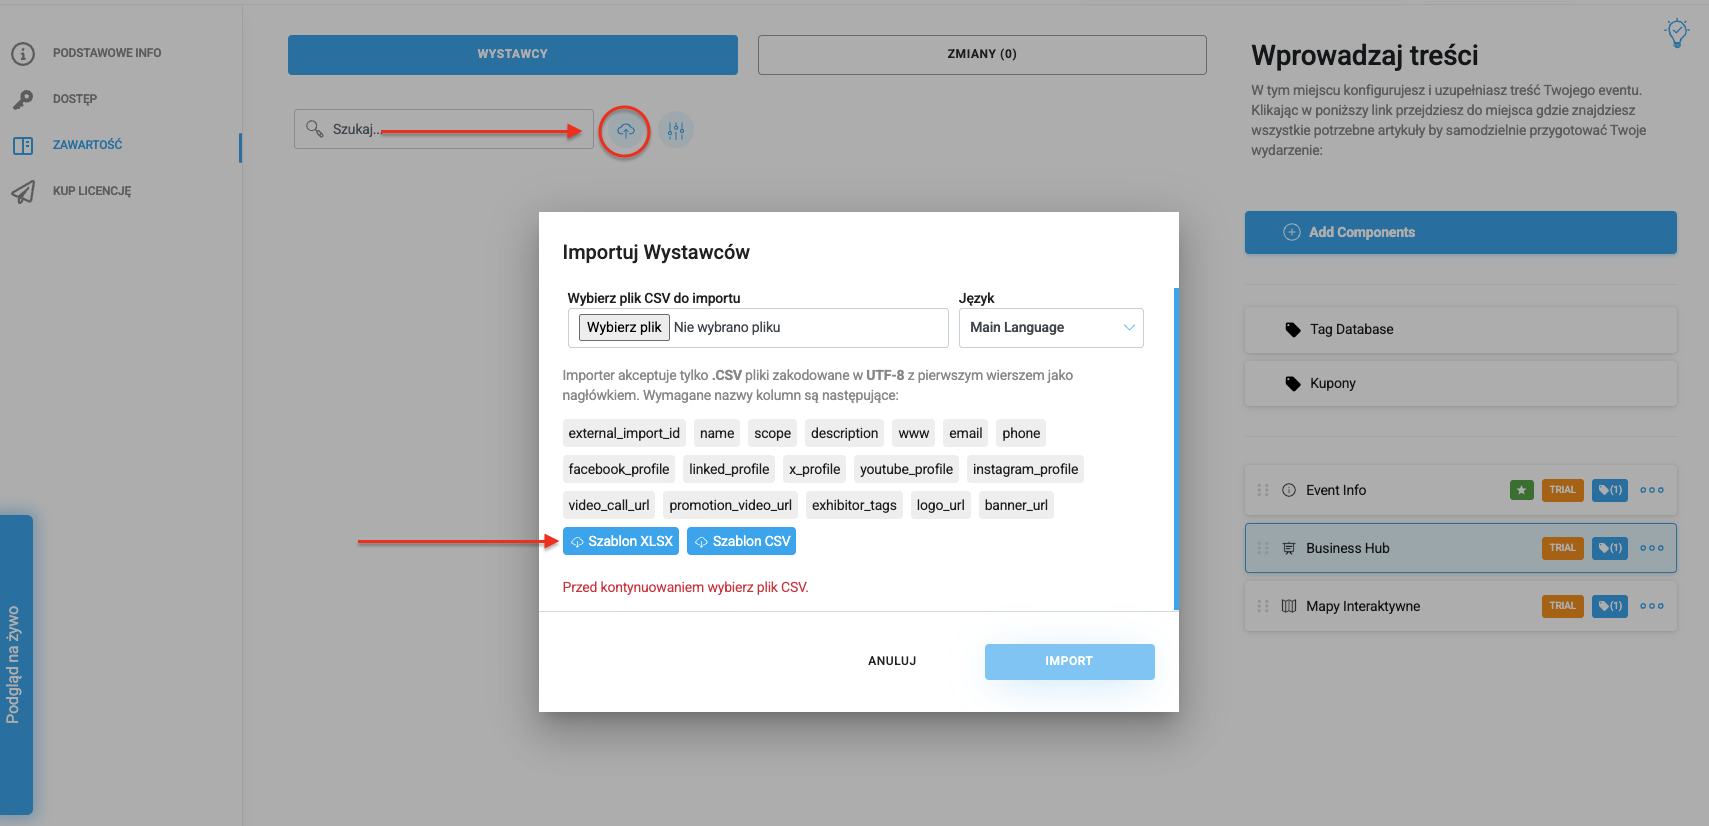

You can prepare a file with the csv extension on your own, which will contain the following columns: externaln_import_id, name, scope, description, www, email, phone, facebook_profile, linked_profile, x_profile, youtube_profile, instagram_profile, video_call_url, promotion_video_url, exhibitor_tags, logo_url, banner_url. These columns should appear in the order listed above. None of the columns can be omitted in the file. Additionally, the columns must be set in the order listed above. Otherwise, the import won’t be completed successfully. If you don’t want to fill in all the columns, you need to leave the column name in the file and just not fill in the cells below it. The only required columns are: uuid and the exhibitor name – name.
externaln_import_id – this is the exhibitor’s identification number. Each exhibitor should be given an individual one. It can consist of a combination of digits and numbers, but we recommend using digits starting from 1 to infinity.
name - this is the exhibitor’s name
scope - this is the scope of activity, the industry in which the exhibitor operates
description - this is the exhibitor’s description
www - this is the URL of the exhibiting company’s website
email - contact email directly to the exhibitor
phone – company phone number, this field is optional. When filling it in, remember that the number should be entered without spaces, otherwise it won’t be displayed in the app; this also applies to numbers with a country code. When entering such a number, skip the "+" sign. Examples: 222333444, 48999888777.
logo_url i banner_url - these are graphic files that will be added as the exhibitor’s logo and banner. Remember that when importing files in the form, it’s necessary for the link to be placed on an accessible server, e.g. Google Drive with open access or Dropbox.
exhibitor_tags - these are exhibitor tags that let you filter in the mobile app and on the event landing page
Links to social media should start with “https://”. Skipping these characters will result in the user not being redirected to the target page. Example link: https://www.linkedin.com/in/nazwa-profilu-użytkownika
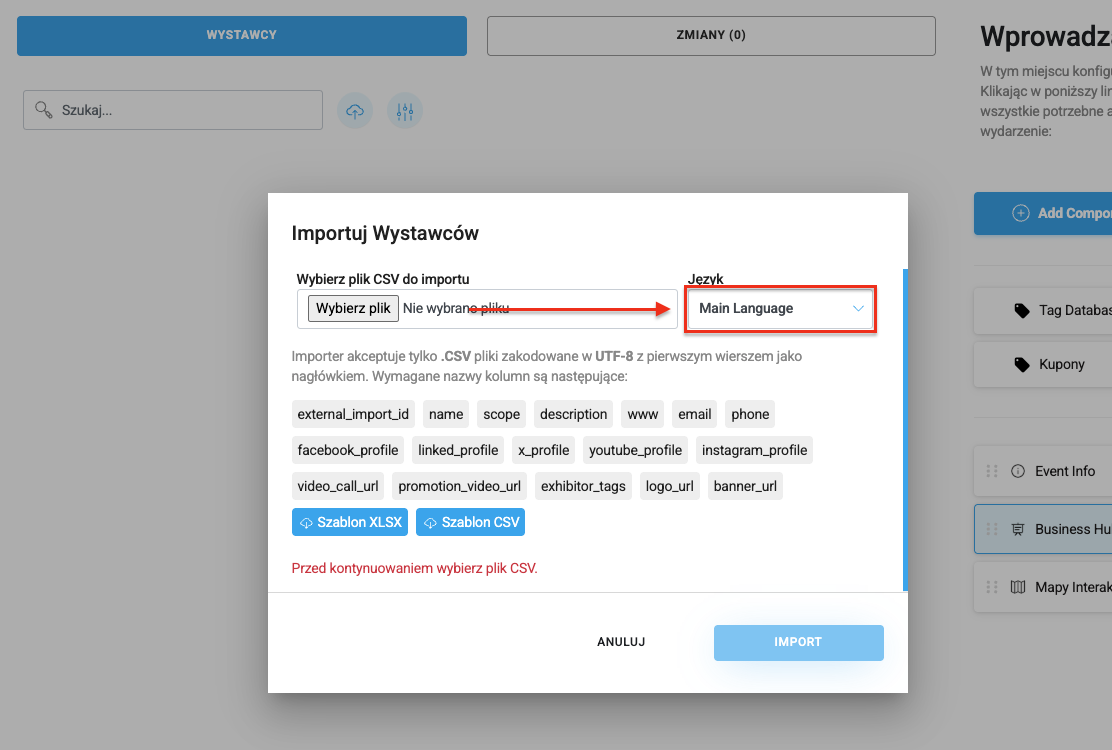
If you already have a csv file ready to import, click the Choose file button and upload the document you prepared earlier. Then click Import, and all speakers will be uploaded to the system.


Translating exhibitor profiles into other languages is only possible when language layers have been added to the event while filling in the Basic Info section.
If you want to import another language layer in the Exhibitors module, you need to prepare a new csv file in which the scope and description columns are translated. The rest of the columns shouldn’t be changed. The profiles of individual exhibitors in both files should have the same order and identical UUID numbers.
To add another language layer, first choose the language from the dropdown list, then follow the same steps as for the first layer:
If, after importing exhibitors to your event, you need to make some changes or add new ones, you can edit the previously added file and import it again. All changes made to exhibitors that are already published will be updated. You can also add new exhibitors with all their information, assigning them subsequent uuid numbers. After editing your file, import it again in the admin panel.
ATTENTION!
Remember to keep the uuid numbers of all exhibitors the same. This will ensure the correct update of the data entered earlier.
Have a great event with Meeting Application!
