Coupons in Meeting Application are a simple way to offer participants various items – from lunch and drinks to welcome packages and promo materials. The participant shows their coupon, the vendor scans the code, and hands over the product or service. Simple, right?
To distribute coupons effectively, you first need to create participant groups in the Create → Content → Tag Database.
When creating a new coupon, the system will automatically assign it to the specified group of recipients. Remember, in our System, each coupon can only be assigned to one group! If you want to create a new group for participants:
go to the section Create → Content → Tag Database
in the User Groups section, click “Add user group.”
create groups that will be assigned to coupons and to users who are eligible for such coupons, e.g., lunch, book, socks.
Distributors - exhibitor profile
For the coupons to be scanned and redeemed, you must create Exhibitor Profiles – that is, companies, food trucks, or other entities that will provide products/services after scanning the coupon in the app.
Add the 'Exhibitors' module
Go to: CREATE → COMPONENTS and activate Exhibitors.
Add an exhibitor profile
Go to: CREATE → CONTENT → EXHIBITORS
Enter:
name,
description,
photo/logo.
If you want, you can expand the profile – instructions can be found in this article.
Add the 'Coupon Scanner (Moderator)' module
In: CREATE → COMPONENTS activate the module Coupon Scanner (Moderator).
Thanks to this, designated people will be able to scan coupons.
Make sure the people scanning are on the User list
They must already be registered for the event – either on their own or via import.
Assign a moderator role
Go to: MANAGE → USERS, find the person, click the three dots next to their name, and select Add exhibitor moderator.
Indicate which booths (exhibitors) this person should be connected to.
Set up a visibility group
For both the Coupon Scanner (Moderator) module and the people who will be moderators, set up a group, e.g., 'Support' – only people in this group will see the scanning module in the app.
 How does scanning with the app work?
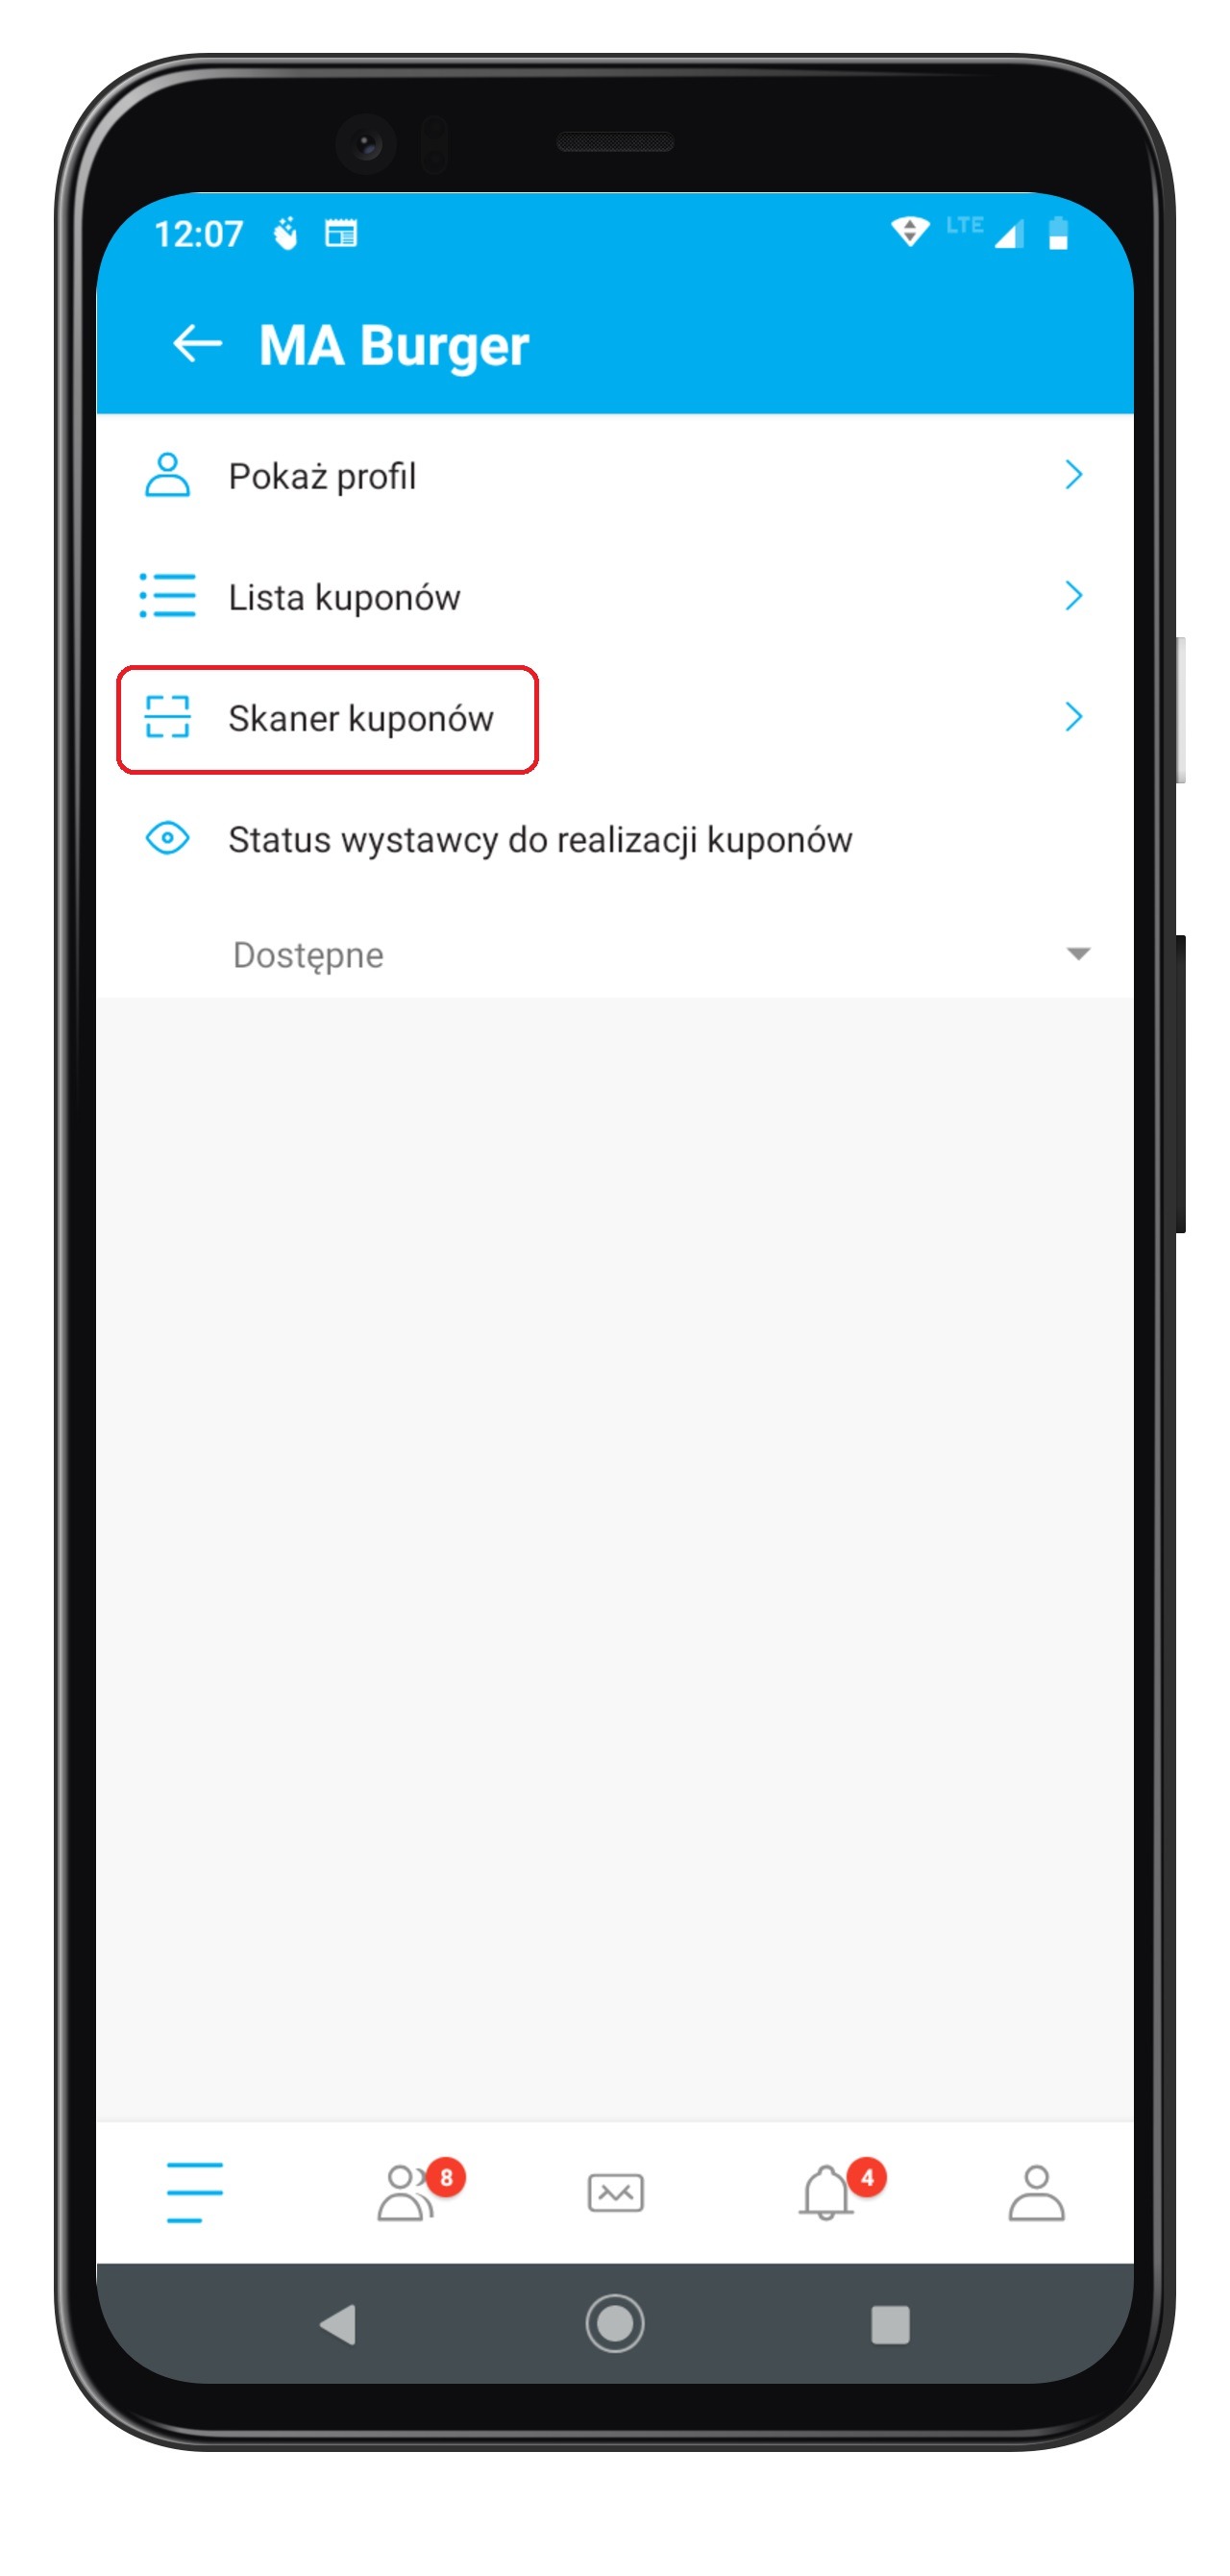
Moderators see a Coupon Scanner module in the app.
They can scan a participant's coupon and issue the product/service assigned to it.
When products run out, they can change the exhibitor's status to Sold Out – participants will then see that the booth is no longer issuing anything.
You can read more about coupon verification later in the article.
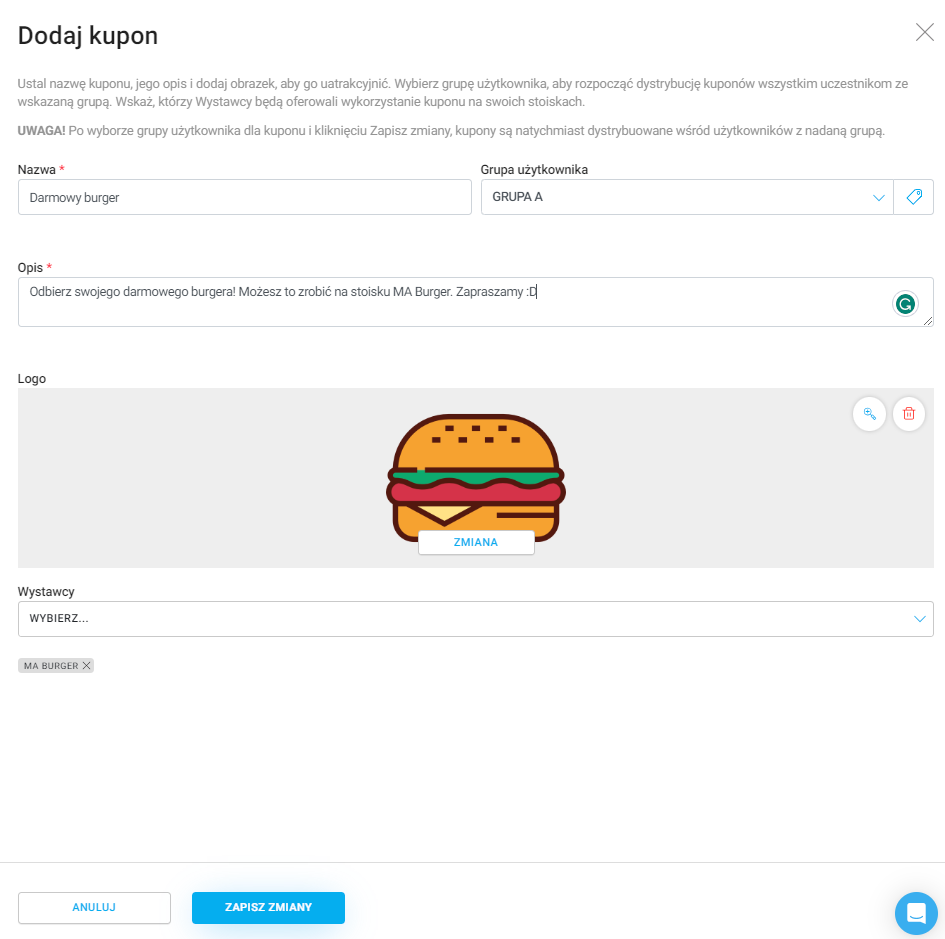
Go to the tab: CREATE → CONTENT → COUPONS
Click the button ADD COUPON.
Fill in all the fields in the form on the right-hand side:
Name: short and easy to understand, e.g., “Lunch”, “Coffee”, “Giftpack”
User group: pick the group you want to assign the coupon to
(if you don't have groups yet, create them in CREATE → CONTENT → TAG DATABASE)
Description: describe what the coupon includes
Logo: add a graphic – drag a file or click “Choose file”
Suppliers: choose who will fulfill the coupon (e.g., coffee stand, catering company)
Click SAVE CHANGES.


Coupon distribution can take several forms:
Automatic
Purchasing both a ticket and an add-on assigns the participant to a group. Add a coupon to the ticket group so everyone buying an event ticket gets it.
Example: buying a Standard ticket and adding a Dinner add-on assigns the participant to the STANDARD and DINNER groups. These groups are visible only to the event admin in the management panel and can be linked to multiple coupons.
Manual
You can assign a group to individual participants from the admin panel, in the Manage/Participants section. After finding the participant, select the three-dot icon on the right side of the row with their information and click Edit user groups. Use this method for custom coupon distribution scenarios, e.g., when only one company or a group of VIPs needs to get additional options.
Importing a participant list or even adding a single participant to the panel, you can assign a participant group, which will automatically give them access to the coupon.
Special
Using an additional tool - Content unlocker, you can create special QR codes that assign participants to a specific group when scanned, and as a result, grant them a coupon associated with that group. This enables the distribution of coupons that can be accessed under special circumstances—e.g., a QR code for the content unlocker displayed after a prestigious presentation will offer participants a free coffee. Keep in mind that a participant who already has a coupon tied to a specific group will not receive another coupon of the same type.
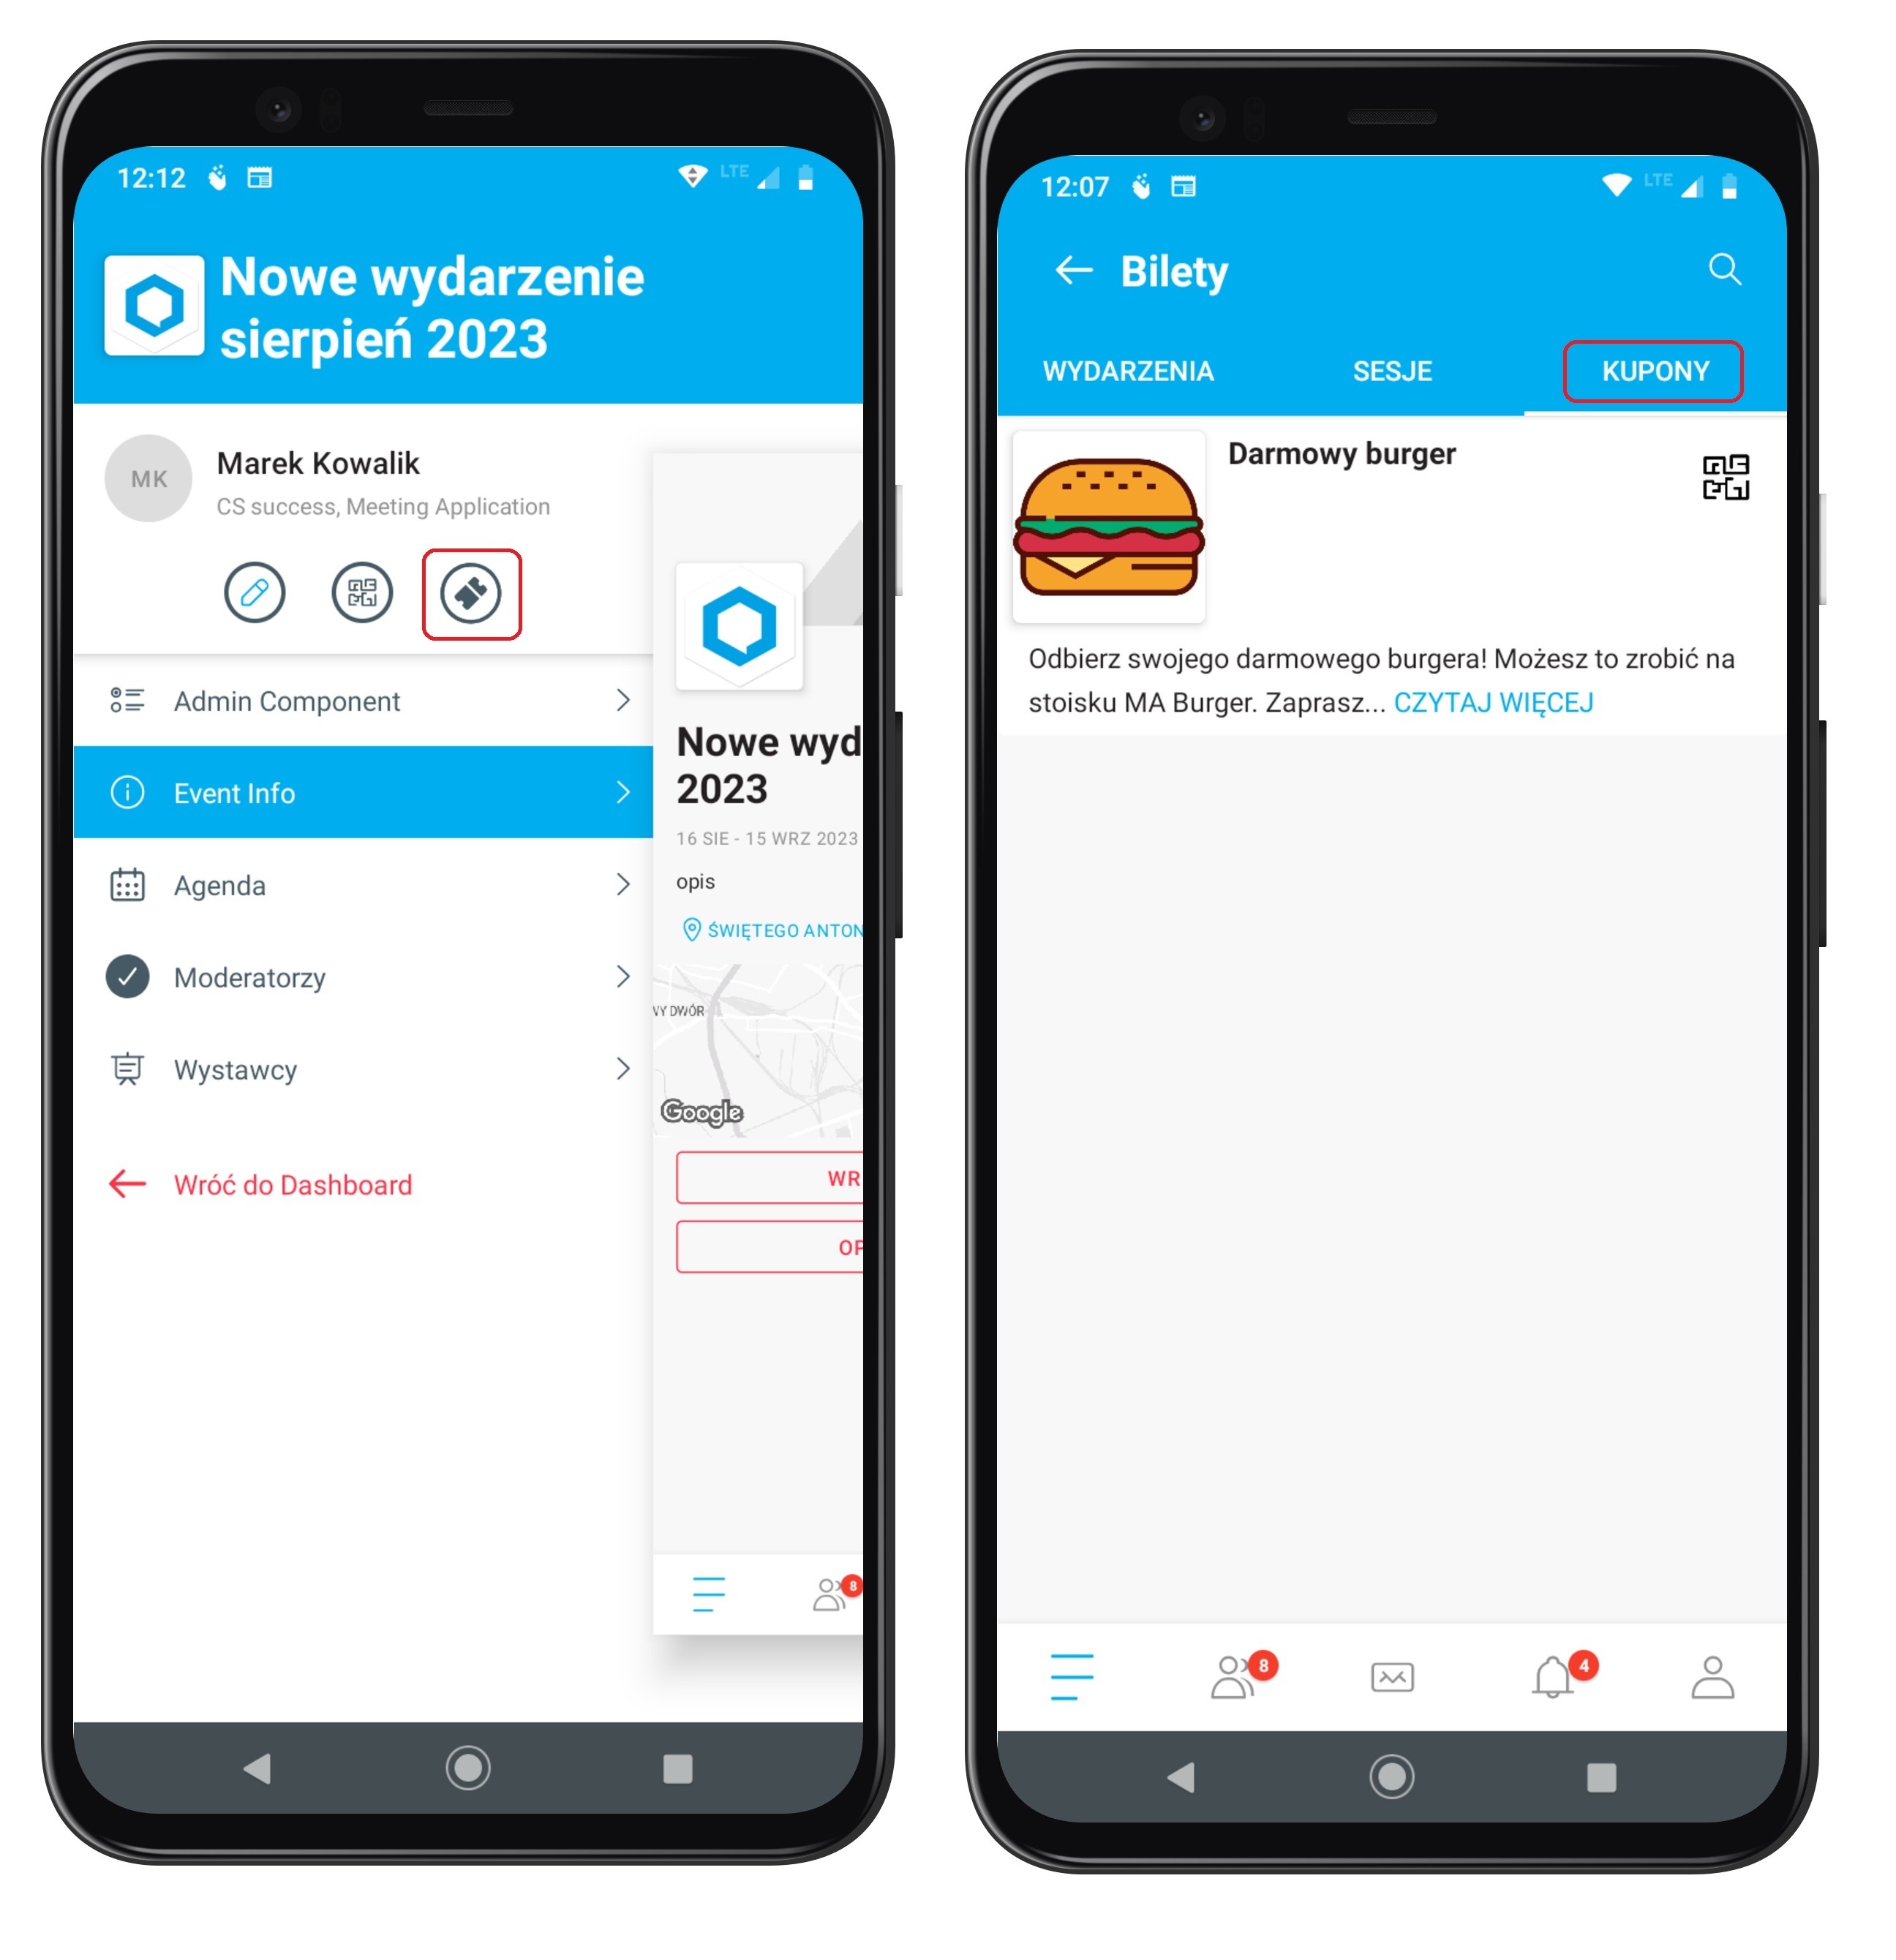
To use a coupon, the participant approaches the Exhibitor's booth and selects the ticket icon in the app, then goes to the Coupons section. From the collected coupons, they choose the one they want to use and show it to the Exhibitor's Moderator.

The moderator logs into the Exhibitor's profile and starts the scanner for a specific product, then points it at the coupon shown by the participant.

If the coupon is valid and associated with this Exhibitor, they will see a message confirming the successful scan of the coupon, with the option to confirm its redemption, which will mark it as used, or cancel the scan. Based on this, the Exhibitor provides the relevant product.
Administrator's Perspective
In the same place where you create coupons (panel/ Create/ Content/ Coupons), you can see how many coupons have been issued, and how many of them have been used.
Have a great event with Meeting Application!