Coupons in Meeting Application are a simple way to give participants various goods – from lunch and drinks to welcome packs and promotional materials, all the way to access to a VOD platform with recordings.

In the Meeting Application system, you can adjust how coupons are issued to match the specifics of your event. Think about what the goal of the coupon is: is it a free lunch for everyone, a physical product added in the cart, or maybe an external discount code for a VOD platform?
To add a coupon, go to the CREATE → CONTENT → COUPONS tab and click the ADD COUPON button. Fill in the basic information (Name, Description, Image, Expiration date), then choose one of the three Distribution types:
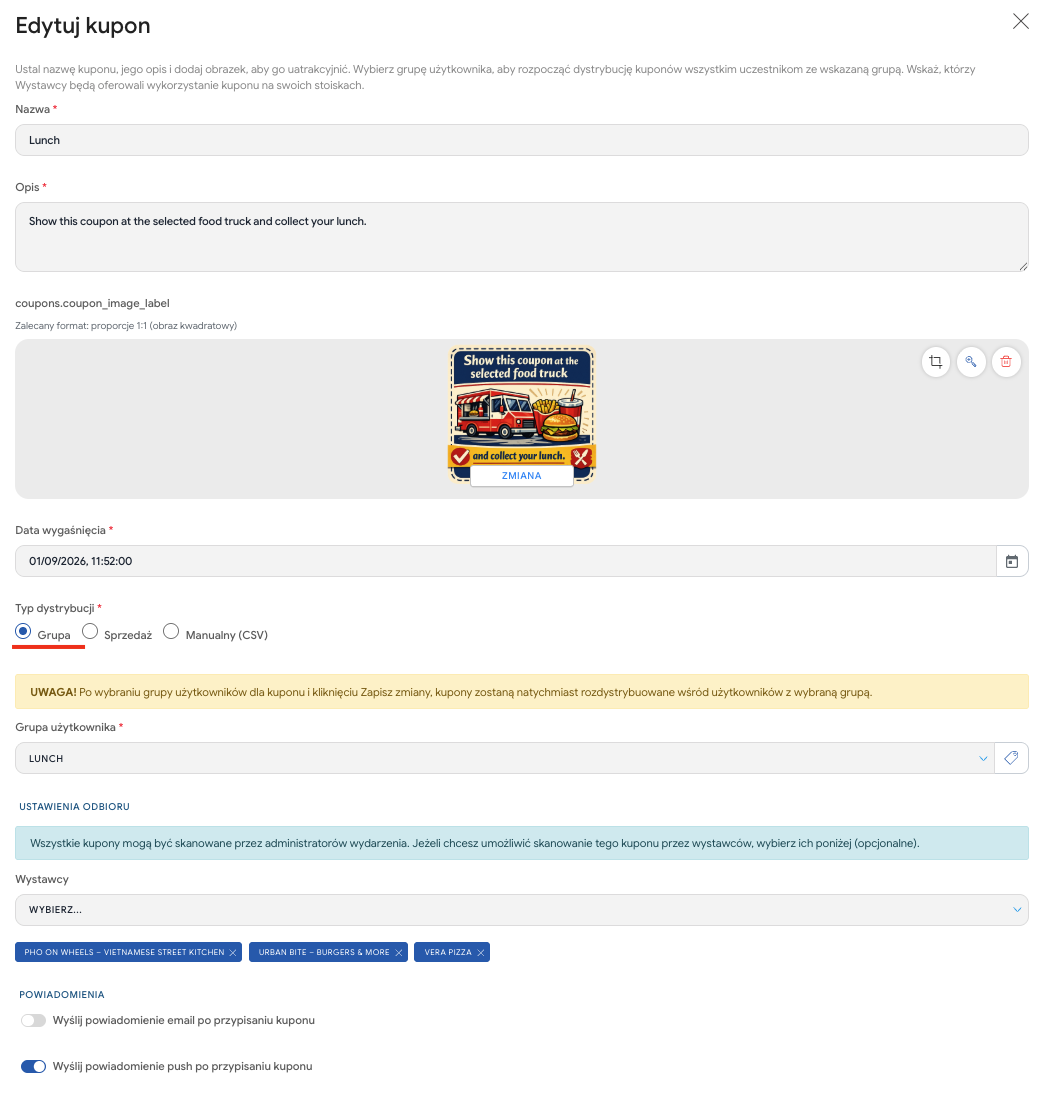
The most popular type for coupons redeemed physically at the event venue, which are intended for a specific pool of people.
Examples of use: Free lunch for staff, a welcome package (giftpack) for every participant, access to the VIP zone.
How it works: You pick a specific User group from the list. The coupon will automatically be assigned to every participant who has (or will get in the future) this group.
Important: After selecting the group and clicking Save changes, the coupons will be distributed immediately among current members of this user group.

Coupon distribution can take several forms:
Automatic
Buying both a ticket and an add-on to it assigns the participant to a group. Add a coupon to the ticket group so that everyone buying an entry ticket to the event gets it.
Example: when buying a Standard ticket type and adding the Dinner add-on, the participant gets the STANDARD and DINNER groups. These groups are only visible to the event admin from the management panel and can be linked even to several coupons.
Manual
You can assign a group to individual participants from the admin panel, in the Manage / Participants section. After finding the participant, choose the three dots icon on the right side of the row with their information and click Edit user groups. Use this method for custom coupon distribution scenarios, e.g. when only one company or a group of VIPs should get extra options.
When importing a list of participants or even when adding a single participant to the panel, you can select the participant’s group, which will automatically give them access to the coupon
Special
With an additional tool - Content unlocker, you can create special QR codes that, when scanned, assign participants to a selected group and, as a result, grant them the coupon linked to it. This lets you distribute coupons that can be available in special circumstances, e.g. a QR code for the content unlocker displayed after a prestigious presentation offers participants a free coffee. Keep in mind that a participant who already has a coupon linked to a given group will not receive a second coupon of the same type.
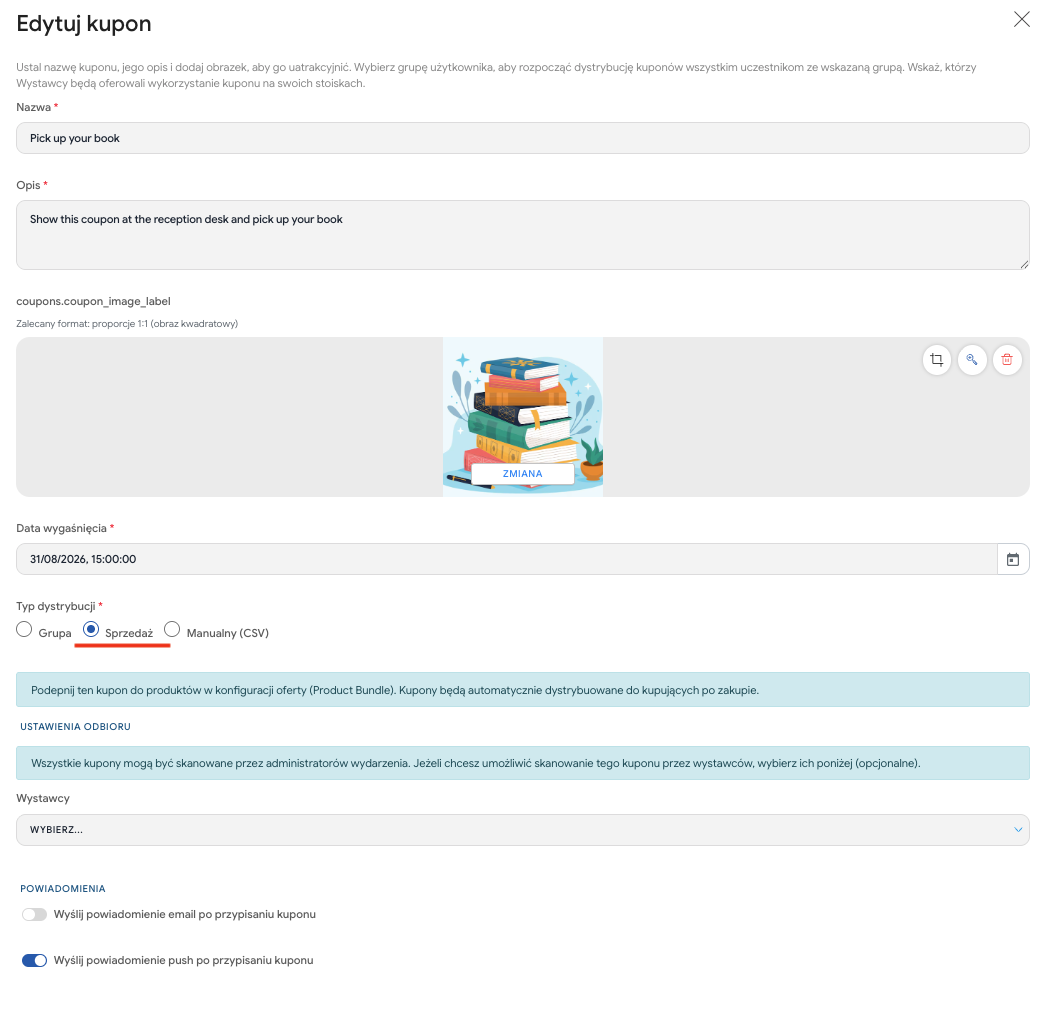
A type dedicated to monetizing the event and doing up-selling. You use it when the coupon is linked to a paid (or free) product in the cart.
Examples of use: Buying the speaker’s book, paid parking spot reservation, a limited gadget bundle added to the ticket.
How it works: Choosing this option means that the coupon is created but doesn’t go straight to any participant. You need to go to the sales module and link it to a specific ticket, add-on, or workshop (in the Product Bundle section). The coupon will be issued to the participant automatically only after the purchase is successfully completed.
Learn more about sales configuration from 👉THIS ARTICLE.
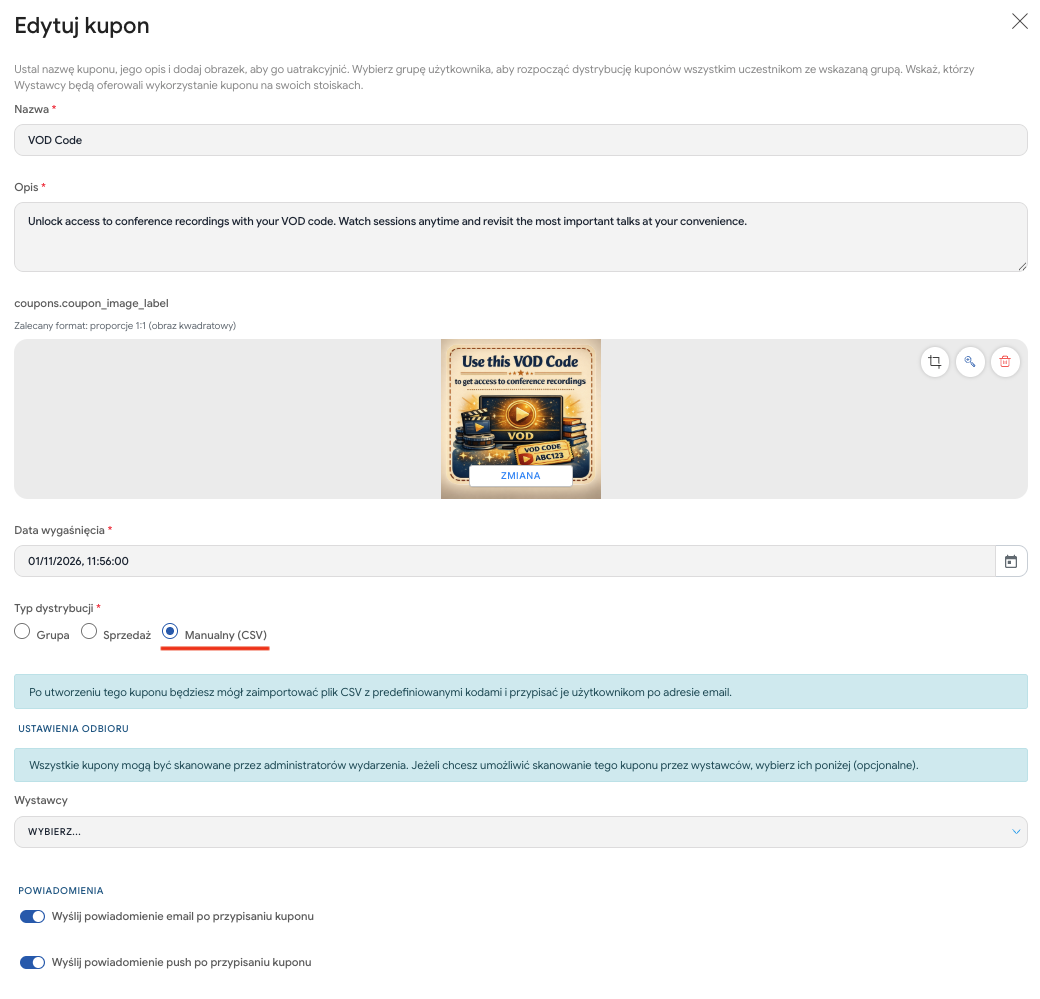
A feature for special tasks, perfect for distributing external alphanumeric codes that participants don’t scan at booths but instead type into external portals.
Examples of use: A unique access code to a VOD platform with recordings, discount codes for Uber Eats, personalized discount codes for the next edition of your event.
How it works: In the first step you create a coupon “shell” with instructions (e.g. “Go to vod.pl and enter the code below”). After saving such a coupon, the system will let you import your own CSV file. In this file you assign a specific string of characters (e.g. VOD-ABC123) to the email address of the selected participant.
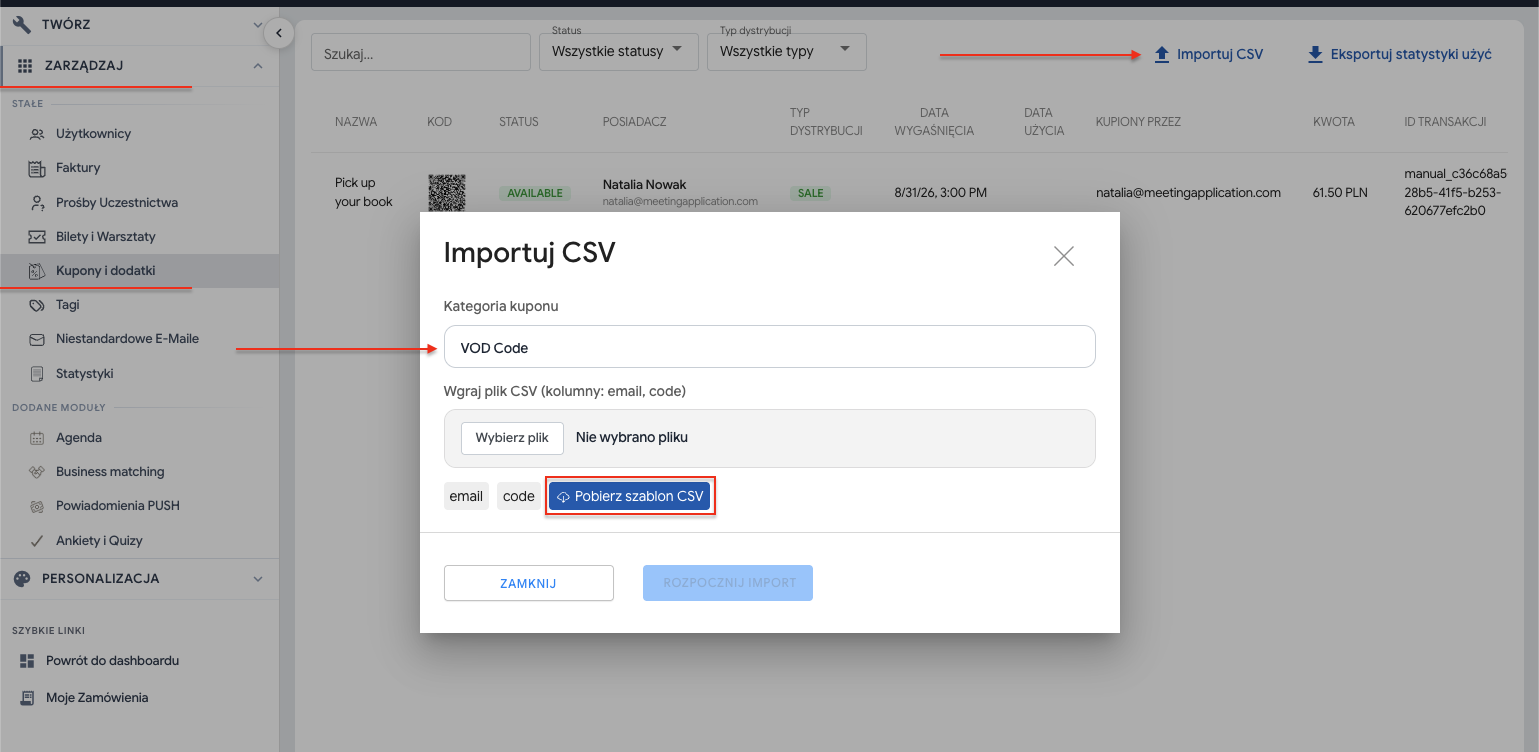
After creating the coupon, go back to the main list view in the MANAGE → COUPONS & ADD-ONS tab.
In the top right corner, click the Import CSV button.
In the import window, in the Coupon category field, enter the exact name of the coupon you just created (e.g. VOD Code).
Upload the prepared CSV file. The system requires a simple format: the file must contain two columns: email (participant’s address) and code (a unique string of characters assigned to that person). (Hint: If you’re not sure about the correct file structure, use the Download CSV template button visible in the import window).
Click Start import. The system will immediately link the uploaded codes with the appropriate users.
For coupons to be scanned and redeemed by people who are not admins, you need to create 👉 Exhibitor profiles – meaning companies, food trucks or other entities that will hand out products/services after scanning the coupon in the app.
Add the “Exhibitors” module
Go to: CREATE → COMPONENTS and activate Exhibitors.
Add an exhibitor profile
Go to: CREATE → CONTENT → EXHIBITORS
Enter:
name,
description,
photo/logo.
If you want, you can expand the profile – you’ll find the instructions in this article.
Add the “Coupon Scanner (Moderator)” module
In: CREATE → COMPONENTS activate the Coupon Scanner (Moderator) module.
Thanks to this, designated people will be able to scan coupons.
Check if the people scanning are on the Users list
They must already be registered for the event – either on their own or via import.
Assign the moderator role
Go to: MANAGE → USERS, find the person, click the three dots next to their name and choose Add exhibitor moderator.
Indicate which booths (exhibitors) this person should be linked with.
Set the visibility group
For both the Coupon Scanner (Moderator) module and the people who will be moderators, set a group, e.g. “Staff” – only people in this group will see the scanning module in the app.
Moderators see a Coupon Scanner module in the app.
They can scan a participant’s coupon and hand out the product/service assigned to it.
When the products run out, they can change the exhibitor’s status to Sold Out – participants will then see that this booth isn’t handing out anything anymore.

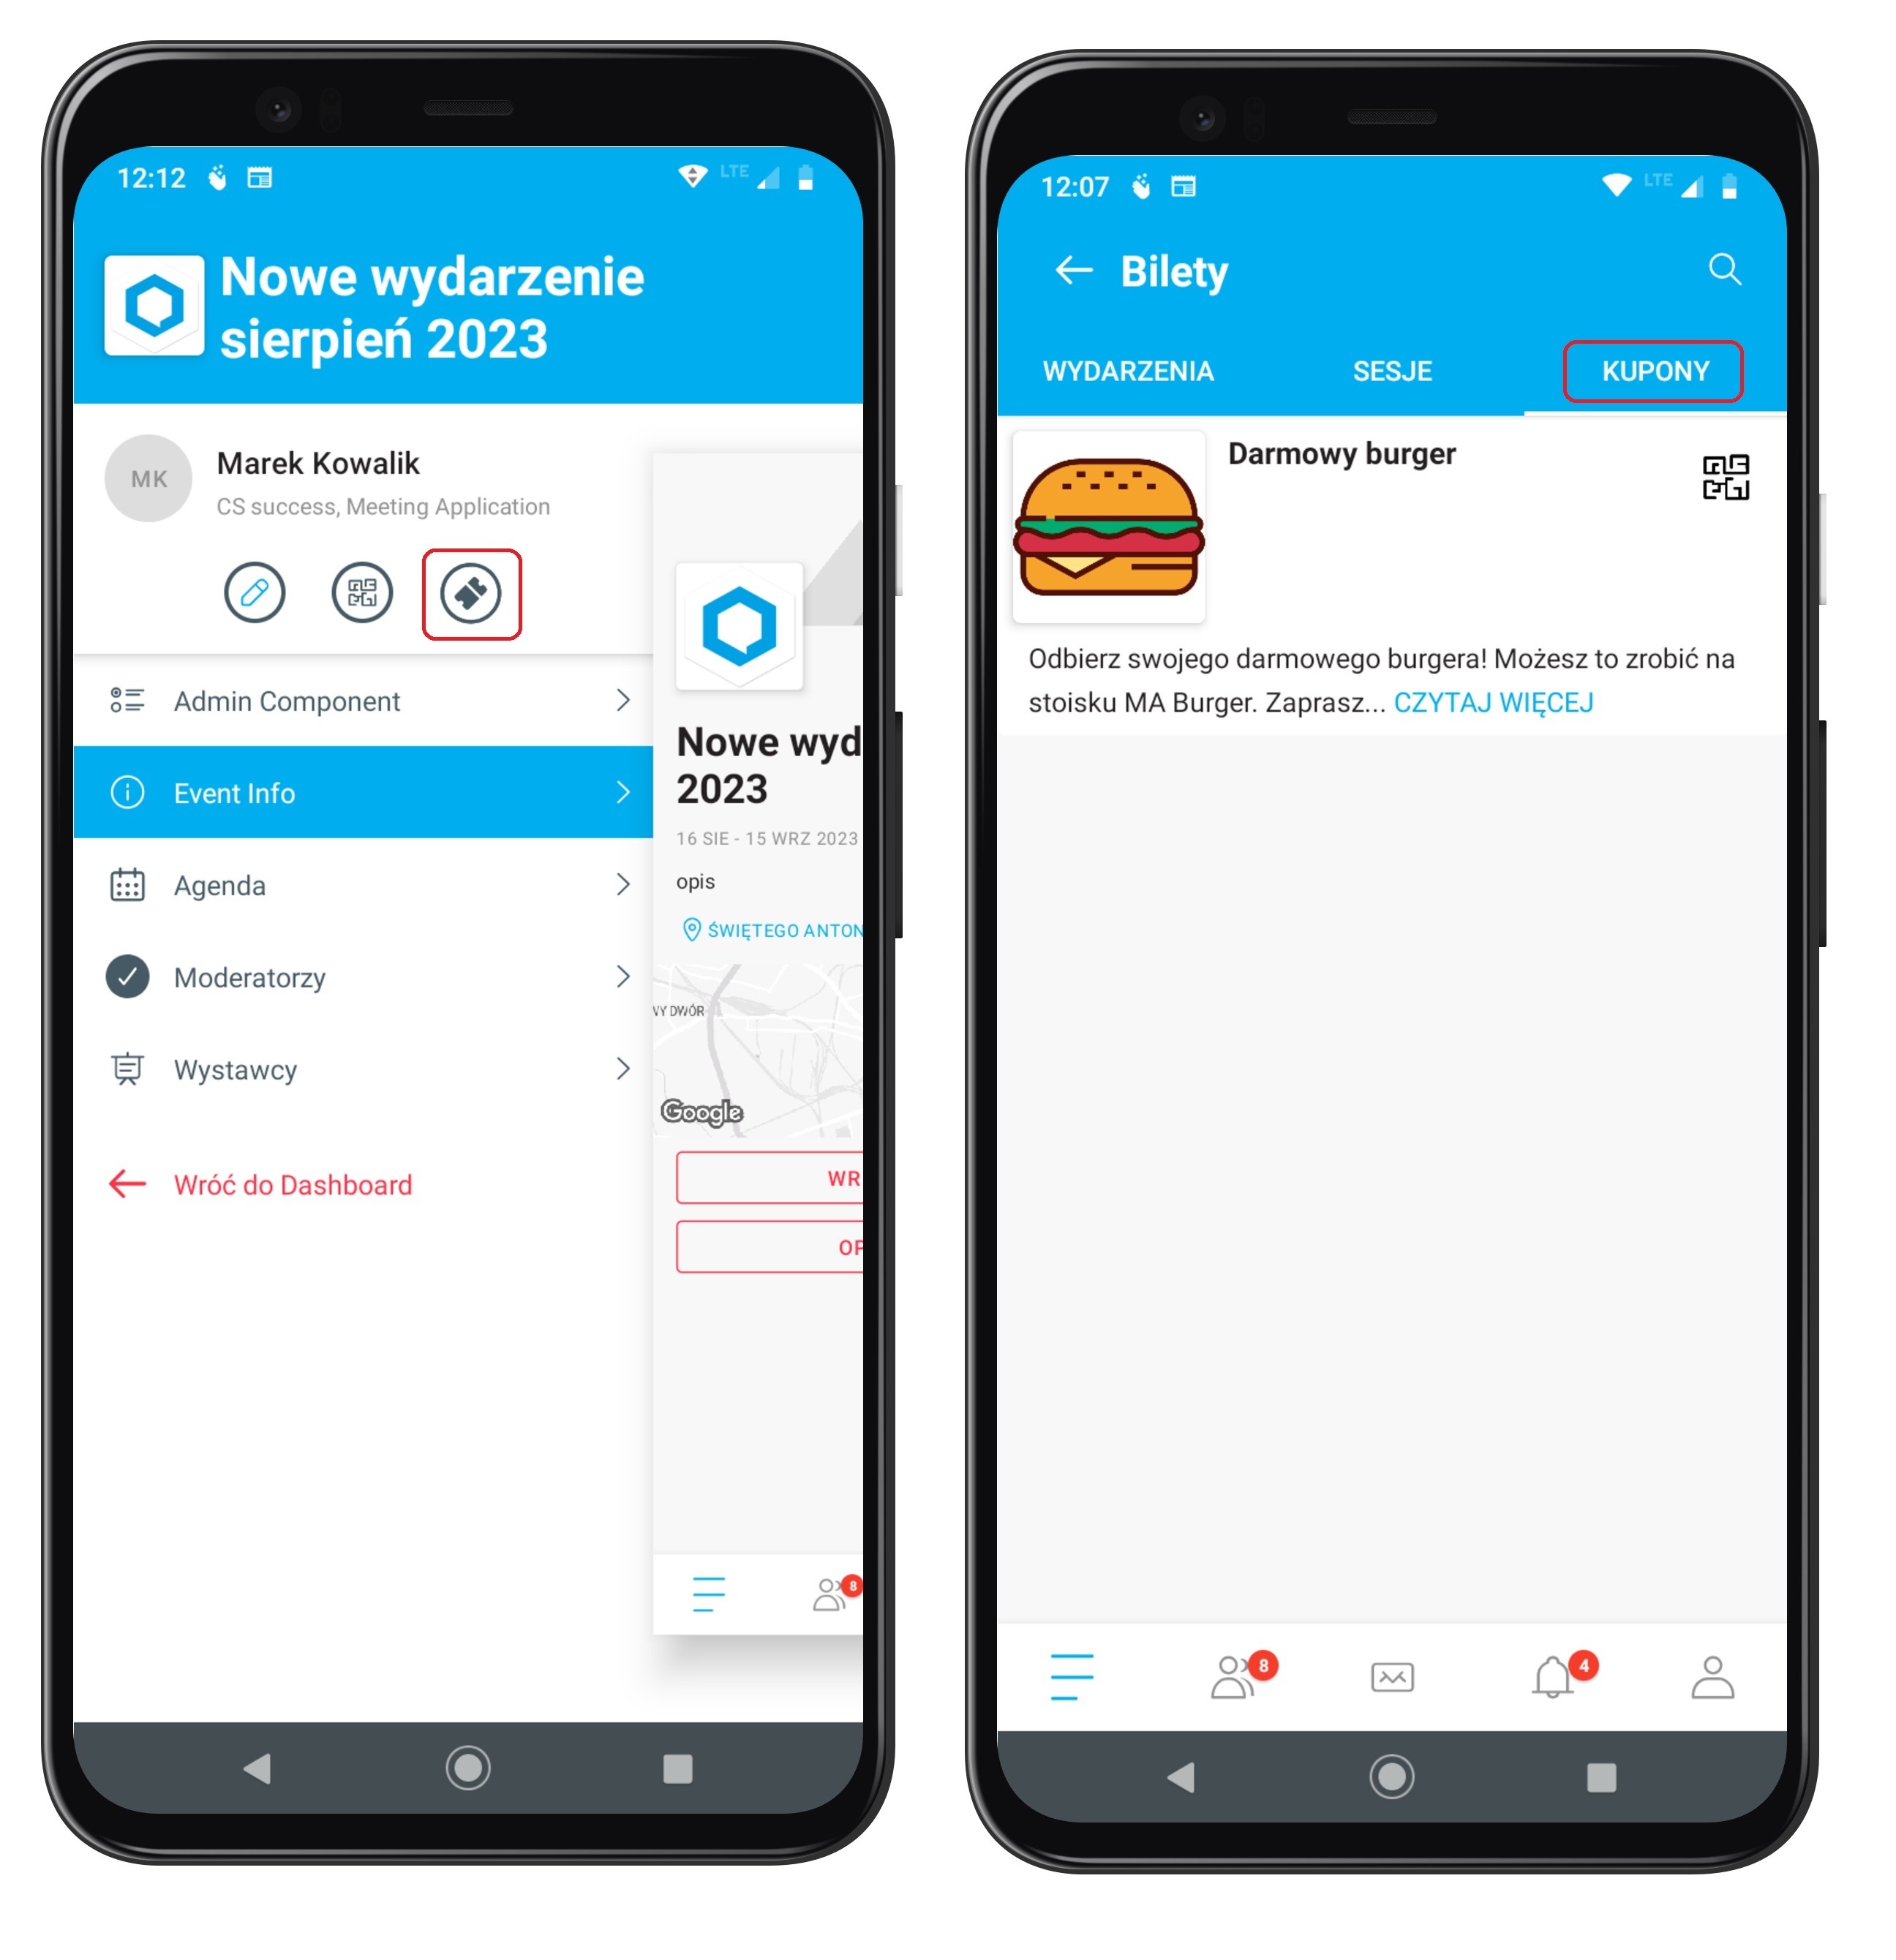
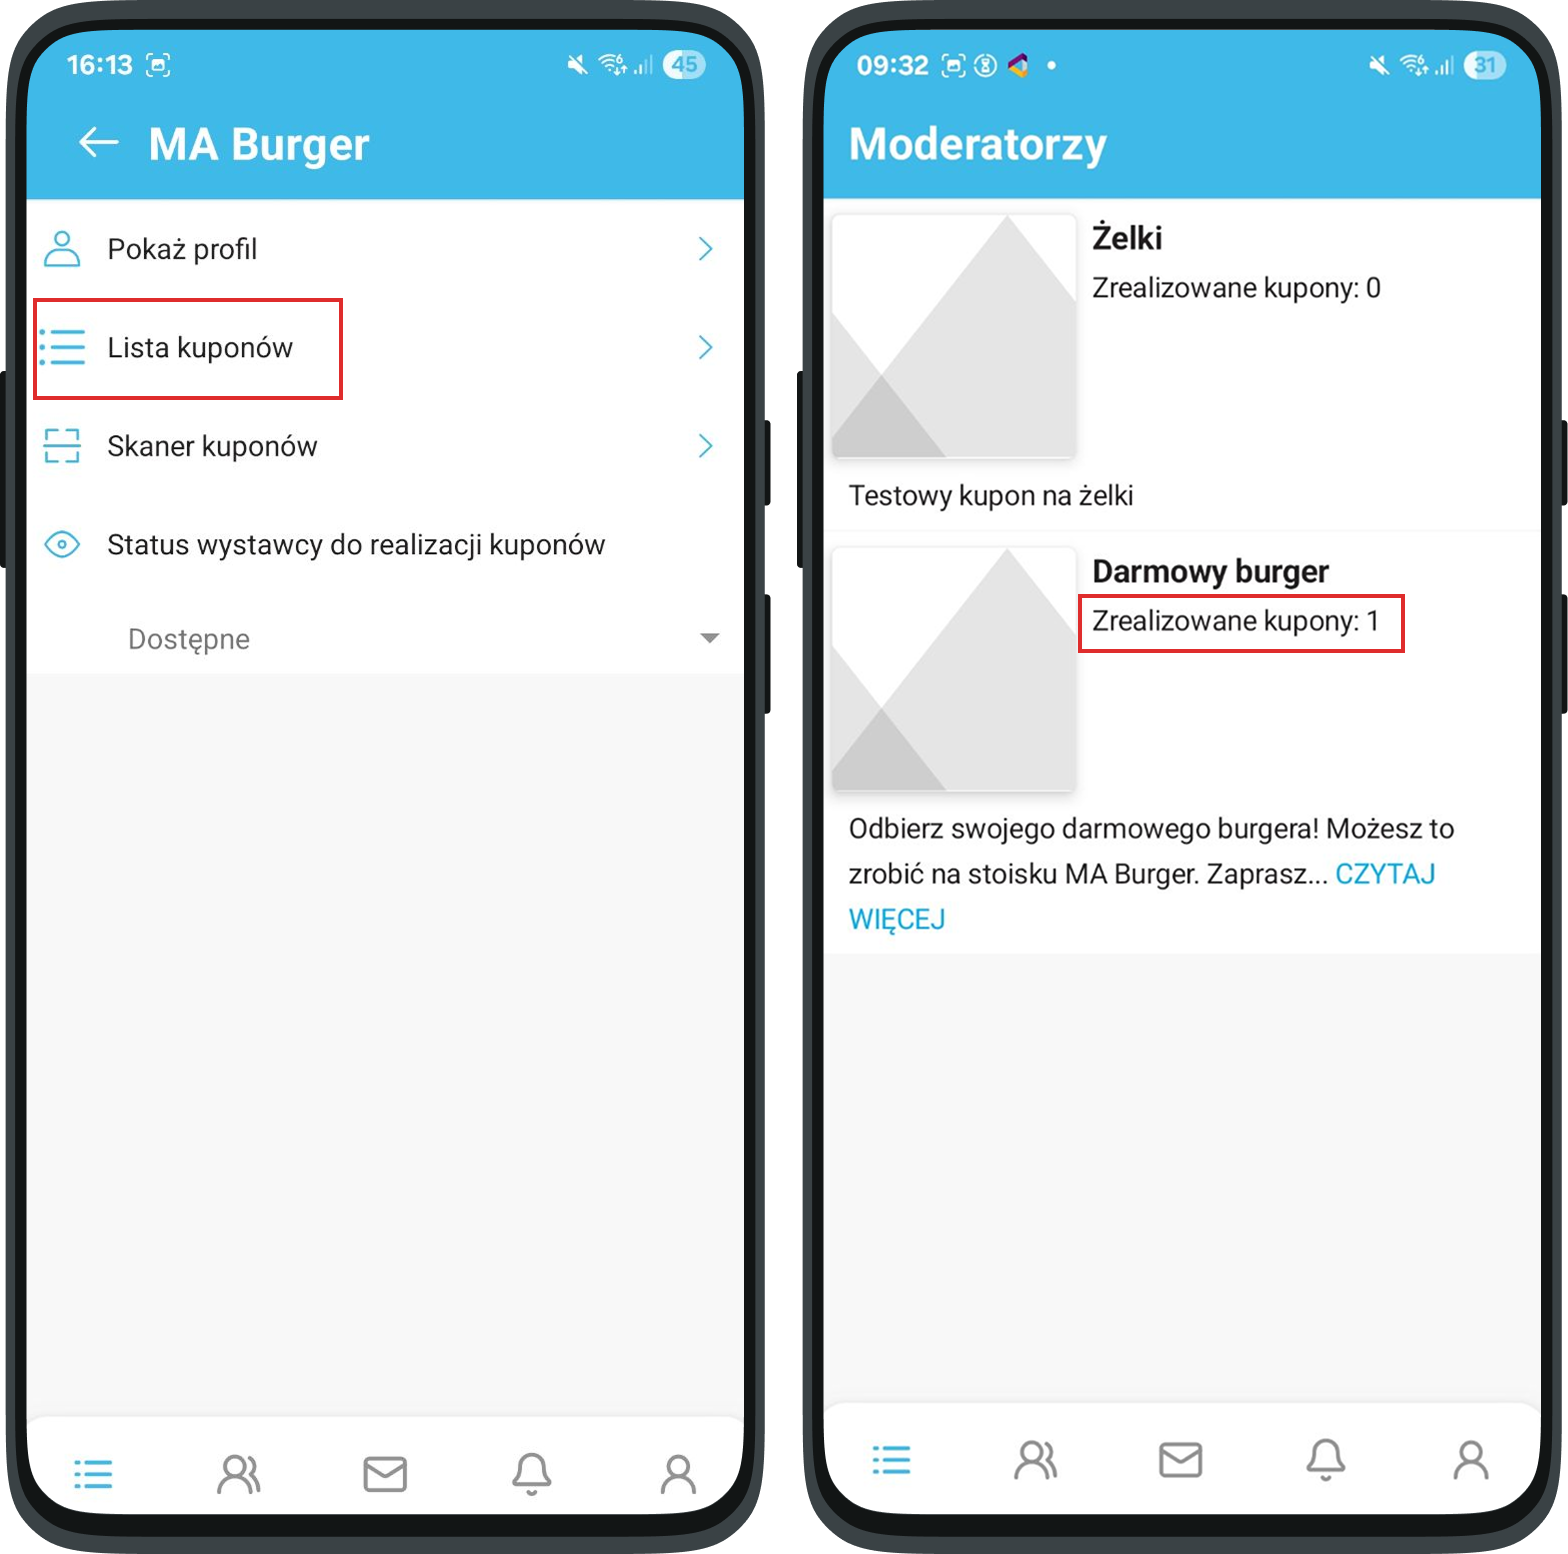
When they want to use a coupon, the participant goes to the Exhibitor's booth and selects the ticket icon in the app, then goes to the Coupons section. From the collected coupons, they choose the one they want to use and show it to the Exhibitor's Moderator.
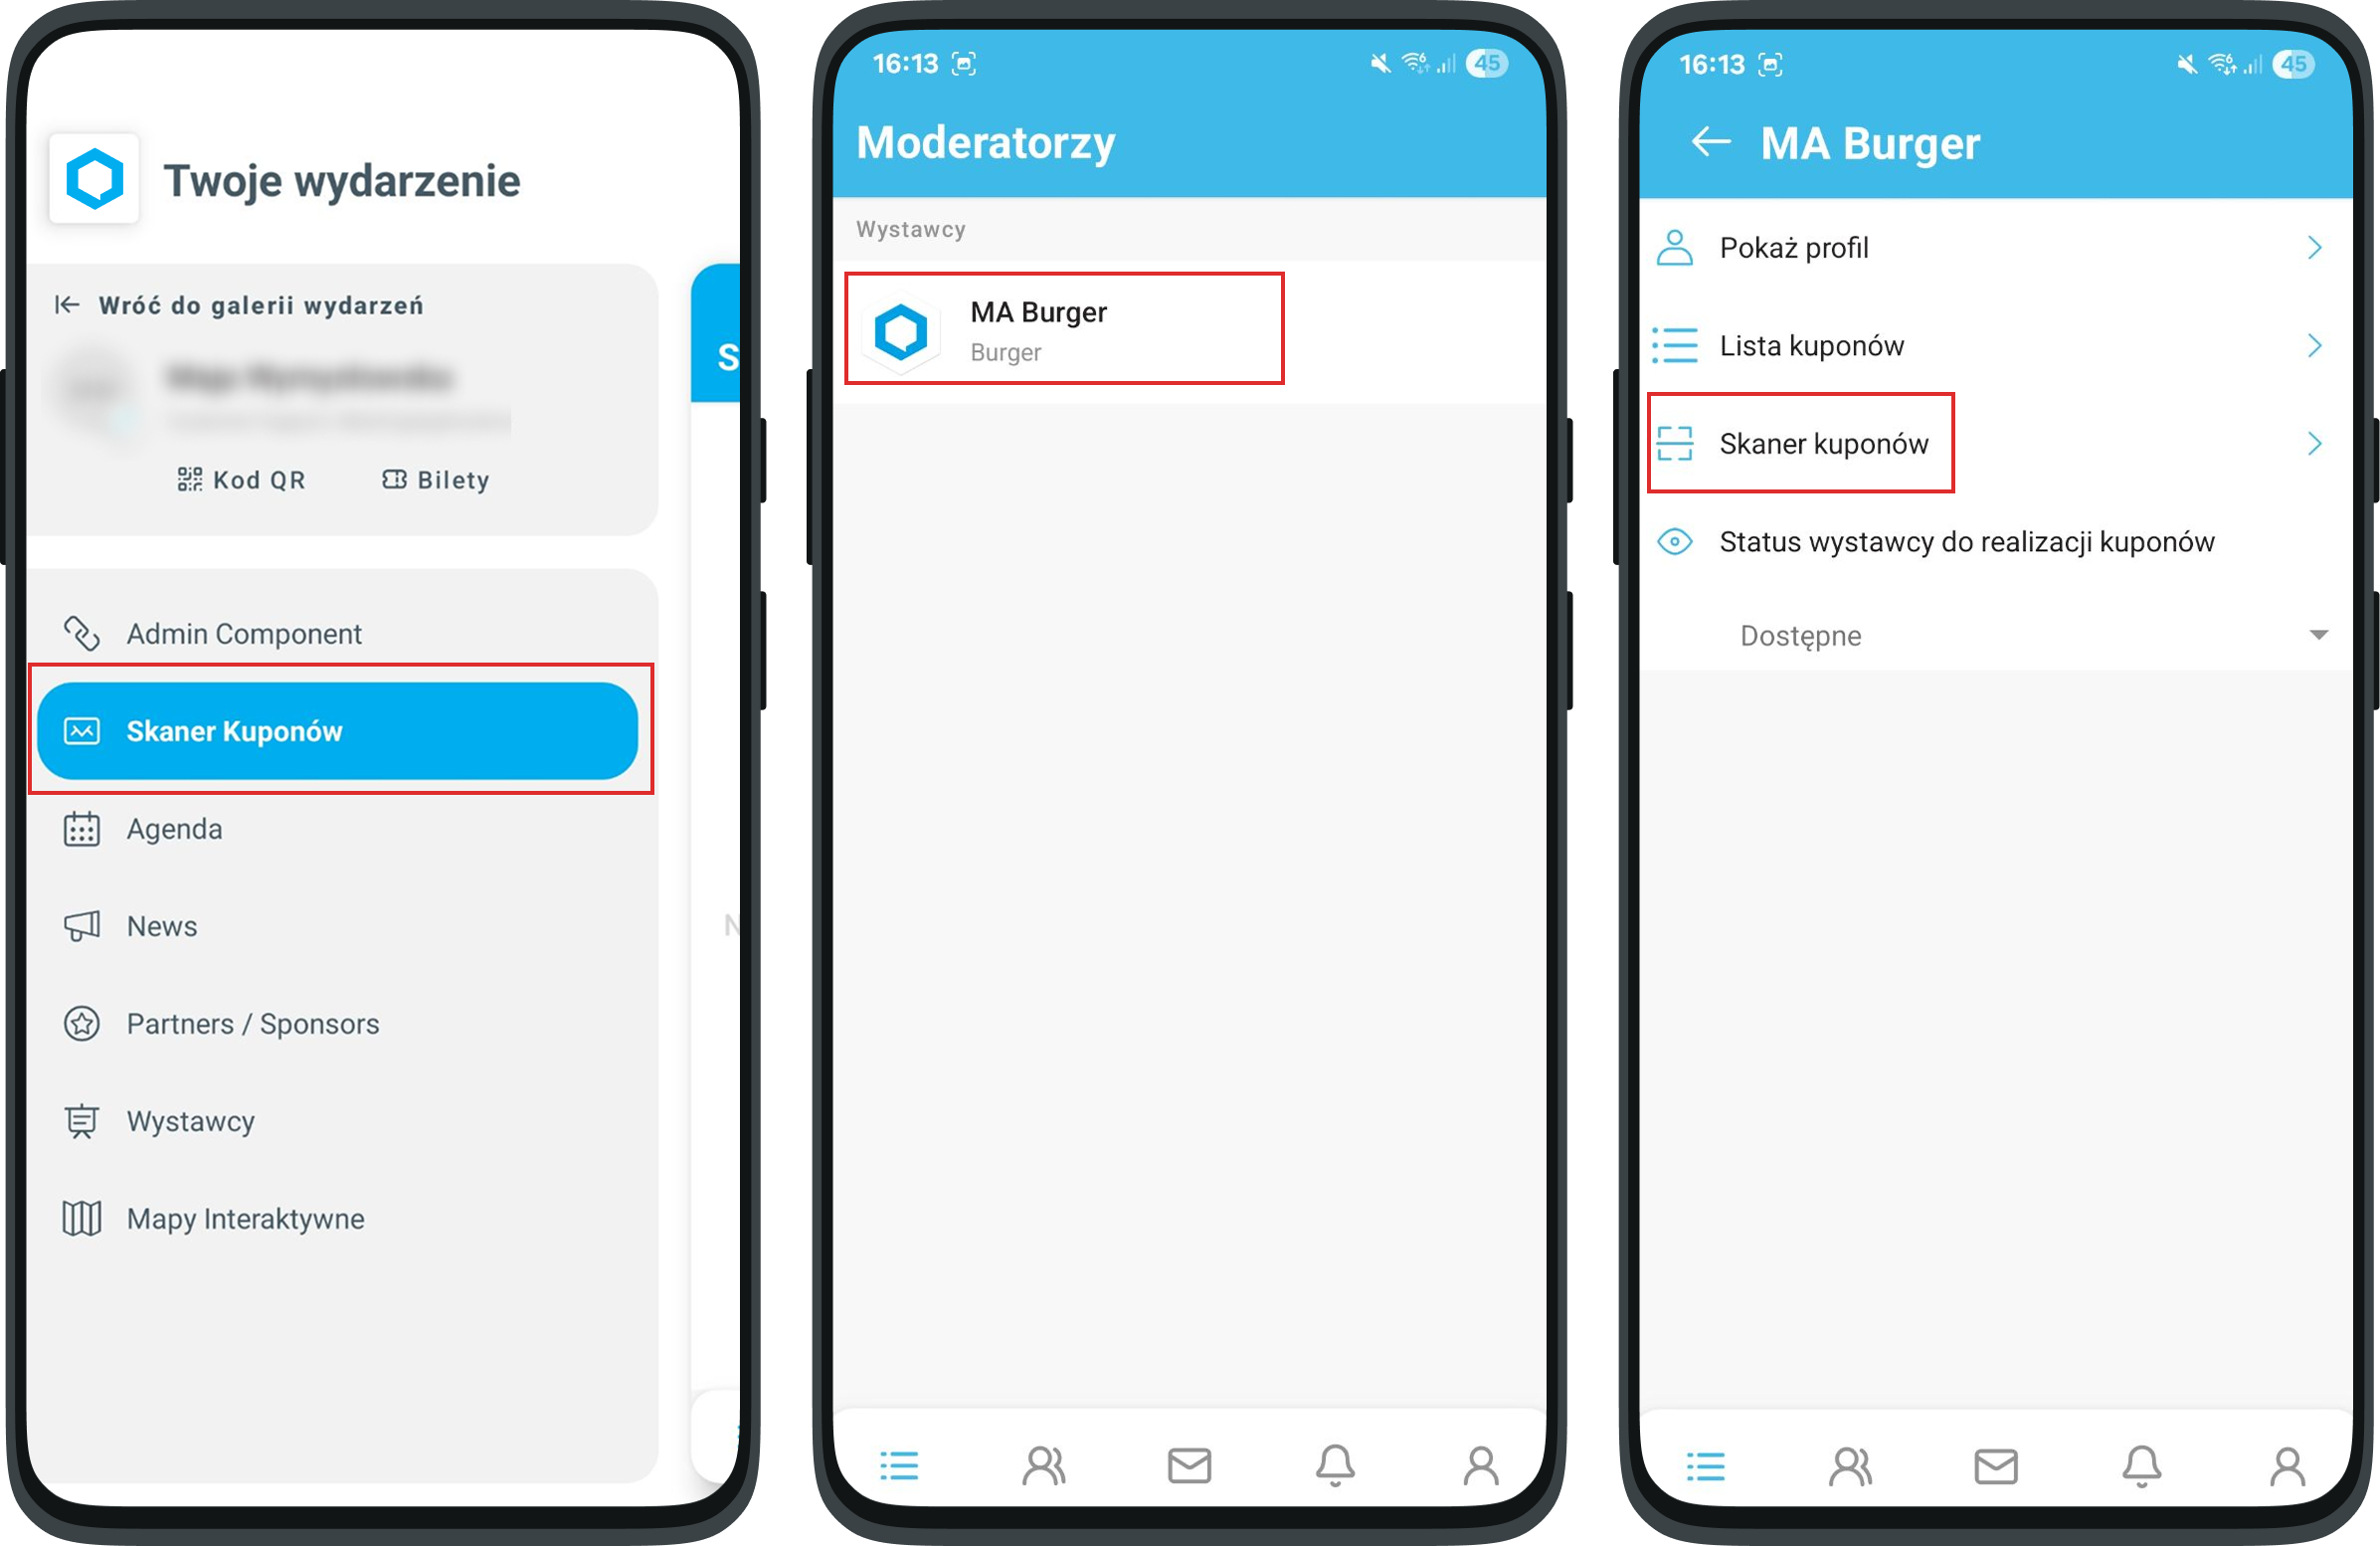
The Moderator opens their Exhibitor profile by selecting the Coupon scanner module from the side menu in the app (however, the event Administrator can freely change the name of this module), and starts the Scanner for a given product, then points it at the coupon shown by the participant.
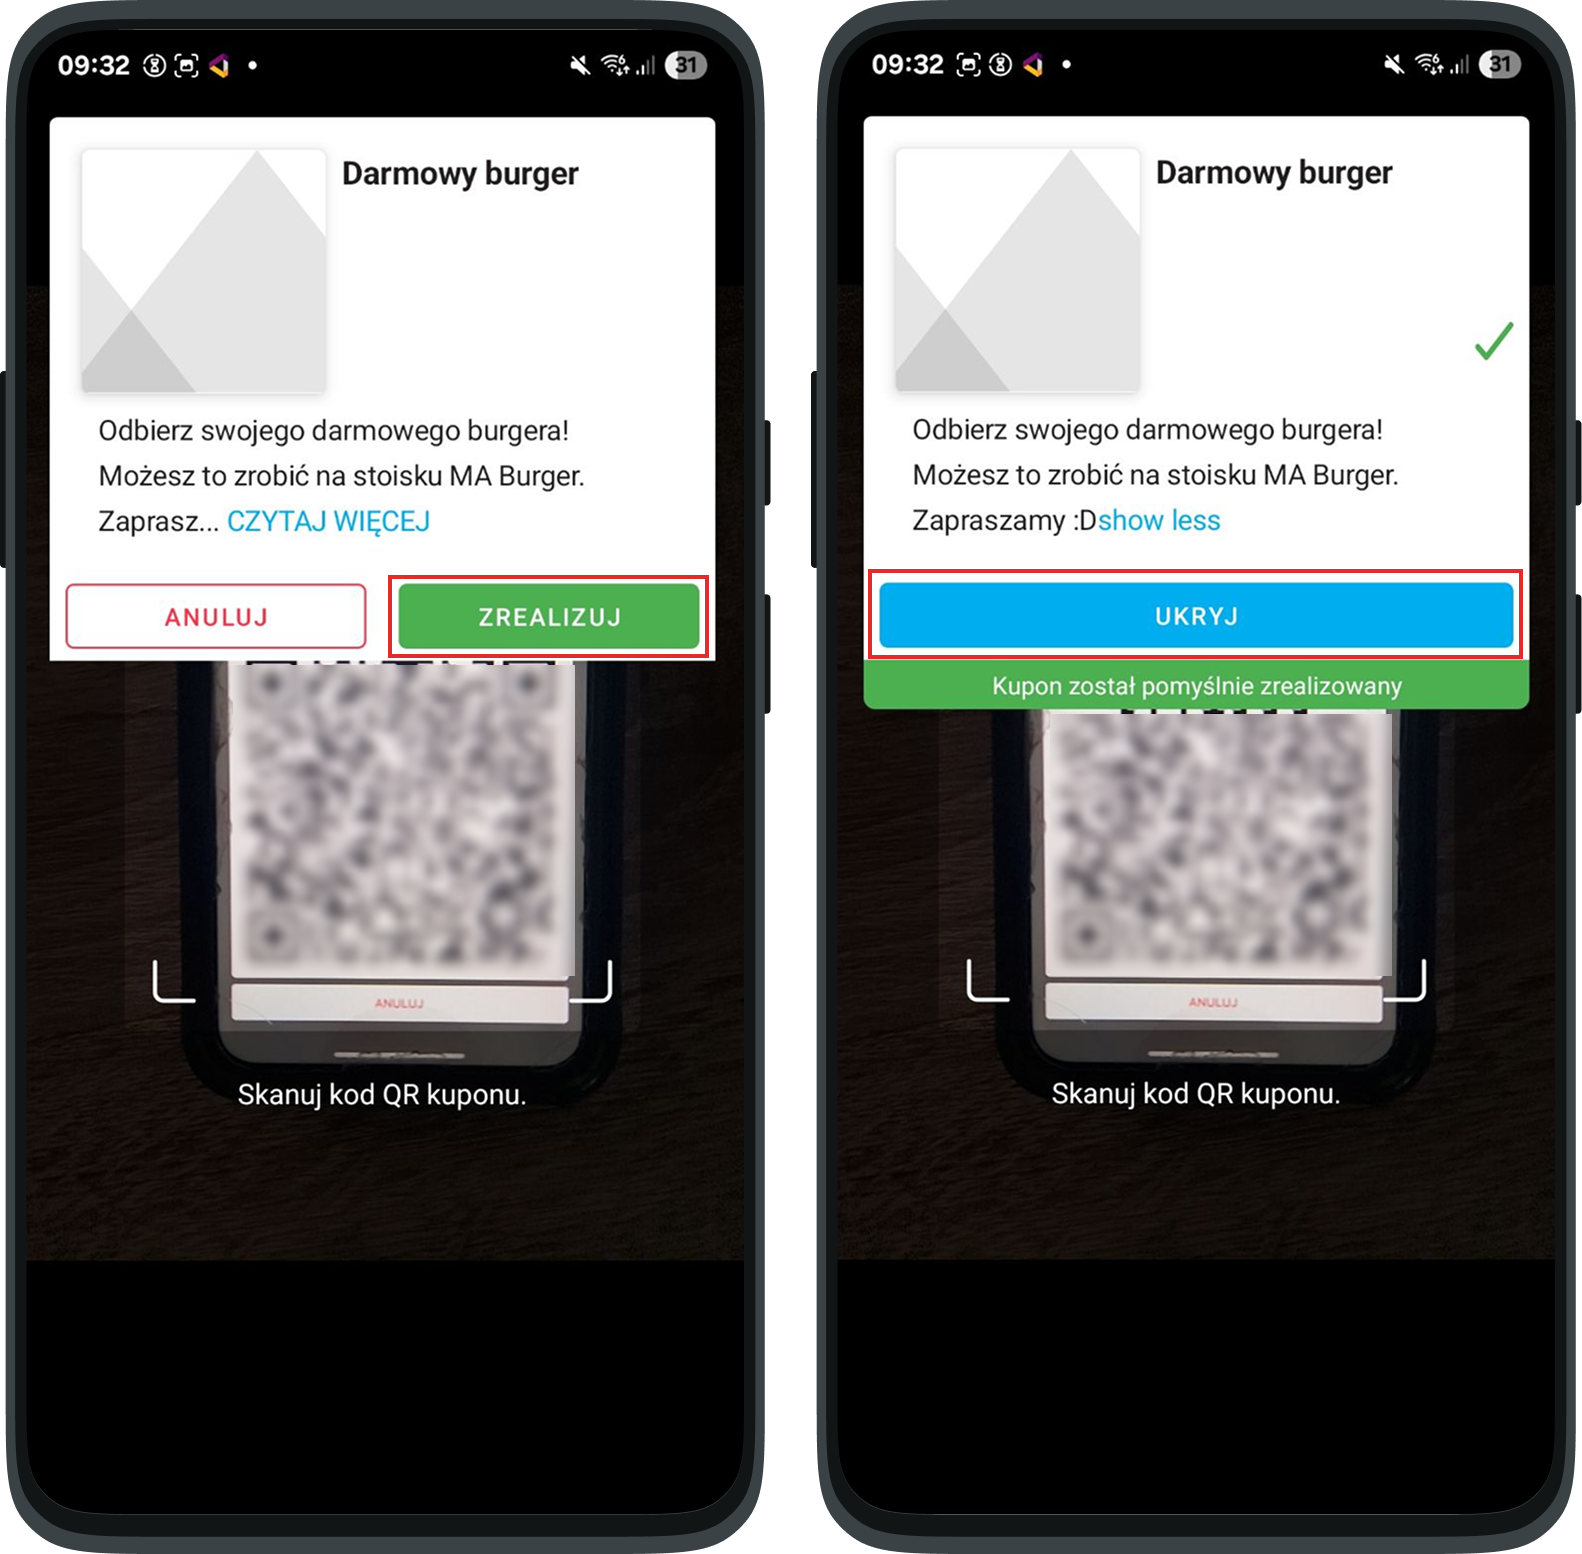
If the coupon is correct and has been linked to this Exhibitor, a popup will appear at the top of the screen, where you can confirm redeeming the coupon using the REDEEM button, which will use it up, or cancel the scan using the CANCEL button. Based on that, the Exhibitor gives out the appropriate product. After clicking REDEEM, a message will appear saying the coupon has been successfully redeemed, as long as this coupon hasn’t already been redeemed before.
After closing the popup and going to the coupon list, the Moderator will find information about the coupons available for their Exhibitor and about the number of coupons redeemed by this Moderator (if the Moderator is assigned to more than one Exhibitor, the value of redeemed coupons is the sum of redeemed coupons at all Exhibitors by this Moderator).
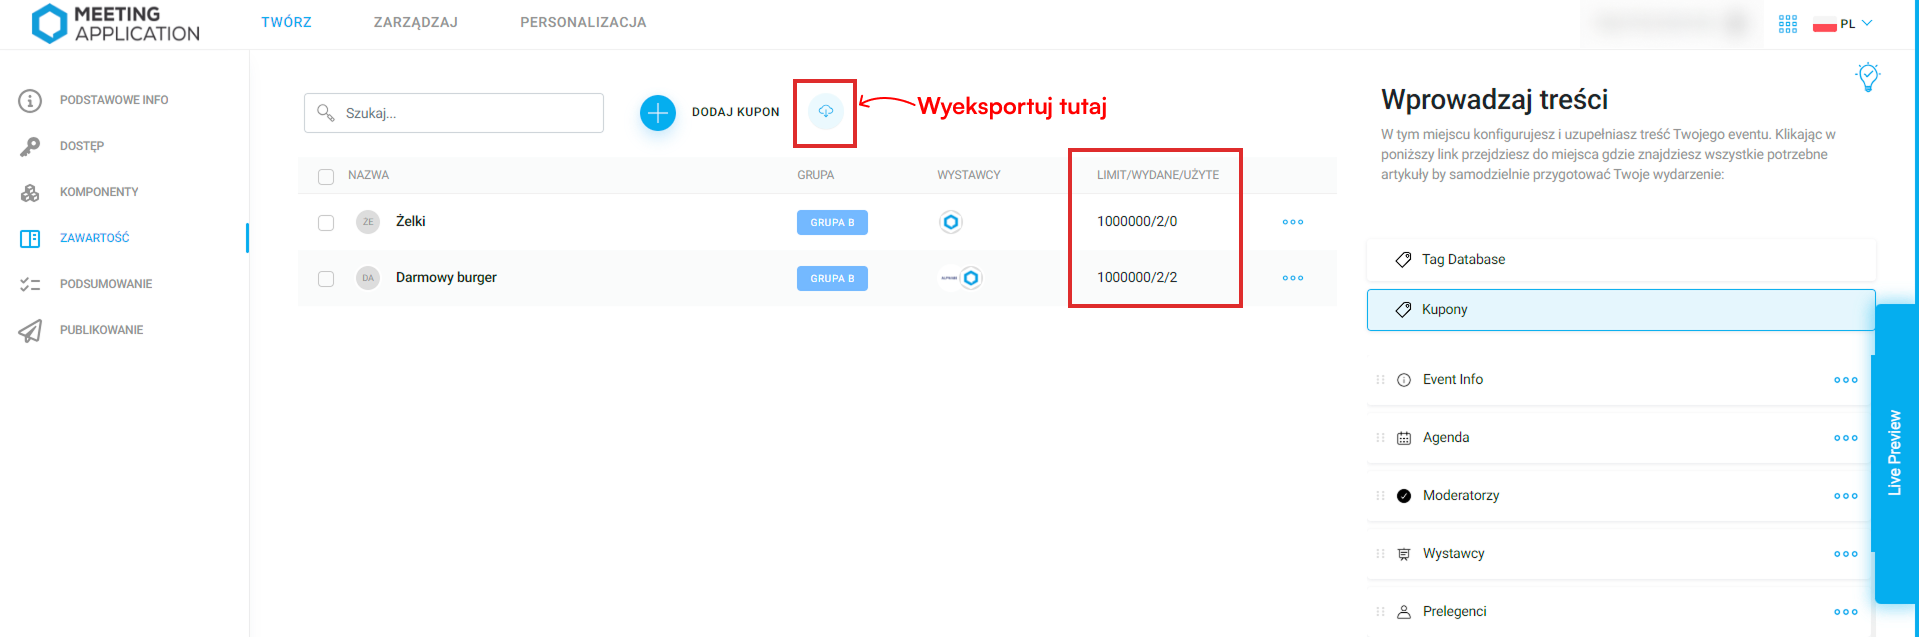
Admin perspective
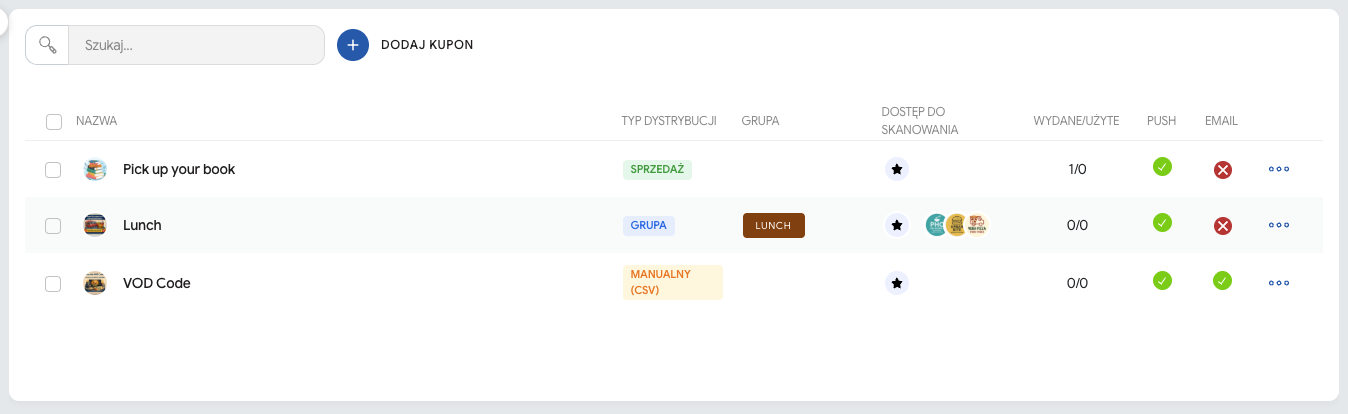
In the same place where you create coupons (panel > Create > Content > Coupons) you’ll see how many coupons have been issued and how many of them have been used. Using the button with the cloud icon you can also export detailed information about redeemed coupons.
Have a great event with Meeting Application!
