A data collection form is a native module that allows you to easily and in a structured way gather key information from participants during an event. It's the perfect tool for accepting additional terms and conditions, registrations for smaller activities, or obtaining consents necessary to unlock premium features (e.g. networking).
After submitting responses to the form, a participant can view their answers on screen at any time, but cannot edit them again.

To add a form to your app:
Go to the admin panel and navigate to Create ➝ Content → Component List.
Add the Data Collection Form module from the list.
Select the module from the sidebar menu and click Create at the top of the page.
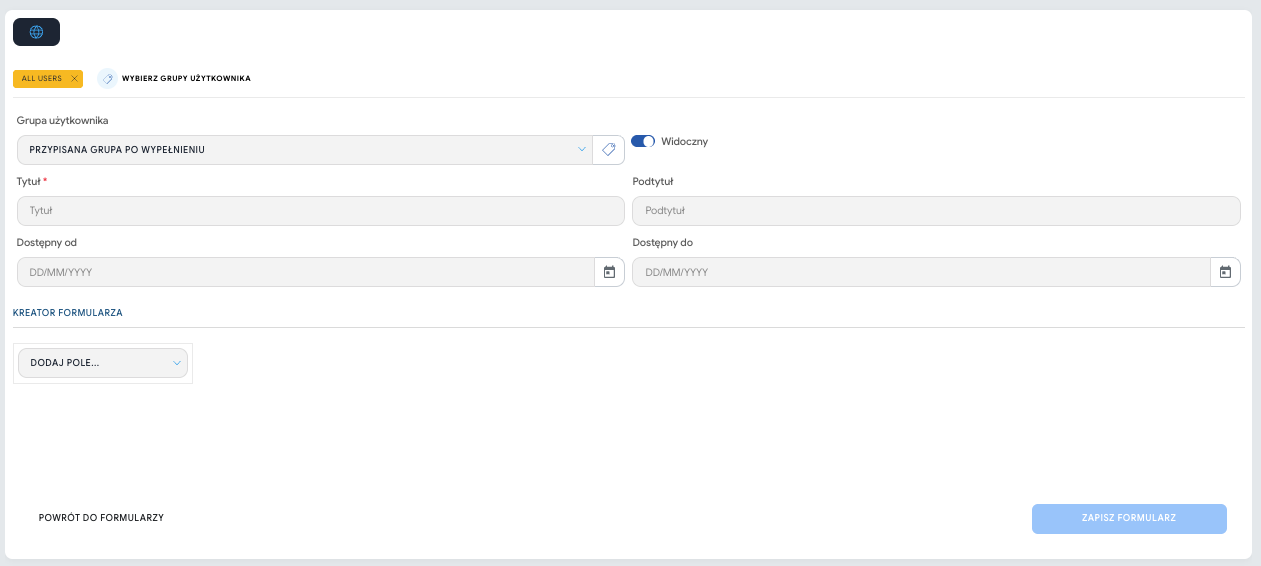
You will be taken to the form configuration menu, where you need to specify its basic parameters:
Select user groups (Availability): You decide who will see this form at all. If it should be publicly available, leave the default tag All users. If it's a survey only for VIPs, specify the appropriate group.
User group (Optional): You specify whether completing this form should automatically assign a new User Group to the participant (like in the networking example described below). You can read more about groups in this article.
Title: The name of the form visible to participants in the app (e.g. "Networking consent" or "Package pickup").
Subtitle (Optional): Additional introductory instruction for the participant.
Available from / Available until: Allows you to close the ability to fill out the form within specified time frames. After the specified date, the form becomes inactive.
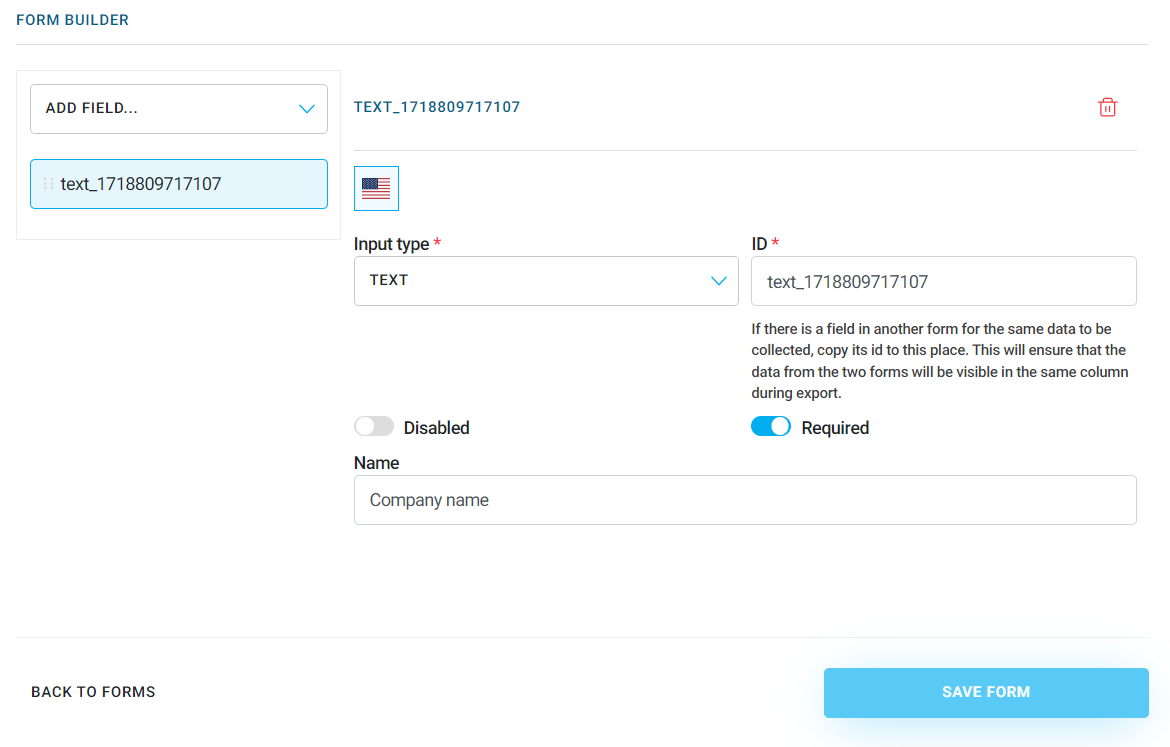
Once the general settings are ready, proceed to building the form itself. Click the Add field... button and select the appropriate format.
Responses collected in the app module can be downloaded in the Manage ➝ Participants tab (Export button). The column in the CSV file will have the same name as you enter in the ID field of the given question.
Each added field can be Required (blocks form submission without an answer) or optional.
Allows participants to freely enter a short text response. Perfect for collecting data such as: company name, vehicle registration number, or information about how you learned about the event
Name (Name): The question text, e.g. "Enter company name".
ID: System identifier (do not use spaces), e.g. company_name. If you have several different forms asking about the same thing, use the same ID – this way responses in the CSV file will go into one consistent column.
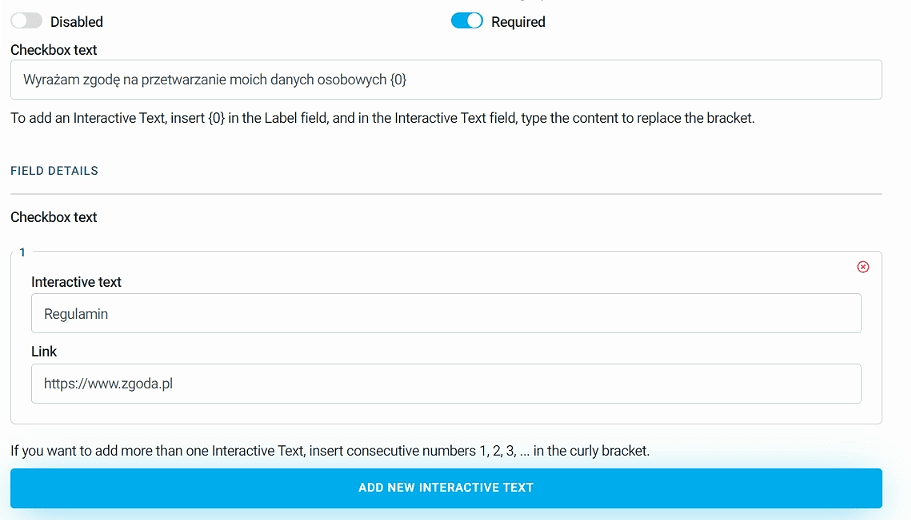
Used to create statements and consents (requires the participant to "check" the box). If you need to collect multiple consents, add several Checkbox fields one below the other. This option allows, for example, acceptance of additional terms and conditions before granting access to networking features, such as Group Chat, Meeting Scheduling, or Event Gallery. Access will be granted based on User Group.
Adding links to Checkbox (Interactive text): If you want a clickable link to appear in the consent content (e.g., leading to a PDF file with terms and conditions), use numeric markers:
In the Choice field text field, enter a sentence and insert a curly bracket with the digit zero {0}, for example: I have read and accept {0}.
The system will display the Field details section below.
In the Interactive text (Text fragment) field, enter the word that should replace the bracket (and become clickable), for example: Consent to use of image; Networking Terms and Conditions.
In the Link (Hyperlink) field, paste the URL address, for example: https://yoursite.com/terms.pdf
💡 Tip: If you need multiple links in one sentence, add successive brackets in ascending order:
{0},{1},{2}and fill in the fields that appear below for each hyperlink.
ATTENTION!
The number in the first added bracket must be 0. If you want to add more clickable texts, enter the numbers in the brackets sequentially 1, 2, 3,... :
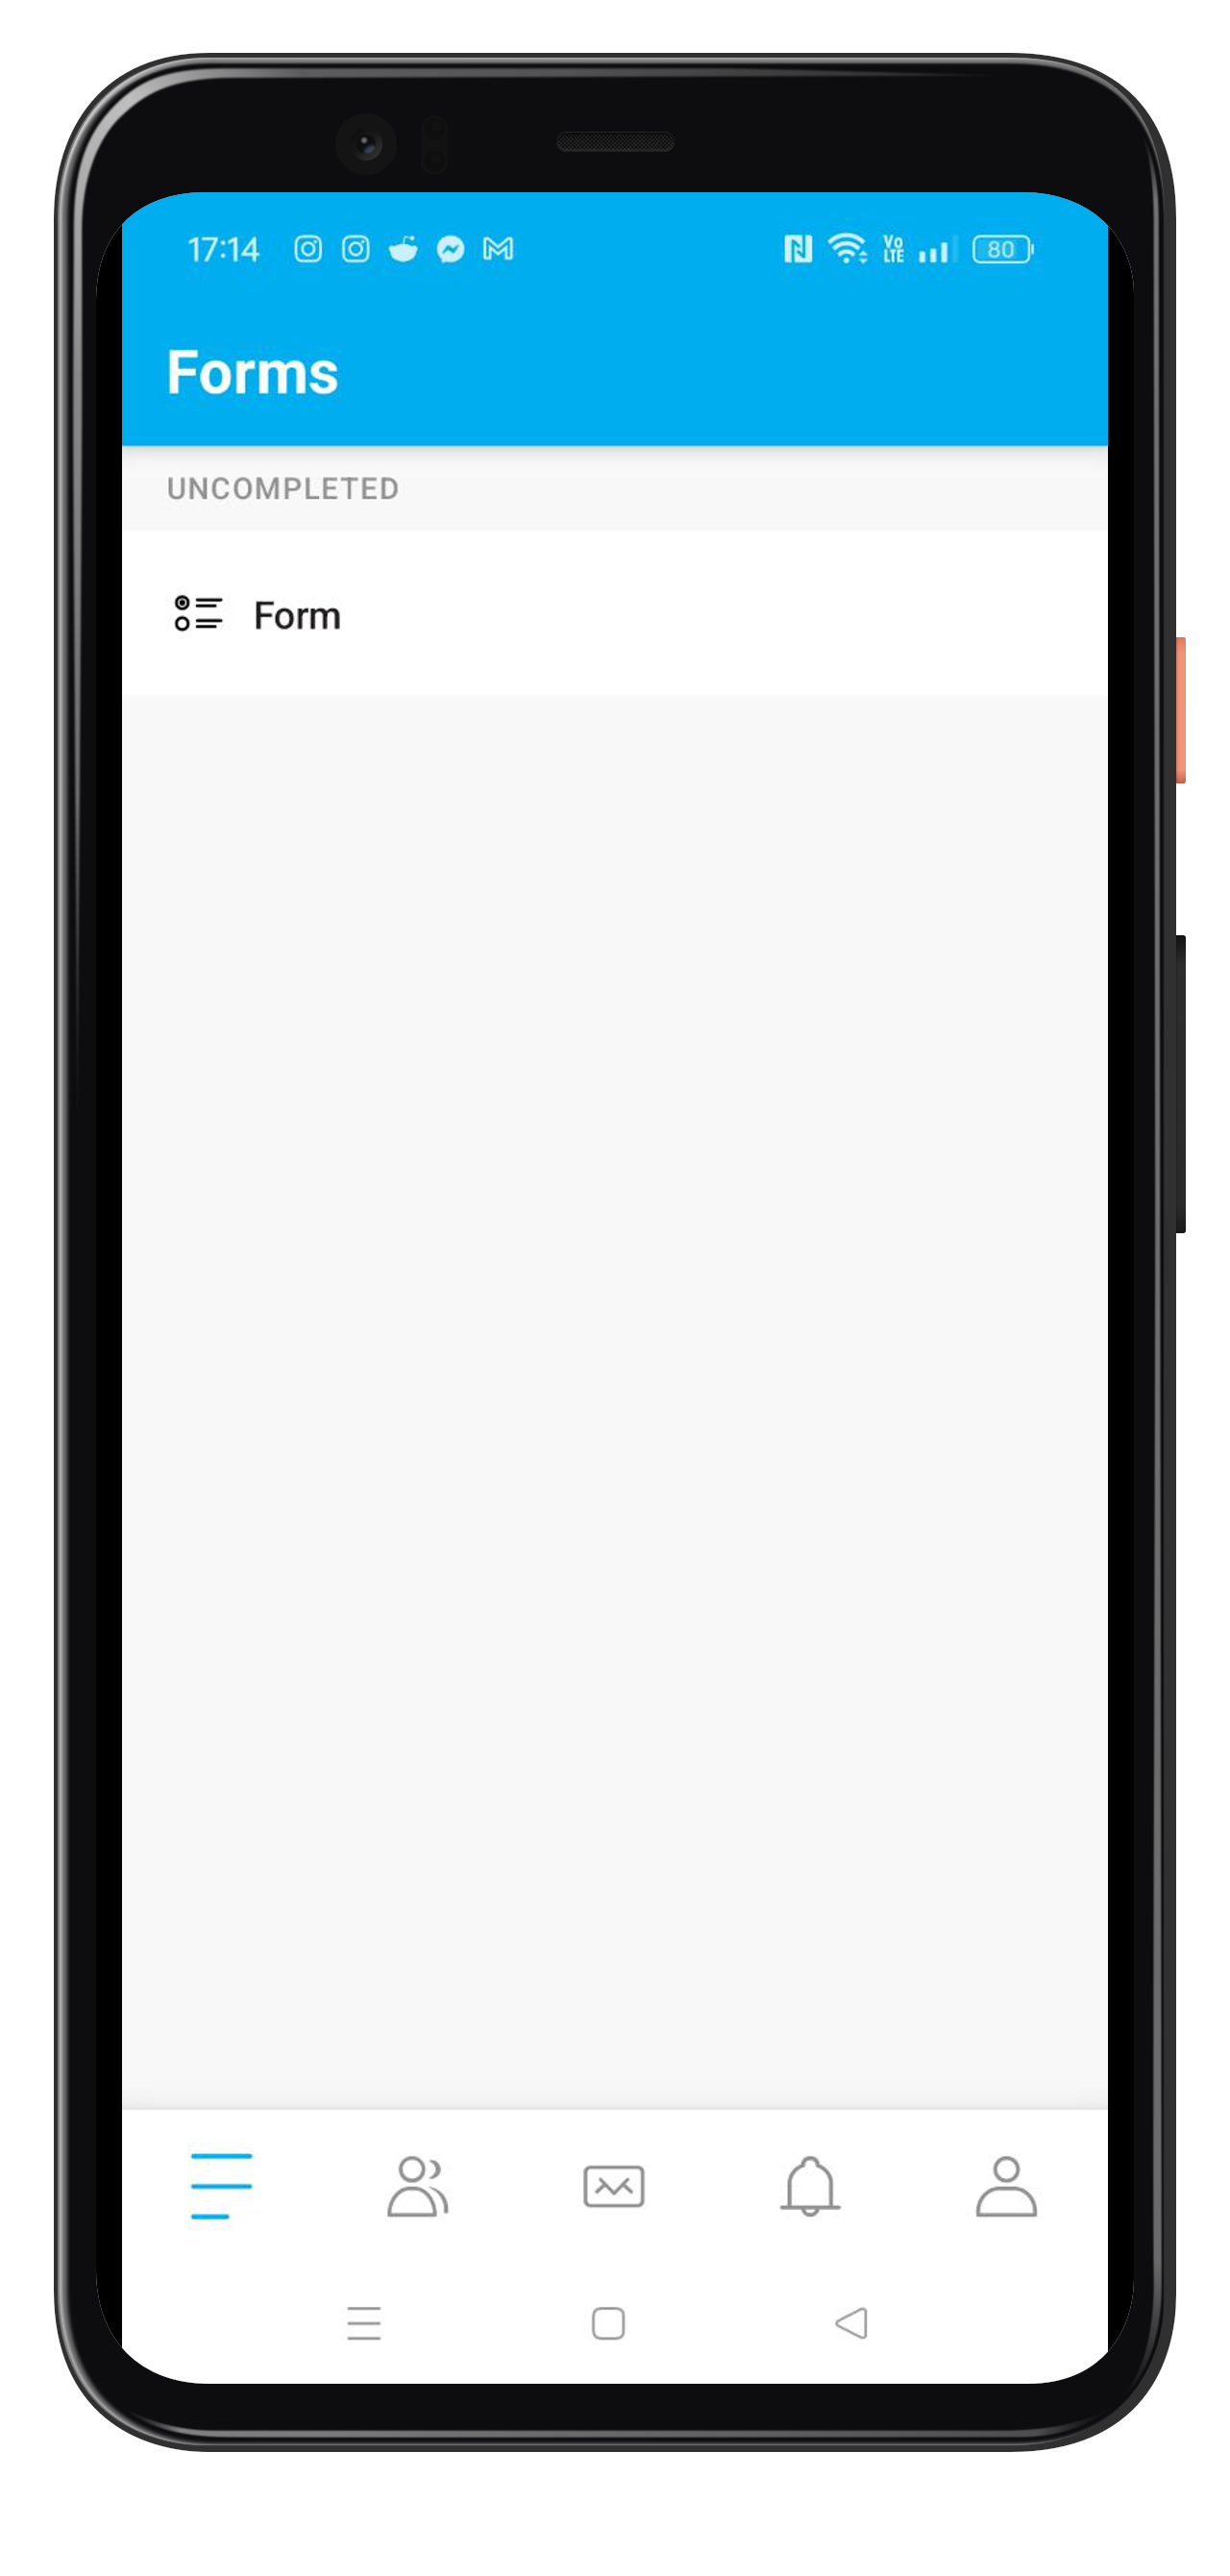
Below you can see the sequence of screens that a participant filling out the form sees.
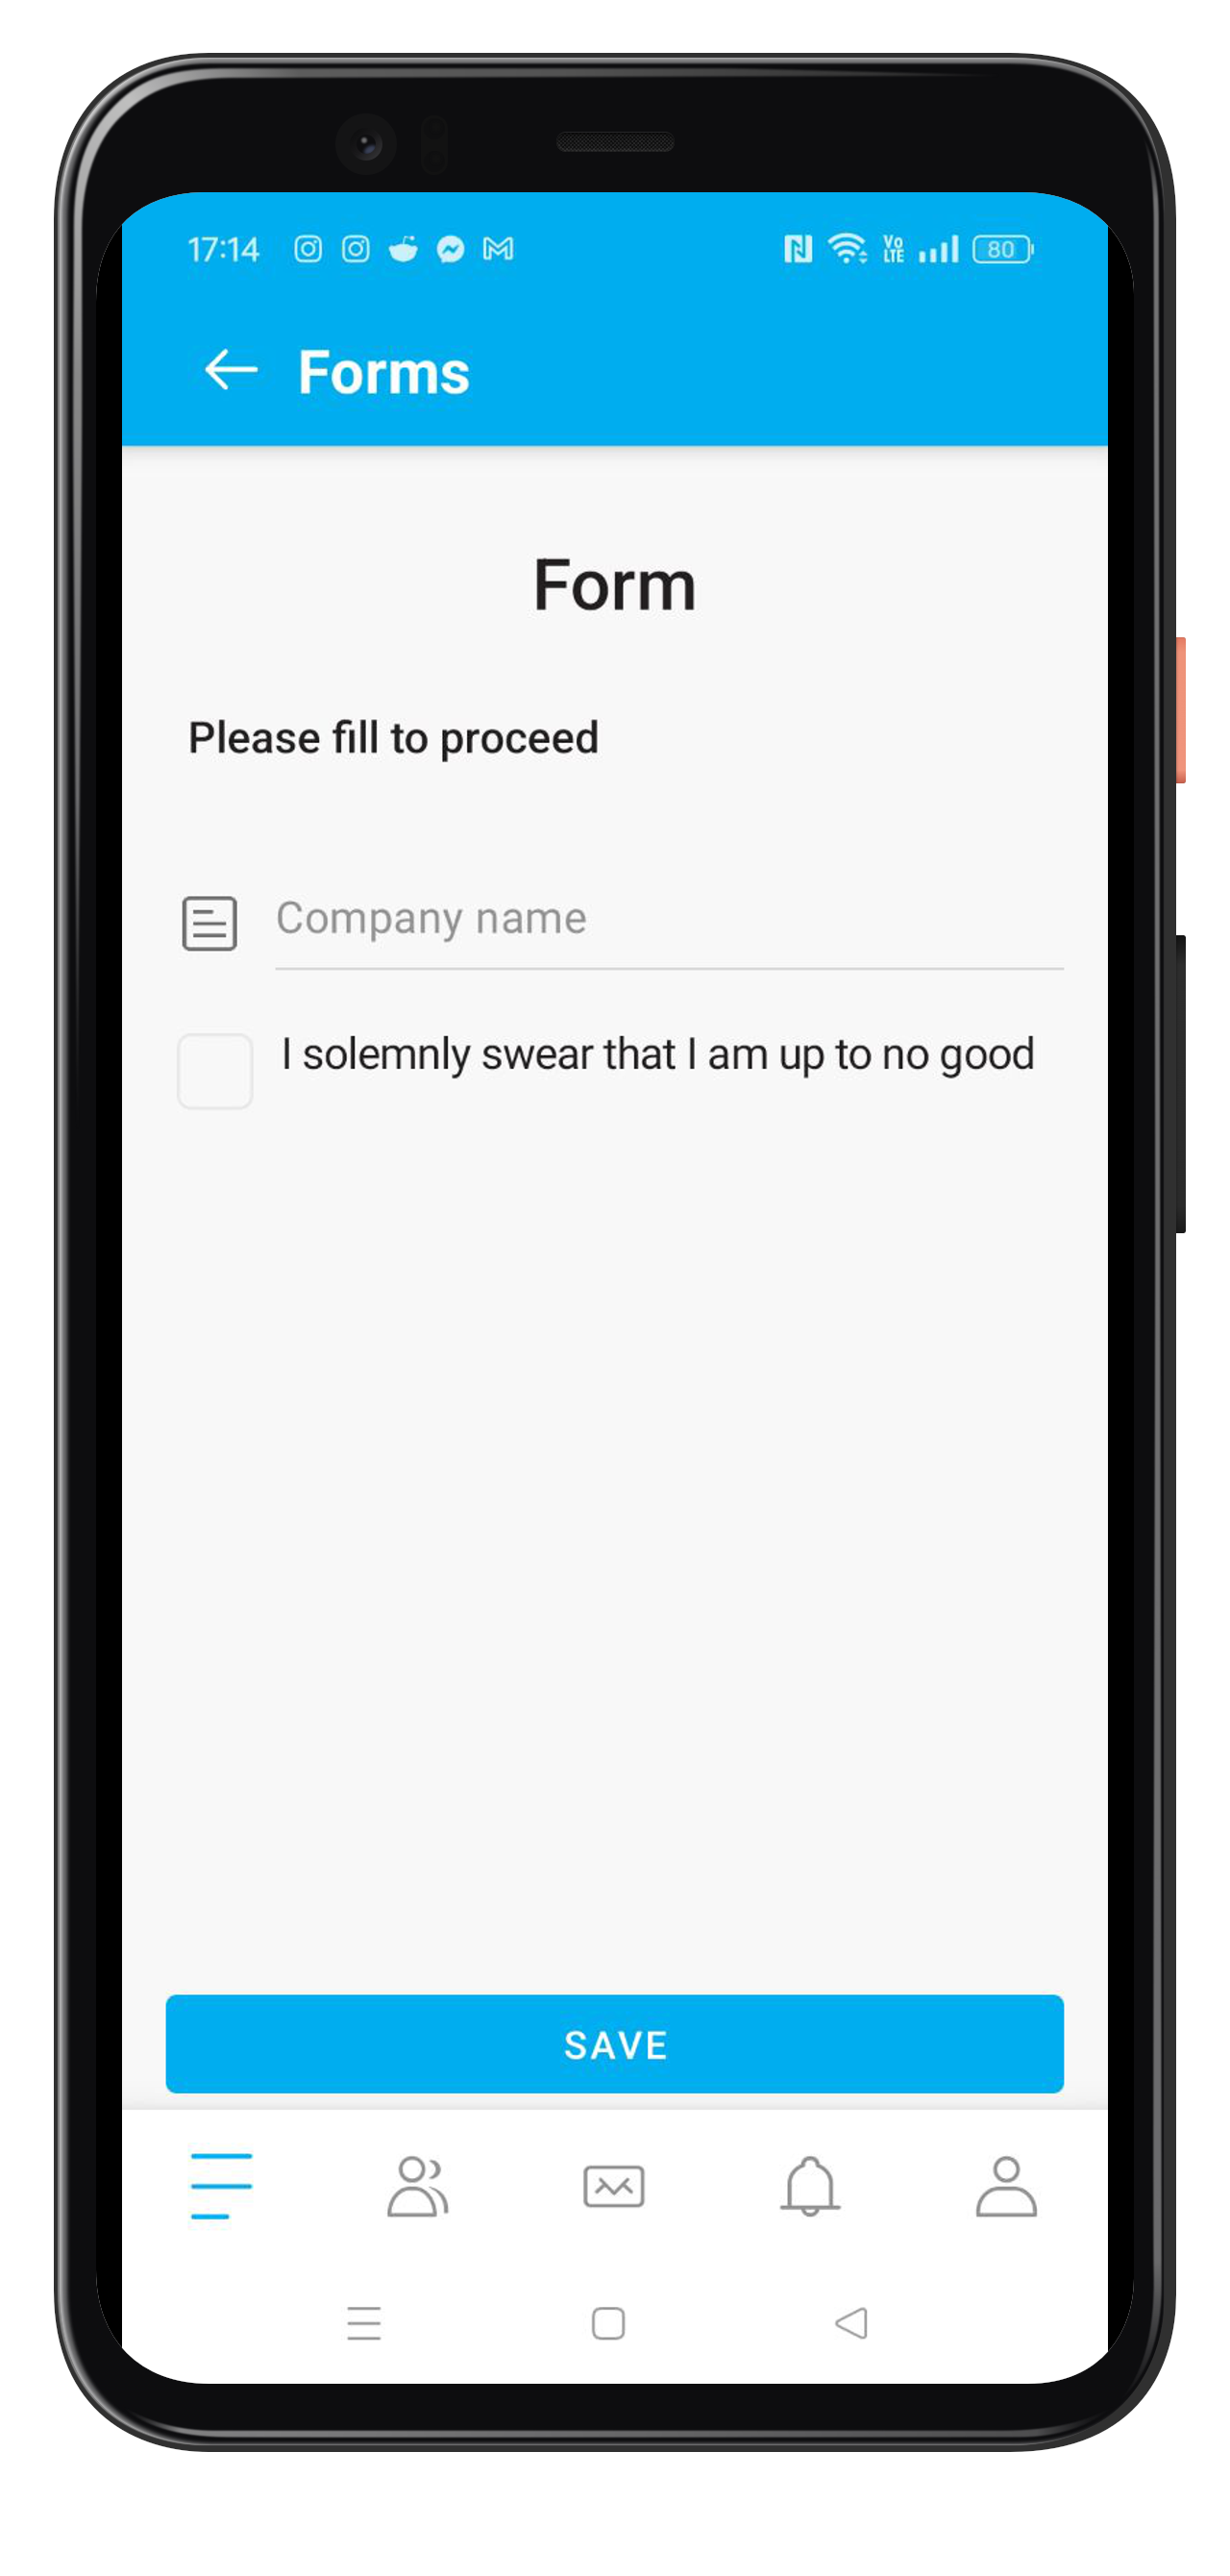
After clicking on the module in the app, the participant sees a list of available forms.
2. After entering the form, fill in the required text fields and check the checkboxes. Remember to keep descriptions clear and concise.
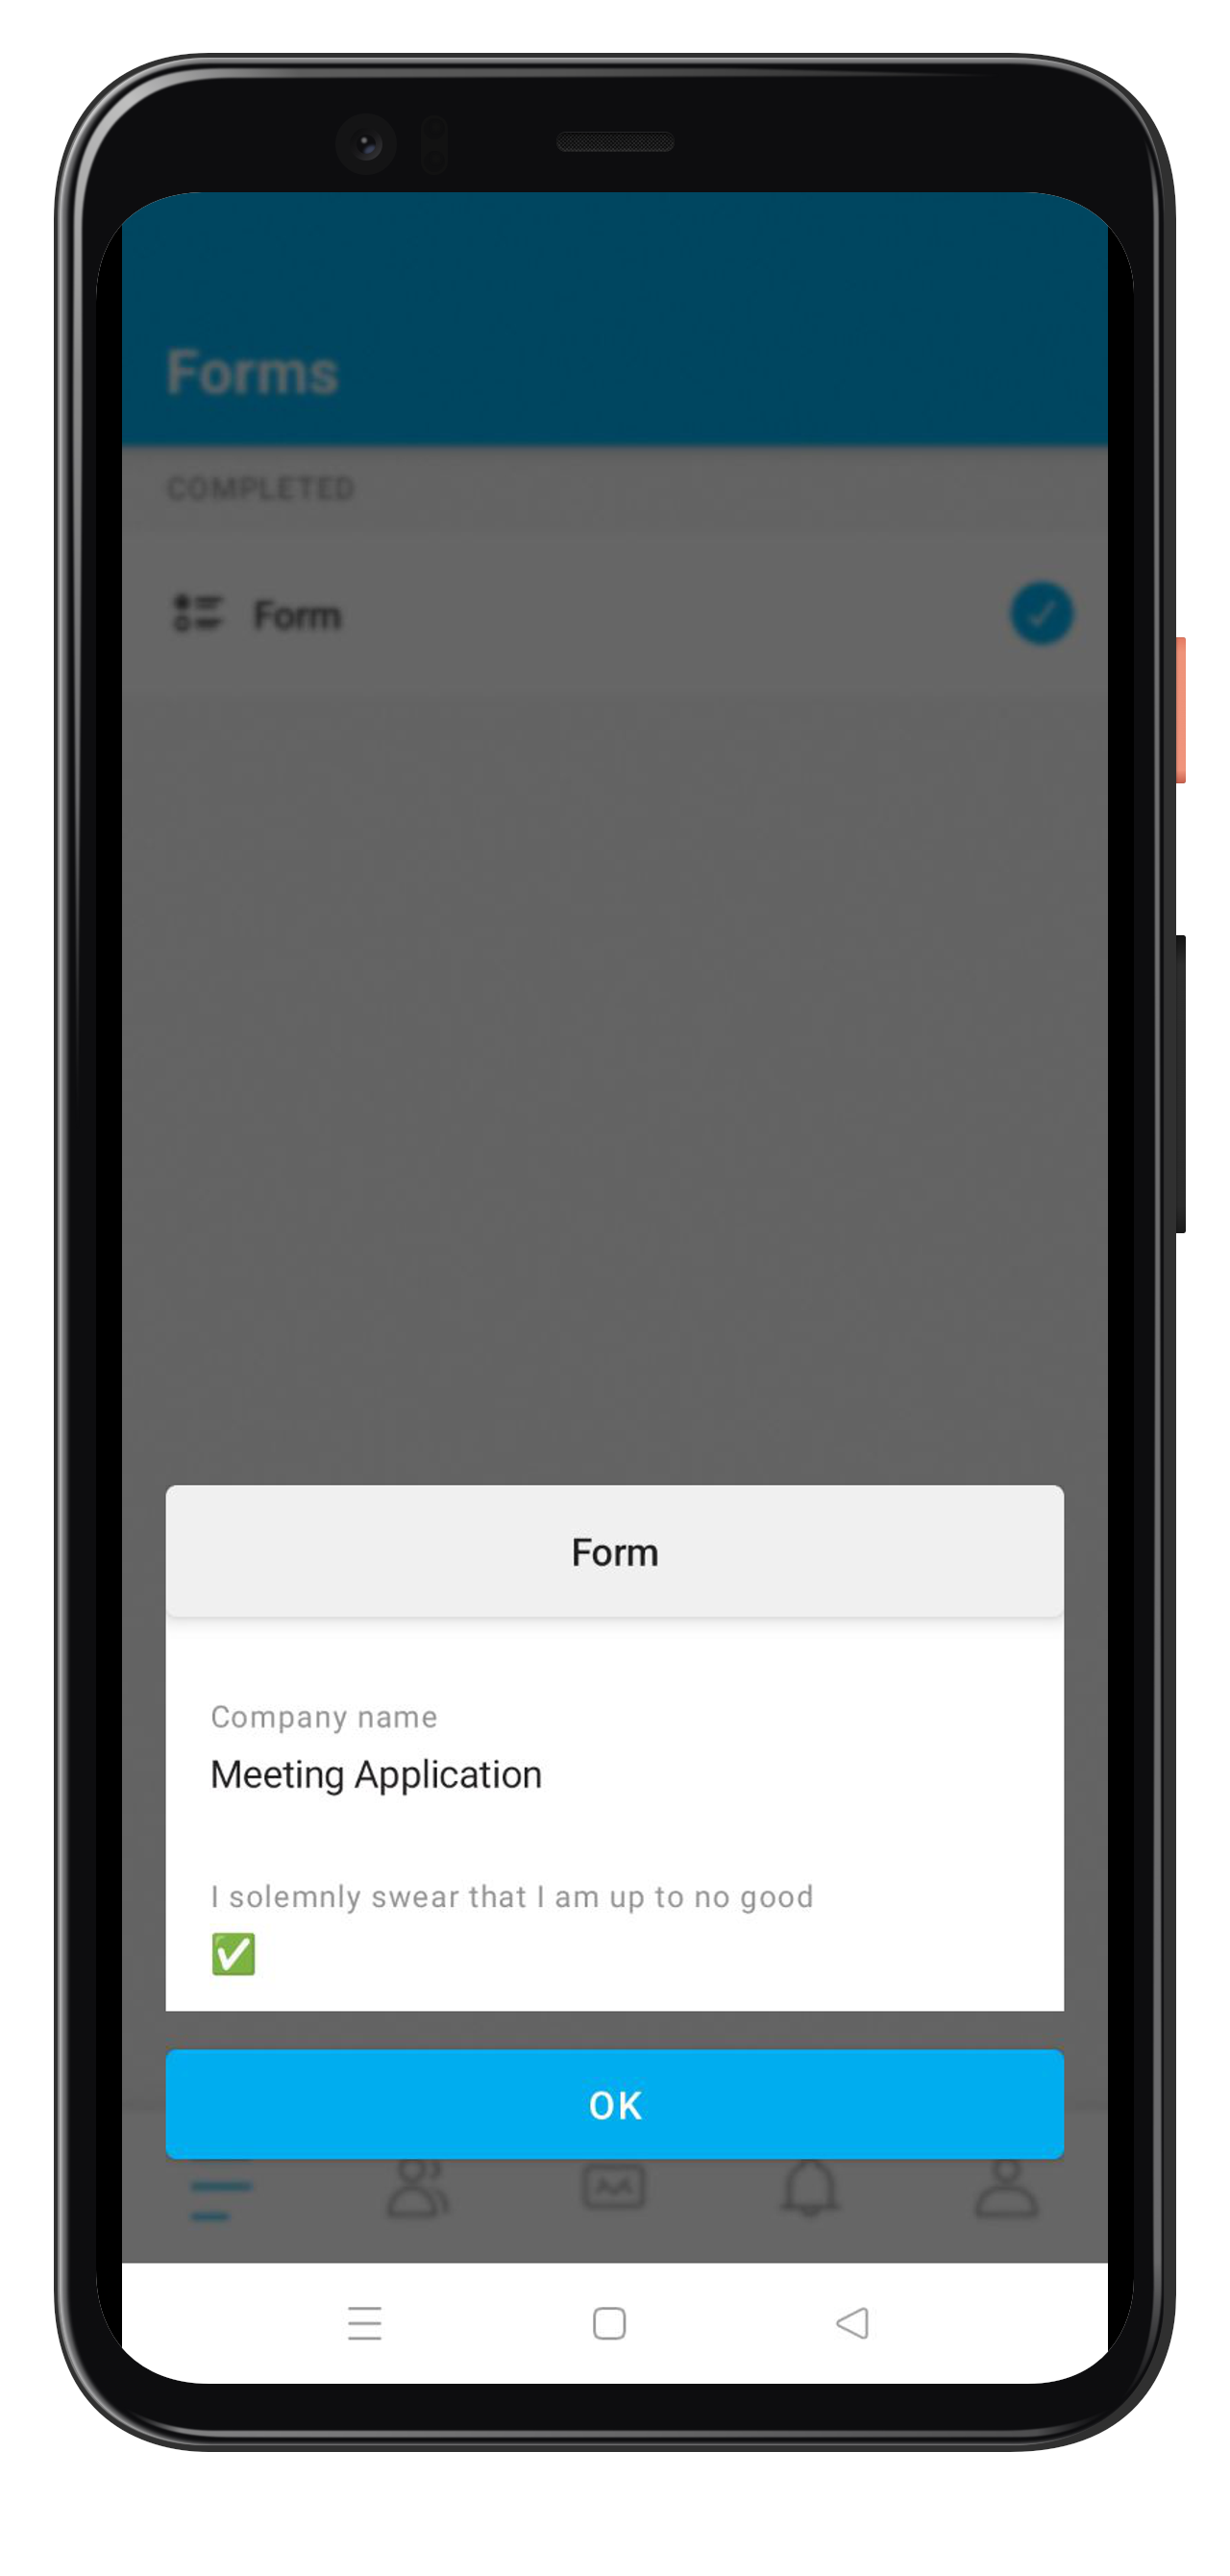
3. After submission, the form receives a "Completed" status. The participant can click on it to display a summary screen of the answers provided – this is a great way for the participant to show reception staff confirmation of accepting the terms and conditions, for example.
To download the data collected in the form, go in the admin panel to the MANAGE → USERS → cloud icon with down arrow → PARTICIPANTS.
The downloaded file in CSV format should be opened in Excel or Numbers.
How to read exported data? All information collected in the form is assigned to the email address of the account owner who provided answers in the mobile application.
At the very end of the exported file you will find additional columns. Their names (headers) correspond to the question ID, which was defined when creating the form. In the rows next to specific email addresses you will find the answers provided:
Checkbox fields: They are saved as boolean values – true (if the consent/option was checked).
Text fields: You will see the ready answers provided by participants.
If you want to remind yourself of the question ID, you can easily check it. Go to the Create → Content tab, enter the form module and click the Edit form button to view the full layout of questions.
