The Meeting Application system lets you fully automate the process of issuing personal invoices and company invoices. Documents are generated in PDF format and sent directly to the buyer’s email address after the payment is confirmed.


Before you launch sales, keep a few key operational points in mind:
Responsibility: Meeting Application supports the document issuing process, but the Organizer is responsible for configuration, correct tax settlements, VAT rates. Before you start, consult your accounting office.
Free tickets: For free events, configuring invoice data is not required.
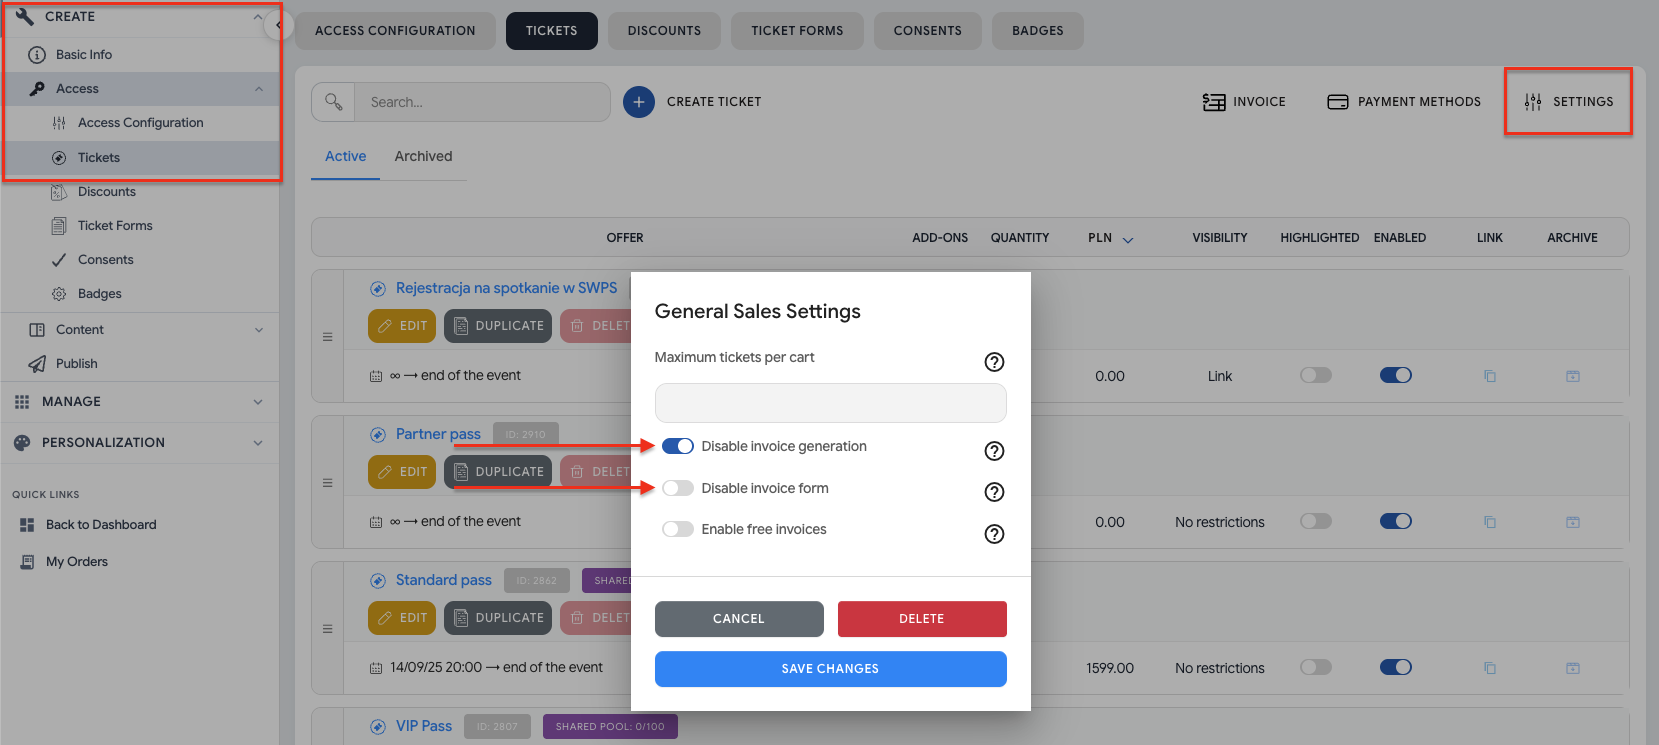
Possibility to collect invoice data without issuing pdf documents via Meeting Application: just go to CREATE → ACCESS → TICKETS → Settings and flip the appropriate switch, and the system will not generate pdf documents.
Possibility to turn off the form for collecting invoice data: flip the second switch in the CREATE → ACCESS → TICKETS → Settings tab, and the form for collecting invoice data will completely disappear from the shopping cart. Remember that when you turn off the data collection form, to issue a document confirming payment for the ticket you have to contact the buyer!
Every participant buying a ticket for your event will be able to receive an invoice made out to a person or a company. It’s very important to fill in your details as the seller. That’s why before adding a ticket you need to complete the invoice data.
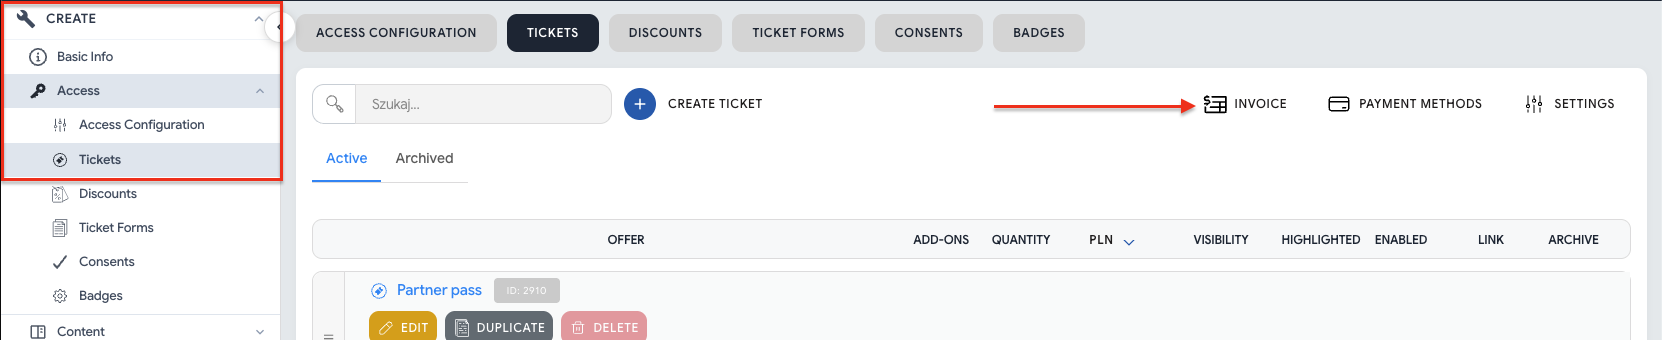
Path: CREATE > ACCESS > TICKETS > Invoice
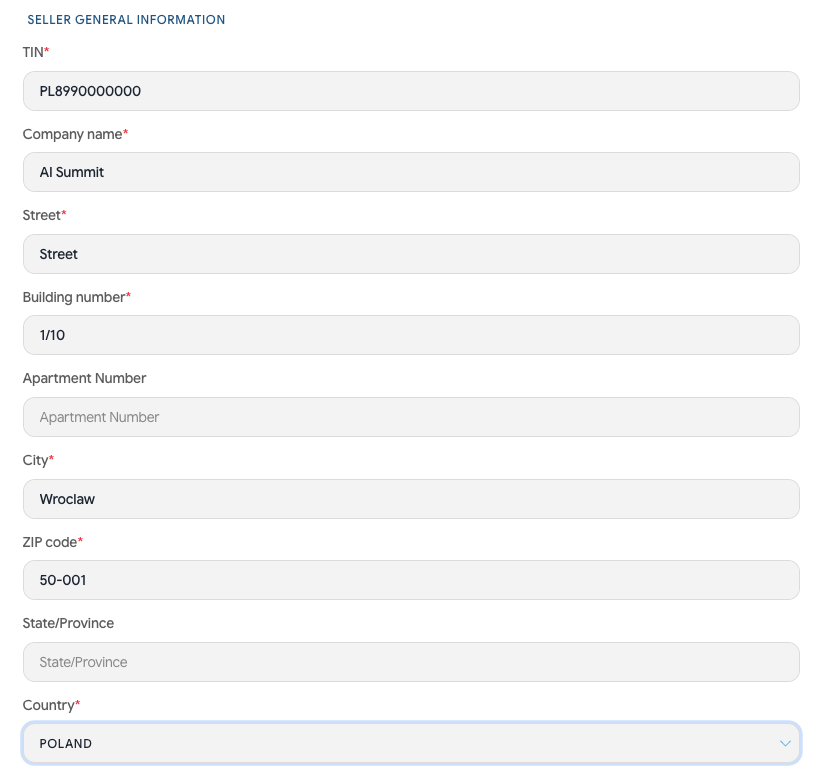
In the General Seller Information section, fill in:
Full company name and NIP (tax ID).
Registered office address (street, number, city, postal code, country).
The JPK_FA section is dedicated to Polish organizers so they can meet the requirements of Polish tax law
If you’re using a VAT exemption, in the VAT exemption section, enter the legal basis. This info will be automatically added to the invoice when you choose the "zw" rate.
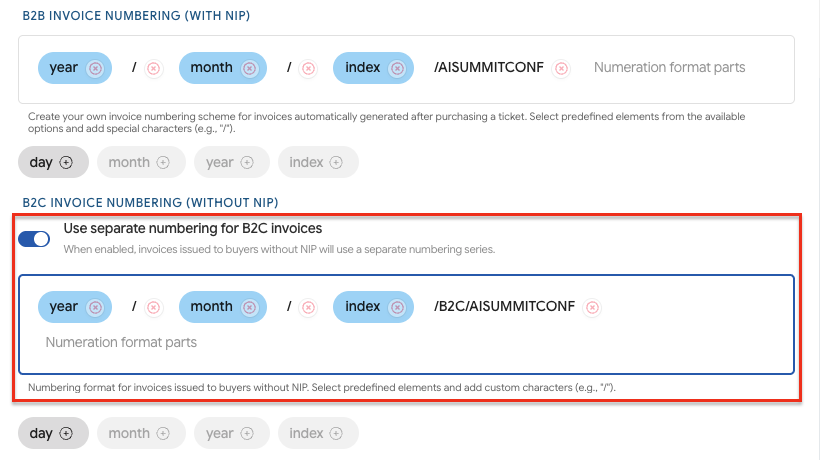
The system lets you use separate series for B2B and B2C invoices, so personal invoices have separate numbering from VAT invoices issued to companies. If you don’t need separate numbering, leave the “use separate numbering for B2C invoices” switch turned off.
How to create numbering:
Use the ready-made elements: {indeks}, {rok}, {miesiac}. These elements are necessary to use so that invoice numbering and document generation work correctly.
Add your own special characters (e.g. /, -) or prefixes (e.g. /B2B or /B2C).
Press ENTER after adding each custom element.
Add constant values and make sure assigning the sales document to your event is as simple as possible. Your accountant will definitely appreciate it, trust us! 🙌🏽

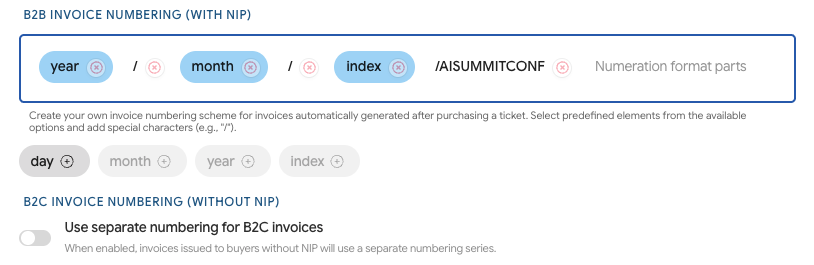
Do you want personal invoices to have separate numbering? Switch on the “separate numbering for B2C invoices” toggle and set a dedicated format, in exactly the same way as for B2B numbering.
PRO TIP: Adjust the communication to the specifics of your event – freely edit the content of emails sent together with the purchase confirmation. Learn more from the article Custom emails.
After filling in the invoice details, click the SAVE CHANGES button in the bottom right corner of the screen.
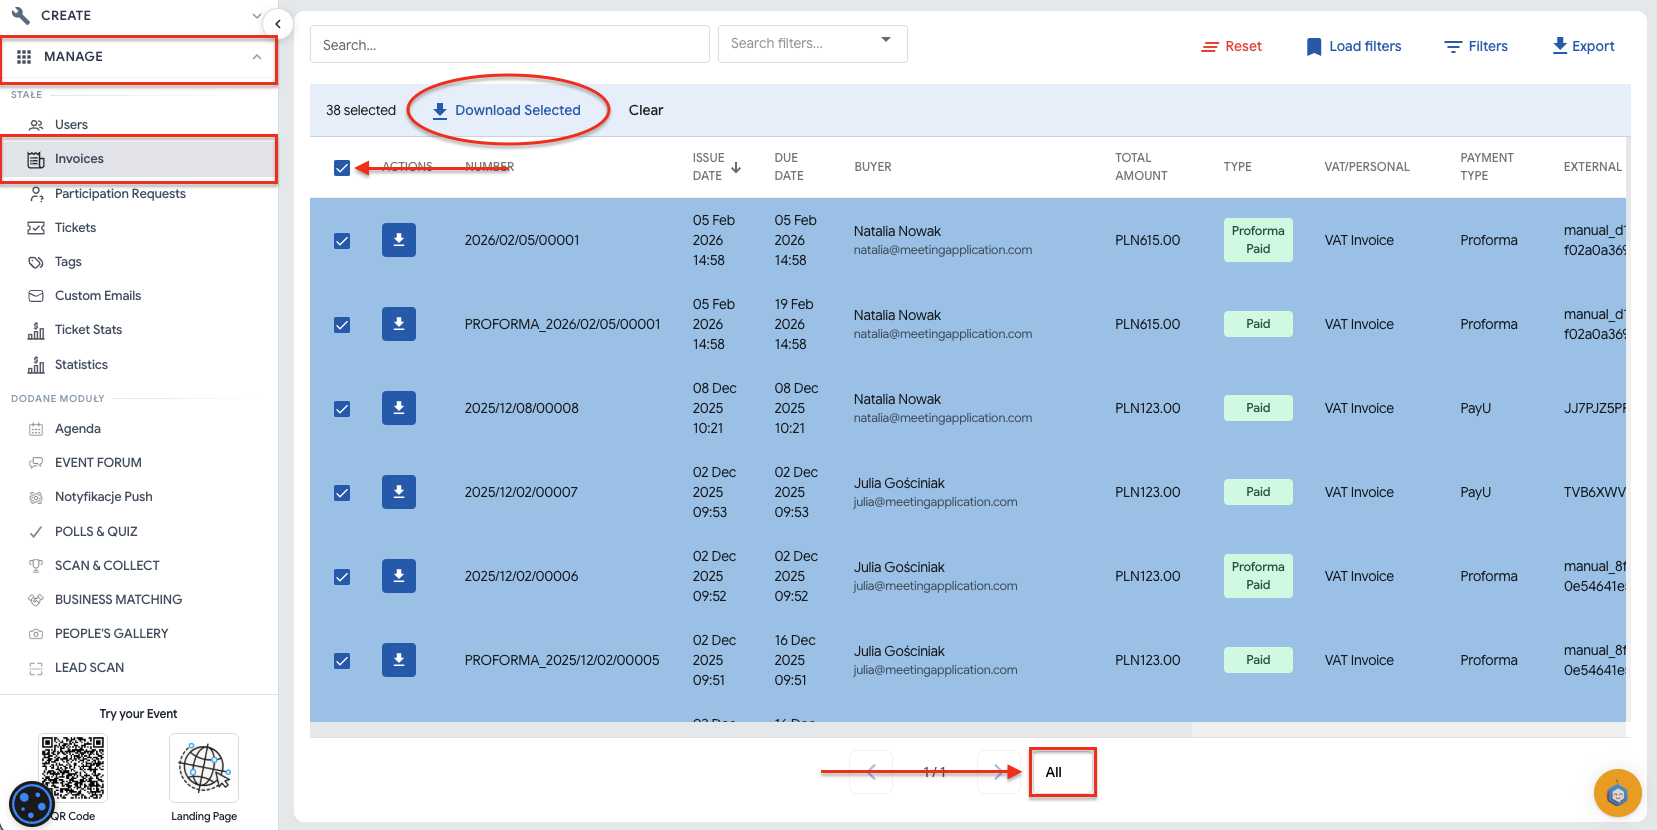
To download the package of invoices issued for the participants of your event, go to the MANAGE → INVOICES tab.
Then increase the number of invoices displayed on the page so that you can, with one click, select all documents generated by the system.
Select all items visible on the page and click Download Selected.
To prepare a correct JPK_FA file for the tax office, first fill in the JPK data in the invoice configuration. Go to the CREATE → ACCESS → TICKETS tab, click Invoice, and then at the very bottom of the form, in the JPK_FA information section, enter the four-digit tax office code, as well as the county and municipality.
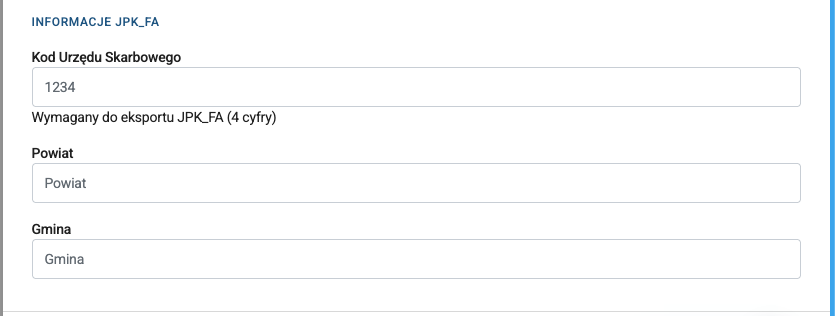
Based on these fields, the system will fill in the data in the JPK_FA file. You can export the ready file from the MANAGE → INVOICES tab.
Click Export in the top right corner, choose the format JPK_FA (Tax Office), optionally set the date range for which you want to generate the file, and click Export again. Dates in the JPK_FA file are saved in the Warsaw/Poland time zone.
Named invoice (B2C): Intended for private individuals. The buyer provides their first name, last name, email address and home address. For events with KSeF enabled, these documents are not sent to the Ministry of Finance.
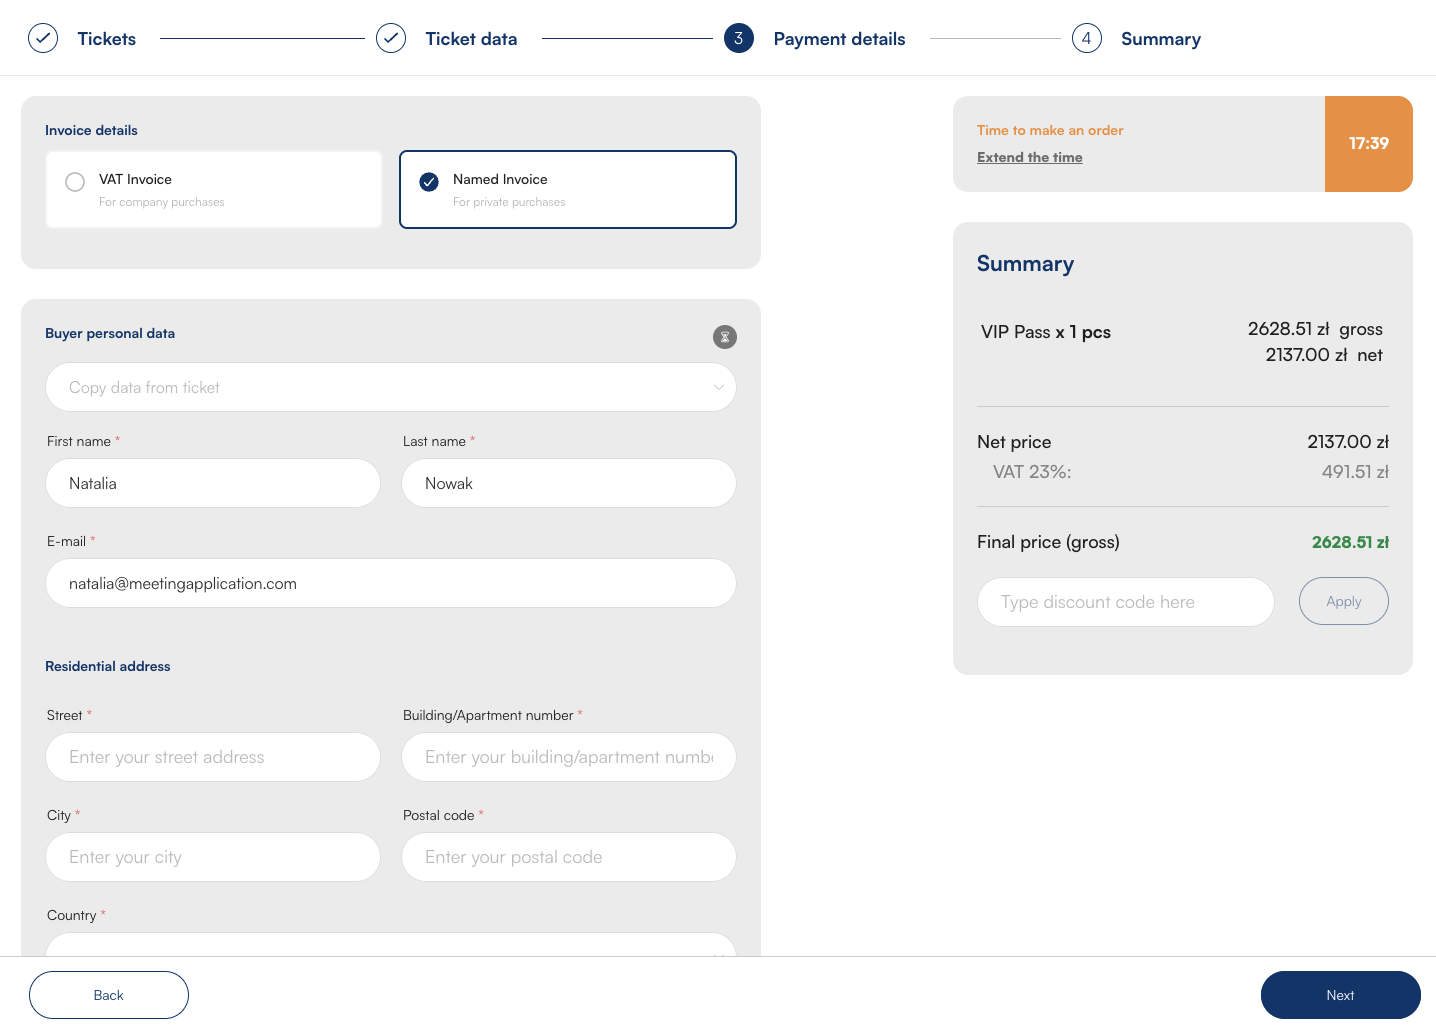
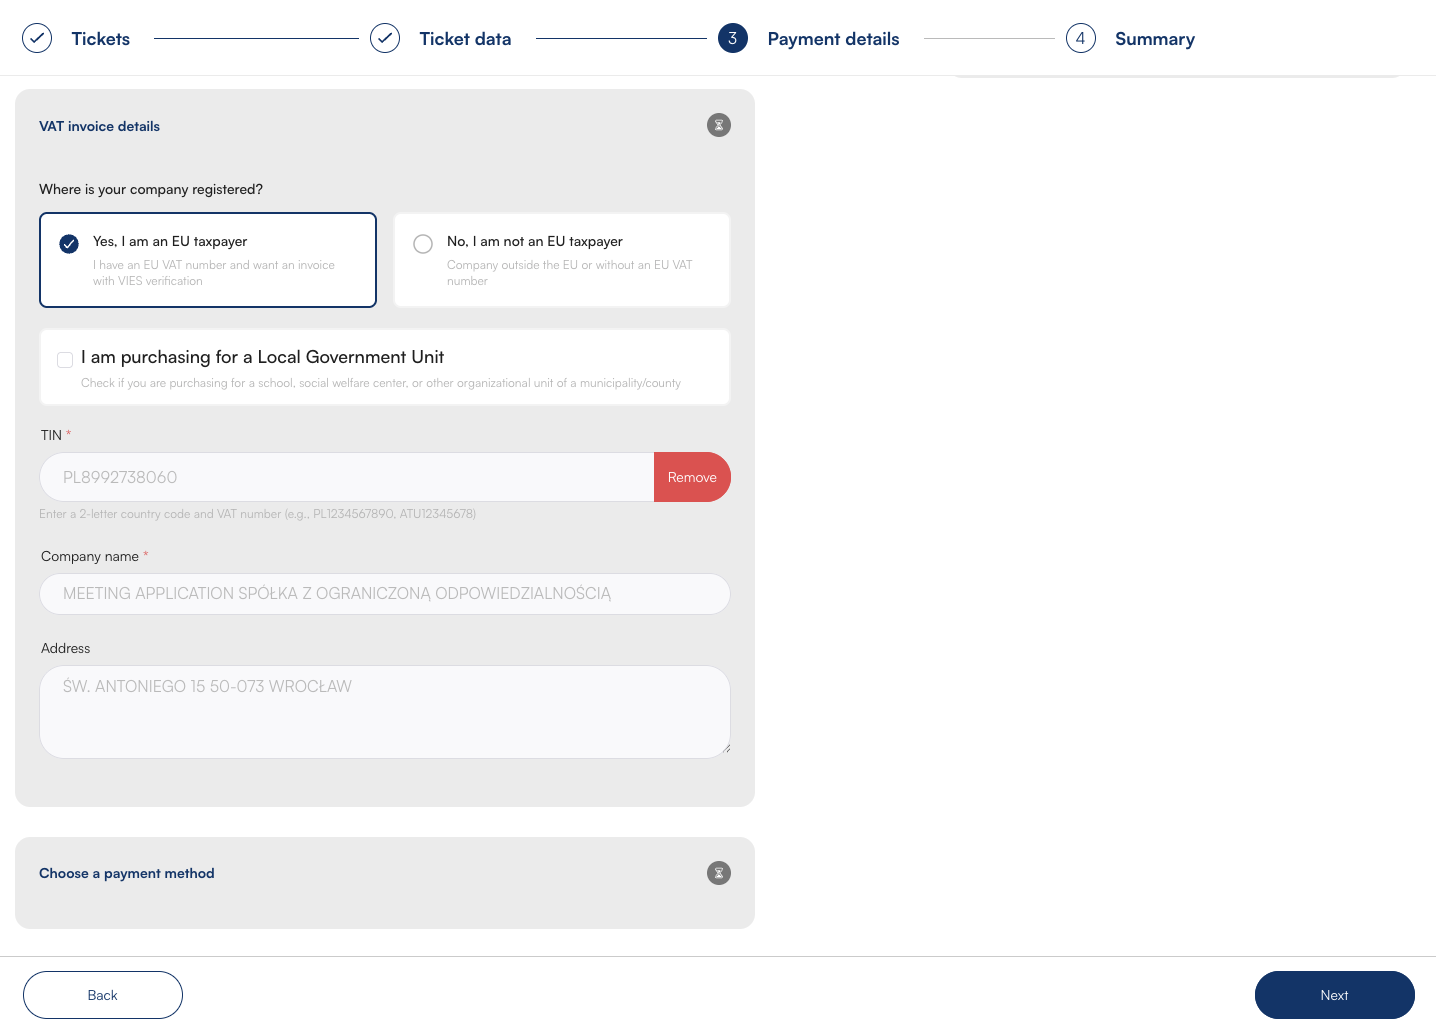
VAT invoice (B2B): Intended for companies and institutions. The buyer must provide a tax identification number (NIP) and the full company details. The Meeting Application system is integrated with the VIES database, which allows automatic fetching of data after entering the NIP, minimizing the risk of errors.
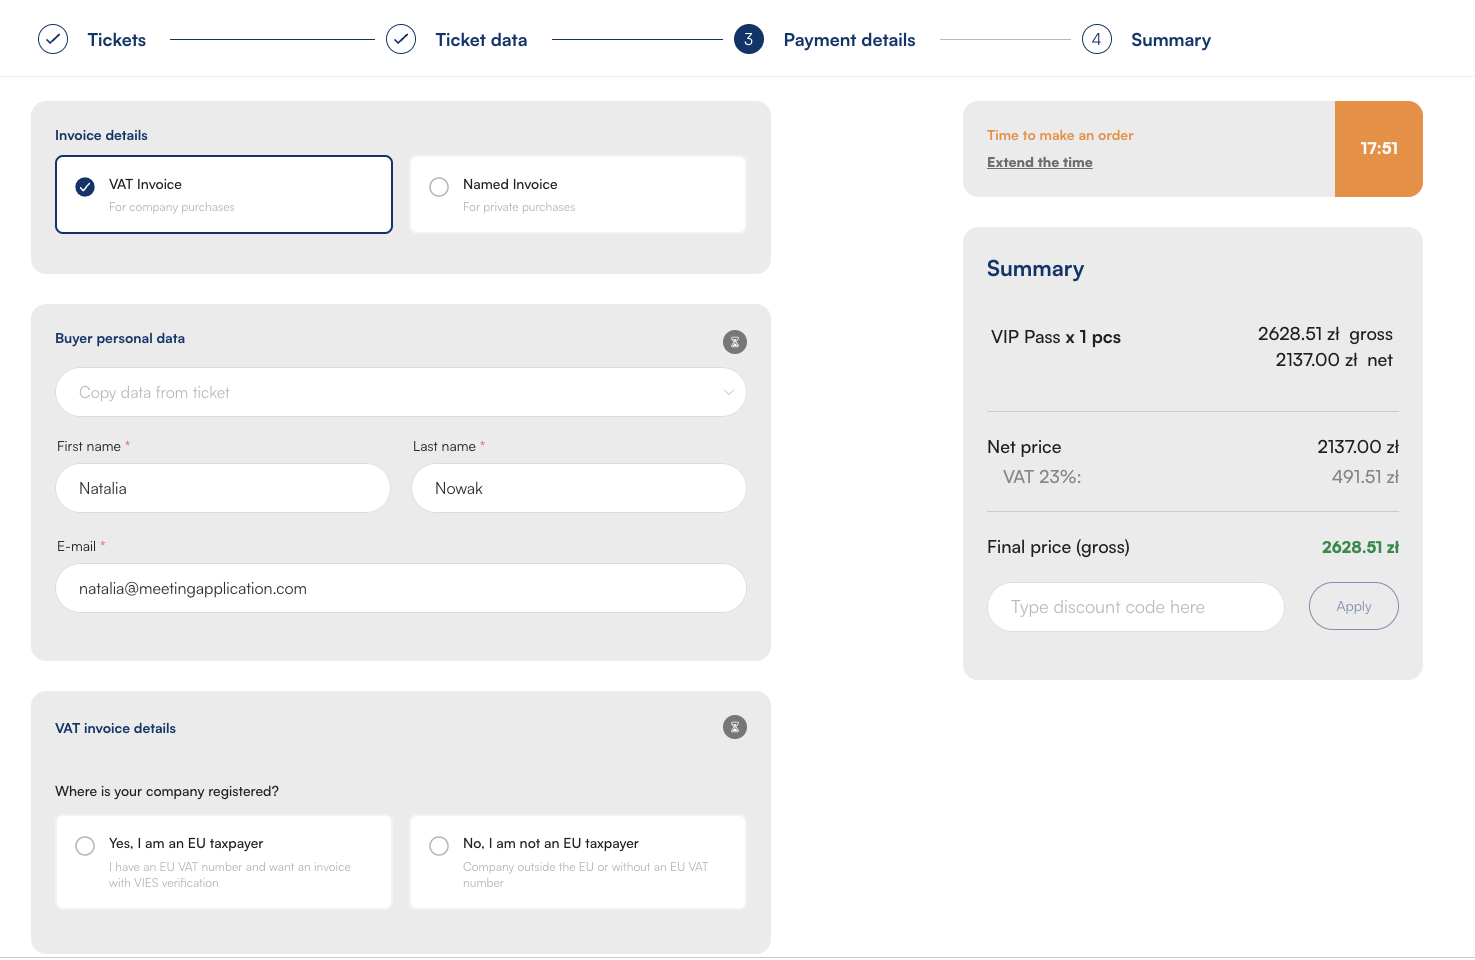
Important: EU taxpayers and Local Government Units (JST). In line with EU legal regulations, the system allows the purchase of tickets by public entities. Choosing the option specifying whether the company is registered in the European Union is key to enabling purchases for, among others, schools or offices operating as JST. In such a scenario, the buyer can indicate separate data for the Payer (e.g. Municipality/County) and the Recipient (e.g. a specific school), which is necessary to keep the XML schema in KSeF correct, as well as for the school to settle the document.
It’s important to distinguish which tabs receive the specific data collected in the checkout, as this makes it easier to manage communication and documentation later:
Ticket Holder Data (Step 2 of the checkout): The person whose data is entered as the ticket owner will receive a PDF ticket with a QR code to their email address. This information goes directly to the ZARZĄDZAJ -> BILETY tab. This is where you can check who will actually enter the event.
Buyer / Payer Data (Step 3 of the checkout): The person or company entered as the payer will receive an invoice (if it was generated) to the provided email address. This data is visible in the ZARZĄDZAJ -> FAKTURY tab.
Lead Database and Marketing Consents: In the ZARZĄDZAJ ->UŻYTKOWNICY tab you’ll find data of all people who logged into the event (via the Landing Page or the app) or went through the checkout process. These are legally acquired leads who accepted the terms and conditions and the privacy policy. In this section, you can download the full list together with all collected additional consents (e.g. for SMS or marketing communication) and use it to send your own communications.
Have a great event with Meeting Application!