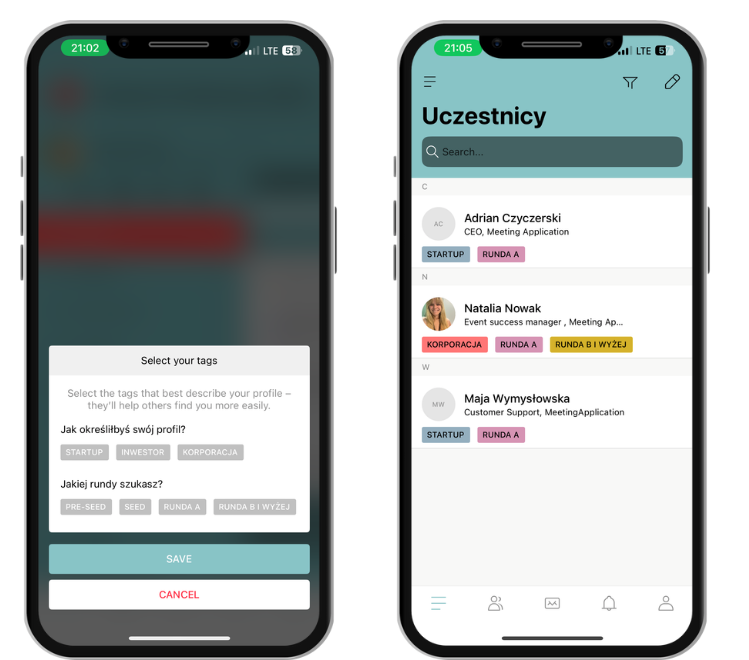
Participant labels are visible tags in the app, which help event participants figure out who's who – for example, which industry someone is from, which country they're coming from, or if they're representing a startup or maybe an investment fund.
Unlike user groups (which are visible only in the admin panel for administrators), labels are visible in the mobile app and they're for users – they support networking and let you personalize the participant view.
You can use labels in two places:
in the Business Matching module, to make it easier for the right groups to connect (like startups with investors),
in the Participants module, so you can quickly see who's who or filter to find event participants who are part of a specific group.

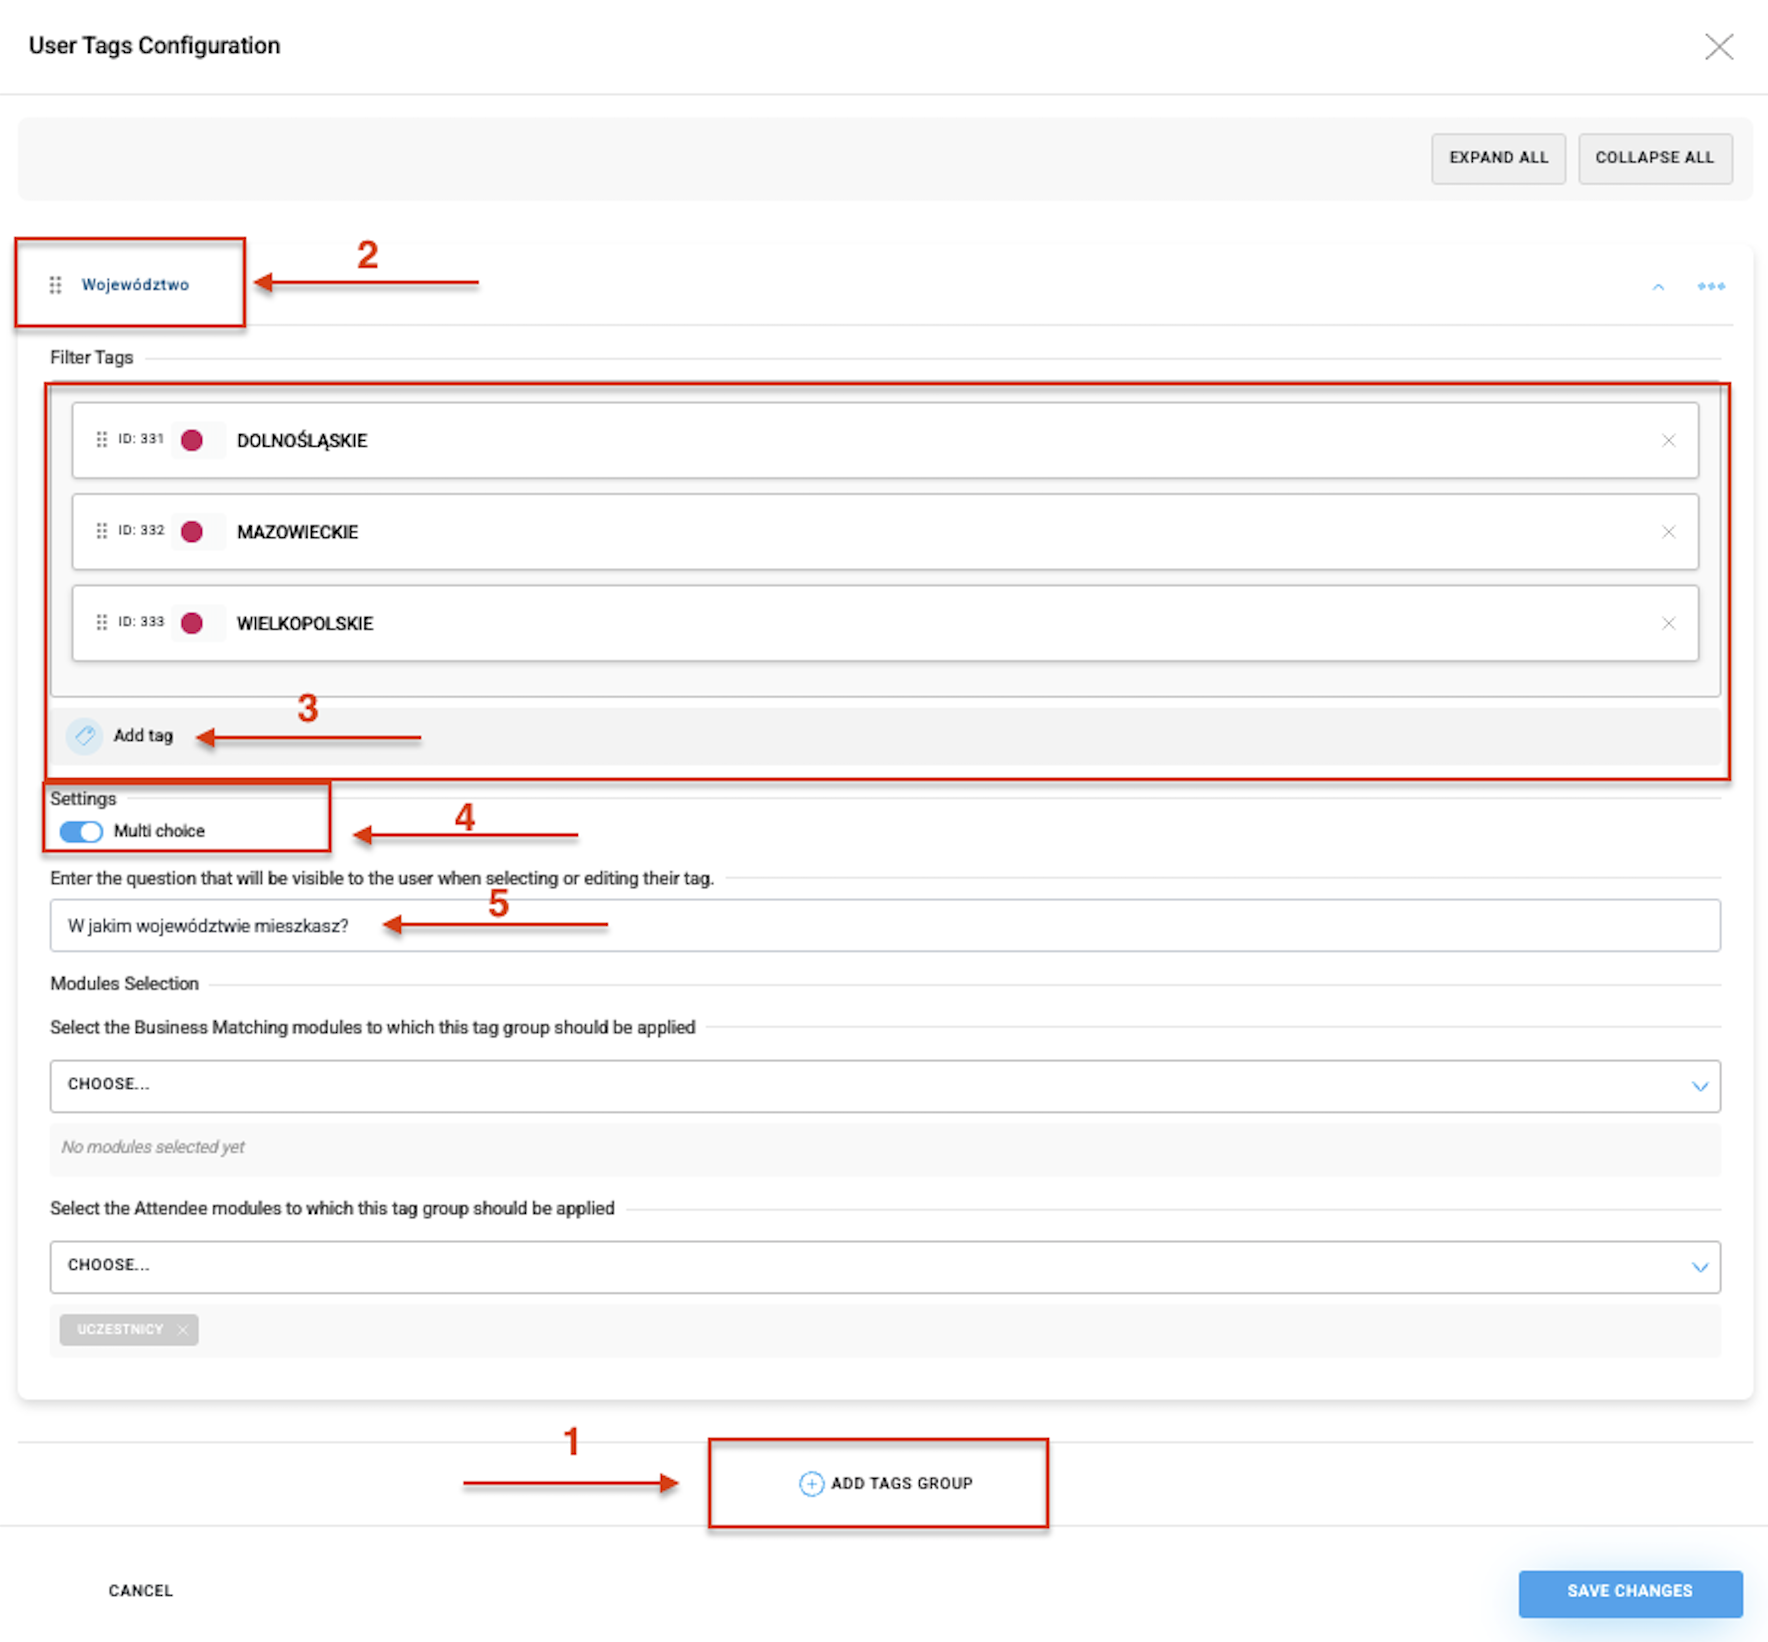
Go to tab: CREATE → CONTENT → MANAGE PARTICIPANT LABELS.
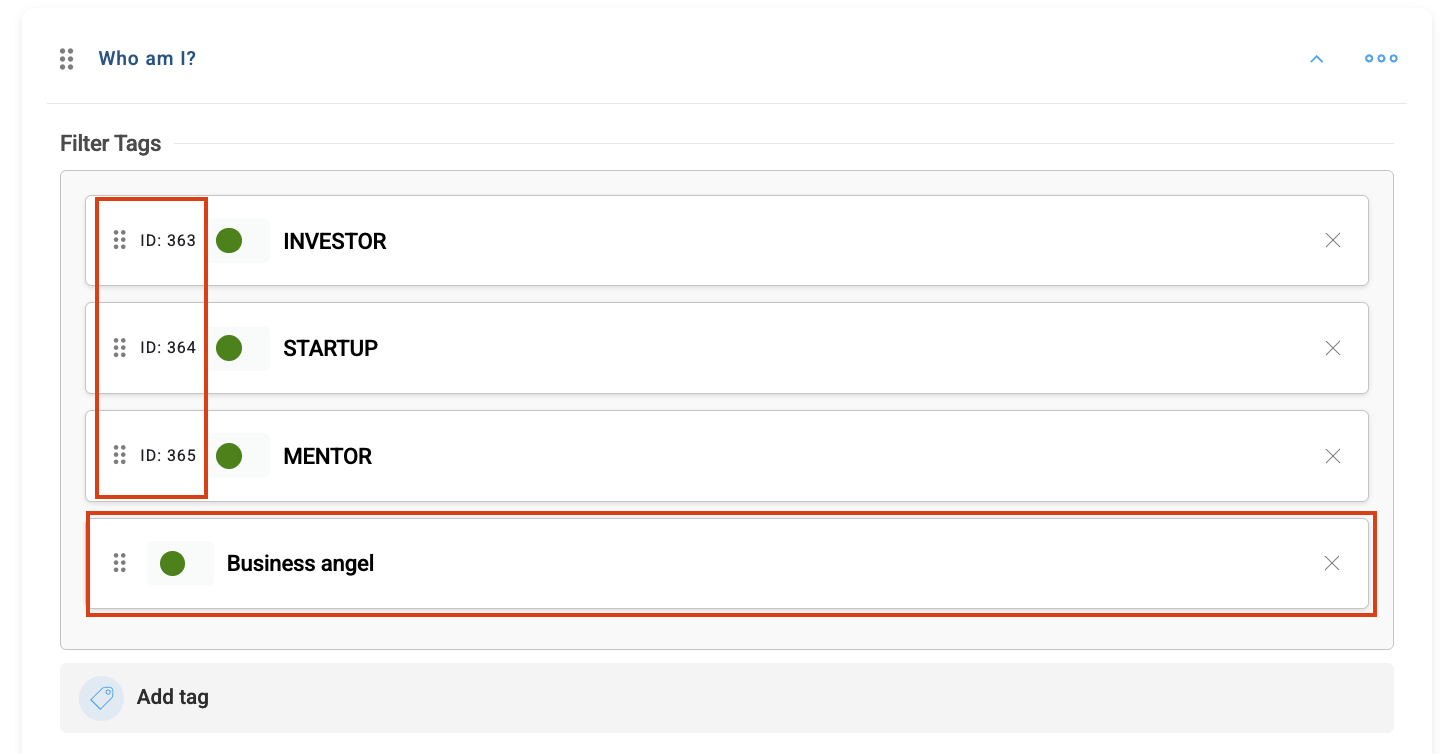
Create your first label group by choosing:
Add a label group ➕
Name your label group, e.g. “Industry”, “Region”, “Role at the event”.
Add labels, which will be available for mobile app users to pick from – e.g. “Startup”, “Investor”, “Technology”, “HR”.
Decide on the selection type:
– Single: the participant can pick only one label,
– Multiple: they can pick a few.
Add a question visible for app users when picking a label from the group
Next, pick the modules, where the created labels should be visible:
– Business Matching
– Participants
(you can pick both).
Click SAVE CHANGES in the bottom right corner.
If you have specific information about your event participants and want certain people to already have labels when they open the app, you can do this by assigning specific ID numbers in the import file. Learn more about importing users.
First, you need to create labels according to the 5 steps described above, and then click SAVE CHANGES in the bottom right corner.
Next, click MANAGE PARTICIPANT TAGS - this will let you check the IDs of created tags and assign them to specific users in the file you’re prepping for import, based on the current template you downloaded from the panel in the MANAGE → USERS tab. You should enter the tags in the N: attendee_tag_ids column.


can choose their own labels (e.g. “Startup”, “Europe”, “FinTech”) from a list prepared by the admin in the panel;
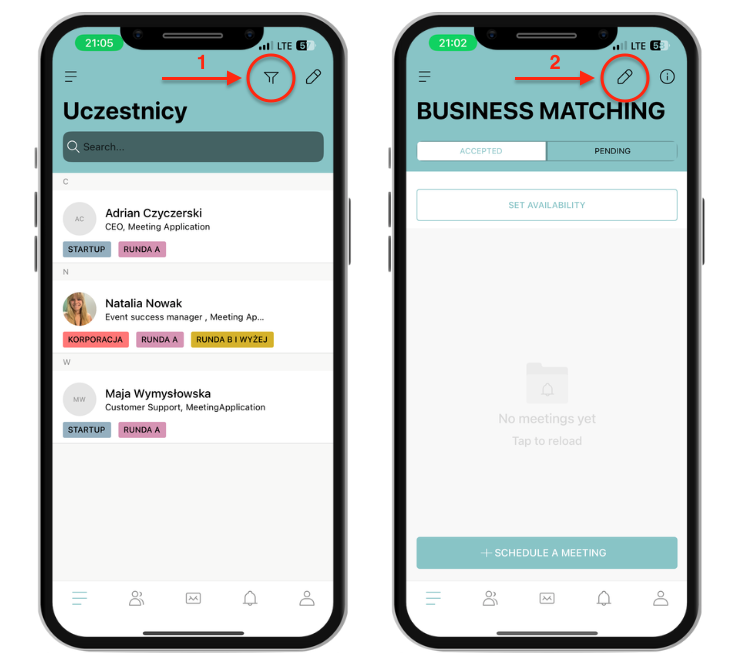
will be visible with their assigned labels to other participants on the list in the Participants component;
can filter other participants by the labels they chose and easily reach out to people they’re interested in;
will find valuable contacts in the Business Matching module more easily and will only set up meetings with people they actually want to network with;
The funnel lets you set up filtering (in the business matching module, filtering is available after clicking “+ schedule meeting”)
The pencil icon opens label editing mode
App users who didn’t pick tags in the pop up when they first entered the app can do it anytime using editing mode.
If an Admin gave a user a specific tag through an import file, the user will still be able to change that tag themselves in editing mode in one of the modules.
Have a great event with Meeting Application
