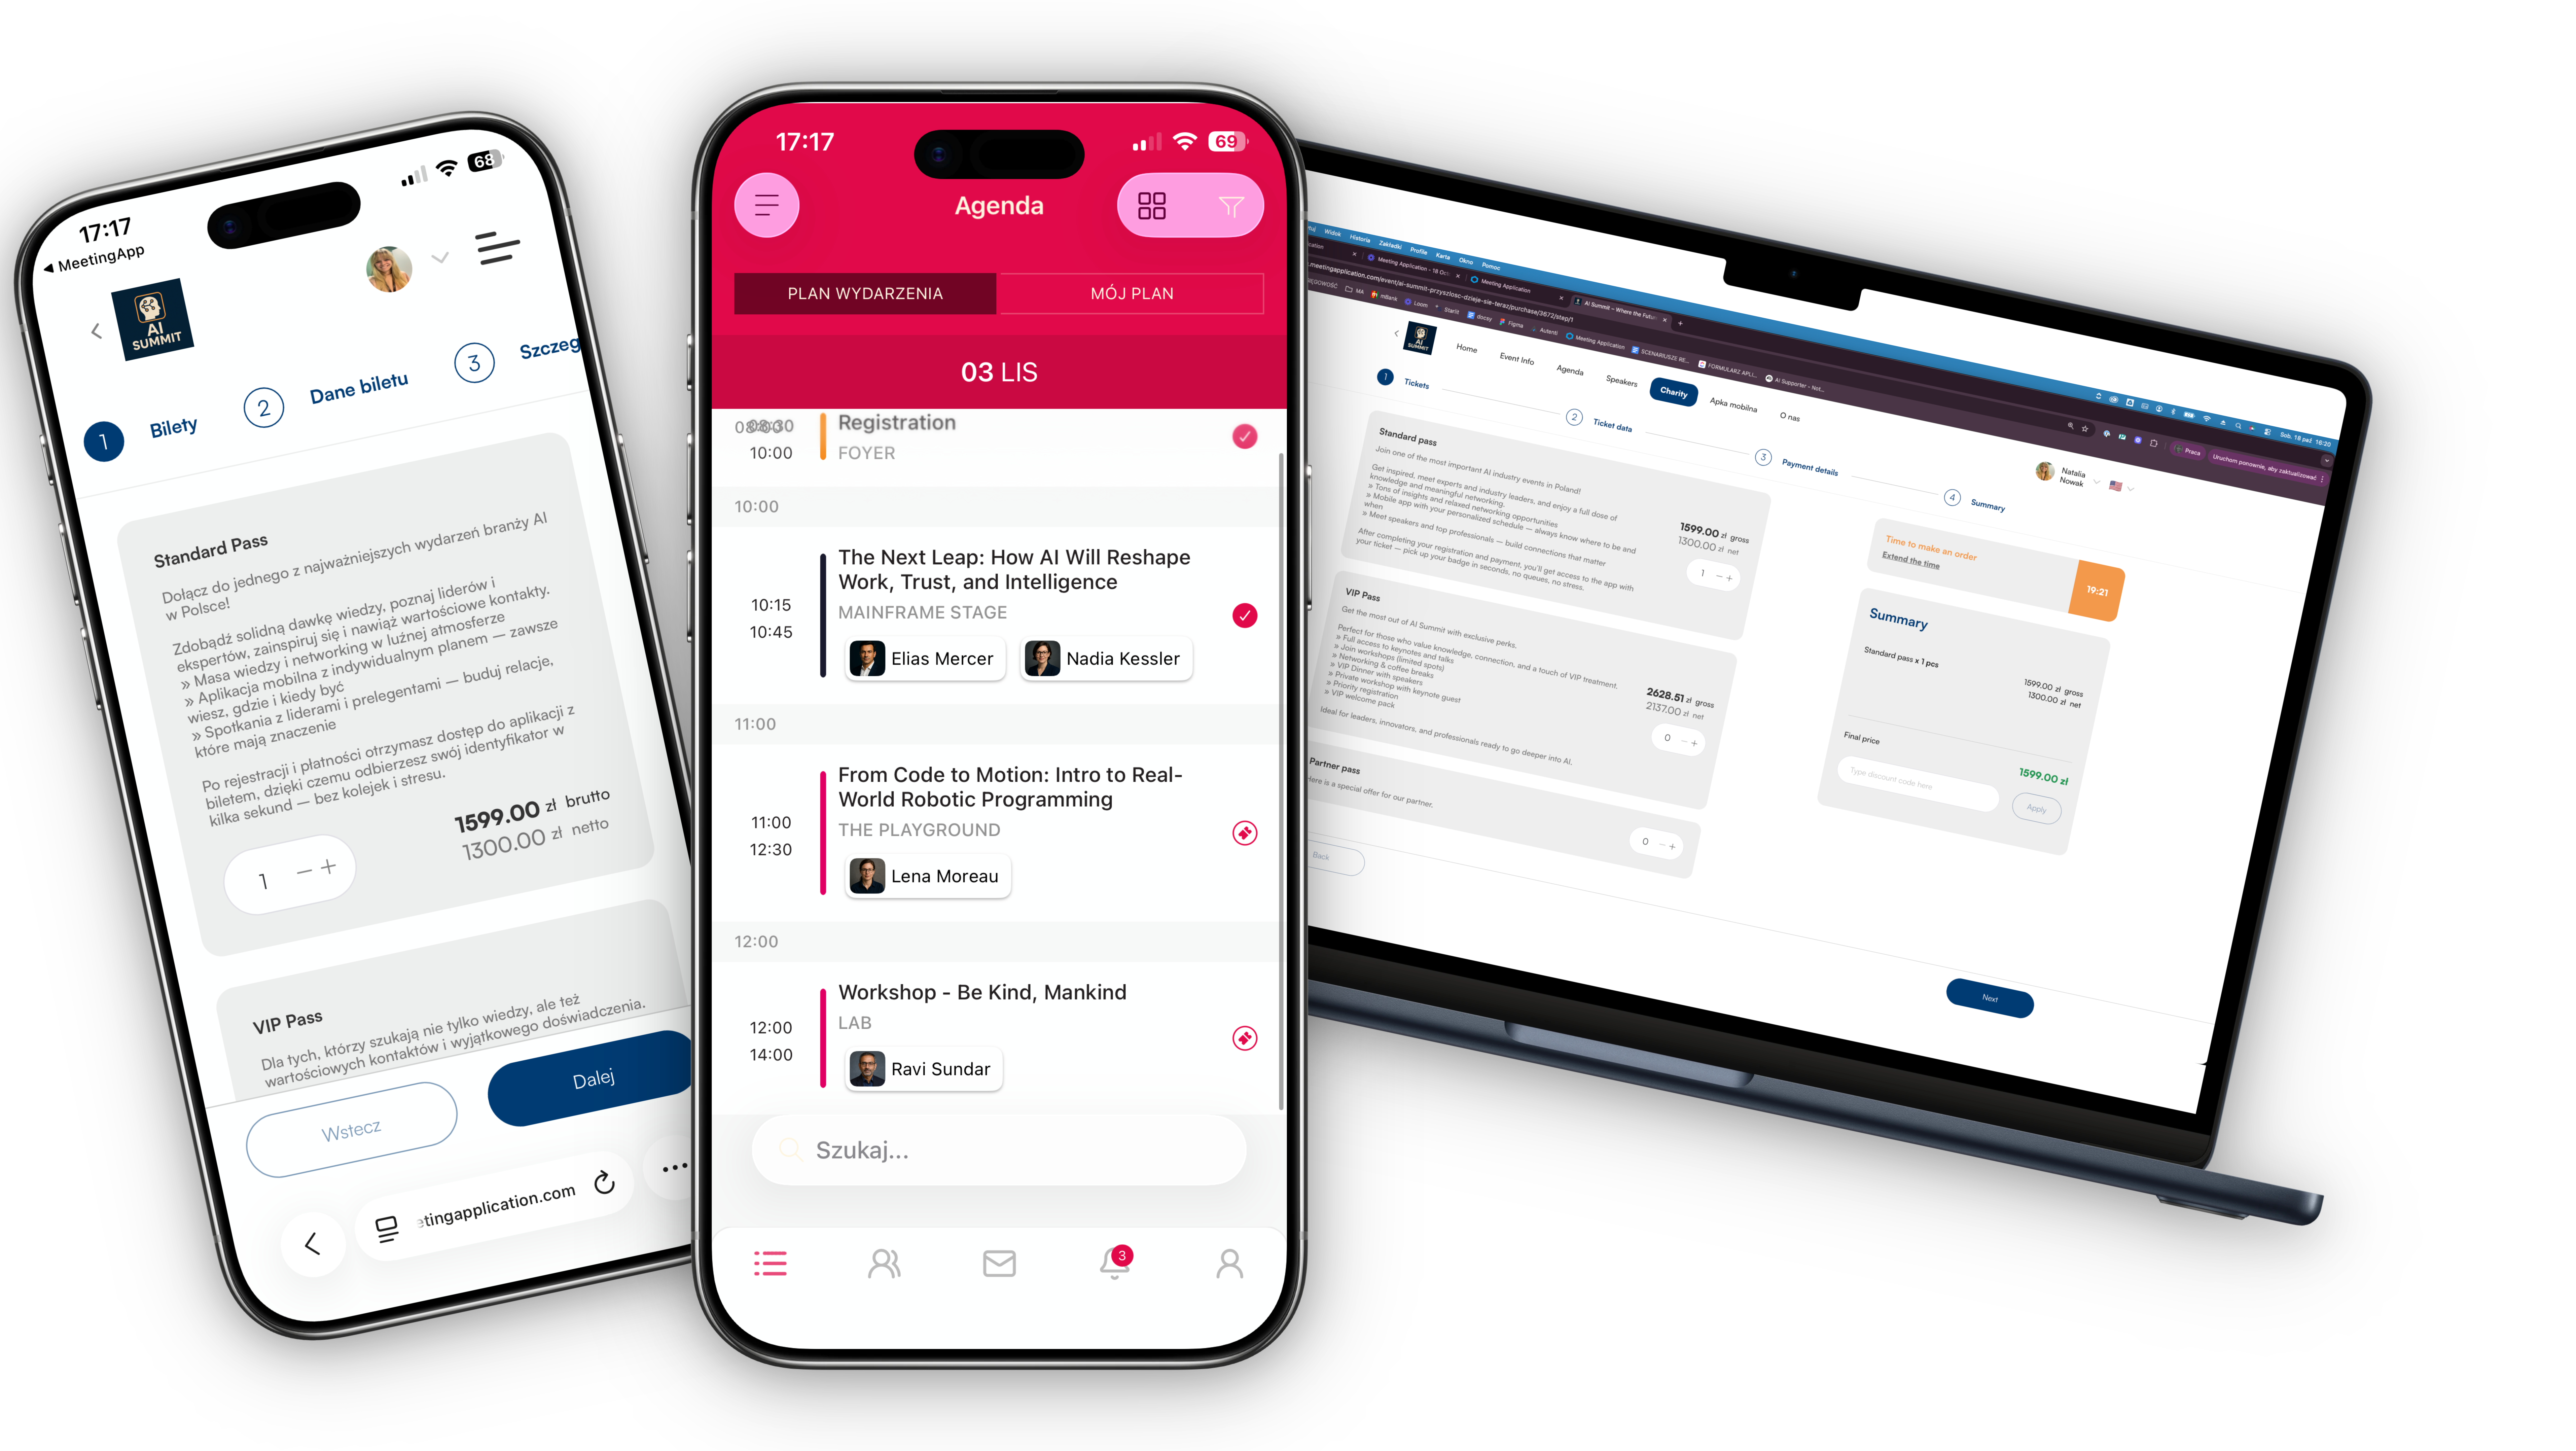
The agenda is one of the most frequently viewed screens in event apps. With the Meeting Application app you’ll make sure that the information in the agenda is always up to date – all changes made there are shown in real time.
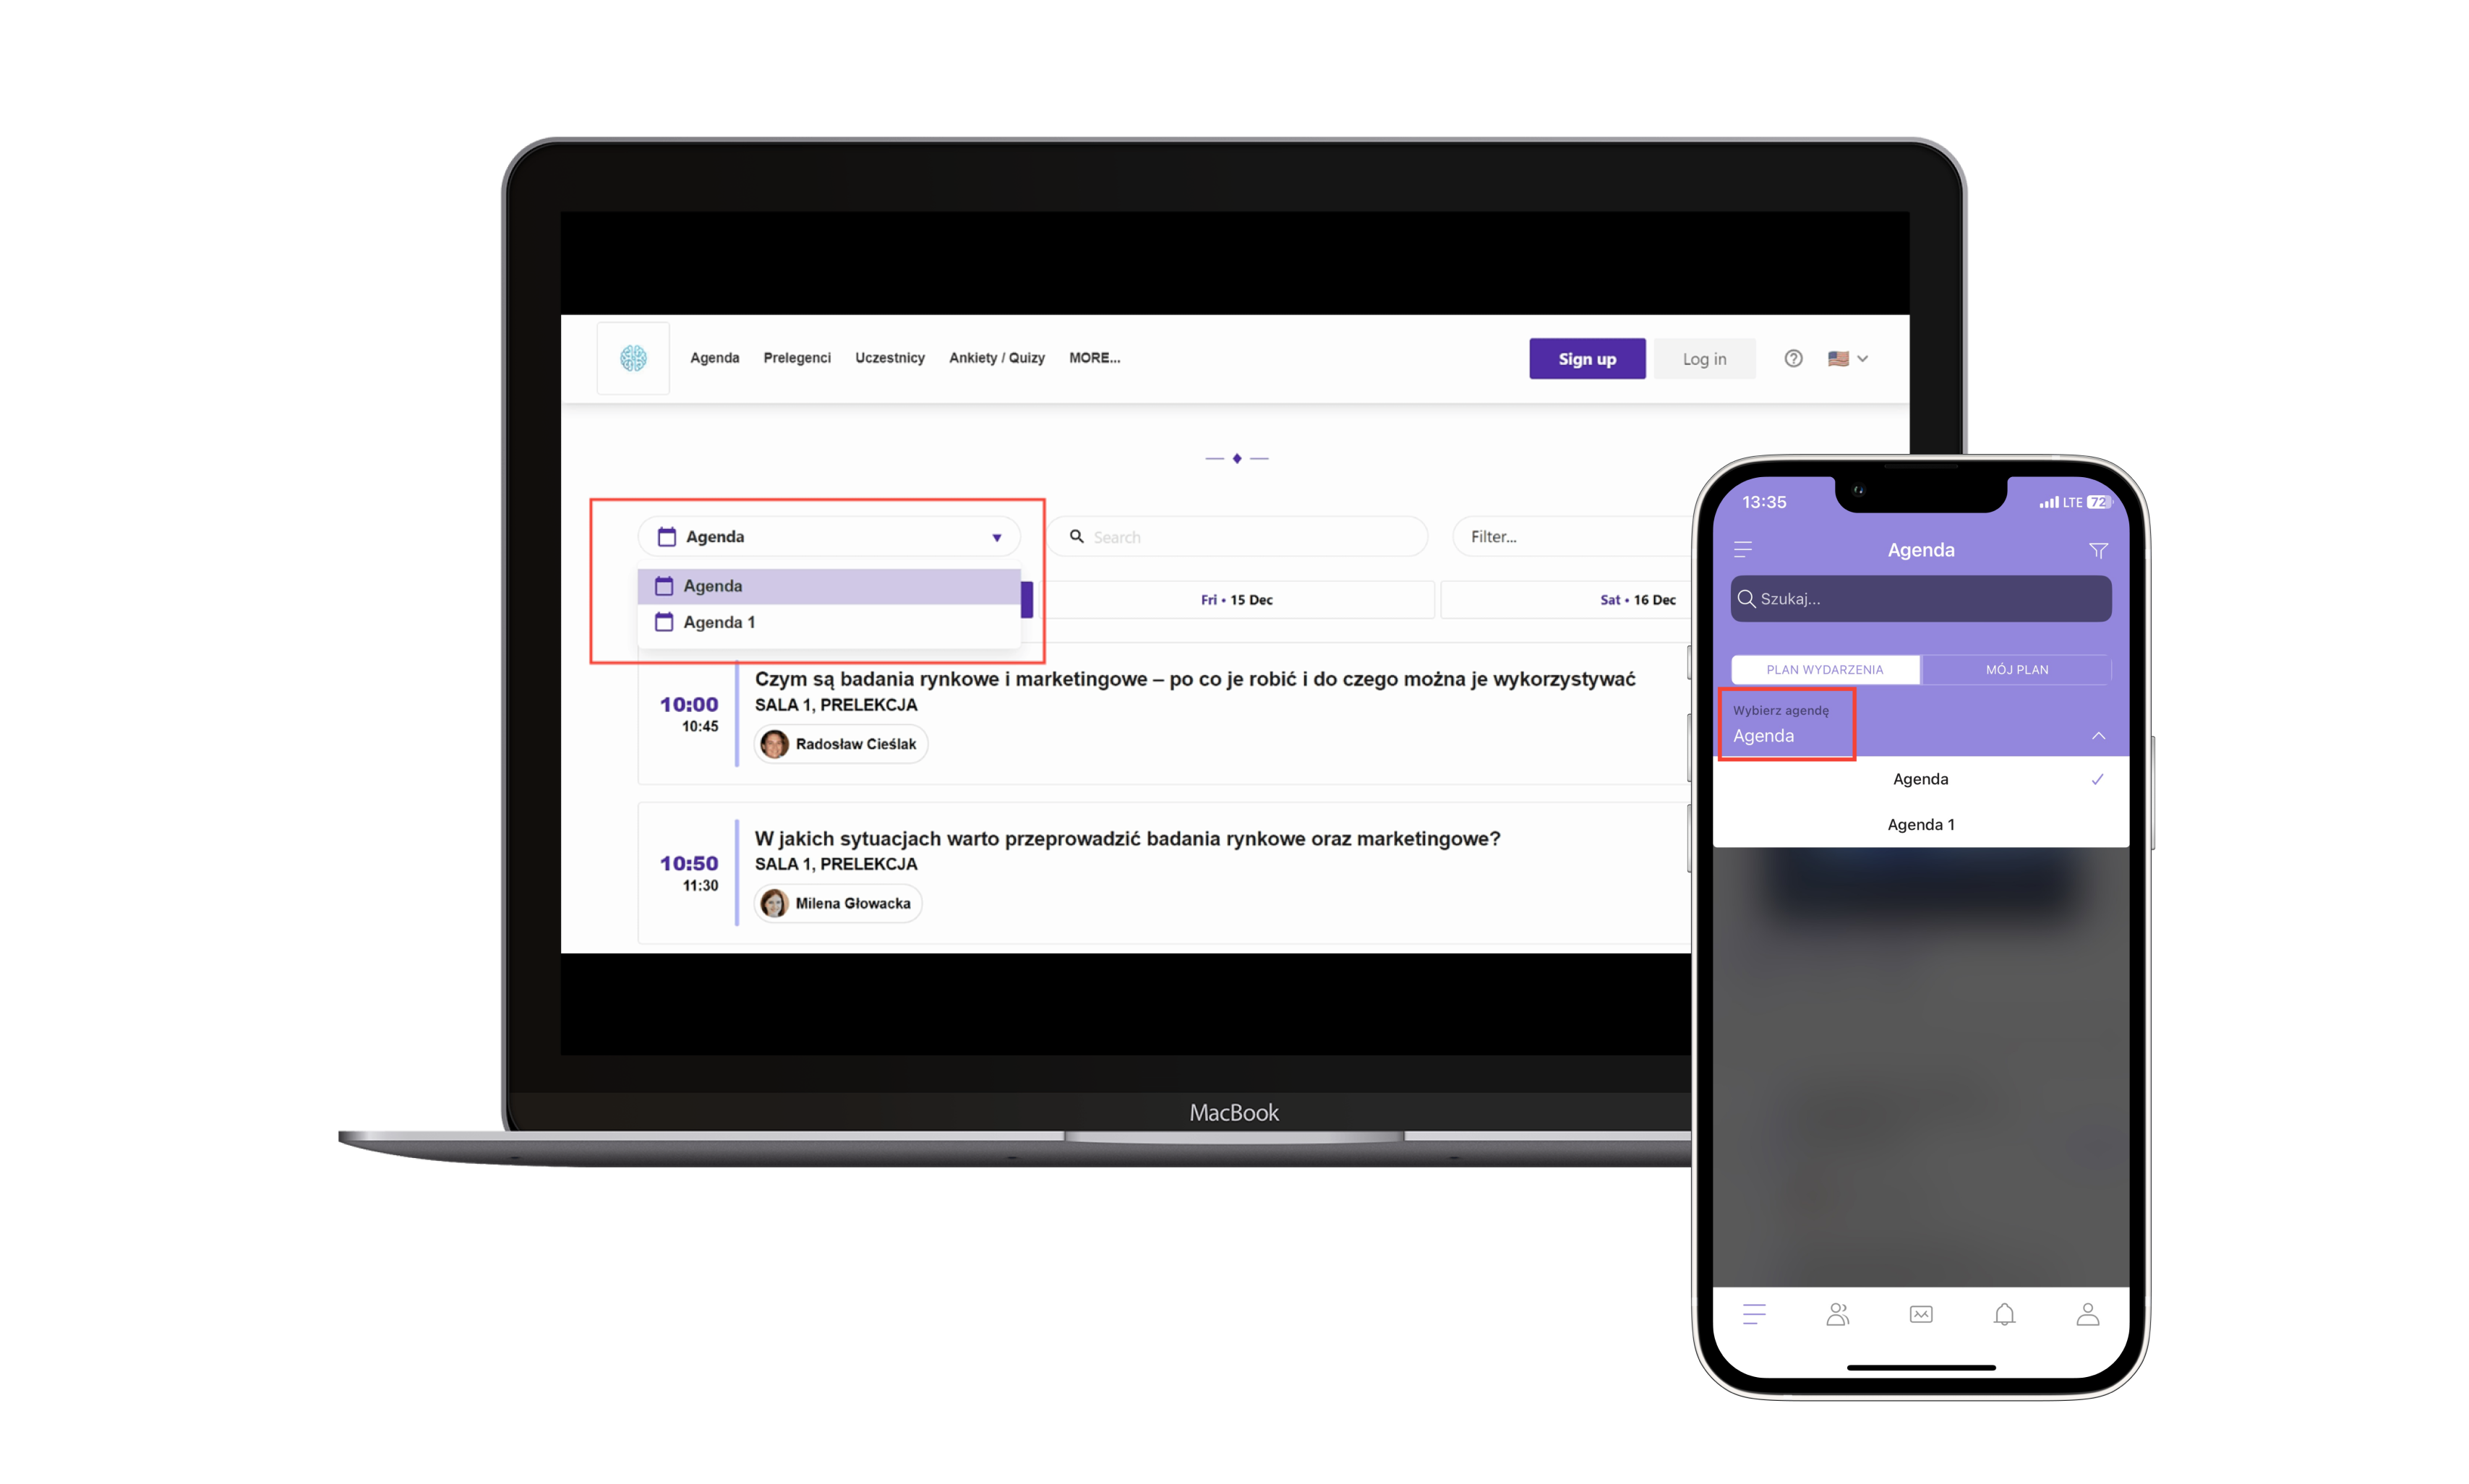
A properly filled in Agenda provides all the information about the events taking place within the conference. The same content will also appear on the event’s dedicated Landing Page or on an external site using the widget embed. By updating the Agenda in Meeting Application you can, with a single click, change it in the app, on the LP page, and on your own website.
By pressing the ➕ next to a specific session, the app user can create their own schedule by adding interesting sessions to the My Plan tab. The list of users assigned to a specific session is visible on the Landing Page and in the App, as well as in the admin panel, in the Manage section. This feature makes it easier for the user to manage their plan, while the organizer is able to estimate in advance which elements of the event attract the most interest:

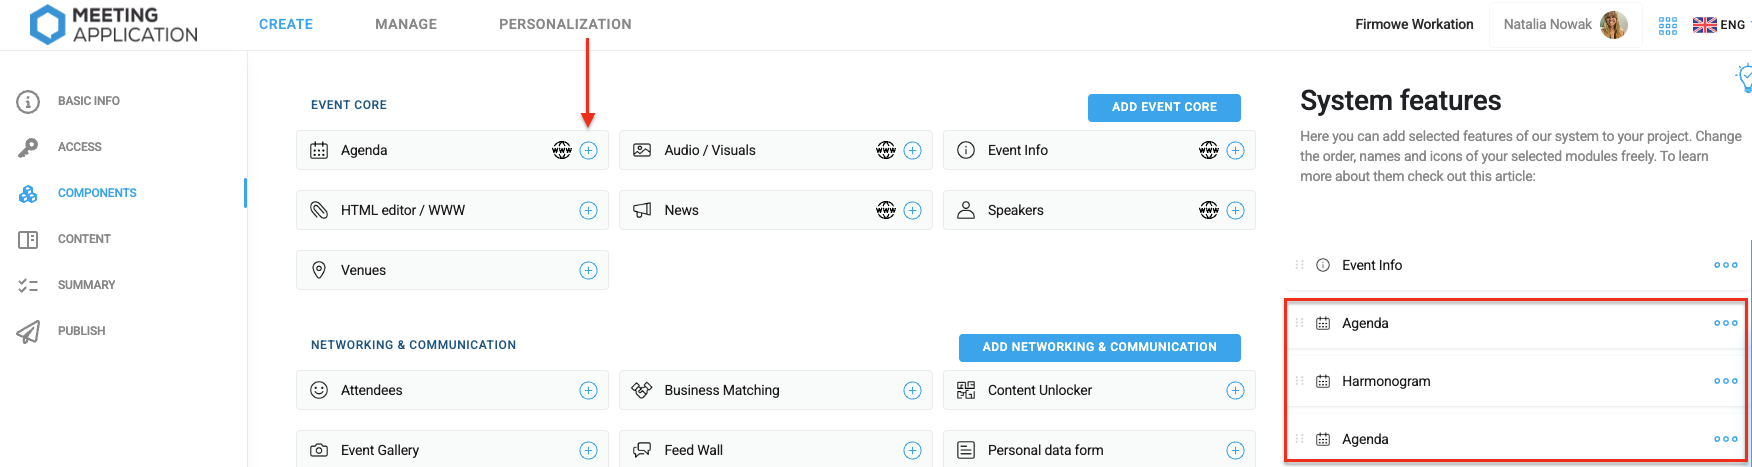
If your event has more than one agenda, you can add several Agenda modules in the CREATE tab, in the Components section, giving each of them appropriate names:


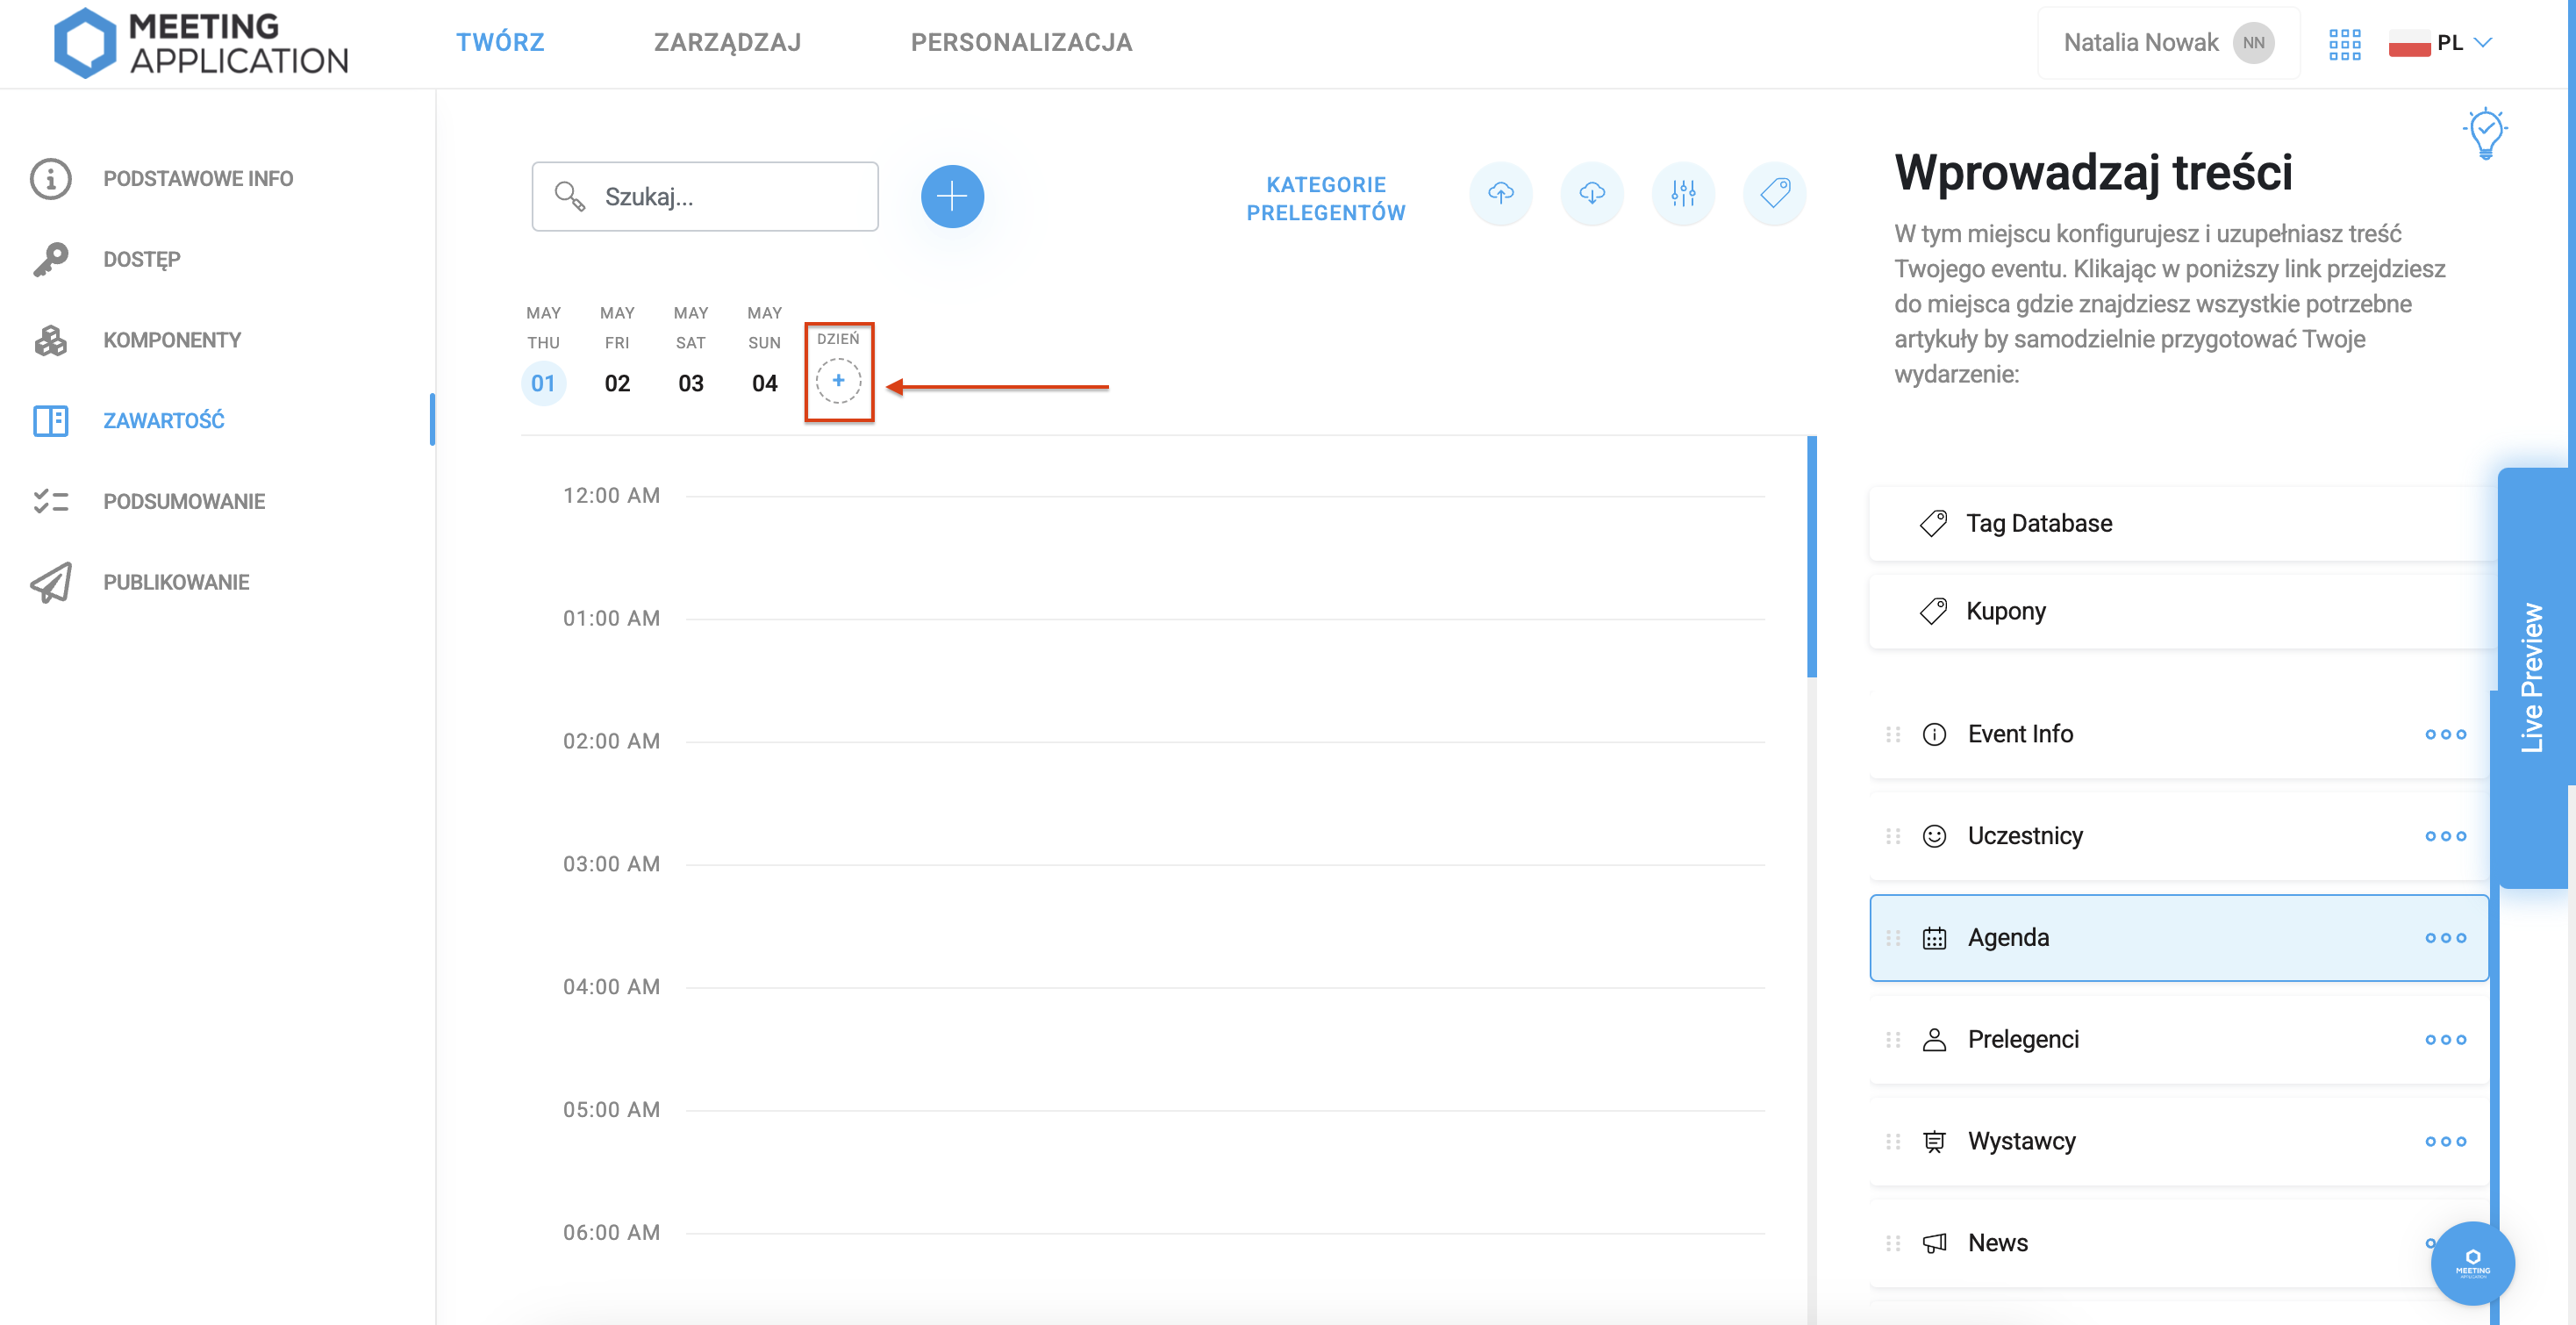
To add a day in the agenda, click the ➕ placed at the top of the module and select the right day from the calendar:
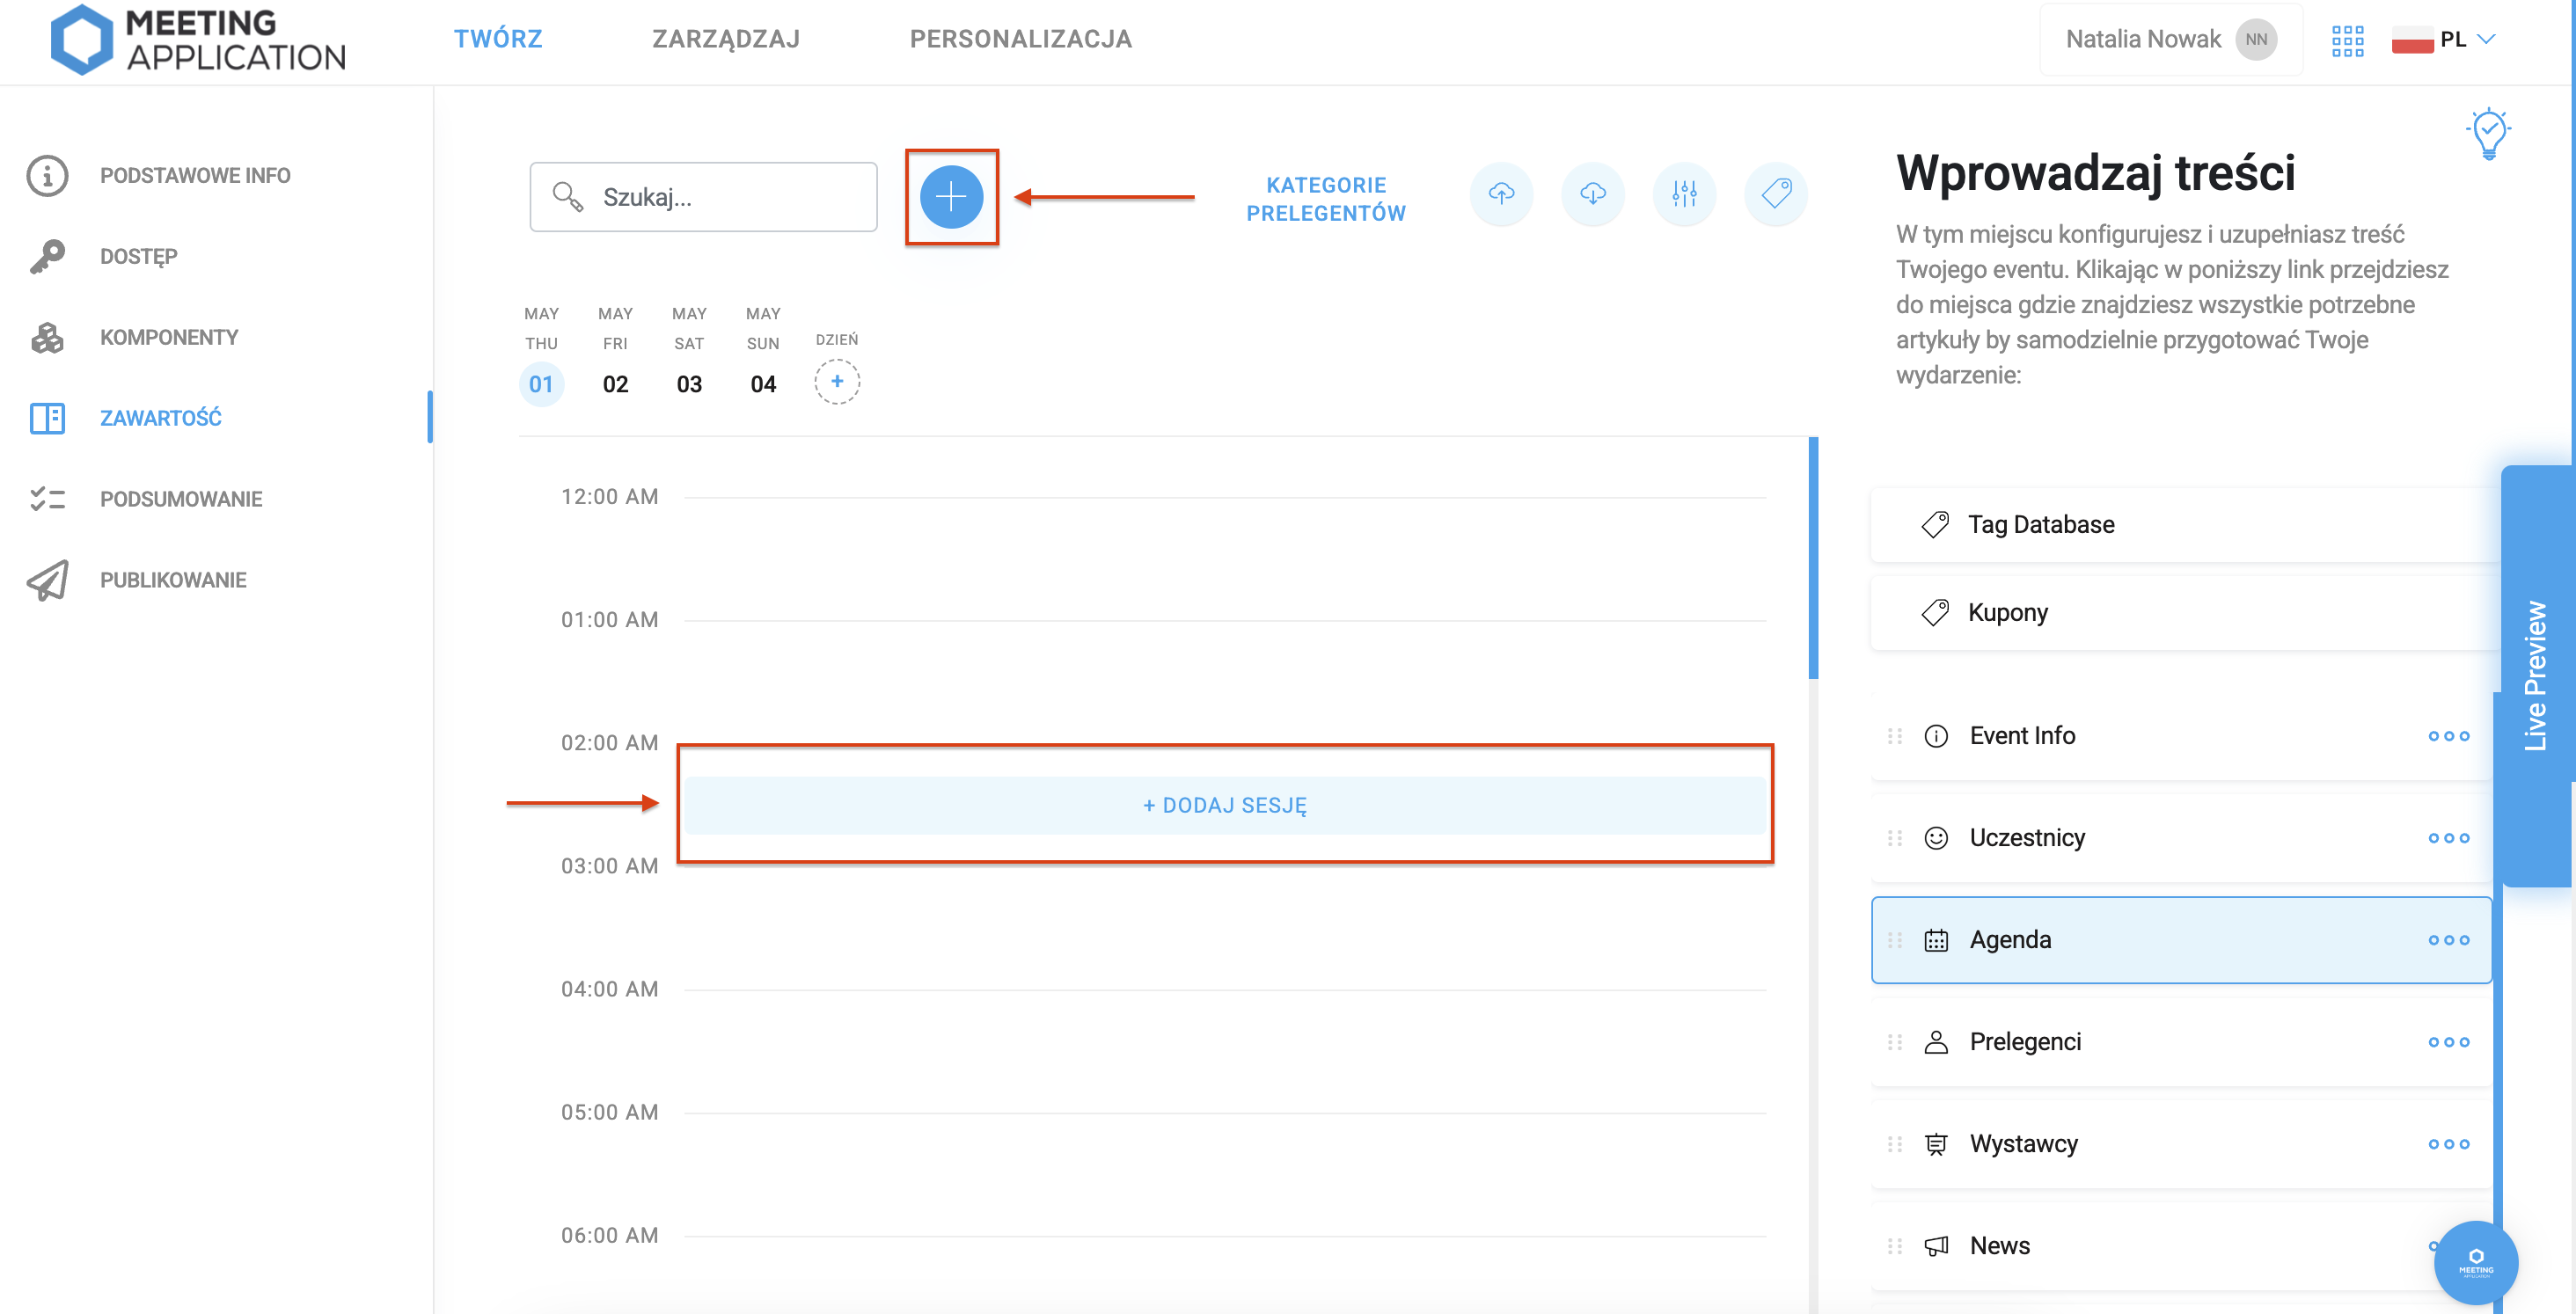
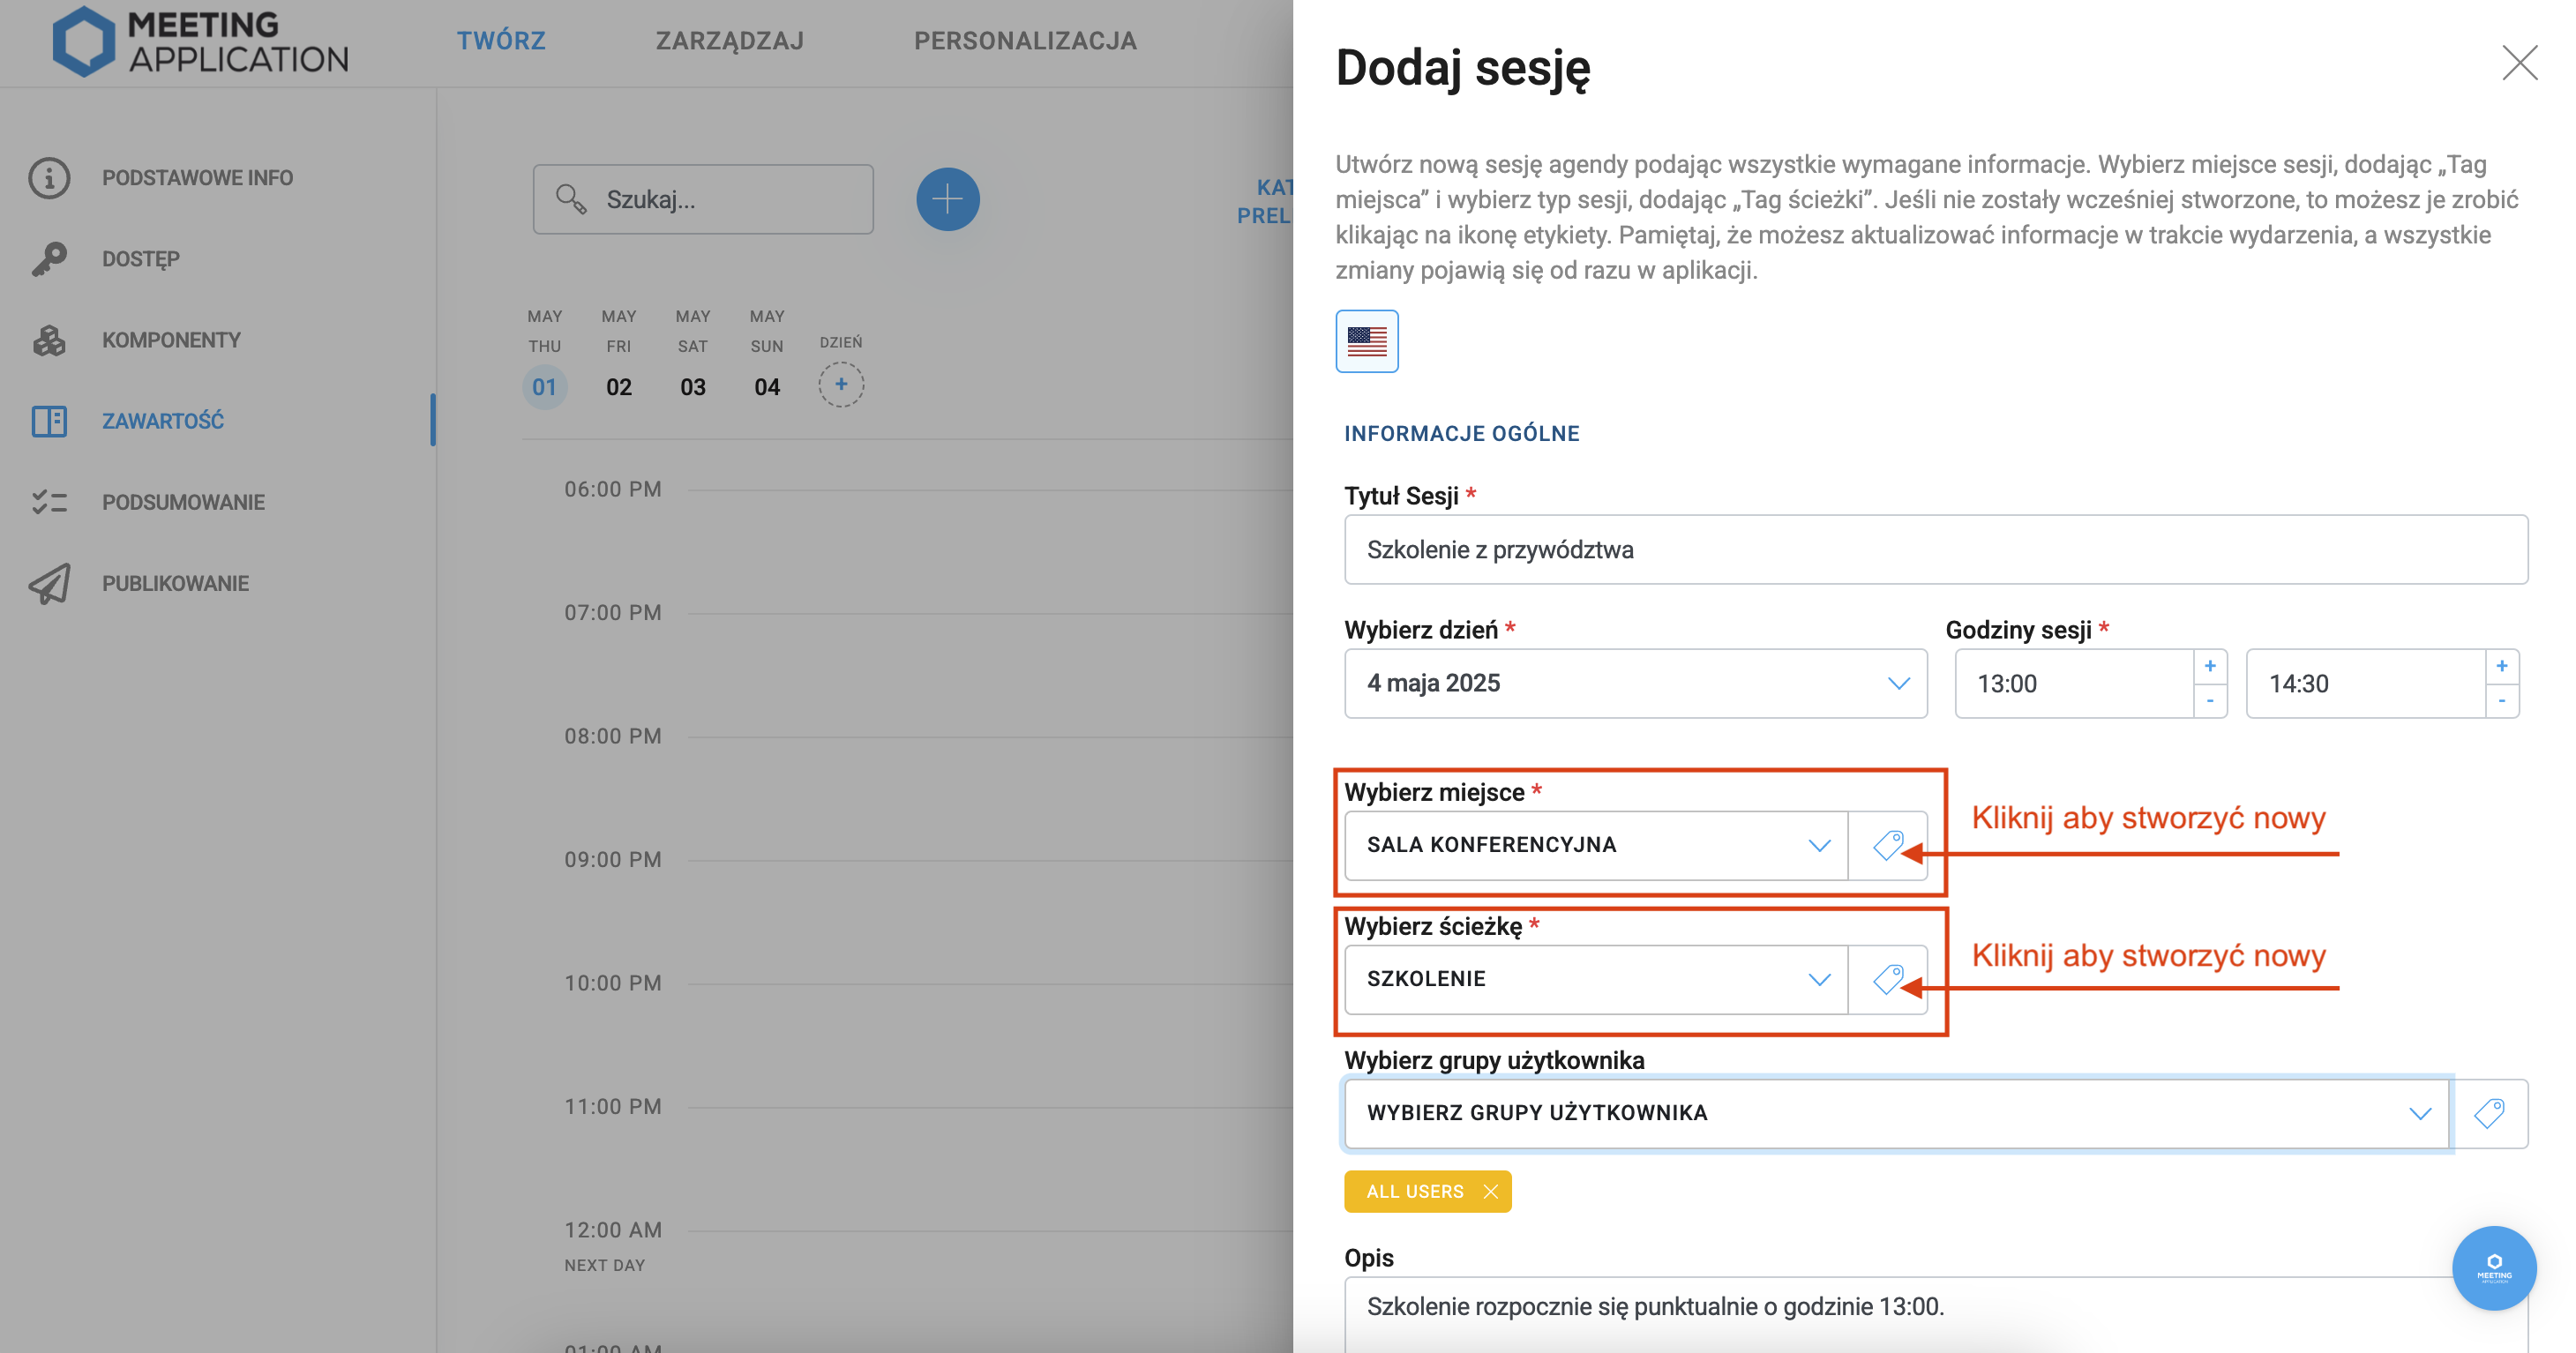
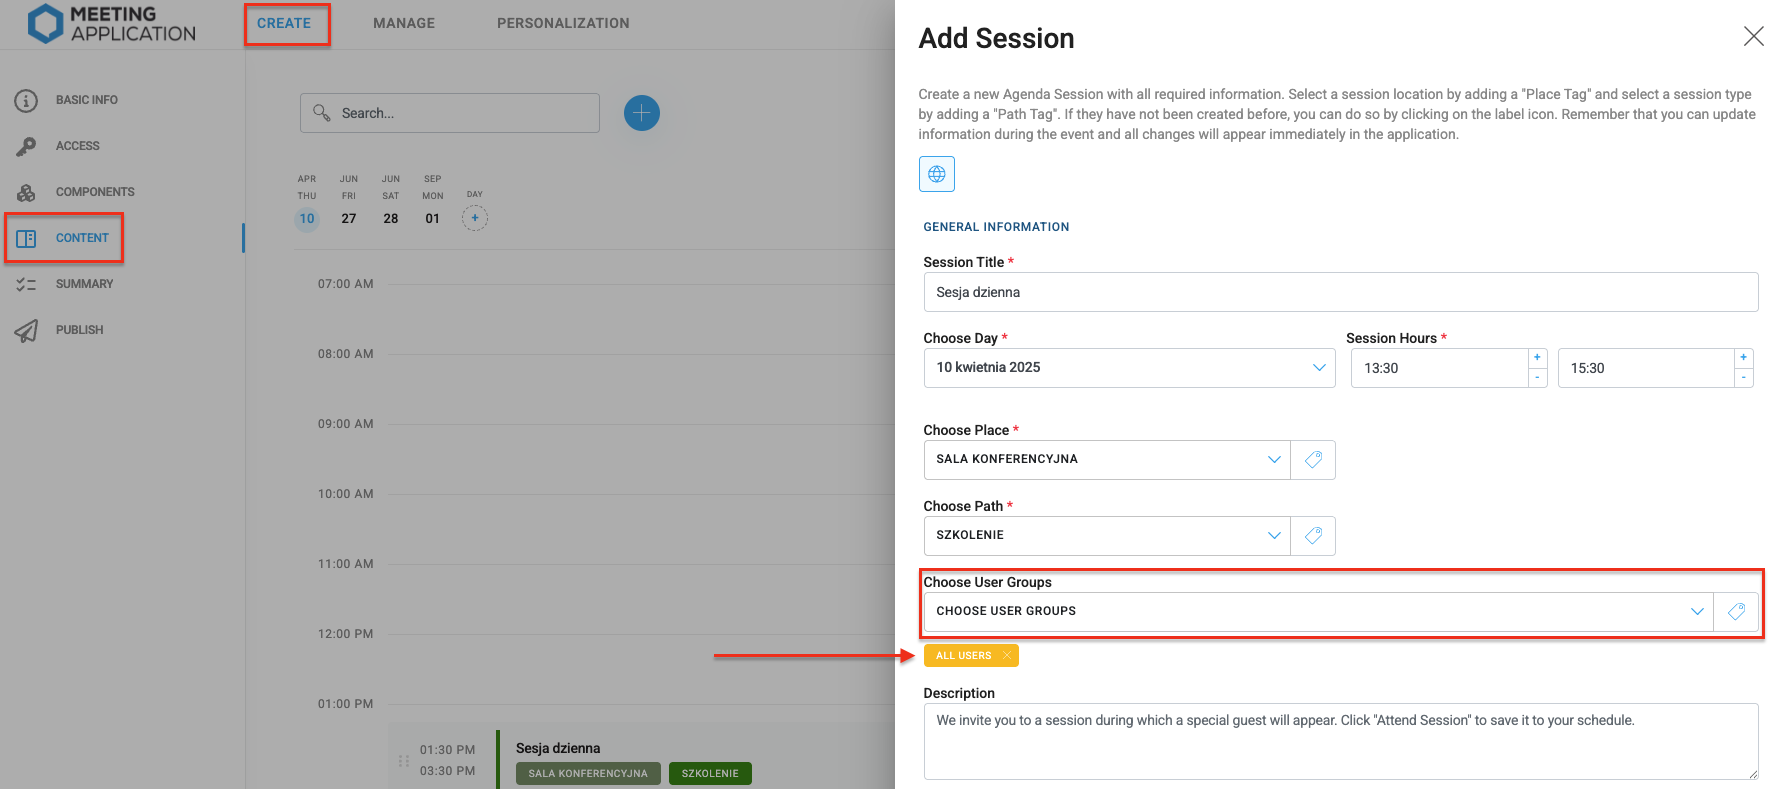
To add a session on a selected day, press the ➕icon at the top of the page, or hover over any time slot and click ➕ Add session. Before saving, you need to fill in all the fields marked with an asterisk.
Adding sessions to the agenda is only possible after creating tags for the Agenda location (e.g. auditorium, foyer) and session type Agenda track (e.g. talk, workshop, or discussion). This lets event participants filter sessions in the App and on the Landing Page.
You can create these tags in the Tag Database module or while creating a session by clicking the label visible next to the Choose place and Choose path fields. Learn more about tags in the Meeting Application app.
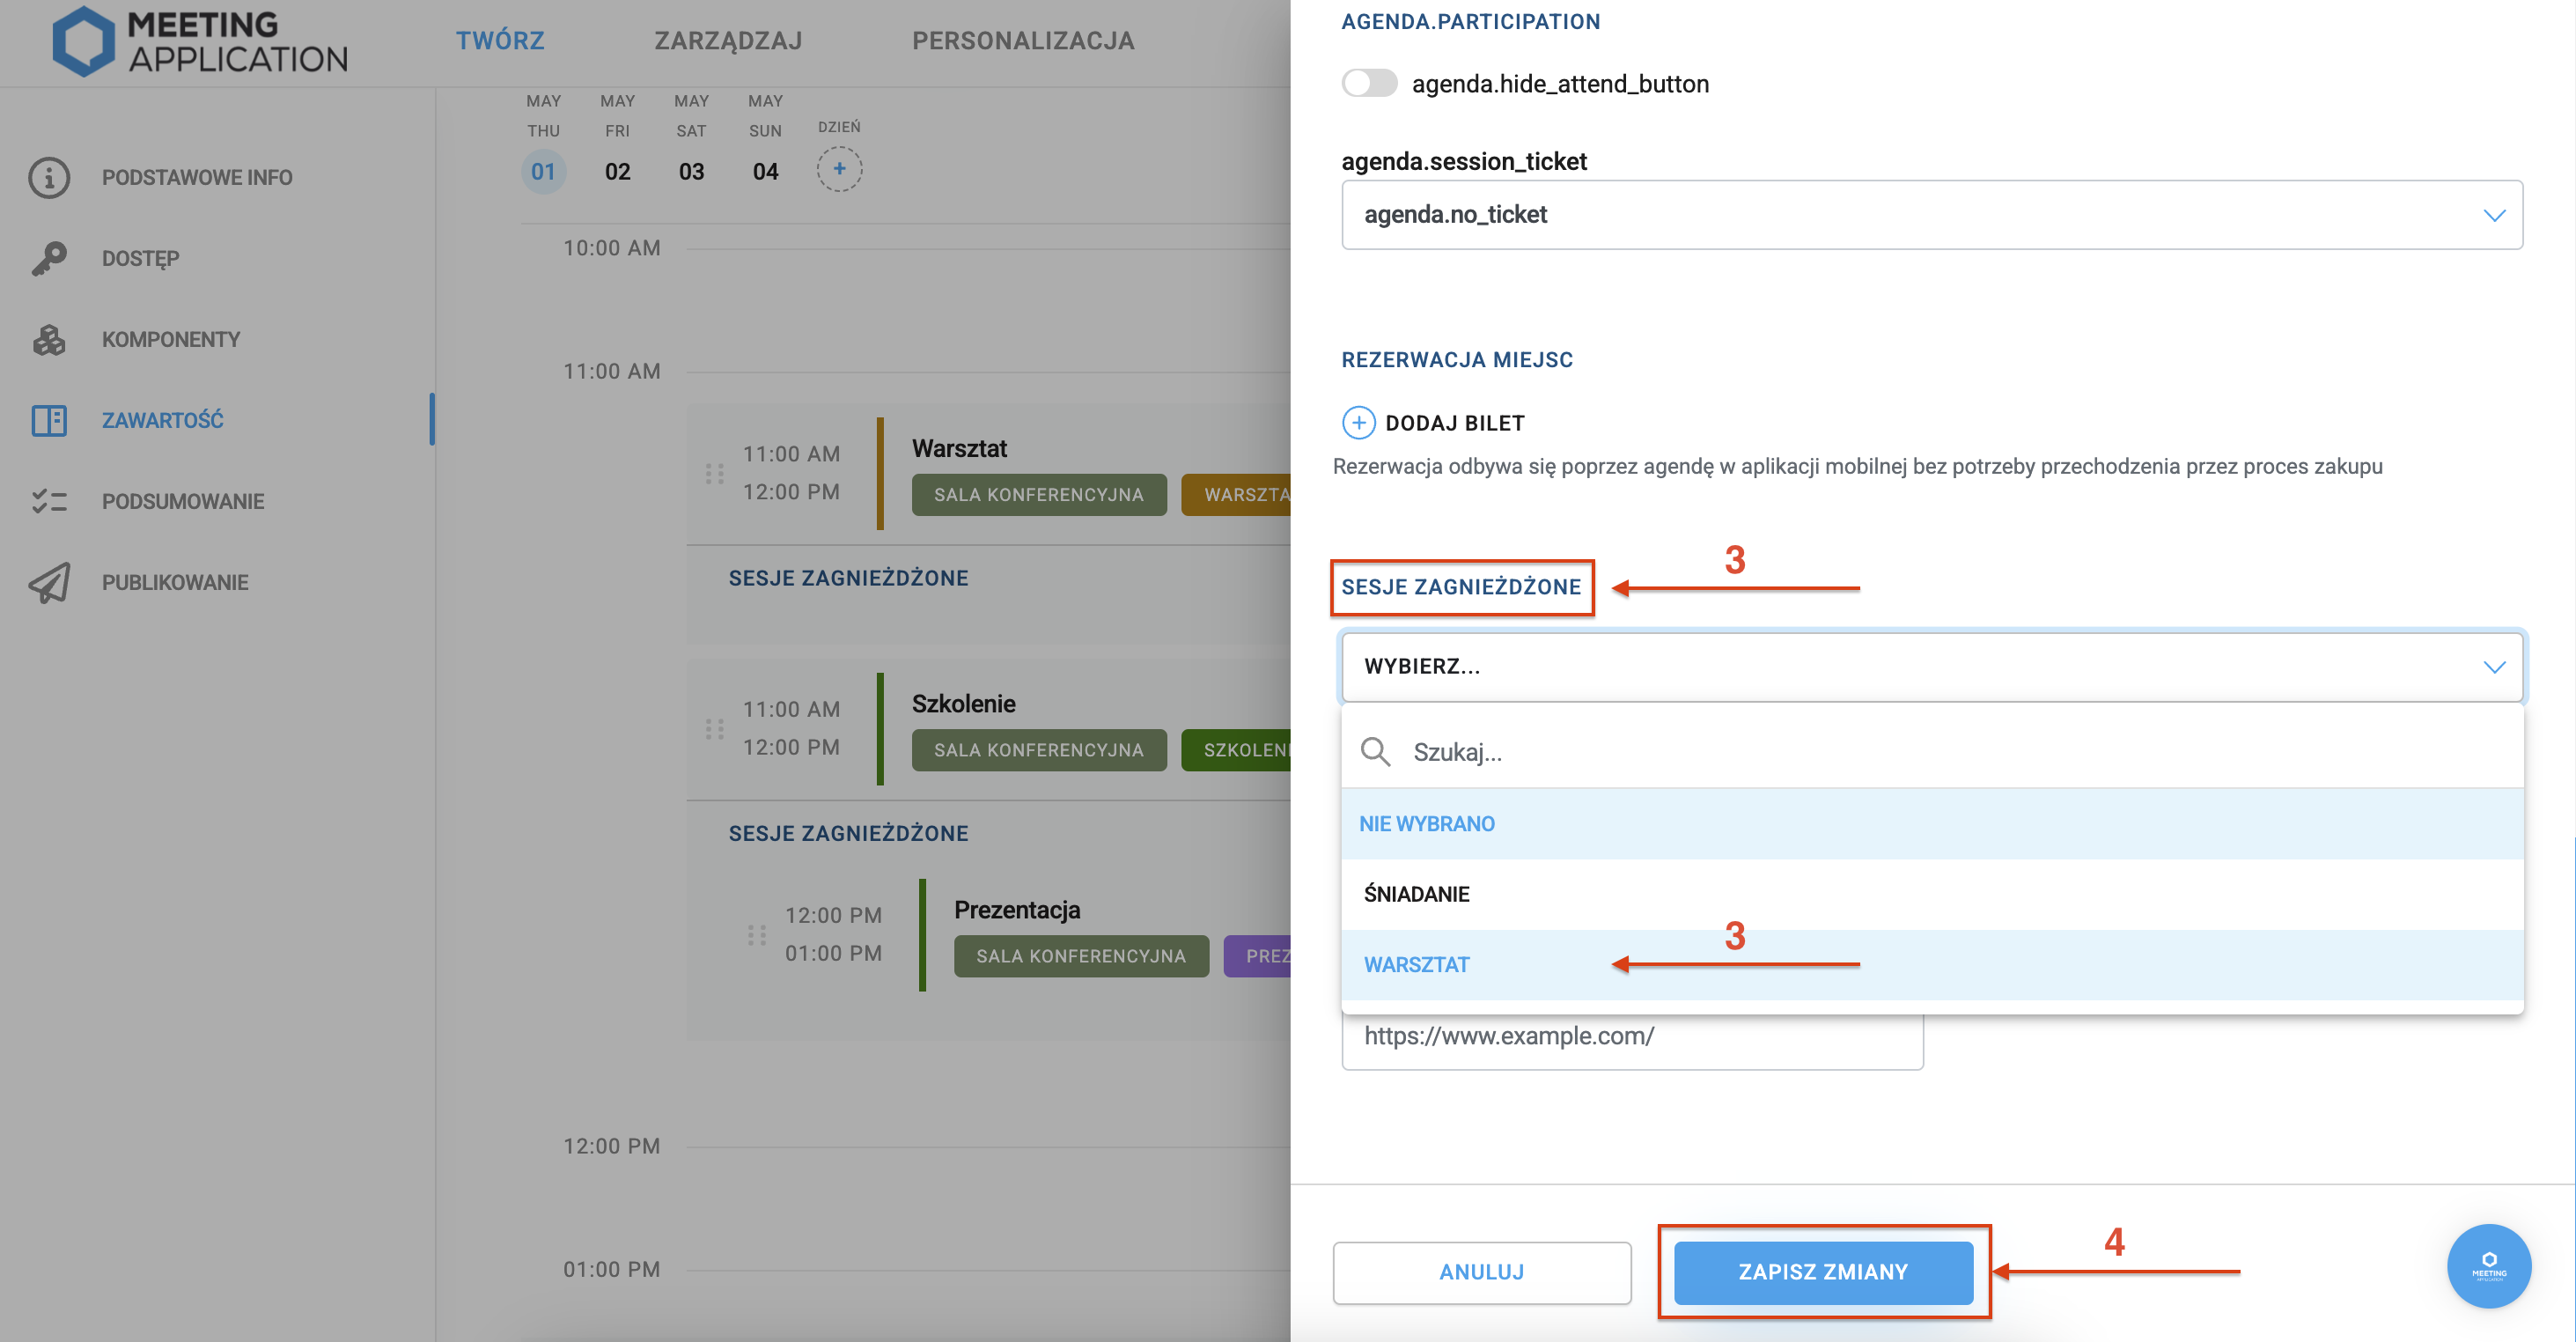
If your event is divided into blocks that contain several shorter talks or meetings, you can add them as nested sessions.
To create this kind of agenda view, follow the steps below:
Add all single sessions: name, duration, tags, descriptions, etc.
Go to editing the main session by clicking … EDIT SESSION
Attach sub-sessions to it by choosing from the dropdown list of previously created NESTED SESSIONS
SAVE CHANGES
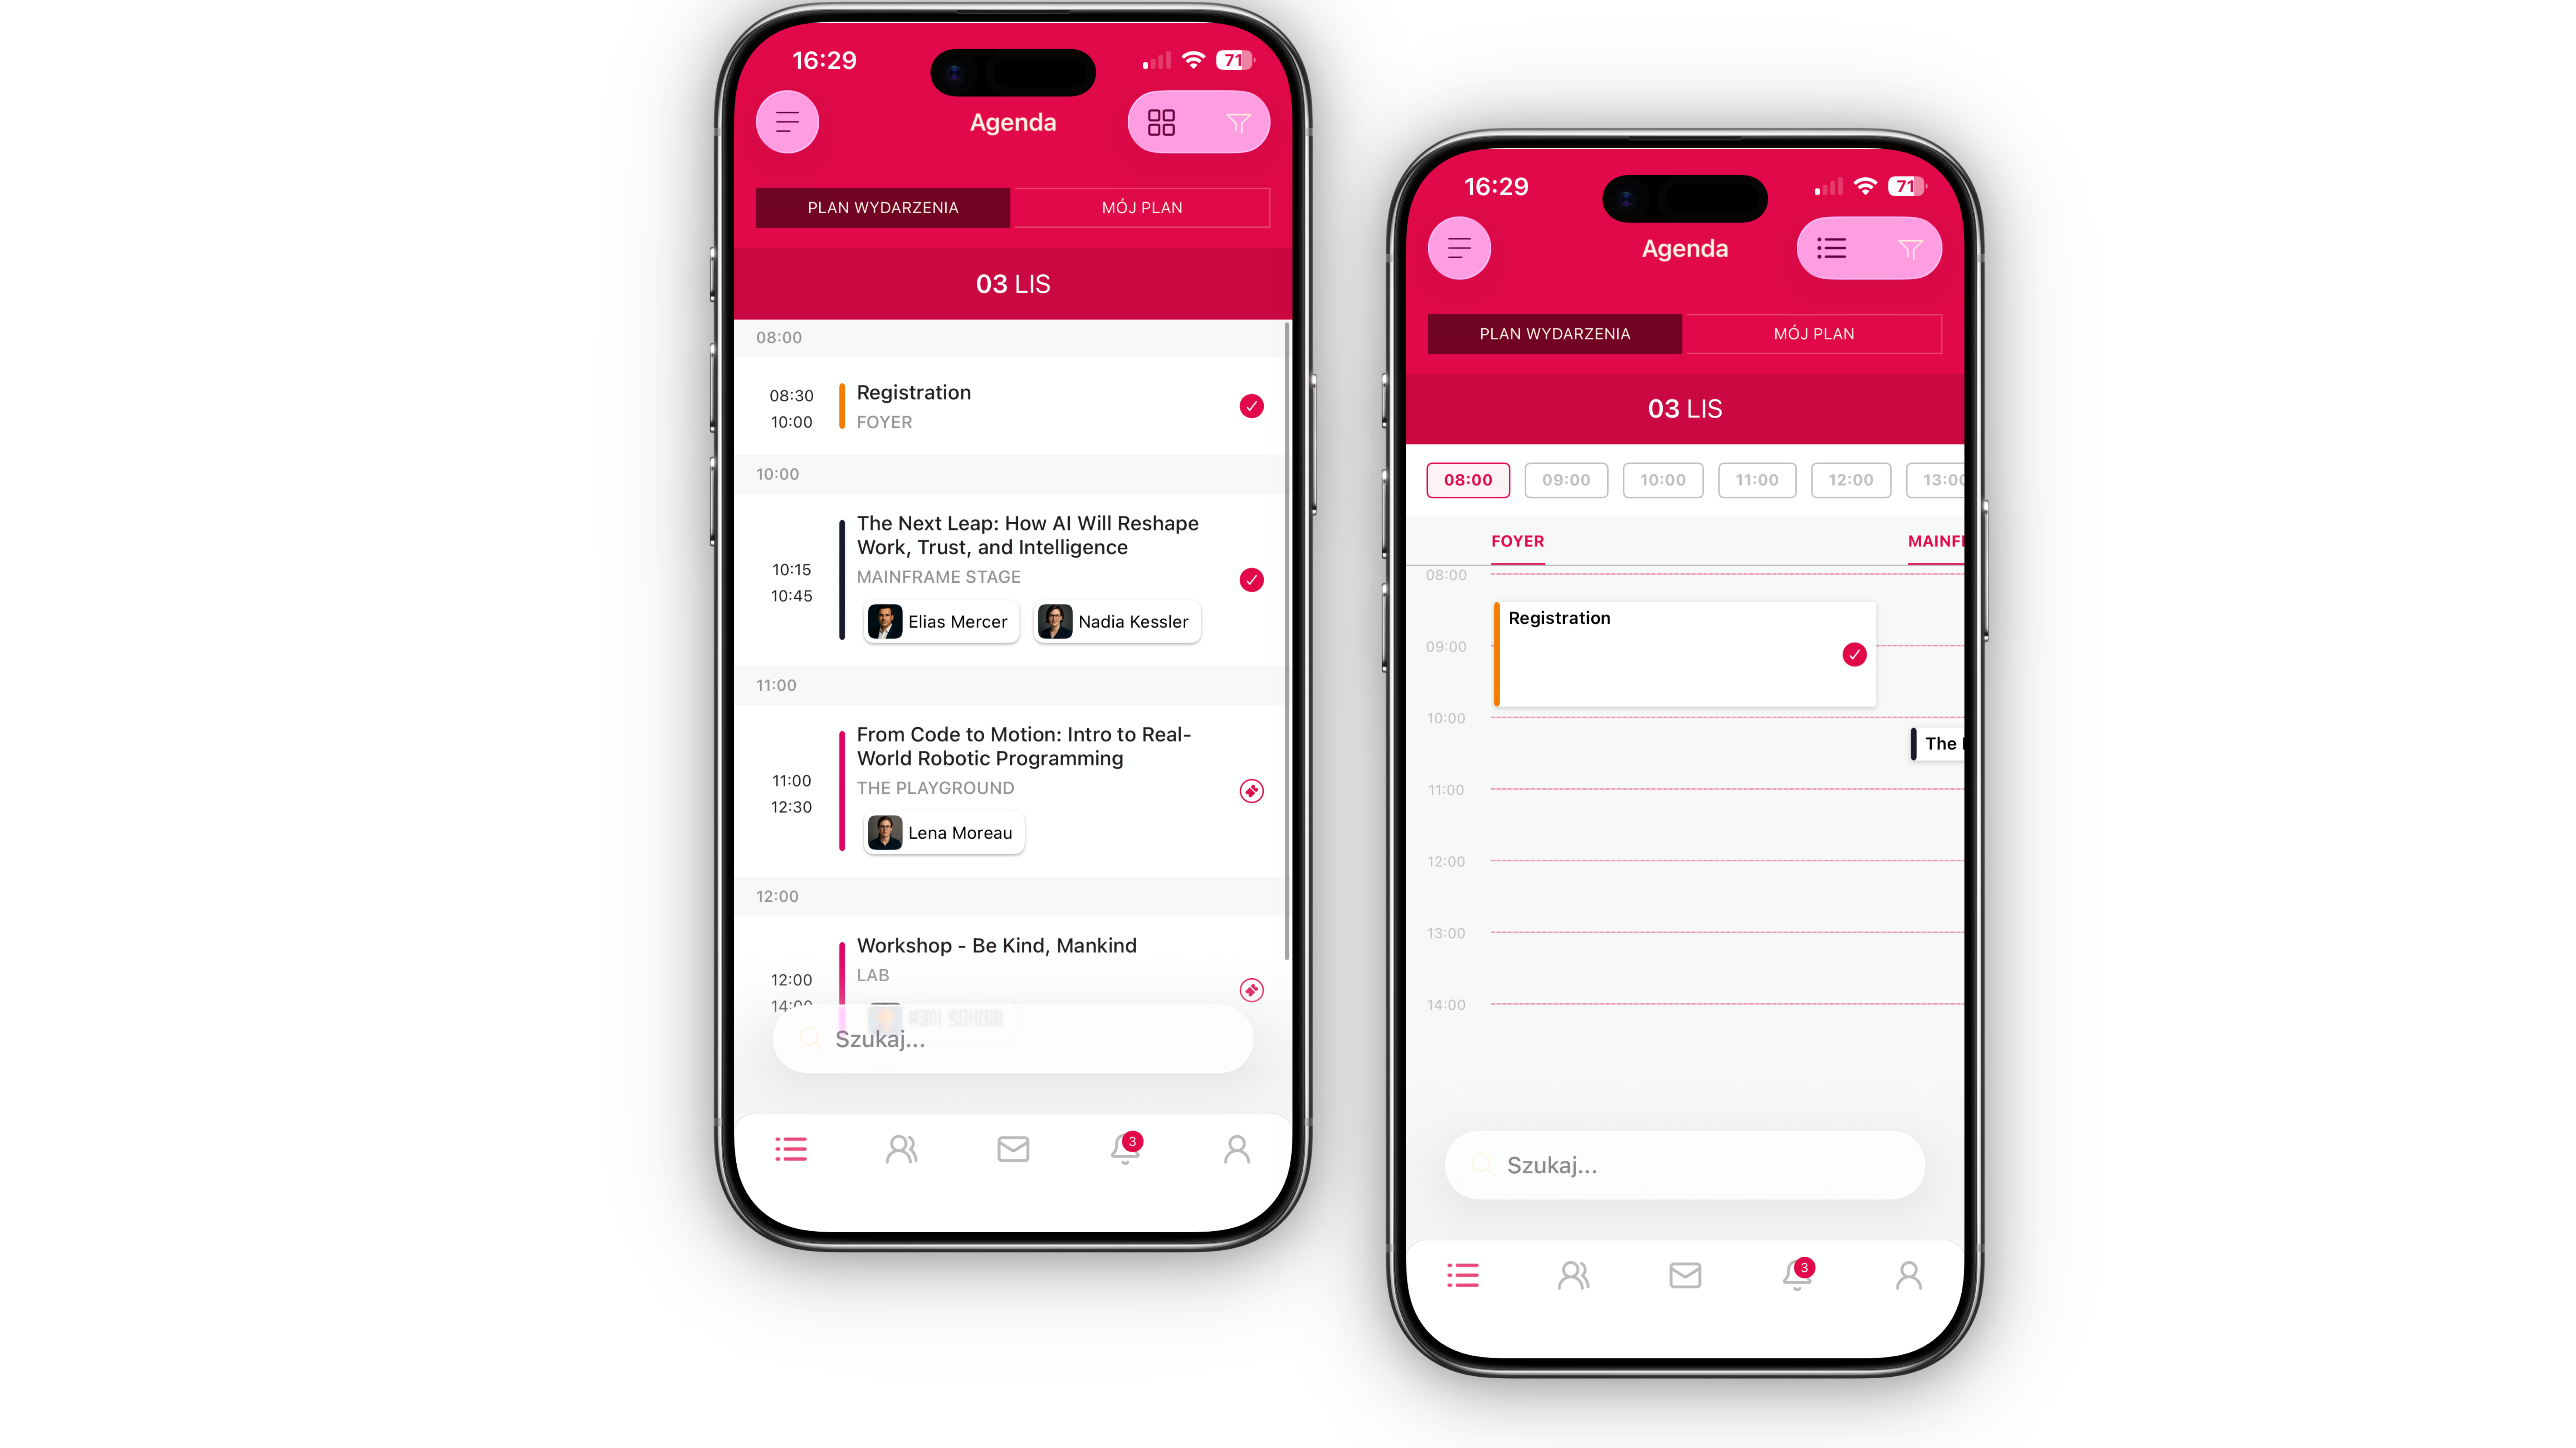
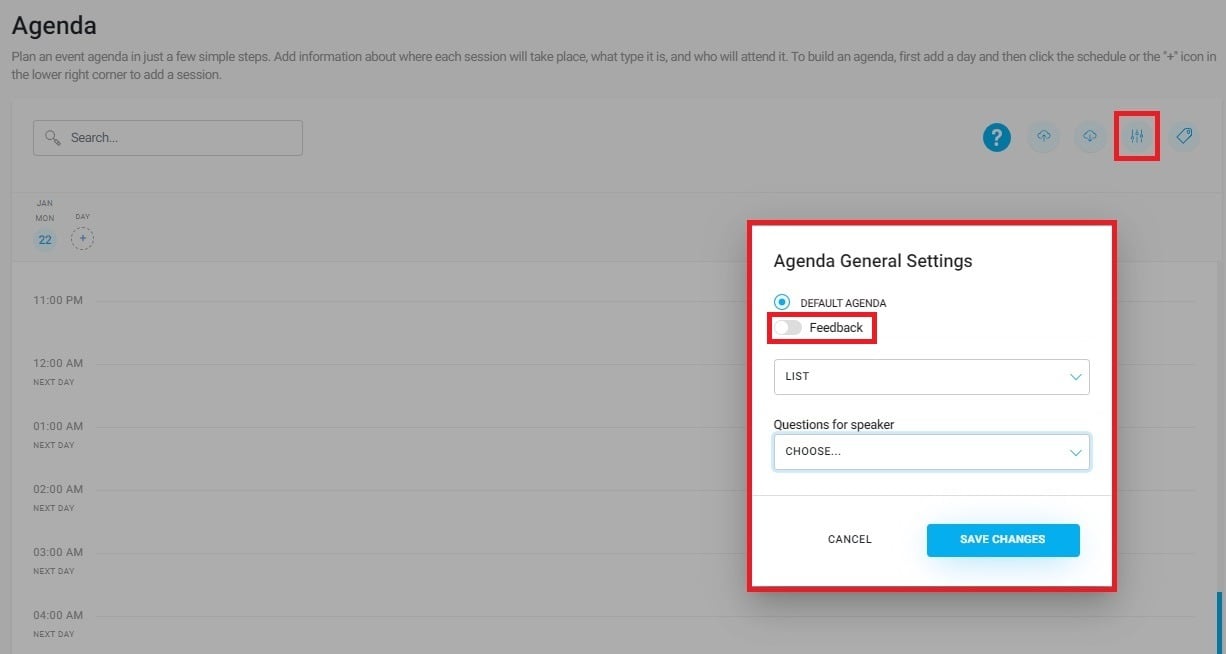
The agenda view of your event in the App can appear as a list or in a block form, meaning as a table. To change the appearance of the agenda, select the settings icon above the agenda and then one of the options from the dropdown list:
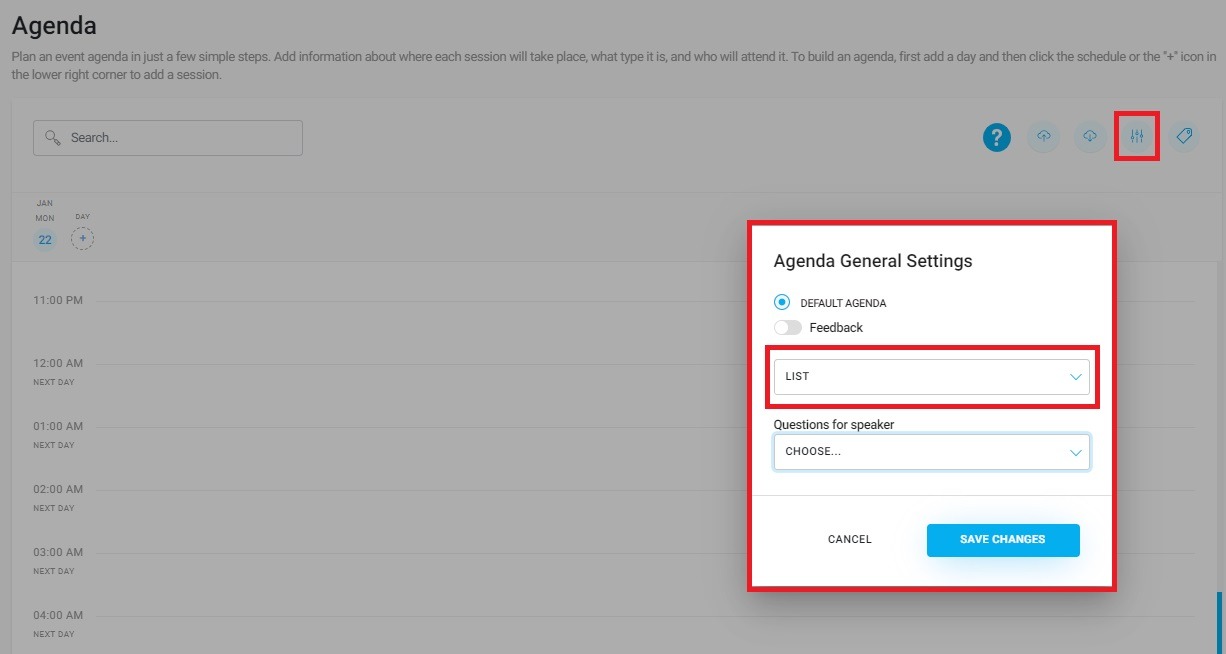
The agenda view that you set in the admin panel will be displayed as the default one after entering the Agenda module. The participant can change the displayed Agenda view in their App using the button in the top right corner.
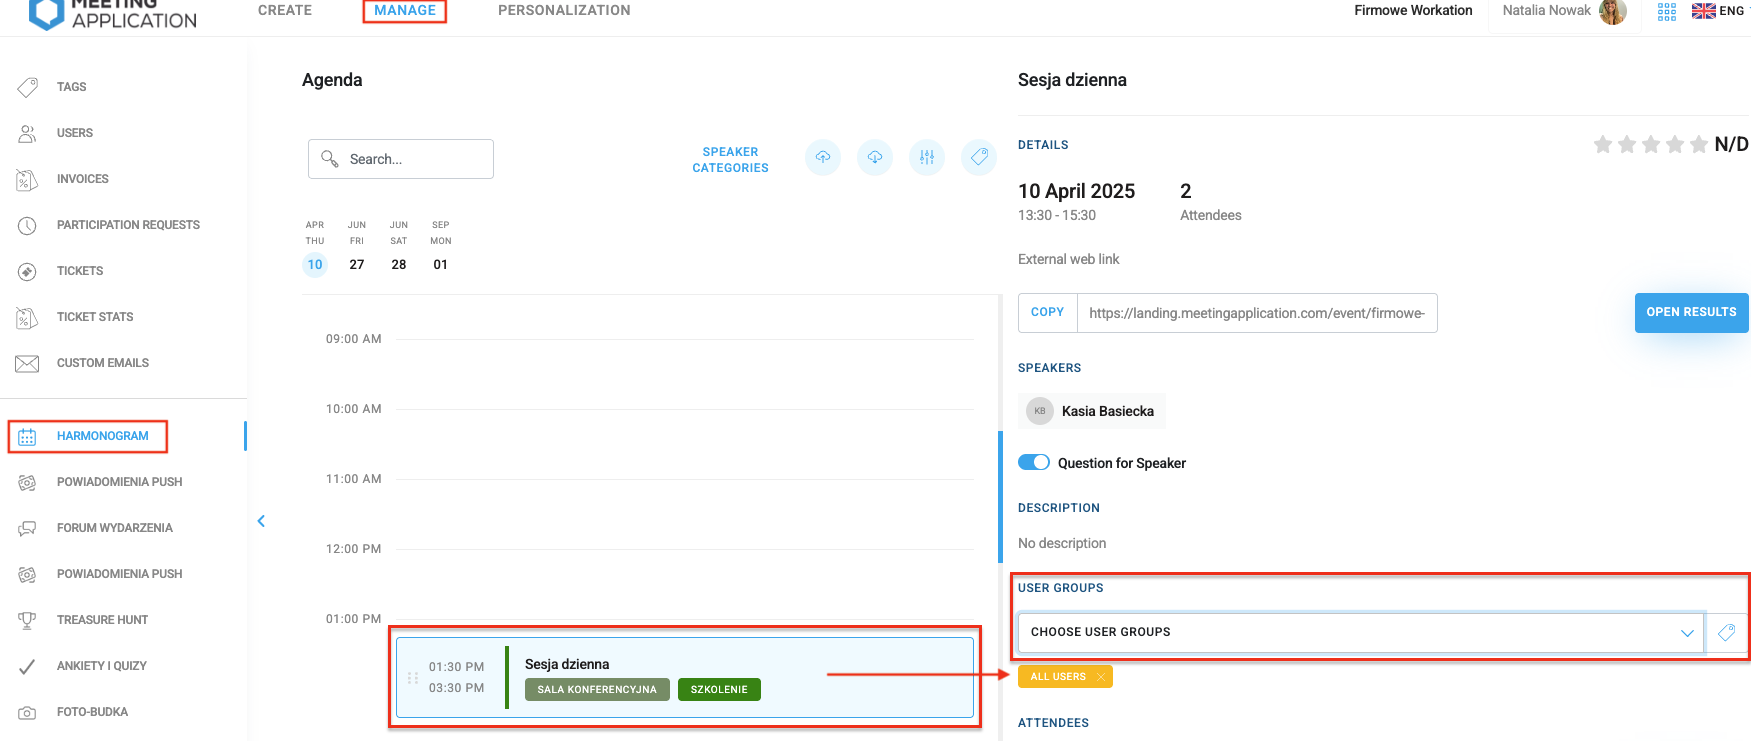
Personalization of the schedule display is done by adding User groups to the module. The entire Agenda module or its individual sessions can be assigned to specific user groups, defined earlier in the Tag Database. You can find more about tags in the article Tag Database - zarządzanie treścią Aplikacji.
By using tags, you can show individual sessions from your event agenda to specific user groups in the system, e.g. allowing sign-ups for workshops only for people who have a special ticket, or showing a unique agenda to participants from the VIP group. With this option you can be sure that every participant of your event sees exactly the plan they are supposed to see.
Managing user groups for individual agenda sessions is done from the MANAGE and CREATE tabs.
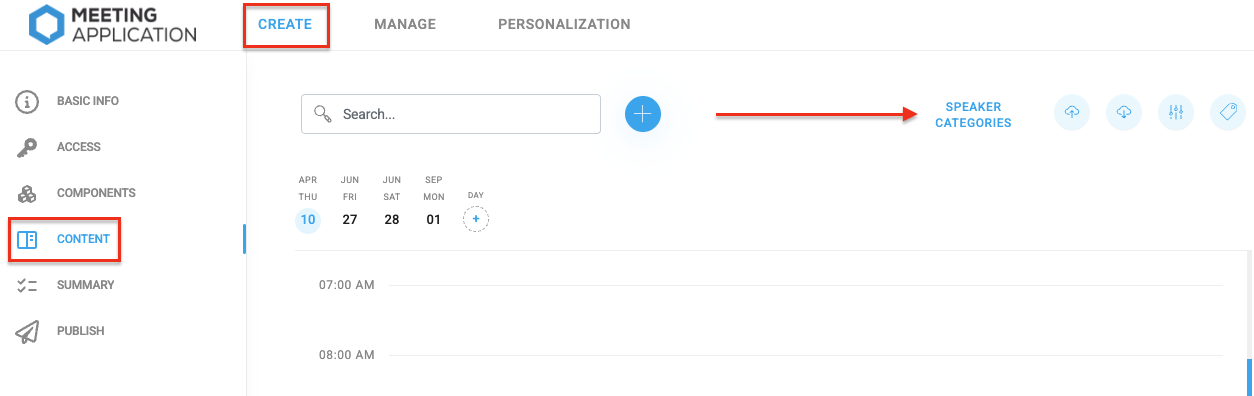
Before adding speakers to the agenda, fill out the Speakers module. Once this module is filled out, go back to the Agenda module in the CREATE → CONTENT tab and choose Speaker Categories from the top menu. This will open a section where you set the roles that speakers can have in this agenda (e.g. speaker, moderator, host).
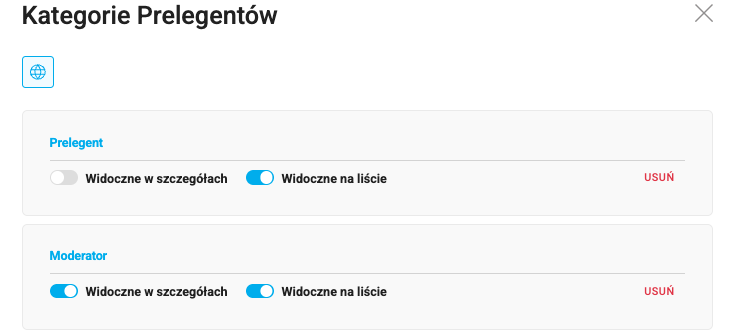
With additional settings you can decide where the content of a given category will be visible:
Visible in details - means that speakers from this category will only be visible after opening the details of a given session.
Visible on the list - means that speakers from this category will already be visible on the list of all sessions.
You can also change the hierarchy of these groups by dragging them on the list. The category at the very top will be visible first.
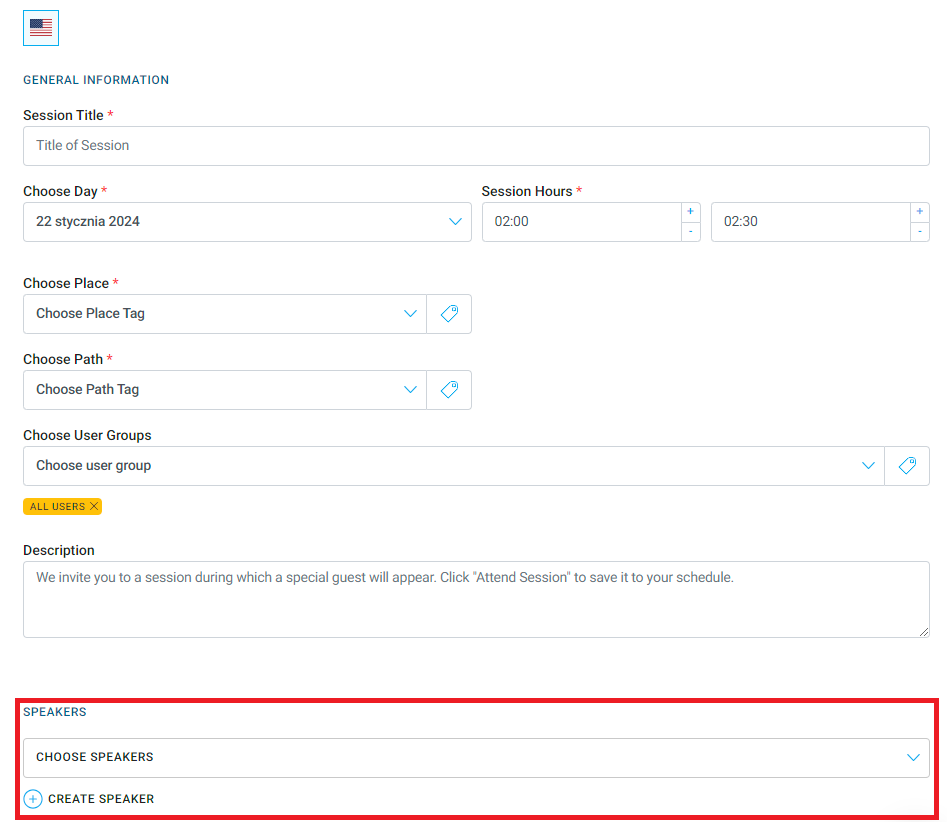
Next, choose an edition or create a completely new session, and in the Speakers section, pick speakers from the dropdown list according to the role they have for this session. A speaker, just like categories, can also be created while adding a session by clicking Create speaker.
After filling in and saving the information, you’ll be redirected back to creating the session you started earlier:
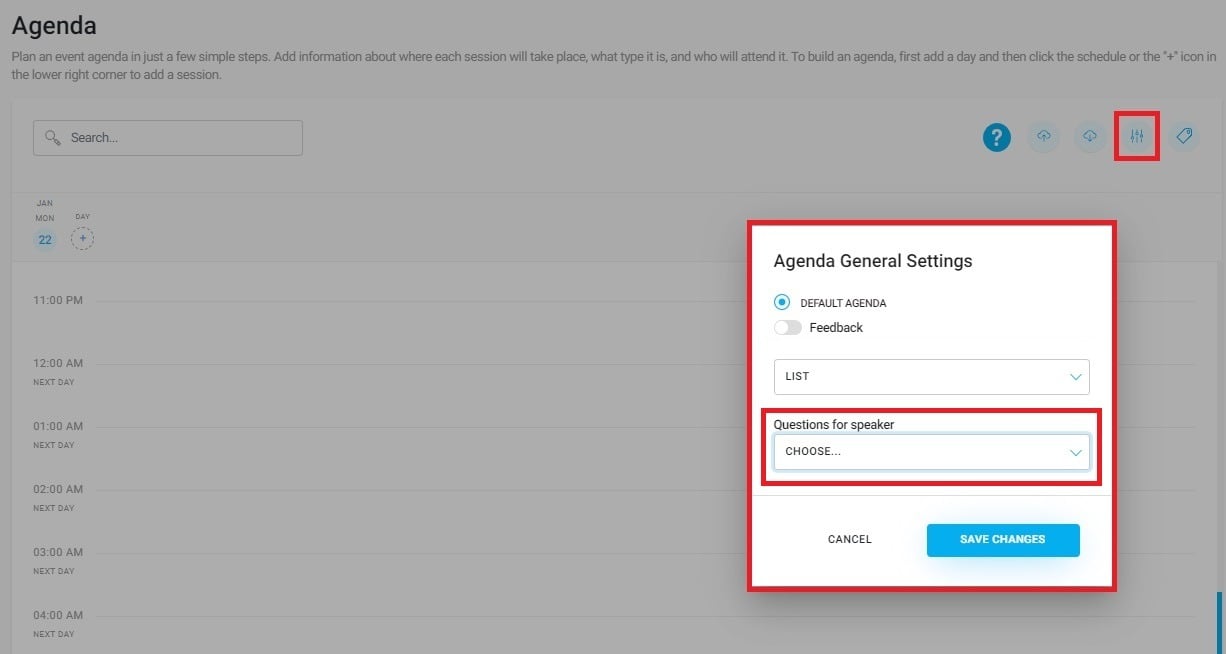
You can decide whether the option for asking questions to speakers will be turned on or off in bulk for all sessions. You can do this using the settings button at the top of the page, and then choosing from the options for Questions to the speaker ON for all or OFF for all.
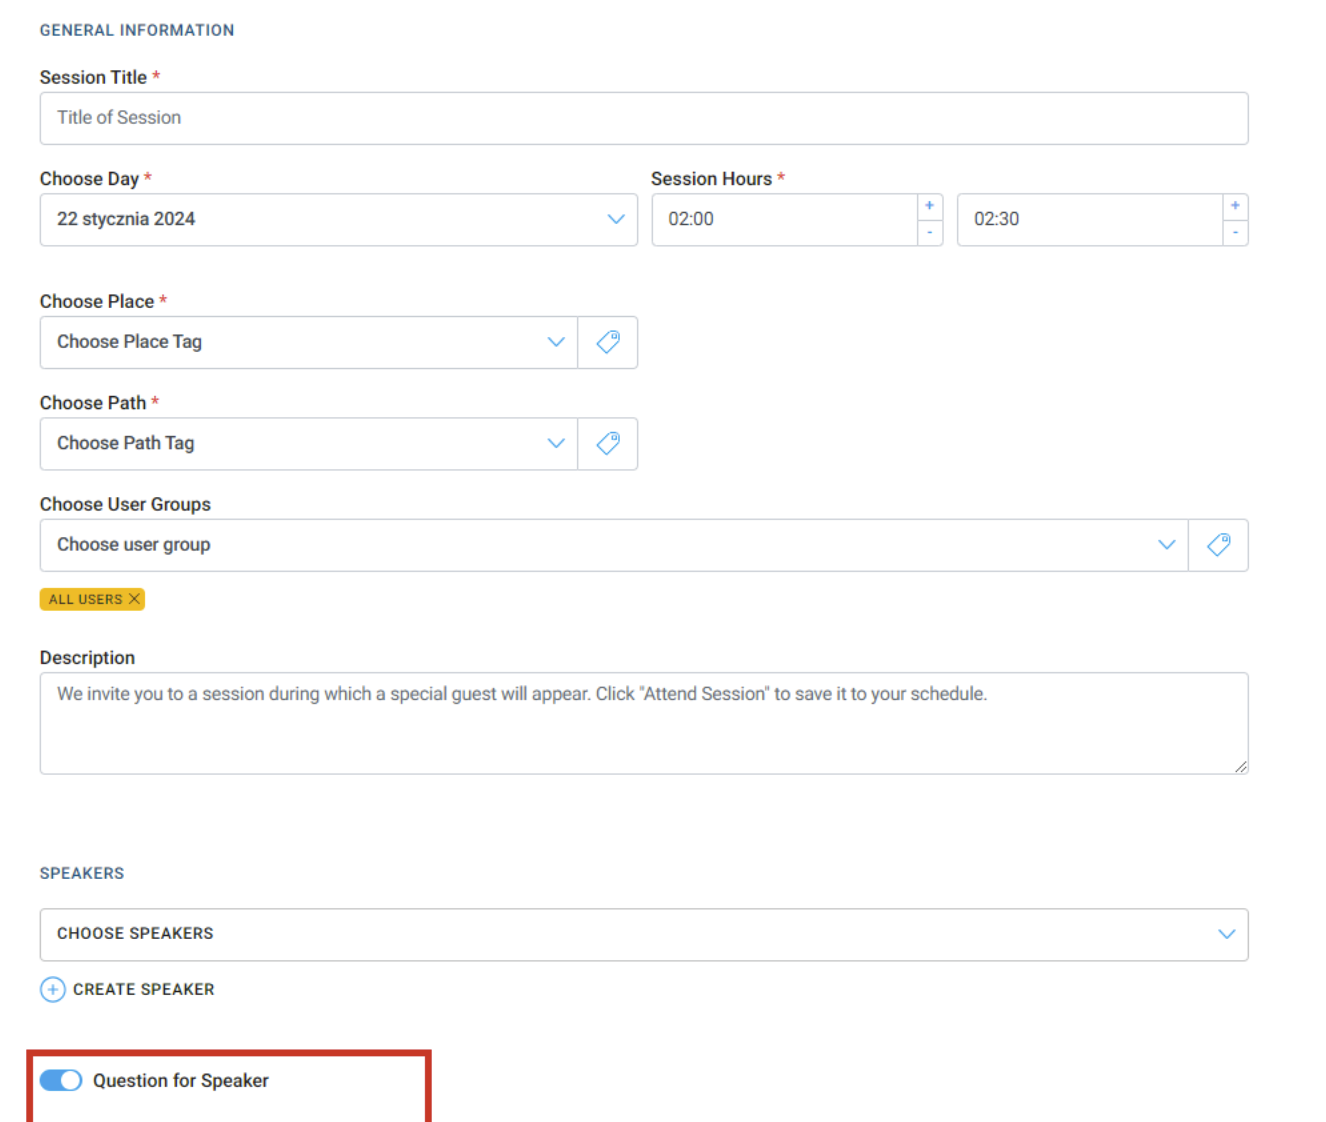
Once the global rule is set, you can change its individual settings for each session in the Agenda. If you want participants to be able to ask questions to speakers only in selected sessions – go to editing one of them and move the Questions to the speaker slider to the right:
Questions asked appear in real time in your event App, in the details of the Agenda. Click on a specific session and then go to the Questions tab – this is exactly the place where event participants can see questions asked by others; like the most accurate ones so they jump to the top of the list; this is also the place where the speaker can independently read the questions from the stage and answer them.
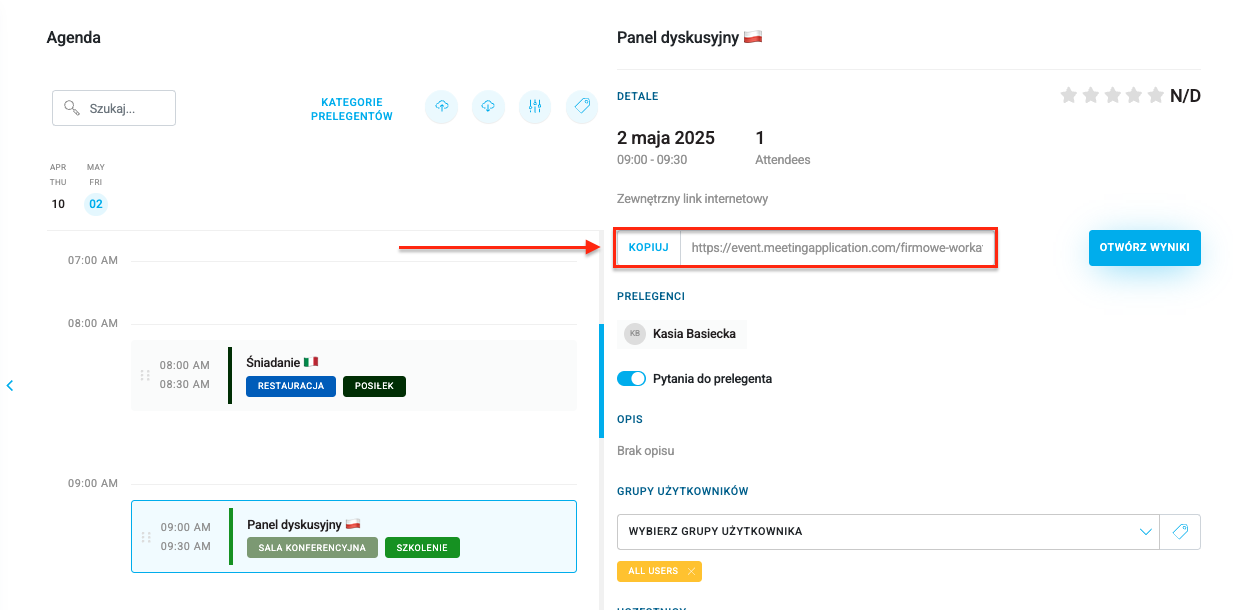
Do you want the questions asked by participants to appear on the big screen during the talk? No problem! In the MANAGE → Agenda tab, you can copy the 🔗link leading to an external page with questions, which you can display on the screen whenever you want or throw onto the prompter preview so it’s only visible to the people on stage.
Questions in the mobile app are sorted in two ways – the most liked questions (the likes mentioned above) and newly asked questions. Participants can like other people’s questions, and this way the most popular ones will be displayed at the top of the list.
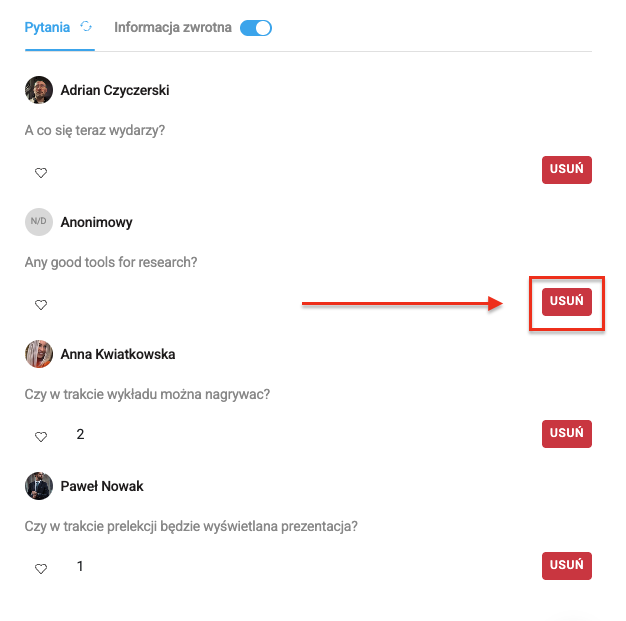
As the event admin, you can also delete individual questions if you decide that any of them is off-topic. In the MANAGE → Agenda, tab, click the selected session and scroll all the way down. Next to a specific question, press DELETE, and then confirm the action:
For each session in the agenda you can add extra materials. These can be abstracts, presentations or offers in the form of attached files, or links, e.g. to a blog thematically related to a given session:
Before you attach a file, it should be losslessly compressed to reduce its size. The preferred format is PDF.
If some parts of the event, such as talks or workshops, have a limited number of spots and require participants to make an early reservation, put this information in the agenda.
Depending on your production needs, you have several options for ticketing sessions, and each of them is a different path for participants to get their ticket.
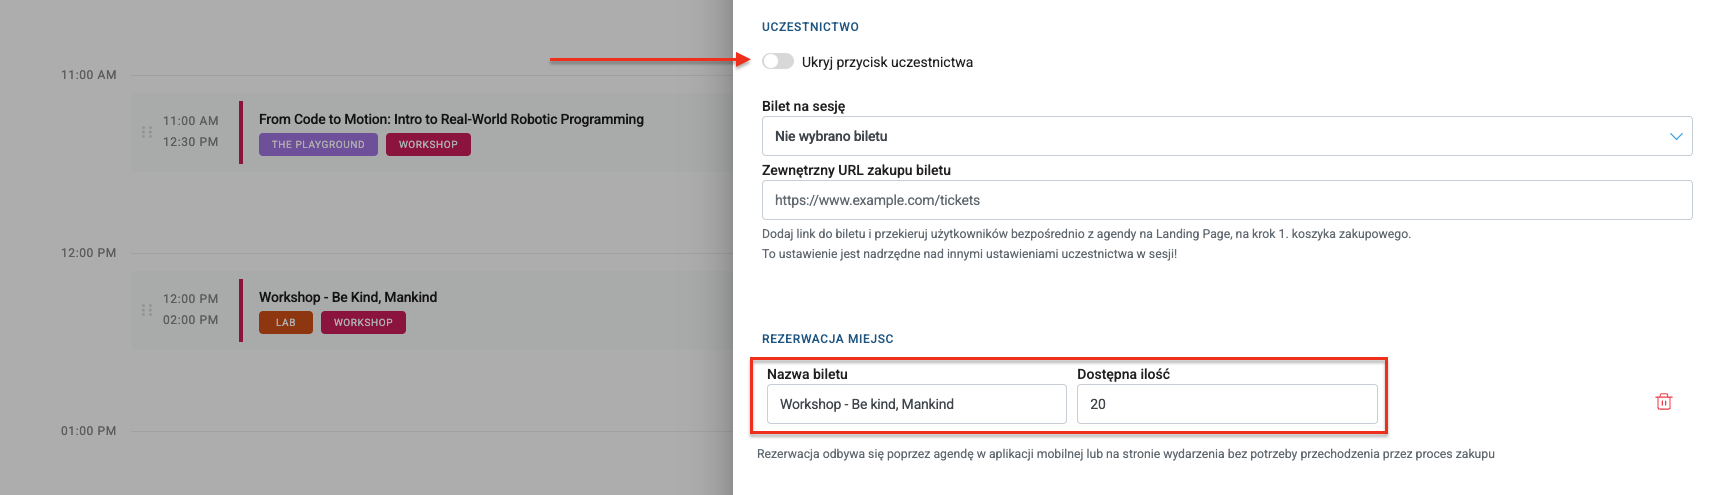
To add a booking option for a given session, click the ellipsis next to the session title, and then Edit session. In the SEAT BOOKING section ➕ Add ticket, enter its name and the number of available seats. Remember that in this setting the participation button must be visible:
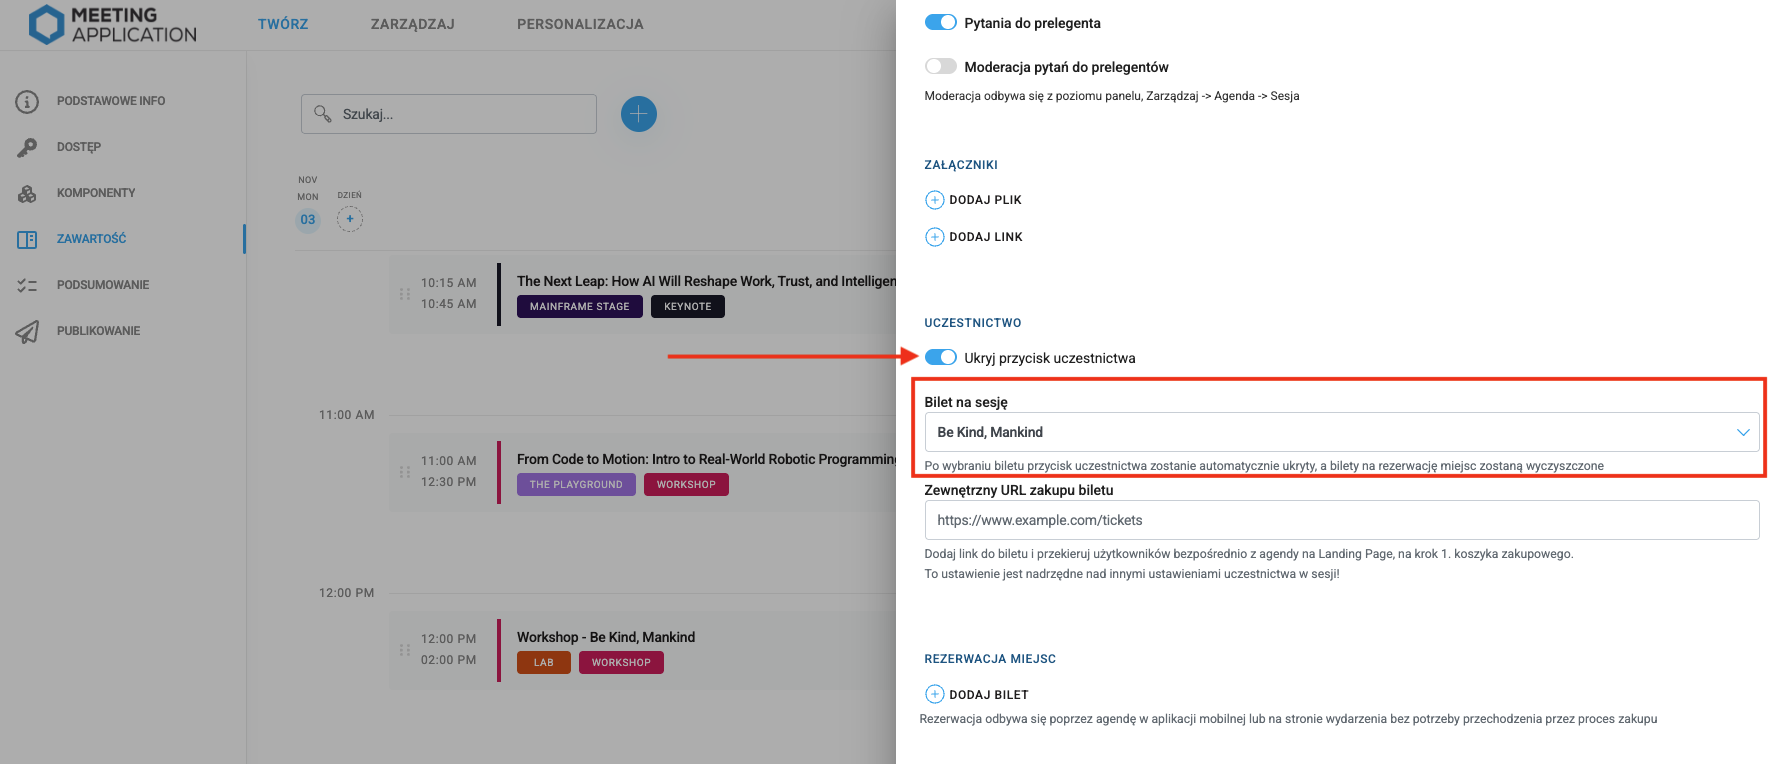
The PARTICIPATION section lets you attach a workshop ticket that was sold as an add-on to the event admission ticket. You can learn more about ticket add-ons from THIS ARTICLE.
To attach to the agenda session the ticket that applies to it, choose a specific workshop ticket from the dropdown list.
After adding the ticket, the participation button will always be hidden – the attendee won’t be able to get the ticket by clicking the icon in the Mobile App or on the Landing Page. It’s a good idea to include information about the ticketed agenda session in the session description.
This gives you the option to paste a redirect link that will be hidden under the ticket icon in the mobile app and on the Landing Page. Clicking the ticket icon will take attendees to the purchase basket or any other place you choose.
With this setting, the participation button can’t be hidden.
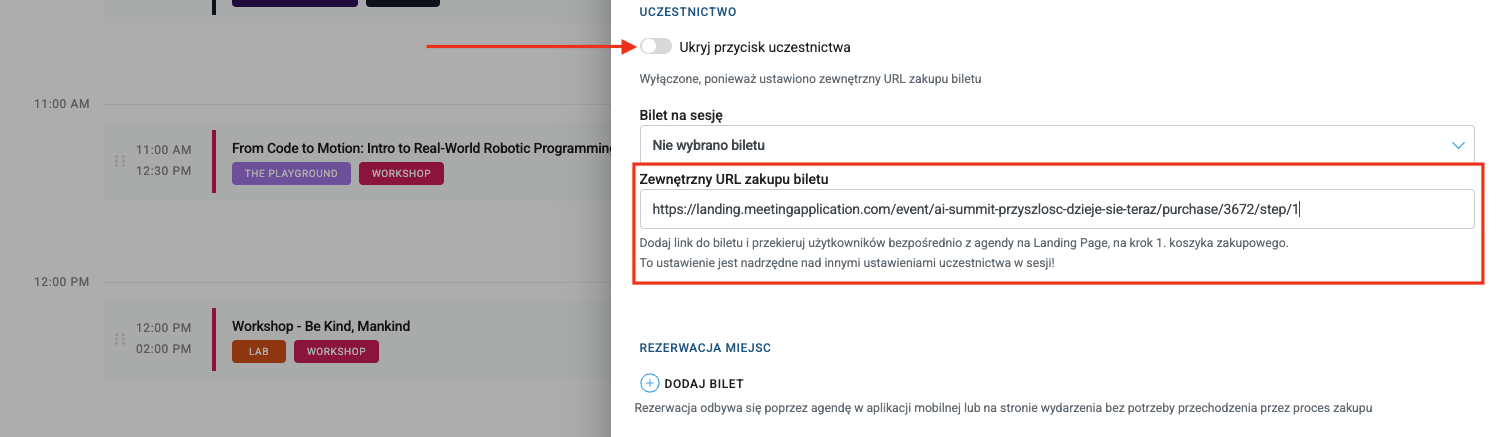
After clicking the ticket icon for a session with an external URL, the user will be redirected to the purchase basket or another chosen place.
Signing up to take part in a limited session assigns a seat reservation ticket. This in turn lets organizers (using Admin component → Agenda Check-in) verify the right to enter a specific workshop, panel, or discussion meeting.
You can learn more about the ticket scanning process from the article User check-in.
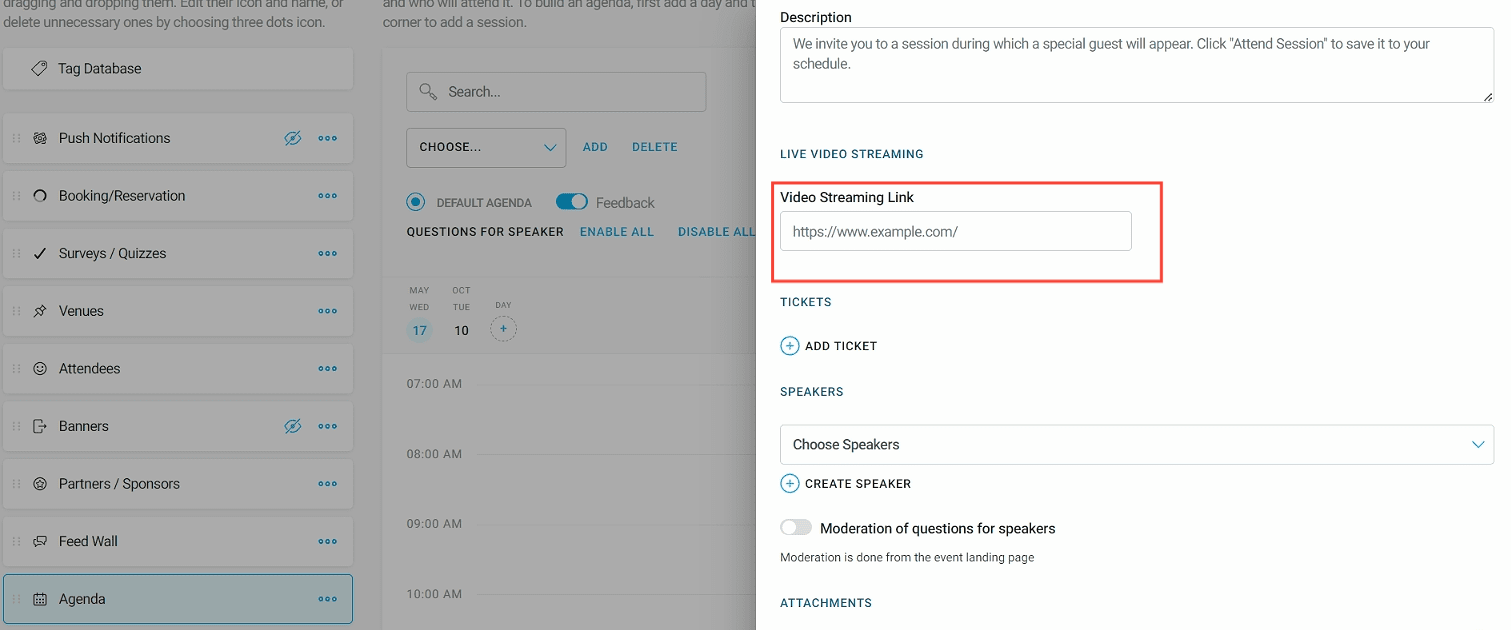
In the Add session tab you can add a link to the live stream from your event, a link to an online webinar, or a Zoom meeting or other platform.
In the Video Streaming Link field, paste the right link:
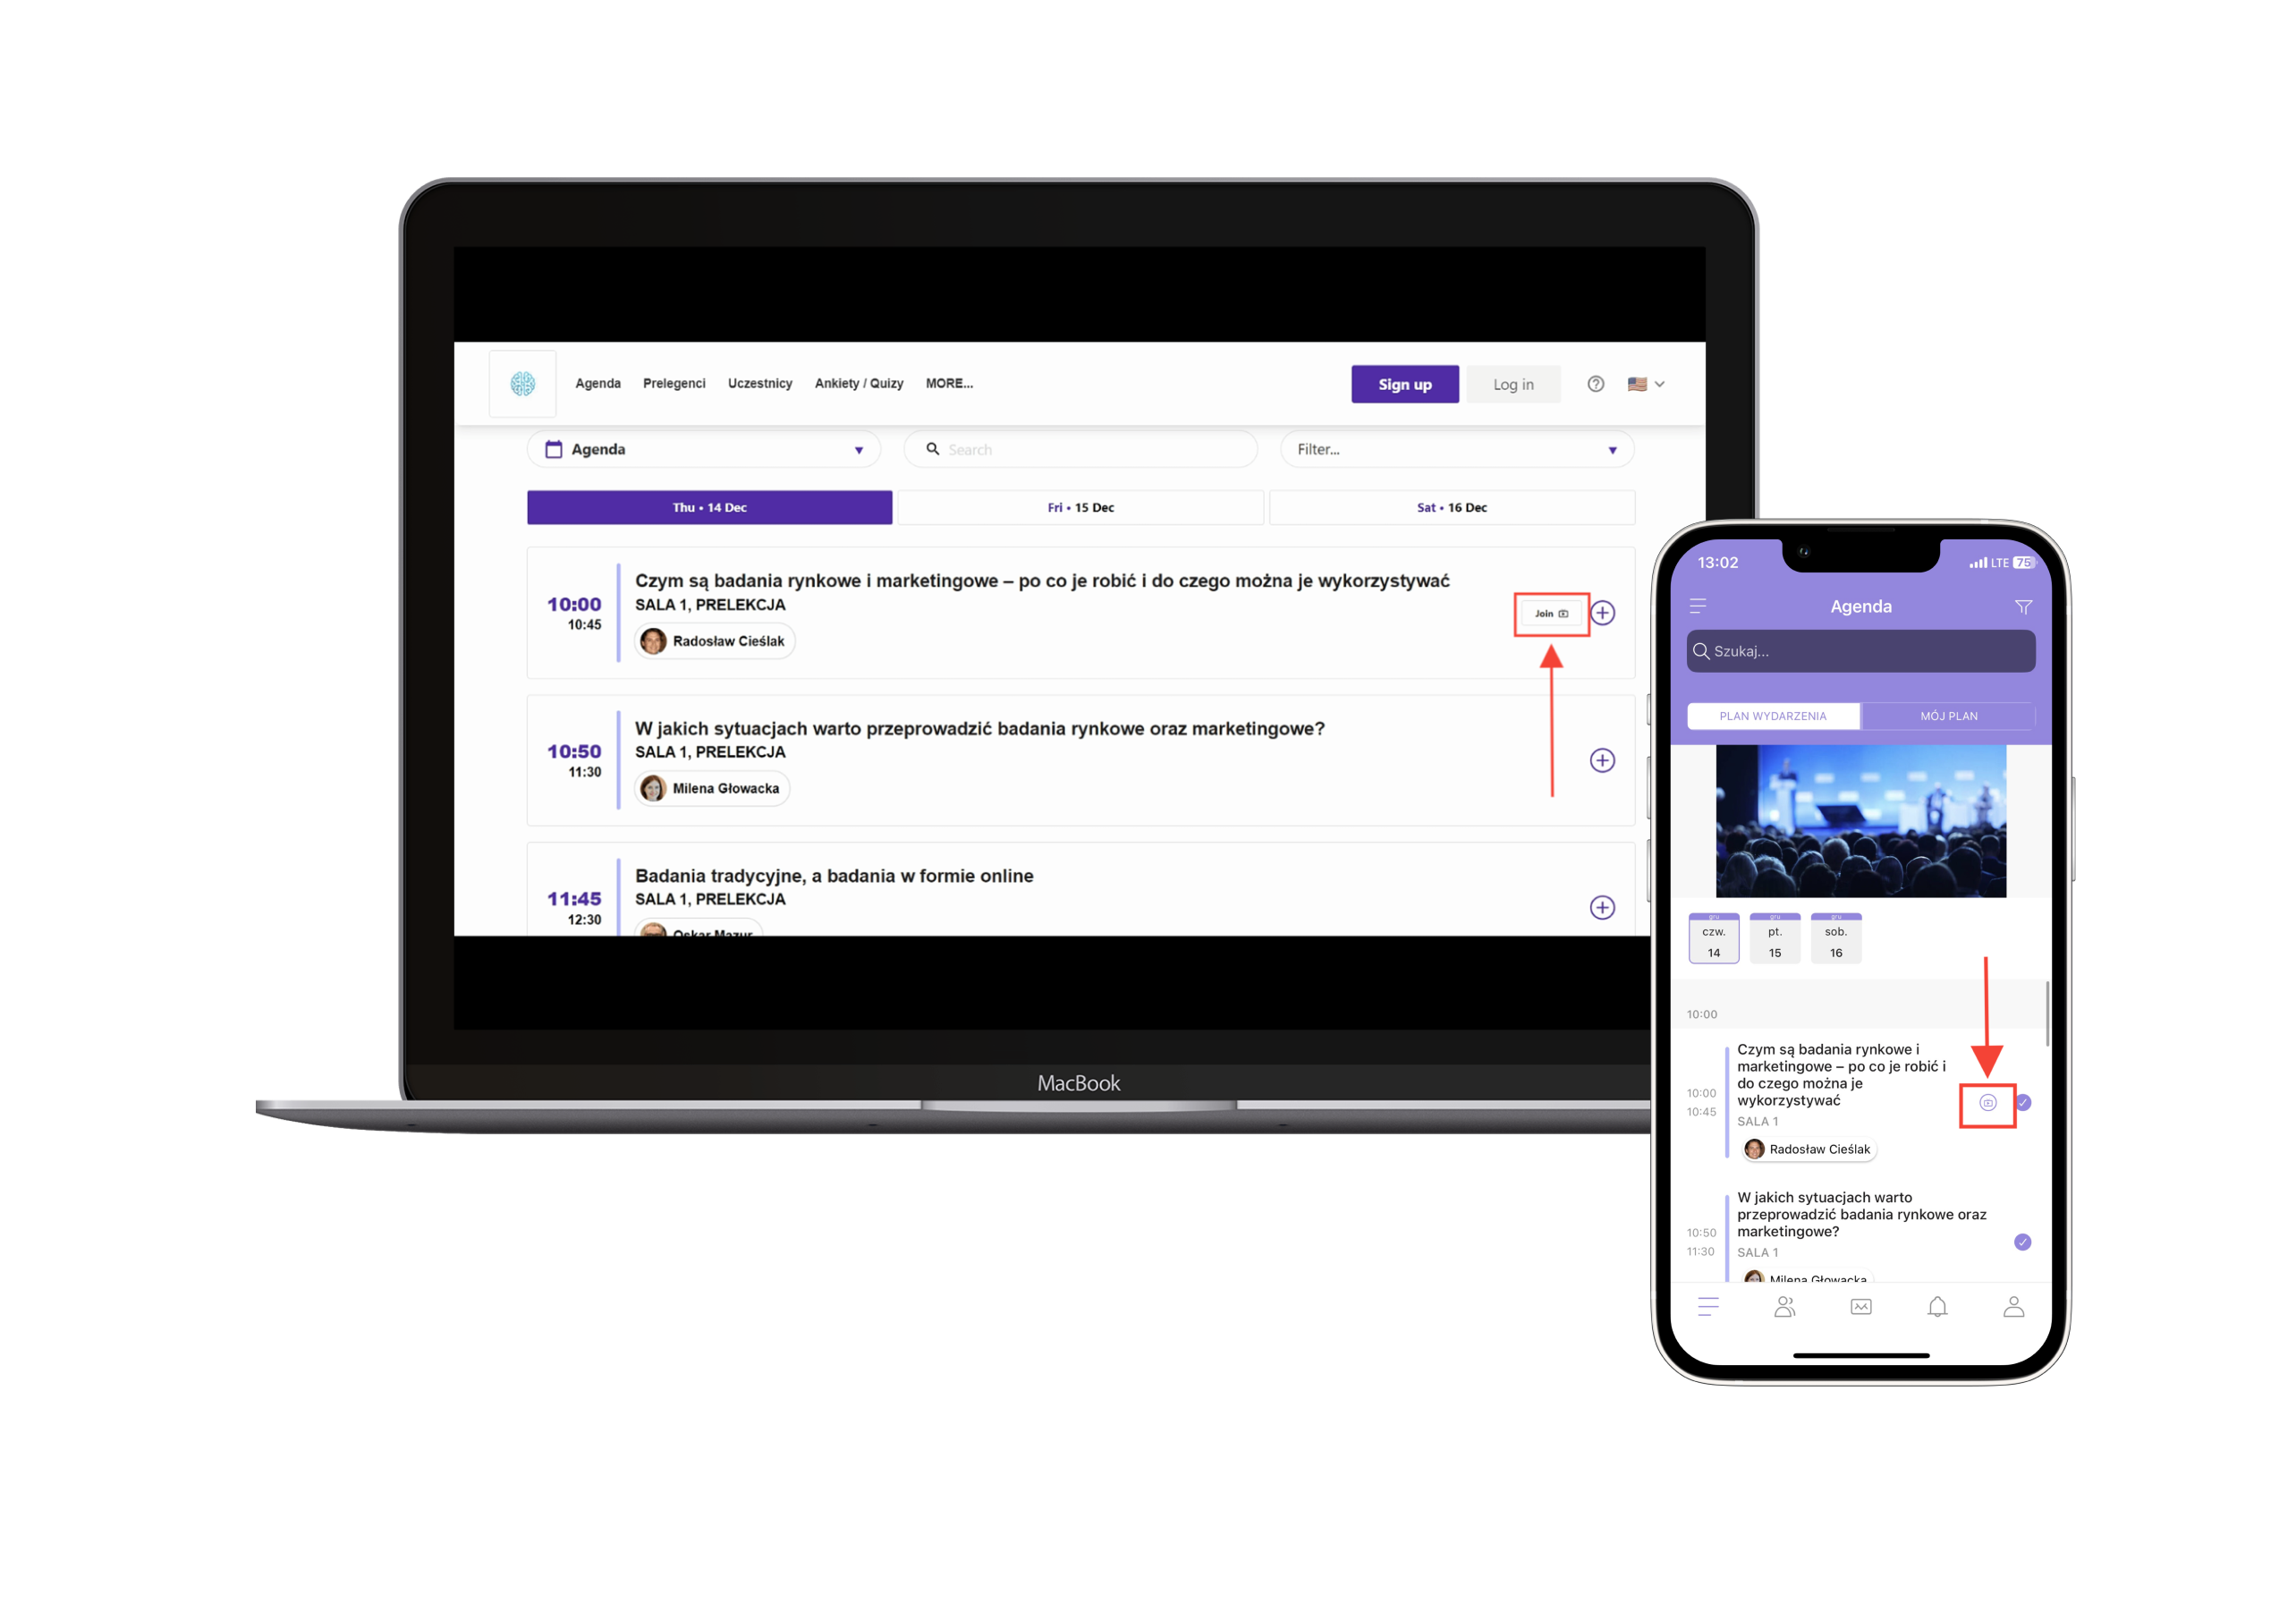
A participant of your event can join the online meeting by clicking the Join button on the Landing Page or the TV icon in the App:
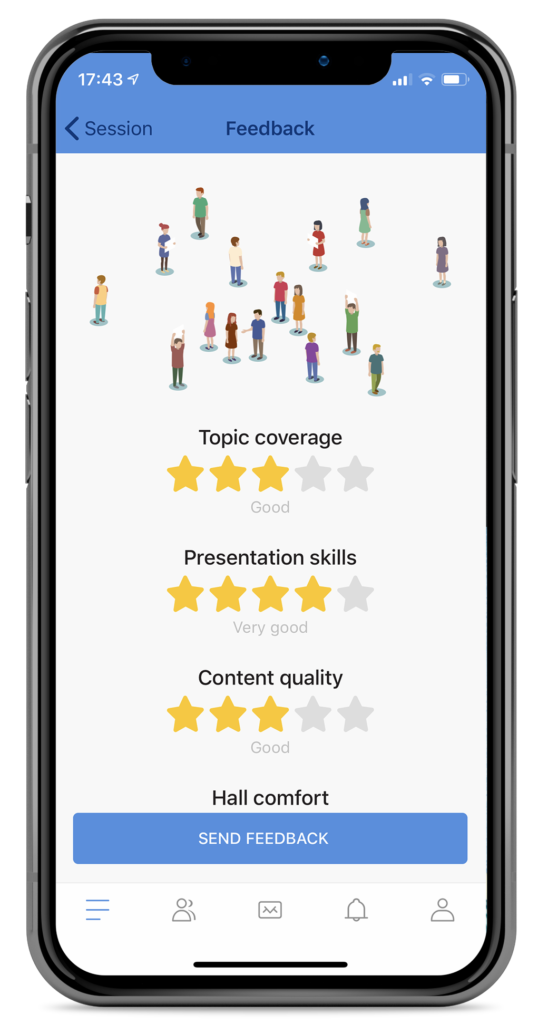
Event participants can rate selected sessions through the Apps. The advanced feedback collection tool lets you collect opinions on any topic:
To collect feedback, use the questions that are prepared under the section where you add new sessions in the Agenda, or create your own.
To disable the option to rate sessions for the entire agenda, uncheck the Feedback option in the Settings section above the Agenda.
To change the wording of any of the default questions (changing a default question will change its wording for every session in the agenda!) or add a new one, in the MANAGE → Agenda tab, select the three dots or click ➕ New feedback for question.
You can collect feedback for a selected agenda session from the MANAGE → Selected agenda session → Feedback switch tab.

In the admin panel you can create 3 types of such questions:
Closed – closed, multiple choice questions. Add a question and possible answers. The available answers will show up in the app as buttons to choose from.
Open – open questions that let users enter a text answer.
Stars – closed questions that users can answer by choosing a number of stars from 1 to 5:
In the Agenda module you can export the session rating, discussion, and the list of session participants. You can download the data as a csv file, both from Create>Content>Agenda and Manage>Agenda, using the Export Opinions, Questions and Participants function, marked with a cloud icon with a down arrow. Press the export button and choose what you want to download:
Questions – the file will export all questions asked by users during the conference. The export will contain full information: which session the question refers to, who asked it and at what time, as well as how many people liked it.
Feedback – exporting feedback related to the session. The exported file contains quantitative and qualitative evaluation results: number of stars, selection of answers to the additional question, and comments.
Participants – the exported file contains a list of participants of the selected session:
Have a great event with Meeting Application!
