If your event is ticketed (paid or with free registration), each participant gets a unique QR code that entitles them to enter. The Event Check-in module in Meeting Application lets you verify these codes in no time and manage the flow at the entrance.
You can learn more about QR codes from the article User QR codes in the System. This article explains how to carry out the check-in of your participants.

People scanning tickets at the entrance must have the right permissions in the system. Before they start working, make sure that:
They have an account in the system: Each staff member must register in Meeting Application (in the event mobile app or via the MA Registration).
They have Administrator permissions: Collect the email addresses of your staff accounts and send them to our Support. We’ll assign them the appropriate administrator permissions in the Event App and the Admin Panel, which will unlock the scanning module for them.

Once the staff has permissions and Android devices, the scanning process goes as follows:
Log in to the event mobile app using an account with administrator permissions.
On the bottom navigation bar, tap Menu.
Go to the Admin Component section, then choose the Event Check-in tab.
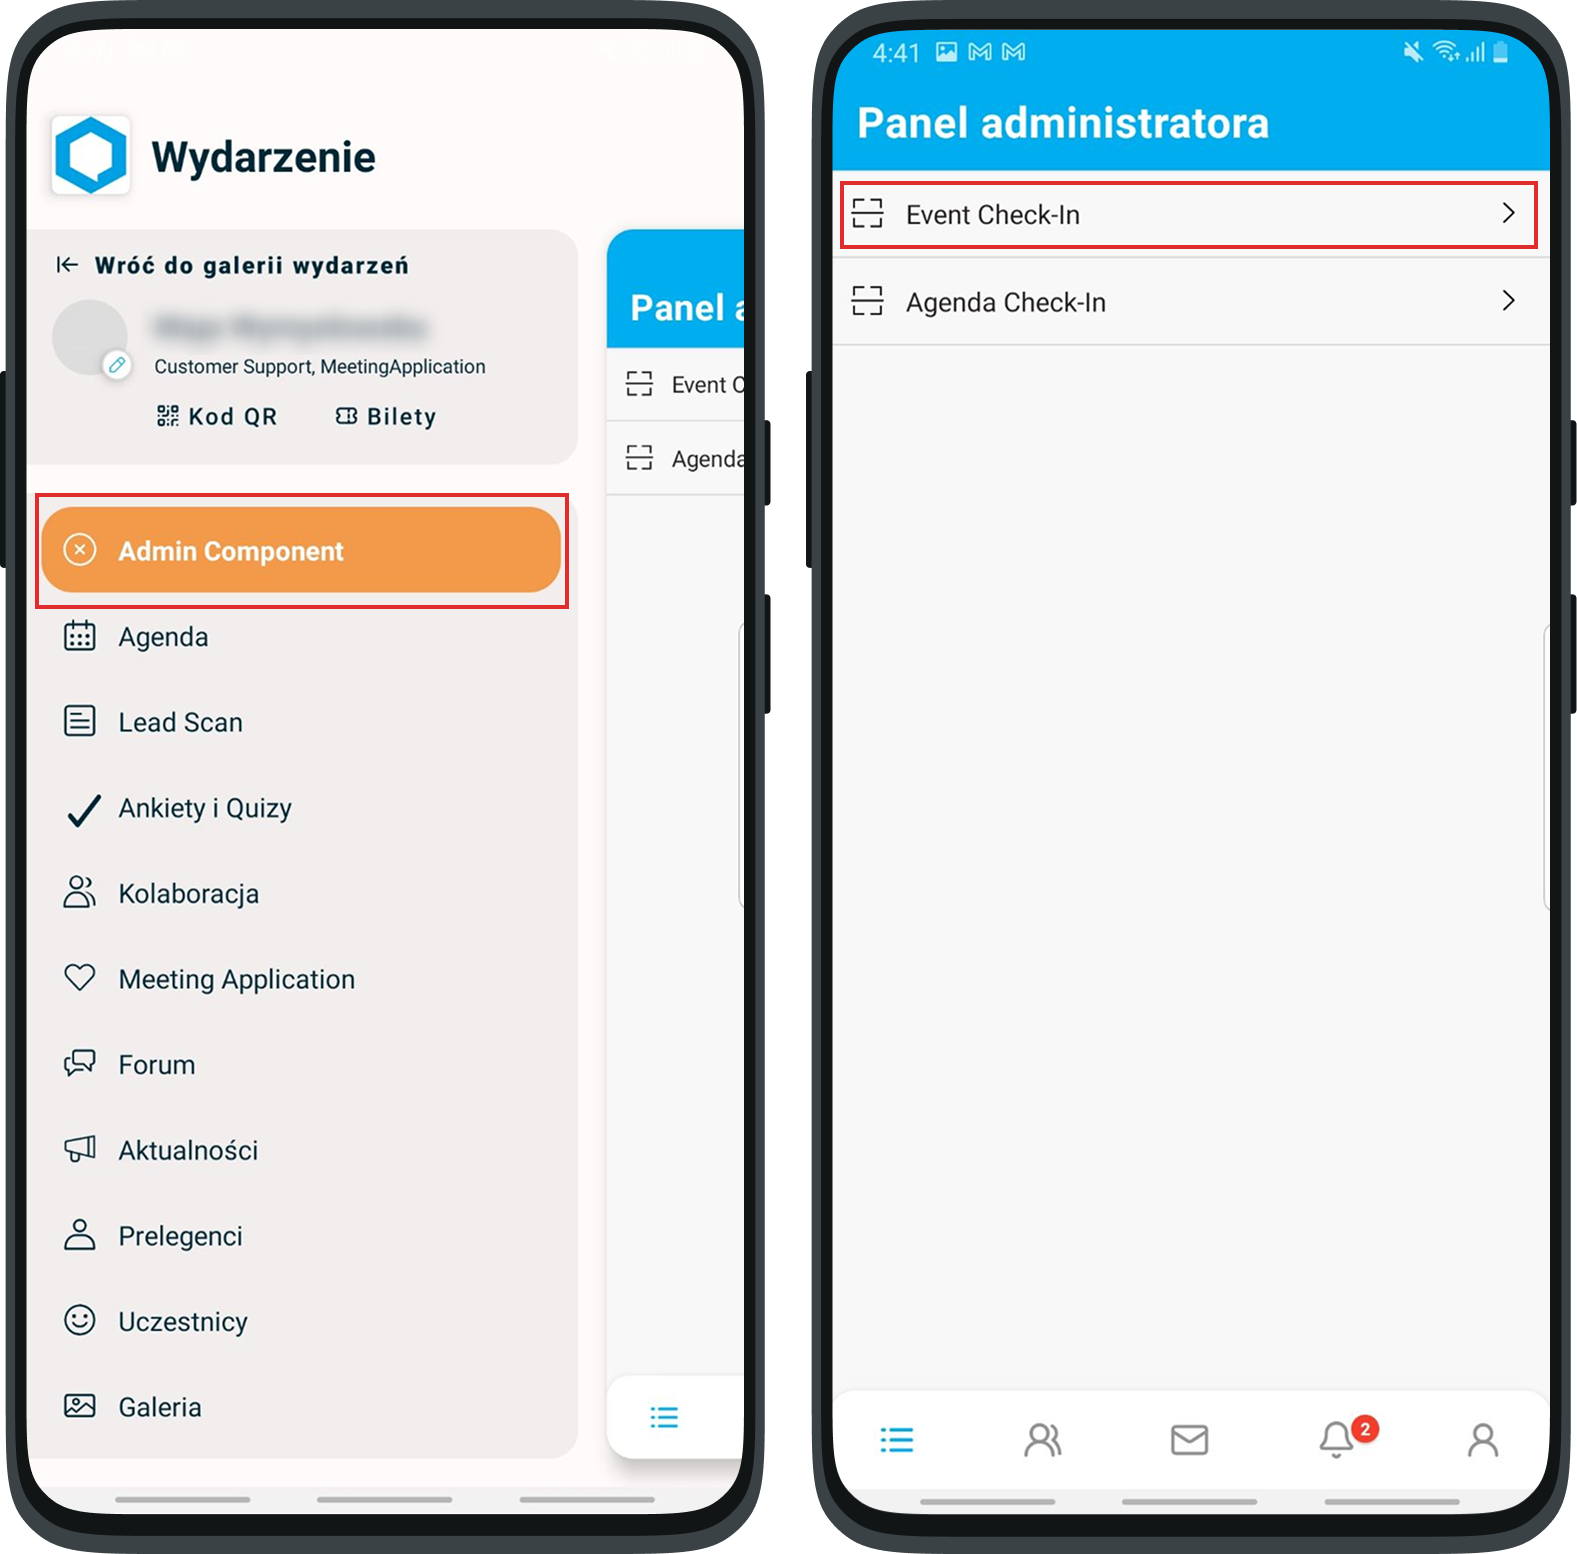
The QR code scanner will launch on the screen.
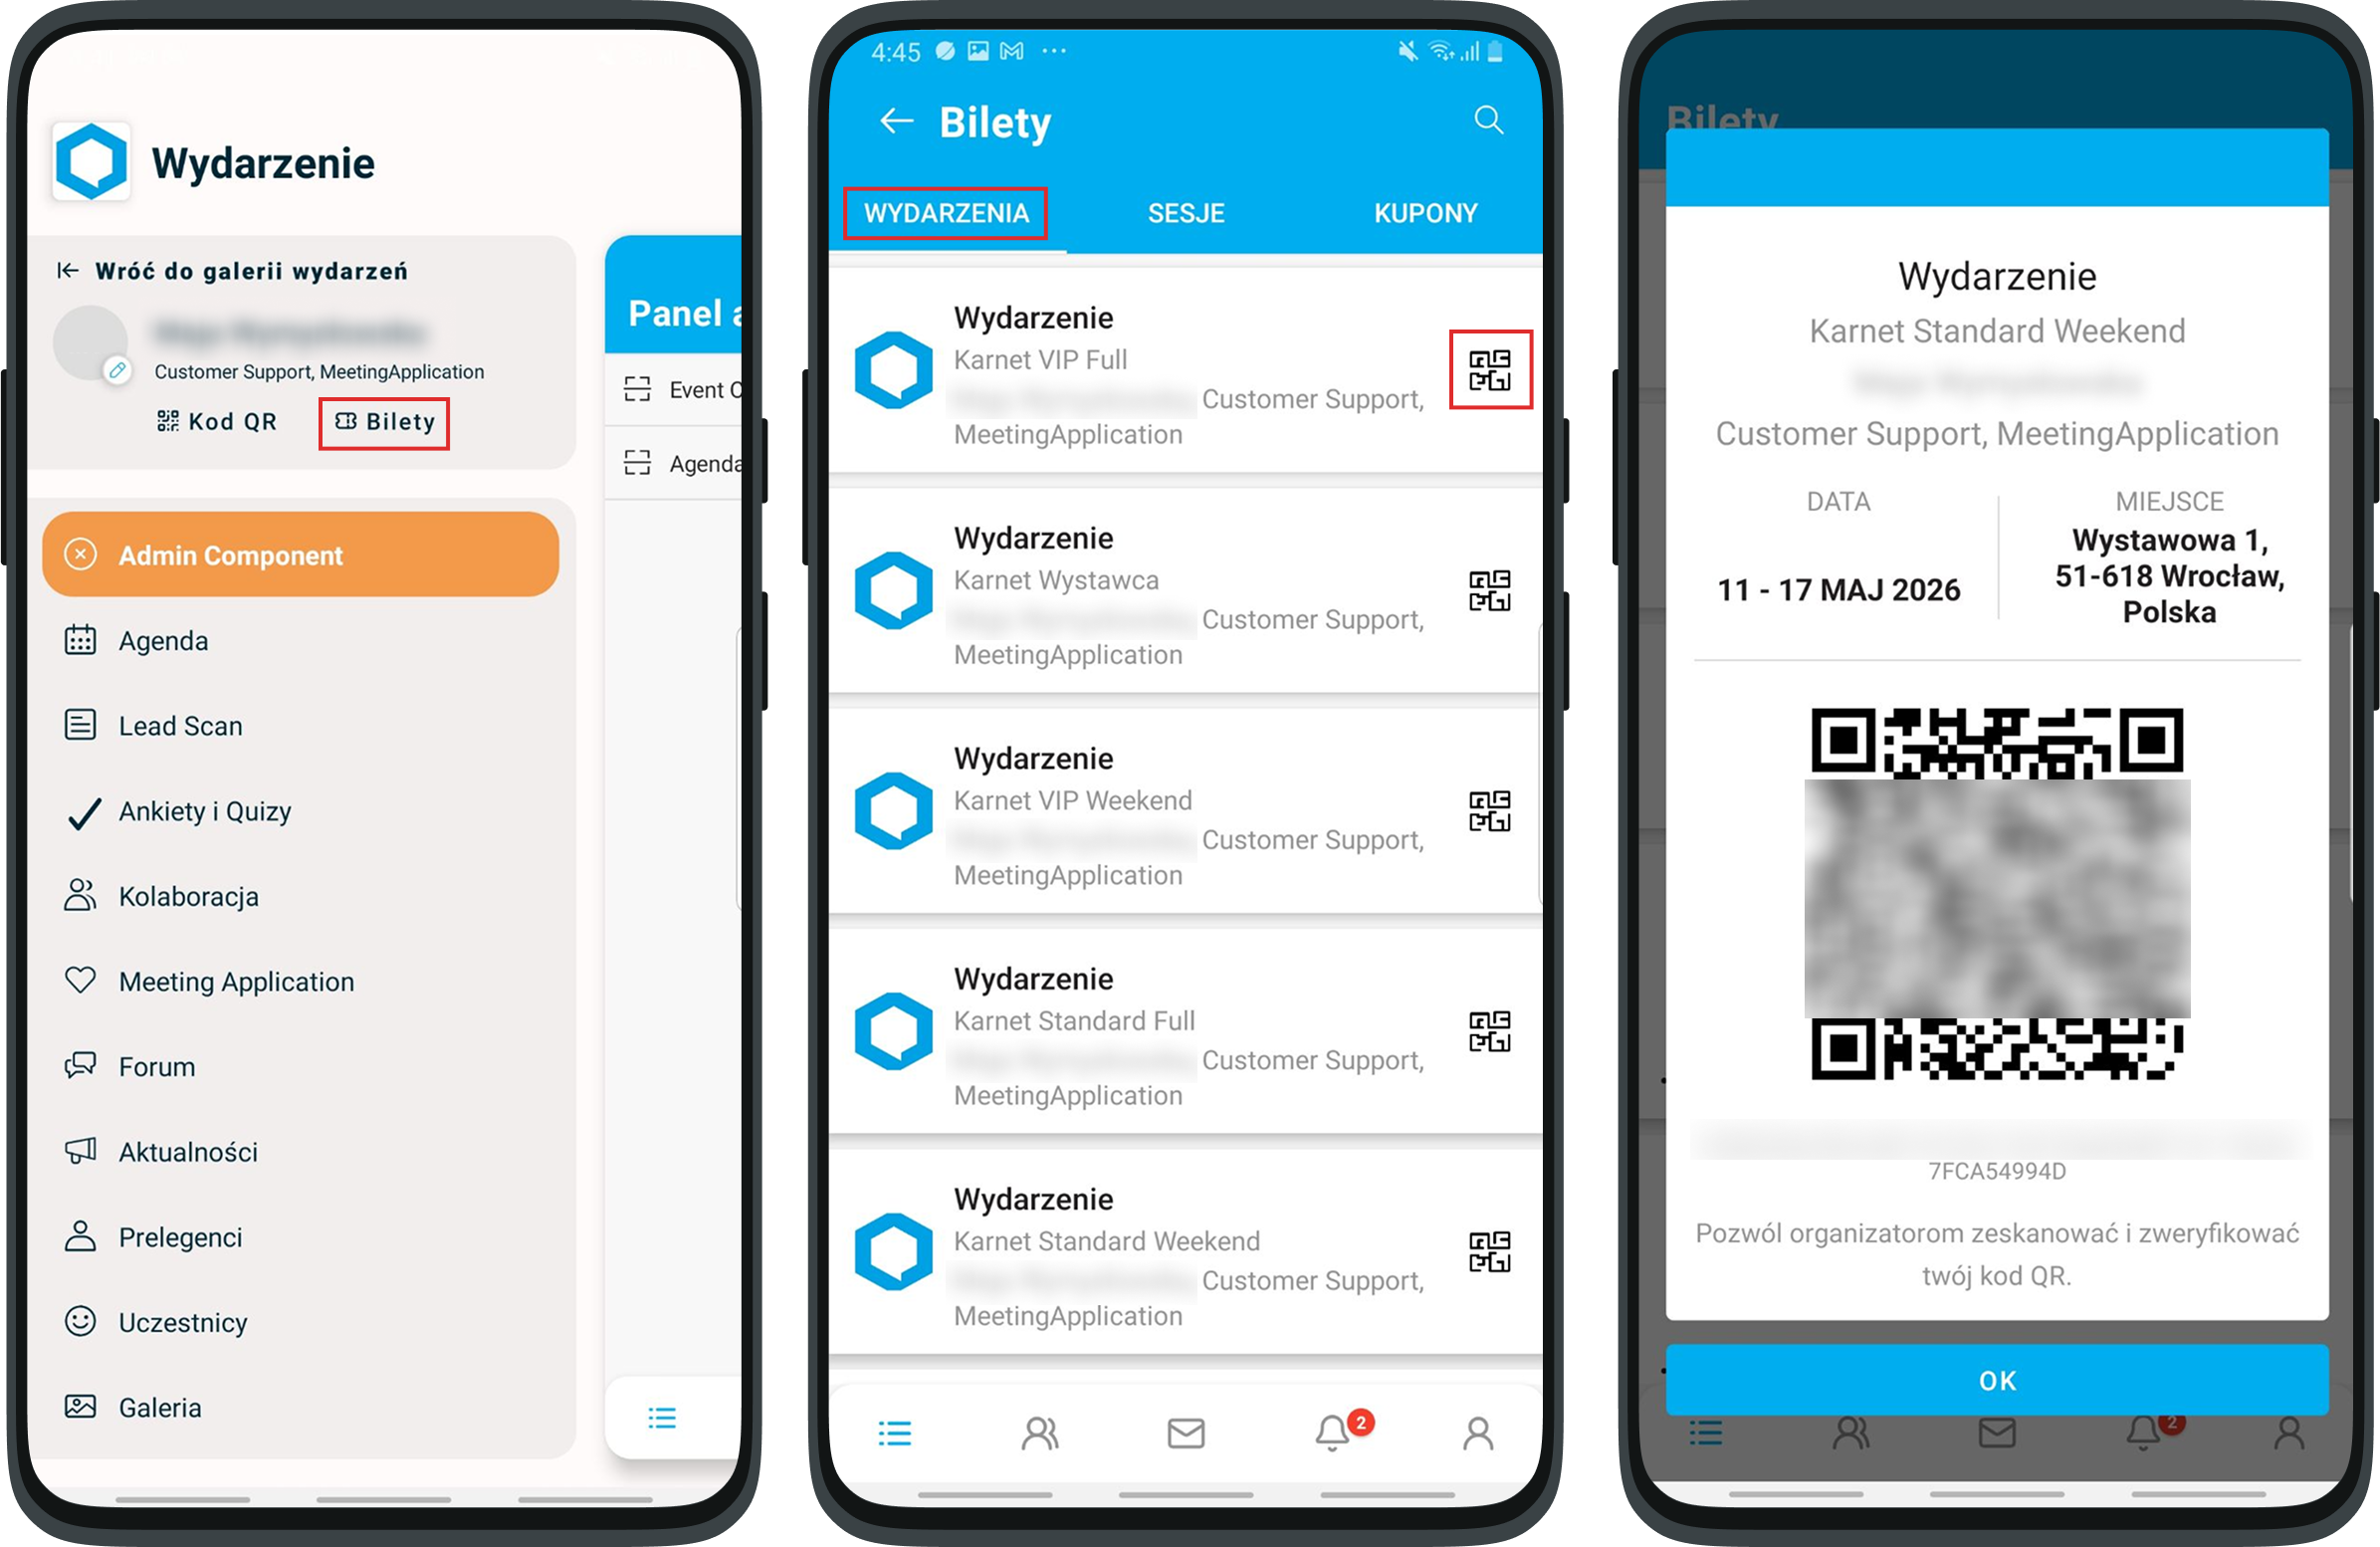
Ask the participant to show their QR code. The participant can find it:
In the email with the registration confirmation (PDF ticket – it can be scanned from the phone screen or from a printout).
In the Mobile App under the ticket icon (above the Event menu).
In the Mobile App under the QR code icon (next to the ticket icon).
Point the camera at the QR code.
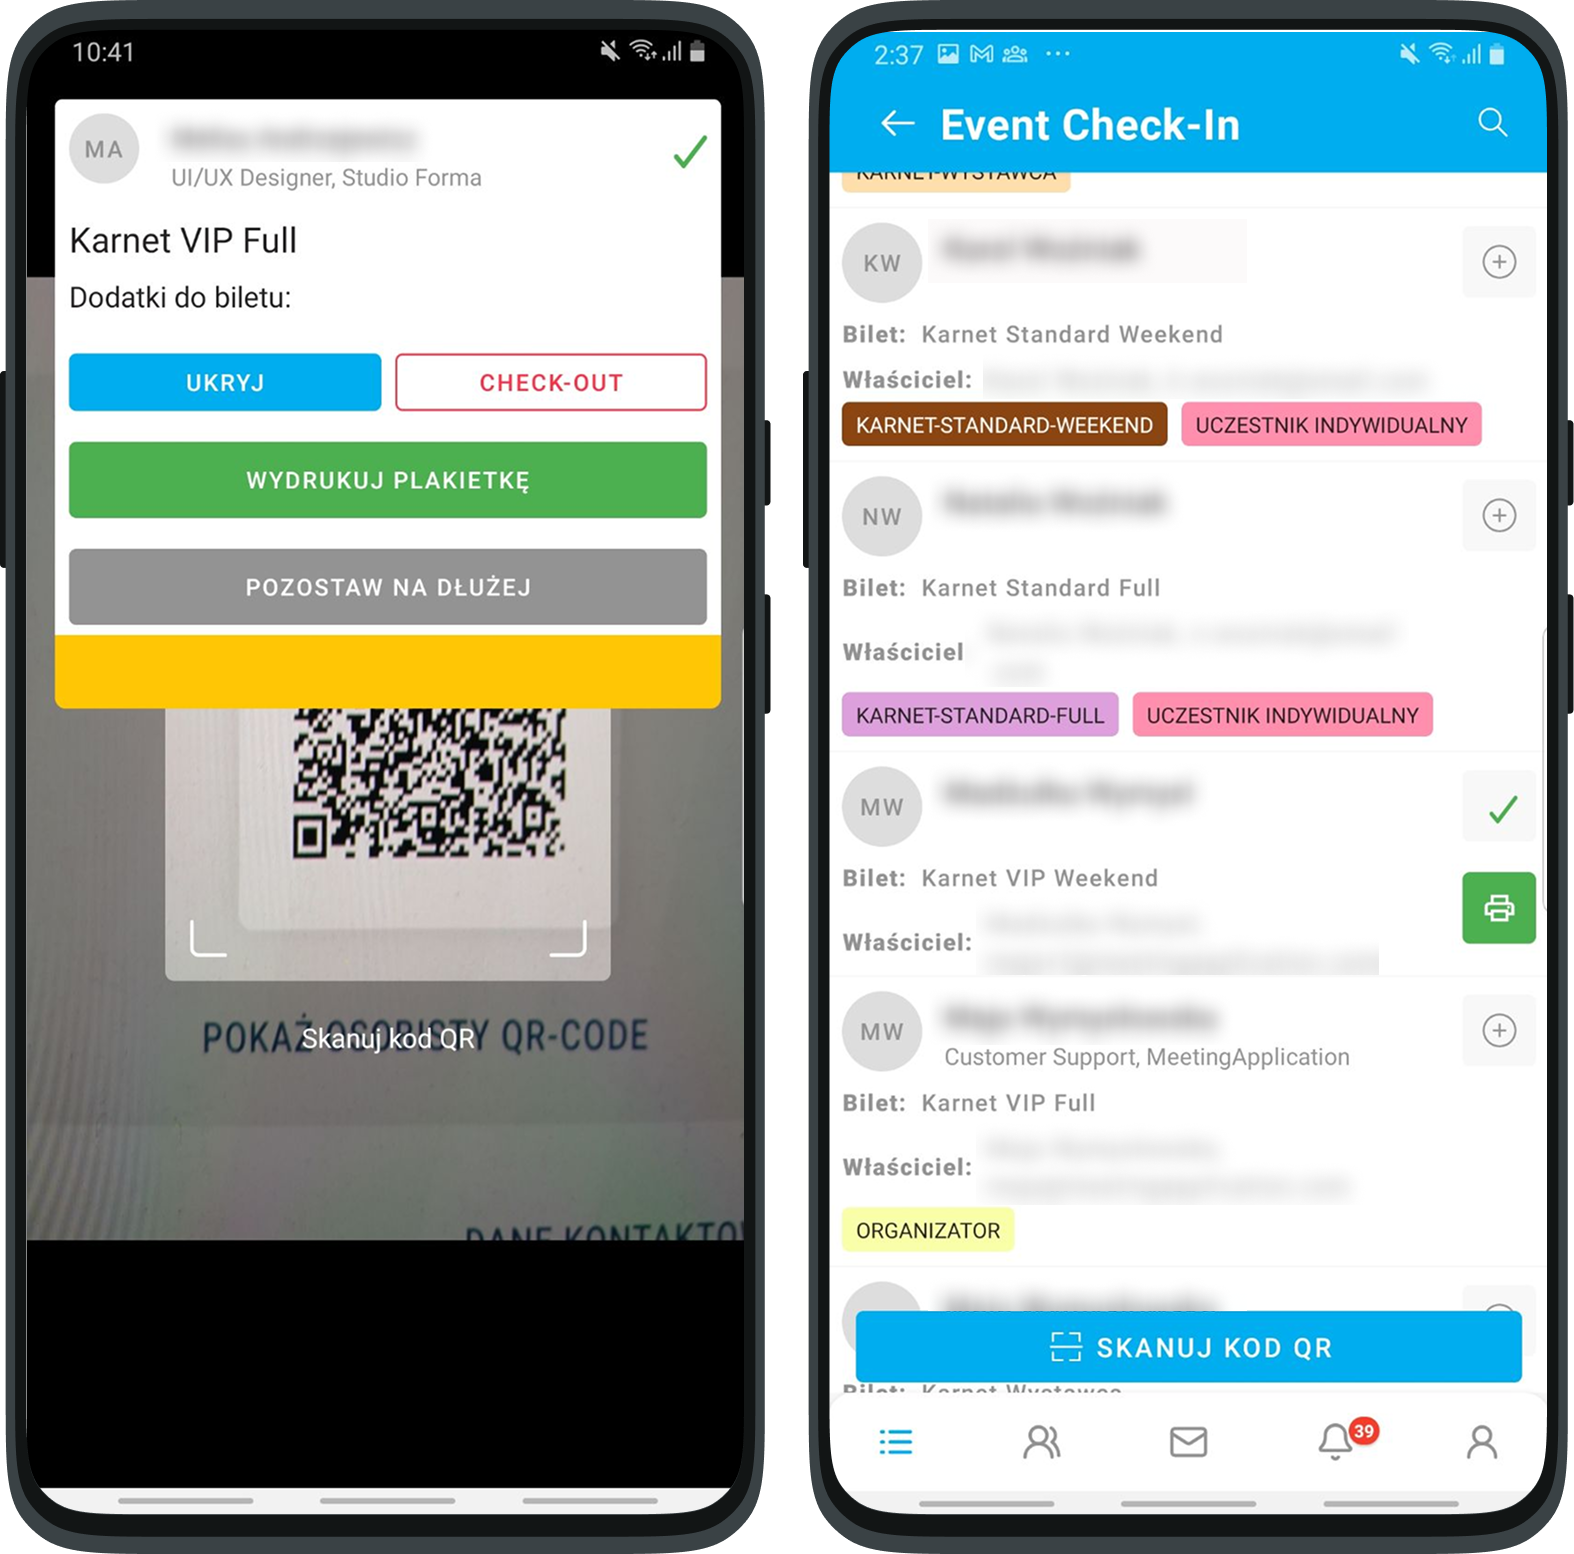
Done! After a successful scan, a message will appear on the screen confirming a correct check-in and showing the groups (tags) assigned to the participant. The participant’s status in the system will automatically change to Checked in (Checked in). You can let the person enter the event area.

You can do a manual check-in in two ways:
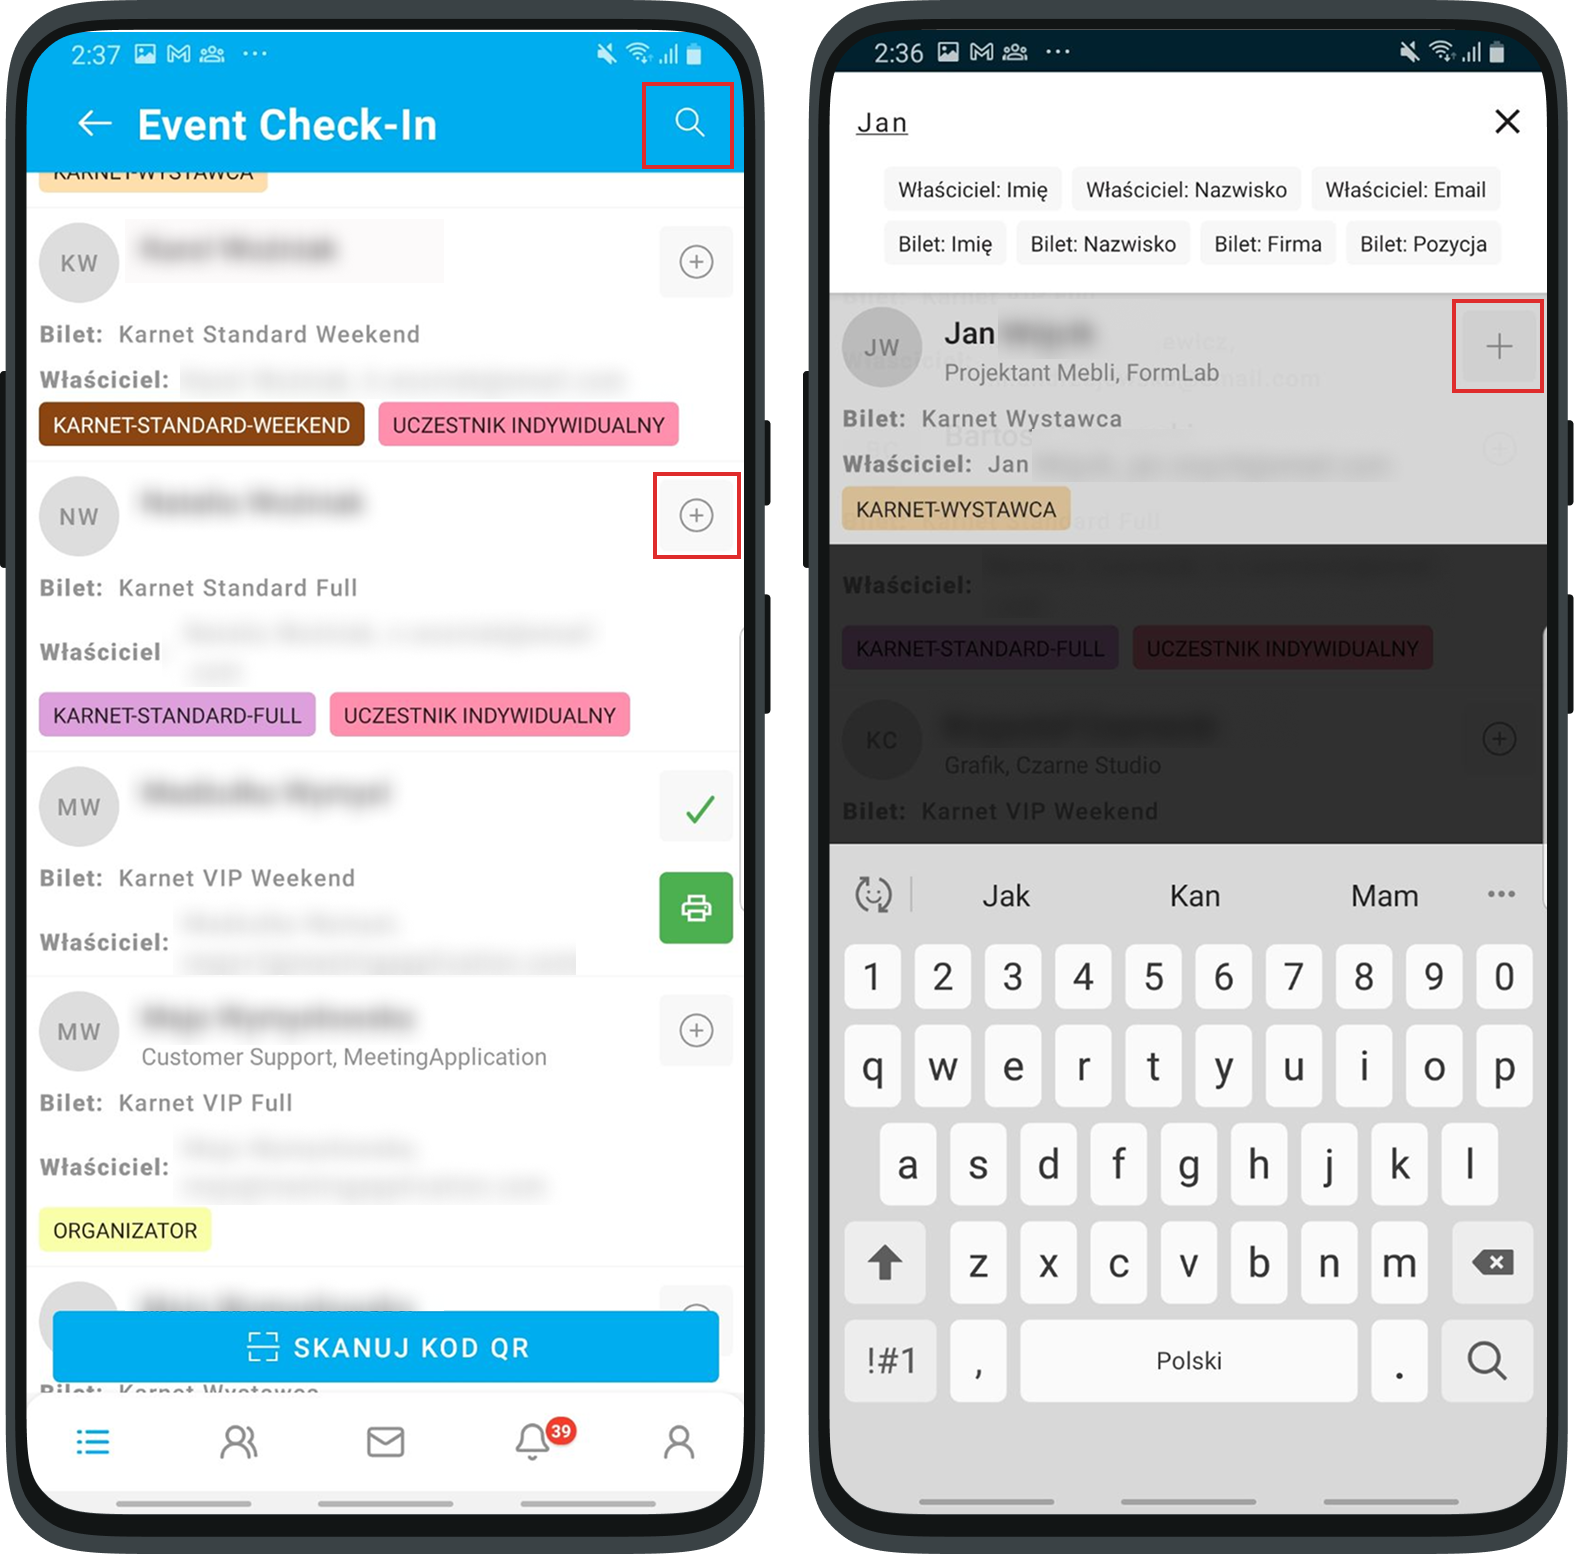
Option A: Via the Mobile App
Go to Admin Component -> Event Check-in (or Agenda Check-in for a specific agenda session).
Click the magnifying glass icon in the top right corner.
Type the first name or last name or email address of the participant. This is important! The system will only search by one parameter.
Click the “+” icon next to the right person to change their status to Checked in. (For shorter lists, you can also just scroll the screen and click “+” without searching).
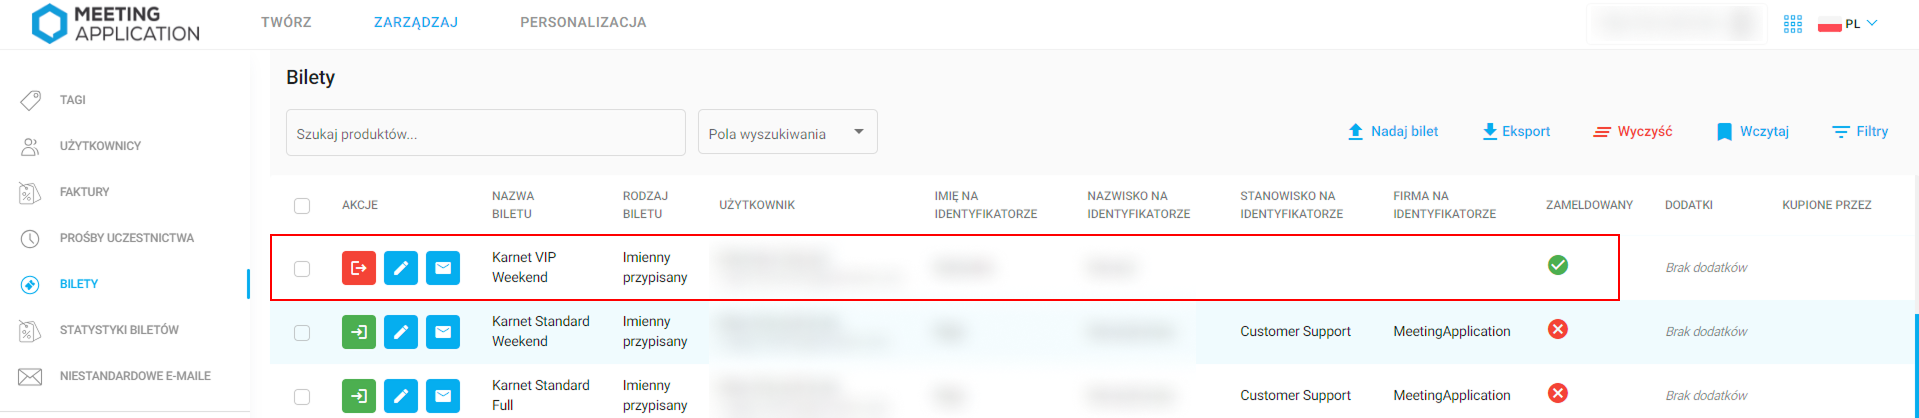
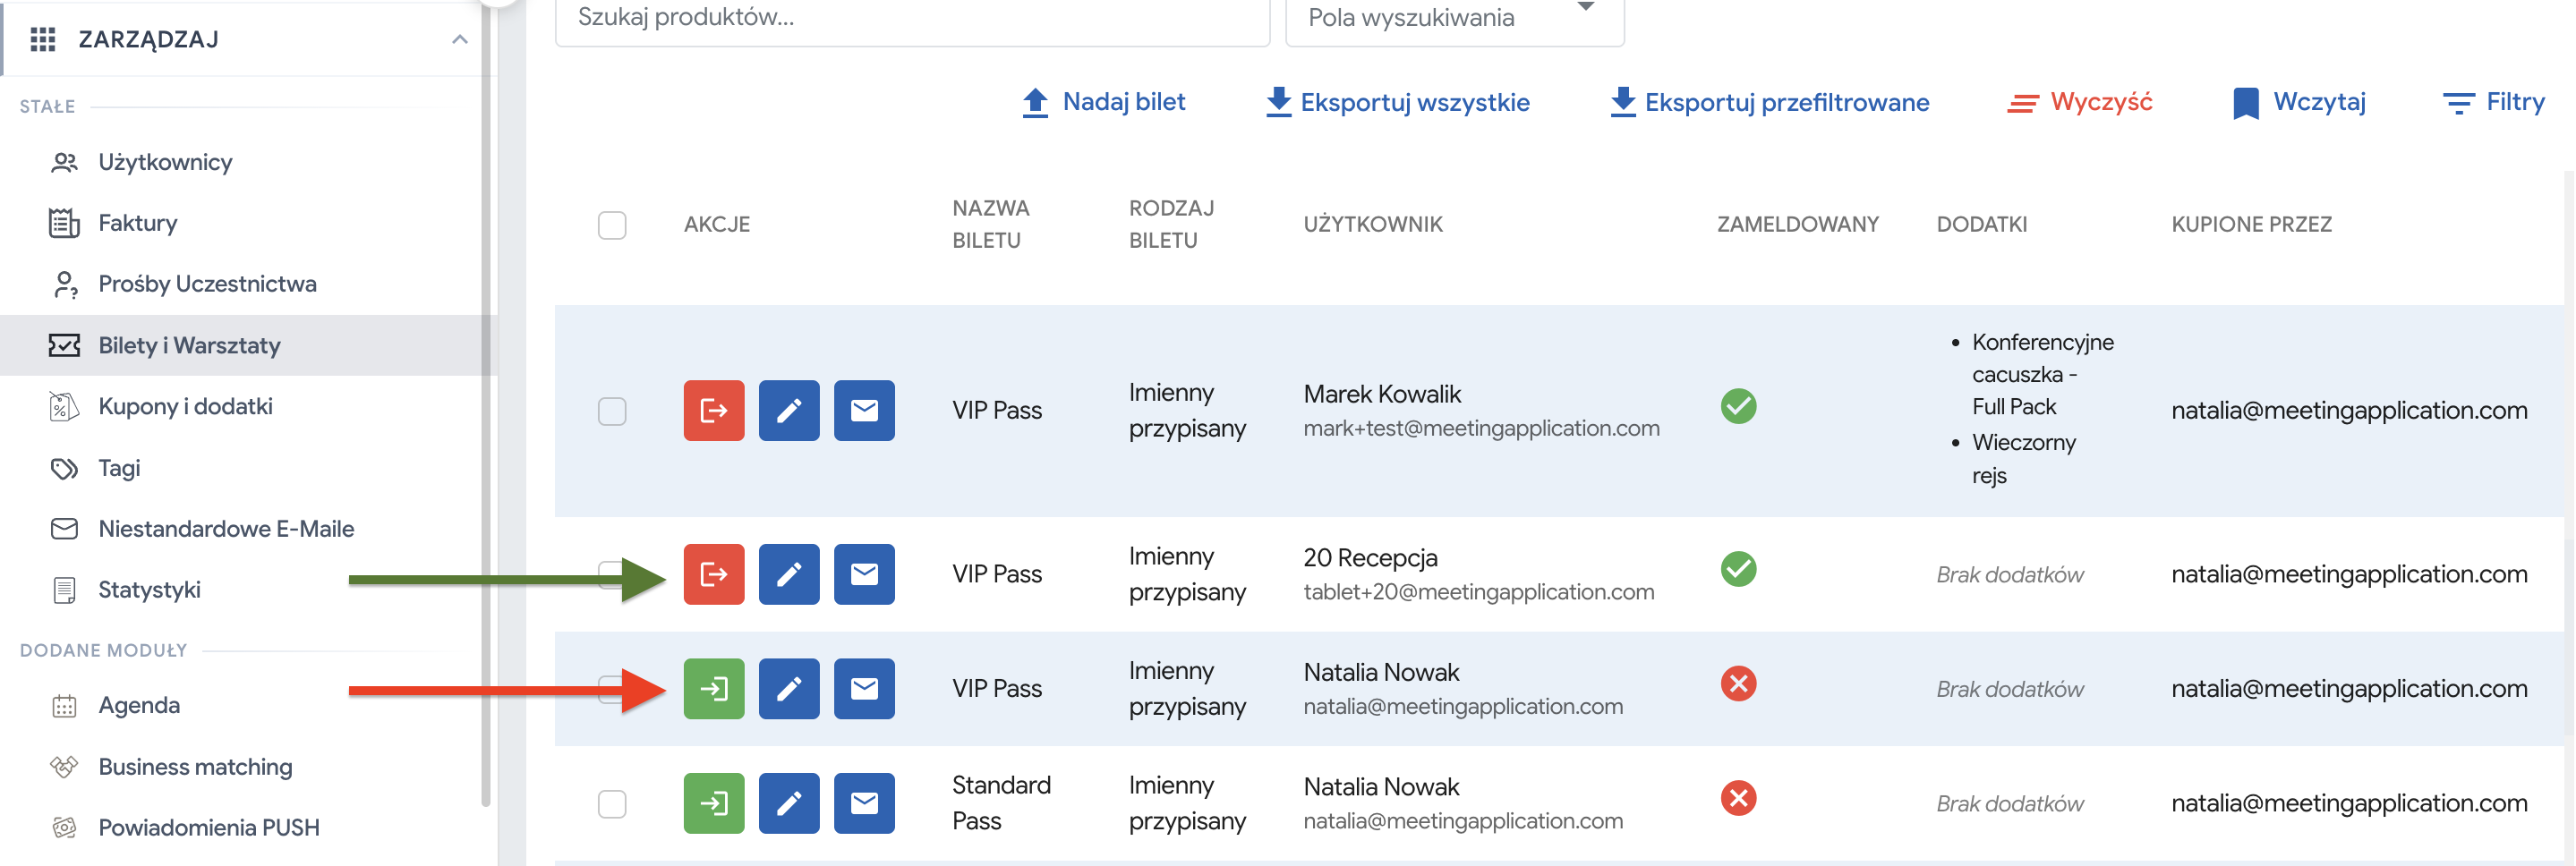
Option B: Through the Admin Panel (from a computer)
Log in to the Admin Panel on your computer.
Go to the Manage → Tickets tab.
Find the participant in the list.
In the Actions column, click the Check in participant button (green icon). The participant’s status will change to Checked in.
You can check out people whose presence at the event has been confirmed at any time by clicking the red icon.
Besides the general entry to the event, you can validate attendees’ tickets for specific agenda items (e.g. closed workshops).
For the session verification to be possible:
You need to use a device with Android and have Administrator permissions.
The session must be configured in advance as ticketed OR you need to be selling a workshop/add-on linked to this session.
👉 Learn more about ticketed sessions FROM THIS ARTICLE.
👉 Learn more about selling tickets for a workshop FROM THIS ARTICLE.
How to run verification for a session:
In the mobile app go to Admin Component and choose Agenda Check-in.
From the list, pick and click the specific agenda session for which you want to verify entry passes.
Scan the participant’s personal QR code or the QR code from their workshop ticket. (Participants will find their workshop tickets in the mobile app in the Tickets → Sessions tab).
After scanning the participant (or manually marking their attendance), a characteristic “checkmark” will appear next to their name on the list, confirming they entered the room.
If a given participant doesn’t have an entry pass for the selected agenda session, a message will appear on your device screen: “Invalid QR code. No tickets found for this user”.
Did you know that after scanning a QR code you can automatically print name labels for participants? We offer rental of special thermal printers which, after integration with the Check-in module, print stickers with the participant's data in a few seconds. You stick them on the badges and you’re done – zero pre-prints and no searching for names on lists!
You can read more about badges in this article.
Have a great event with Meeting Application!
