The event user list is a record of people who registered or were invited. For each participant, it includes at least info like first name, last name, and email address. Each participant can expand their profile with their job title, company where they work, phone number, and lots of other stuff. Depending on your setup, it might also include extra info—anything you're collecting through Registration Forms. Find out more about forms in the article Registration Forms.
The participant list contains data of Users who accepted your event consents during ticket purchase, import, or when confirming consents on the Landing Page or Mobile App:
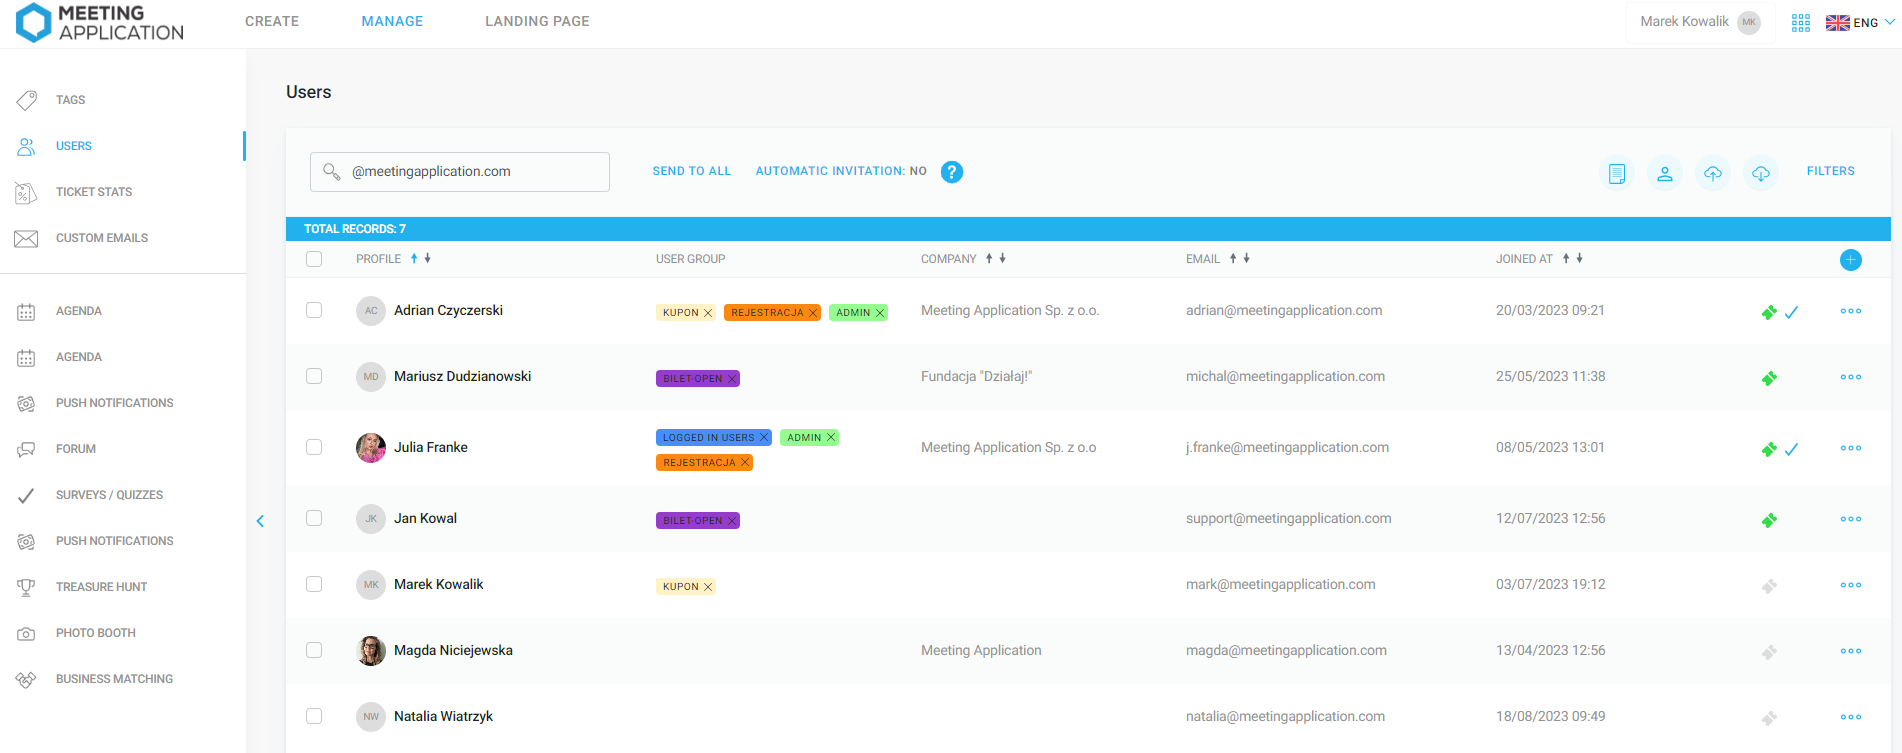
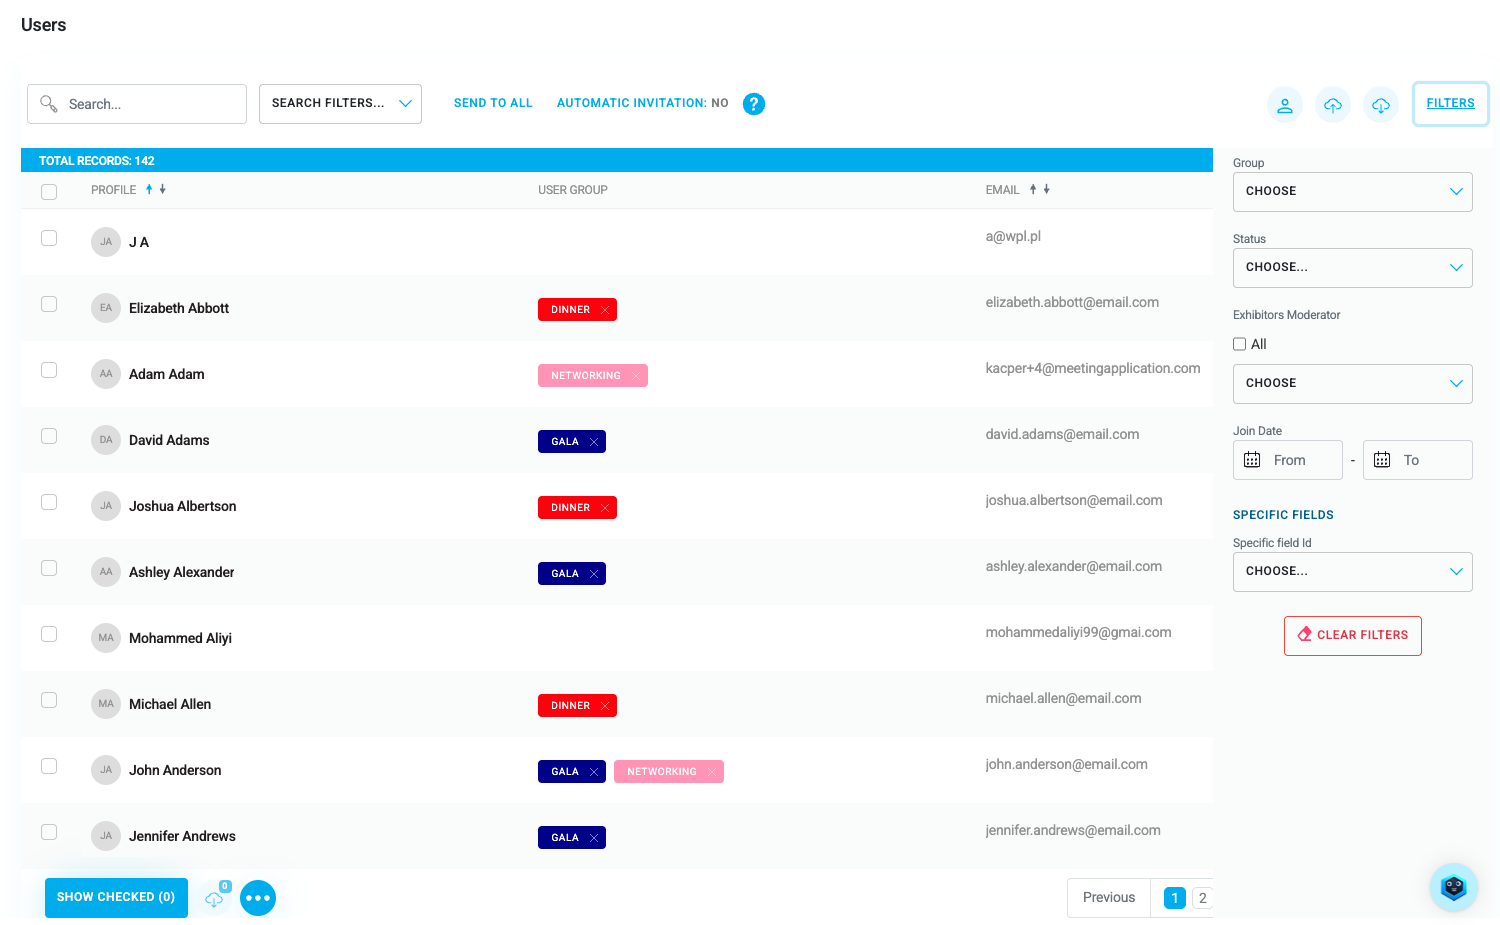
You can also filter the user list by different categories, like: user group, their status, or the date they joined the event. Click the Filters button to pick the options you're interested in:
If you’re the event organizer and want to add your participants to the event yourself, you can use the import feature. You can find out more about importing users in the Importing users article.
You can also add individual participants, for example, if registration is already closed on the day of the event and someone shows up late. In this case, just click the person icon, fill out the participant's info, and give them an entry ticket if needed:

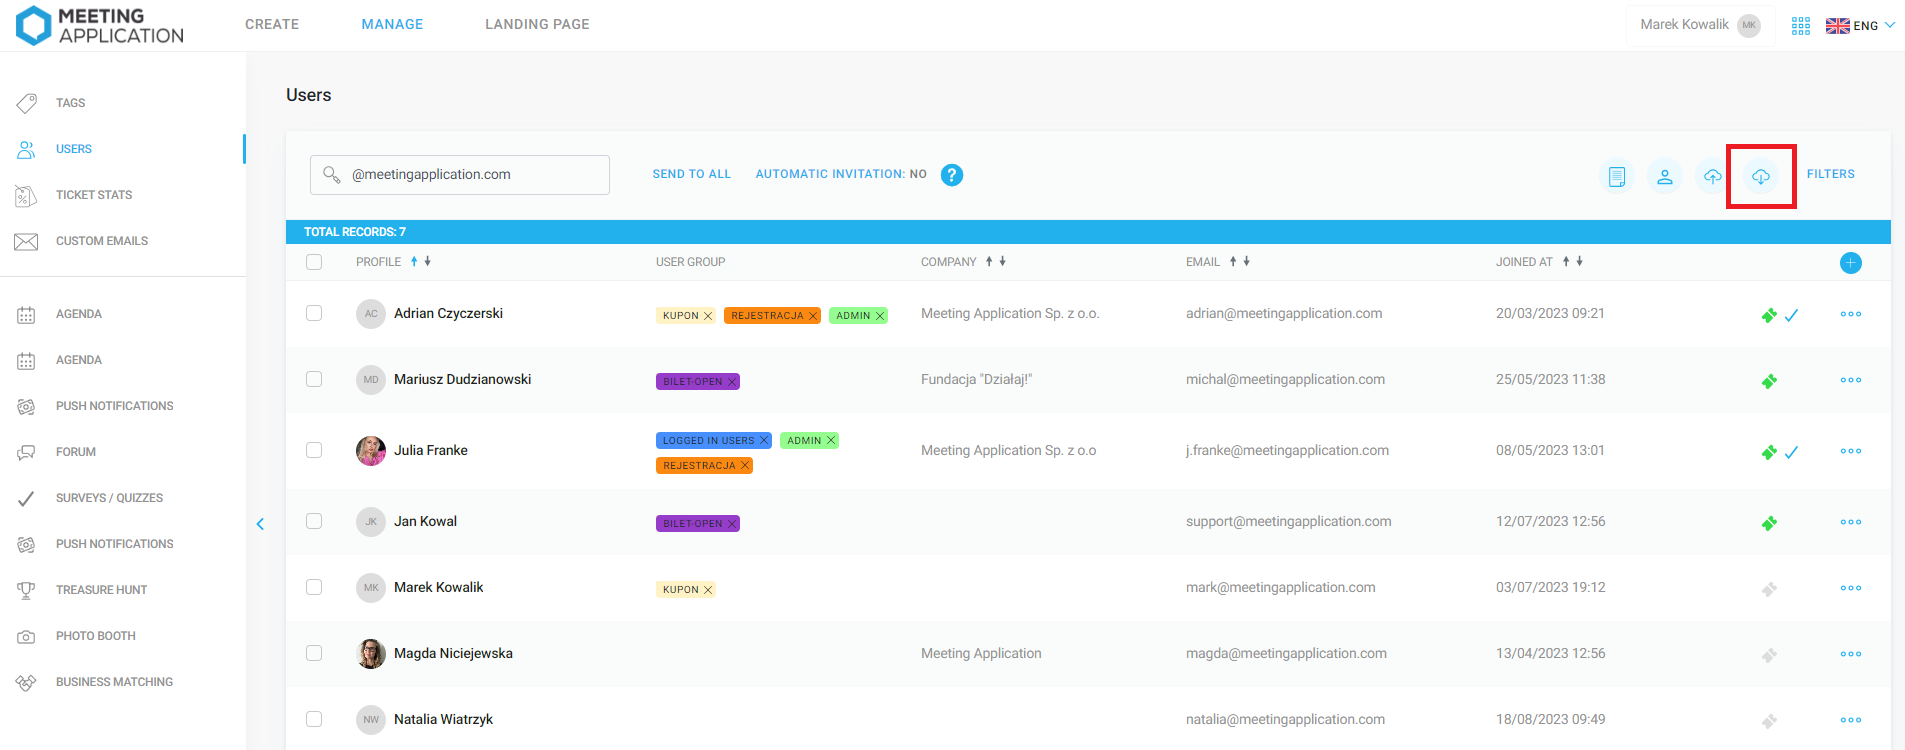
If you want to export the entire list of event participants, just click the cloud icon with an arrow pointing down in the top right corner, and you'll get a ready csv file:
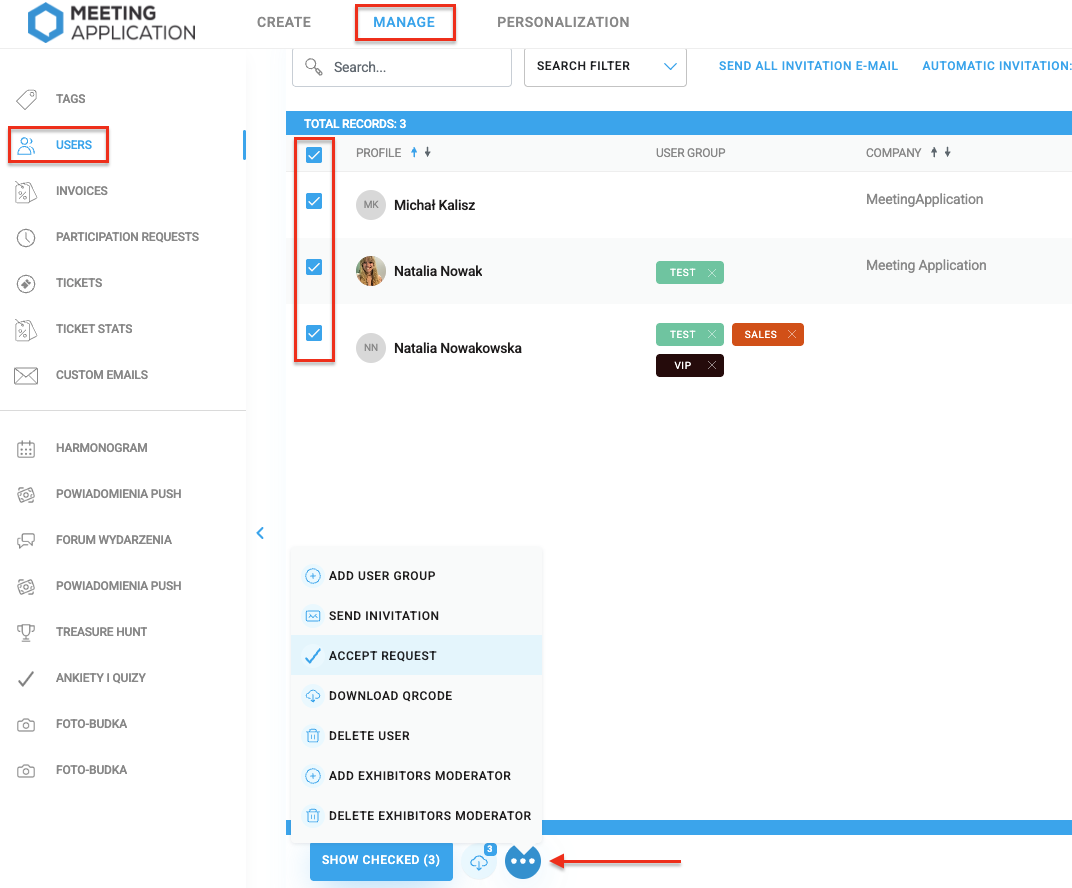
You can also filter the list with any criteria you like to export only the users you choose. Once you get a list of participants that meet your criteria, select them one by one or all at once, then click the cloud icon at the very bottom of the page:
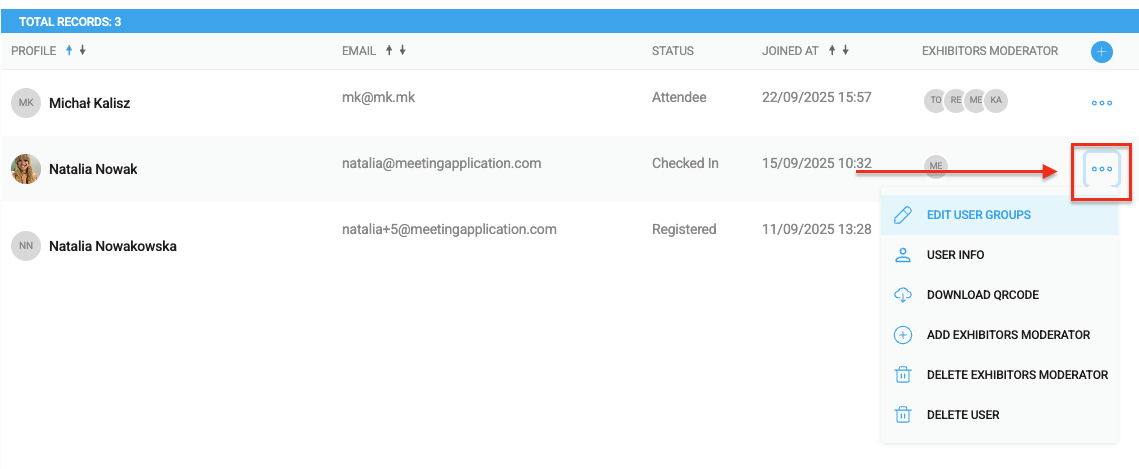
If you select a specific user or select multiple people from the list, and then click the three dots, you'll see extra options:
add user to group
send welcome email to newly registered users
approve joining the event – for events with “list only” access
download a personalized QR code for chosen users (the same one that's printed on name badges in the reception module)
remove users from your event
grant exhibitor moderator permissions – learn more about the Moderator role from THIS ARTICLE
revoke exhibitor moderator access
Click the three dots next to a single user to perform actions just for that person or to view user profile details (name, surname, email, personal QR code, what they offer, invoice details, etc).
To make the participant list visible to others in the mobile app, go to the CREATE → COMPONENTS tab and add the Users module. You can learn more about the Participants module in THIS ARTICLE.
When it comes to events where the participant's calendar setup is important - making sure everyone is assigned to the right groups and that their schedules are managed efficiently can be a challenge. Luckily, event organizers have tools to help manage each user's agenda. To assign participants to a specific session in Agenda, go to the Agenda module in the Manage section. Then, choose the event you want to manage. At the bottom of the screen, you'll see a list of users assigned to this event:
To add a specific person to the event, click Add participants, and then choose a user from the list. Once you've picked a user, save the changes and this attendee will be assigned to the chosen session. You can also first tag several participants with a specific group, then choose to import the members of that group into the session. Keep in mind, this kind of import won't add people to the session if they only get added to the group later on.
Once the user is added to the event, they can log in to their account on the Landing Page and in the App, then head over to the Agenda – My plan section. In their calendar they'll see the event they've been assigned to. That way, attendees don't have to check the sessions their ticket applies to by themselves—organizers can just manage their schedule:
This tool definitely makes it easier for event organizers to manage the schedules of all participants and makes sure everyone’s assigned to the right groups and sessions during your event.
Have a great event with Meeting Application!
