In the Meeting Application, you can run open ticket sales and distribute entry passes, or limit the ability to get a ticket only to selected participants. We know that sometimes you need to organize an event where the number of spots is limited, or you need to verify who’s allowed to come.
For these types of events, ticket reservation is perfect — this mode lets you consider each request individually. You don’t have to worry anymore about competitors checking out your ideas or guests from outside your target group showing up 😏 Thanks to our solutions, you’ll always be ready and informed!
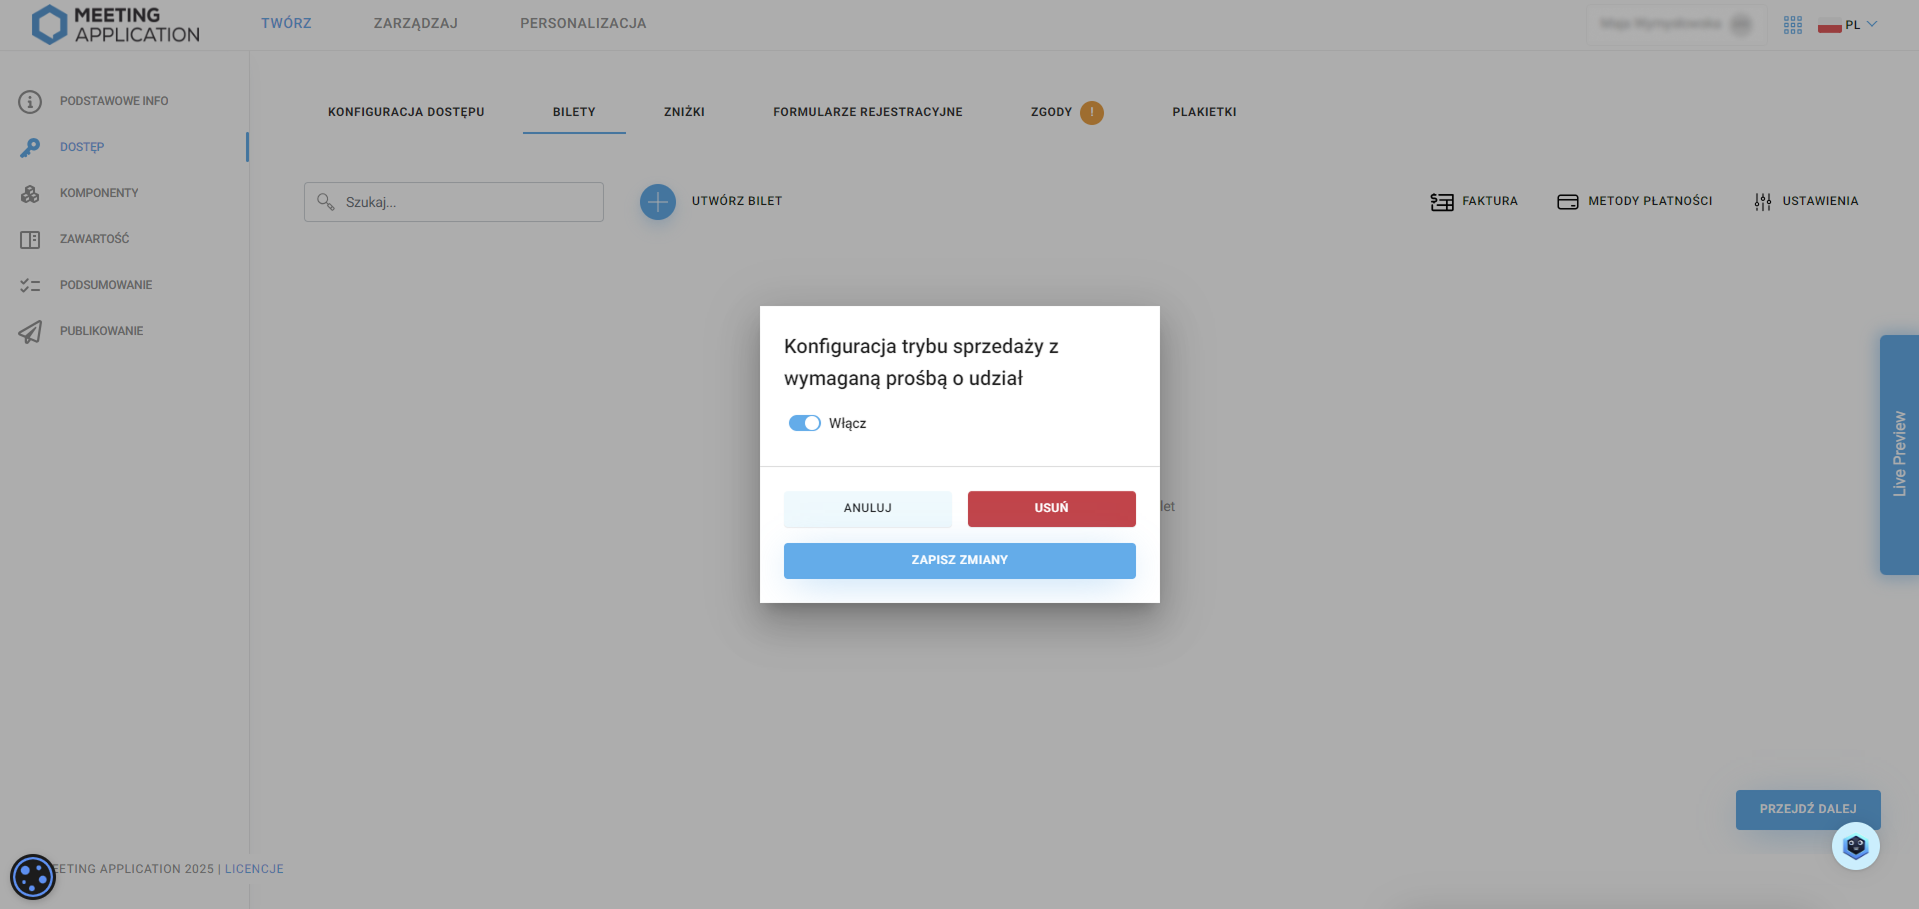
To enable ticket reservation mode, in the Admin Panel, go to the tabs CREATE → ACCESS → TICKETS, then click Payment Methods in the top right corner — there you’ll find the PARTICIPATION REQUESTS option. Flip the switch next to the sales mode with participation request so that it turns blue, which means it’s enabled.
Configure available tickets, add discount codes and coupons if needed, registration forms, connect payment methods, set up invoices and necessary regulations and consents, adjust email contents, then publish the tickets. From this moment, anyone who wants to get a pass (paid or free) will need to be approved by you, the Organizer.

All participation requests sent on behalf of potential participants can be found in the MANAGE → PARTICIPATION REQUESTS.

Here you'll see all requests with their current statuses:
New: new request, waiting for approval from the Event Organizer
In progress: request reviewed by the Organizer, waiting for payment/action from the Participant
Completed: request processed, successfully finished → Participant got a ticket
Rejected: request processed, rejected by the Organizer → Participant cannot get a ticket
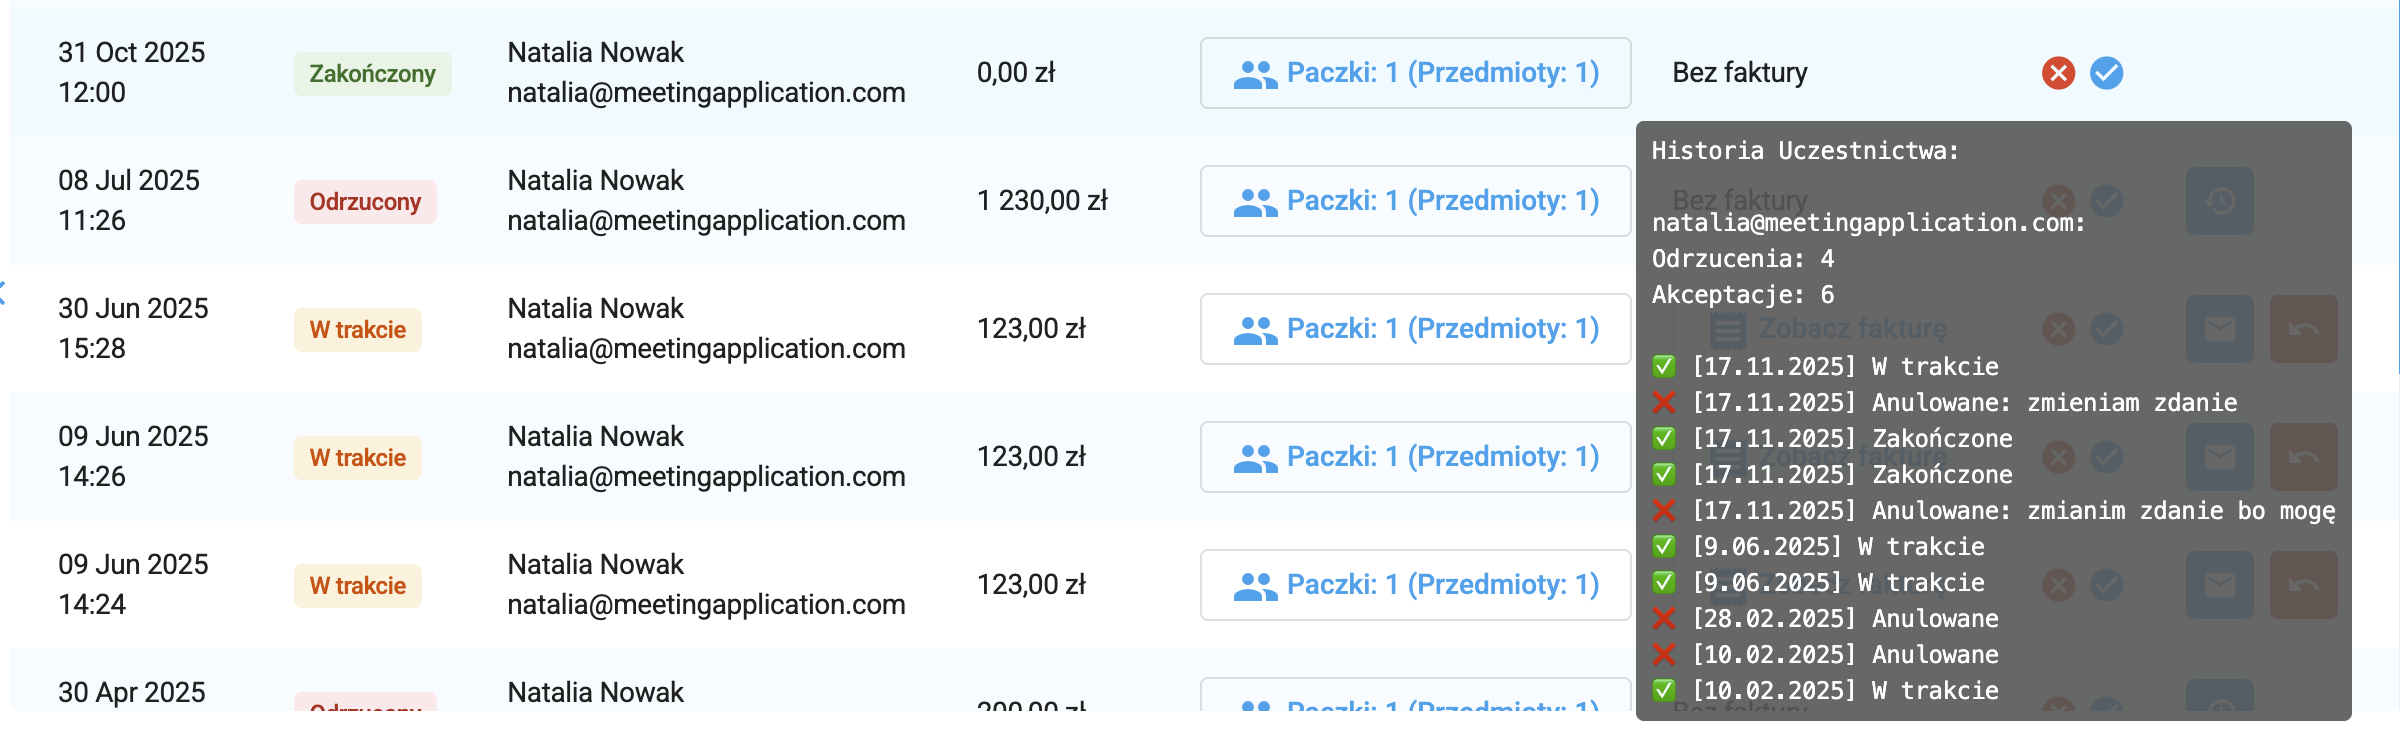
In the Buyer column, you'll see the first and last name (if the ticket is personalized) and the payer's email address, plus the total gross amount of the order right next to it.
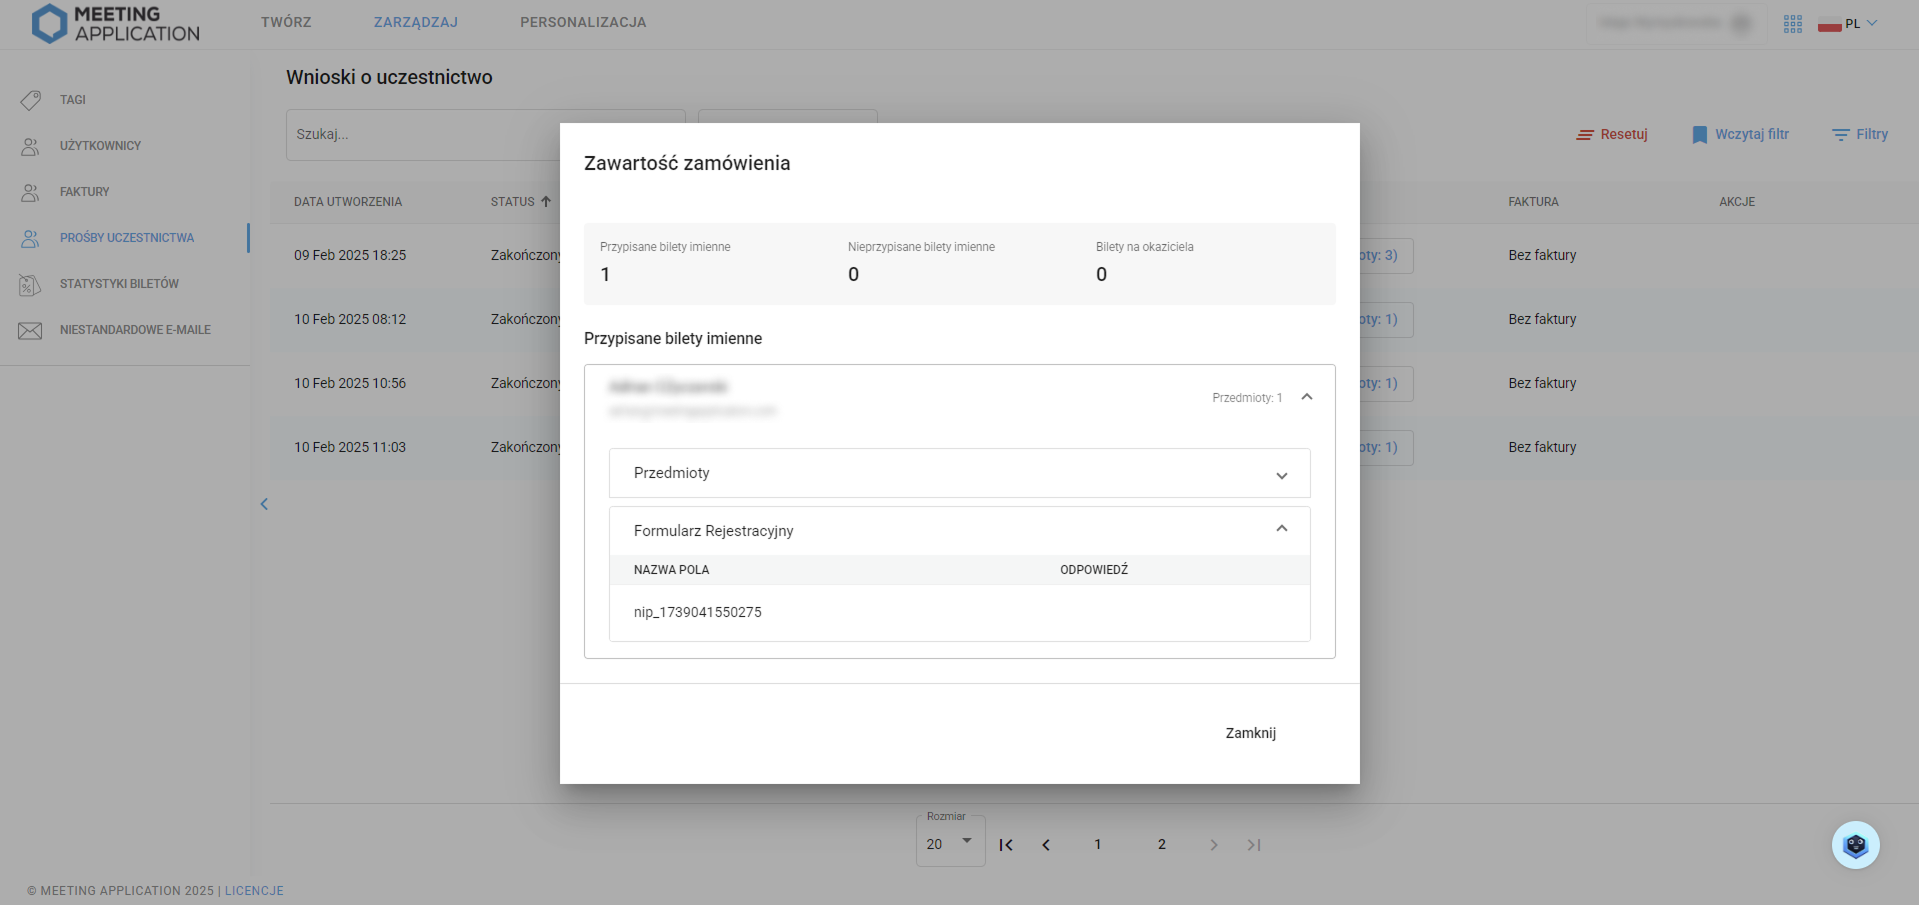
Order contents can be viewed by clicking on individual item packages (set of tickets, add-ons).
Inside the window with the order contents, you can also preview the answers to the registration forms attached to specific tickets.
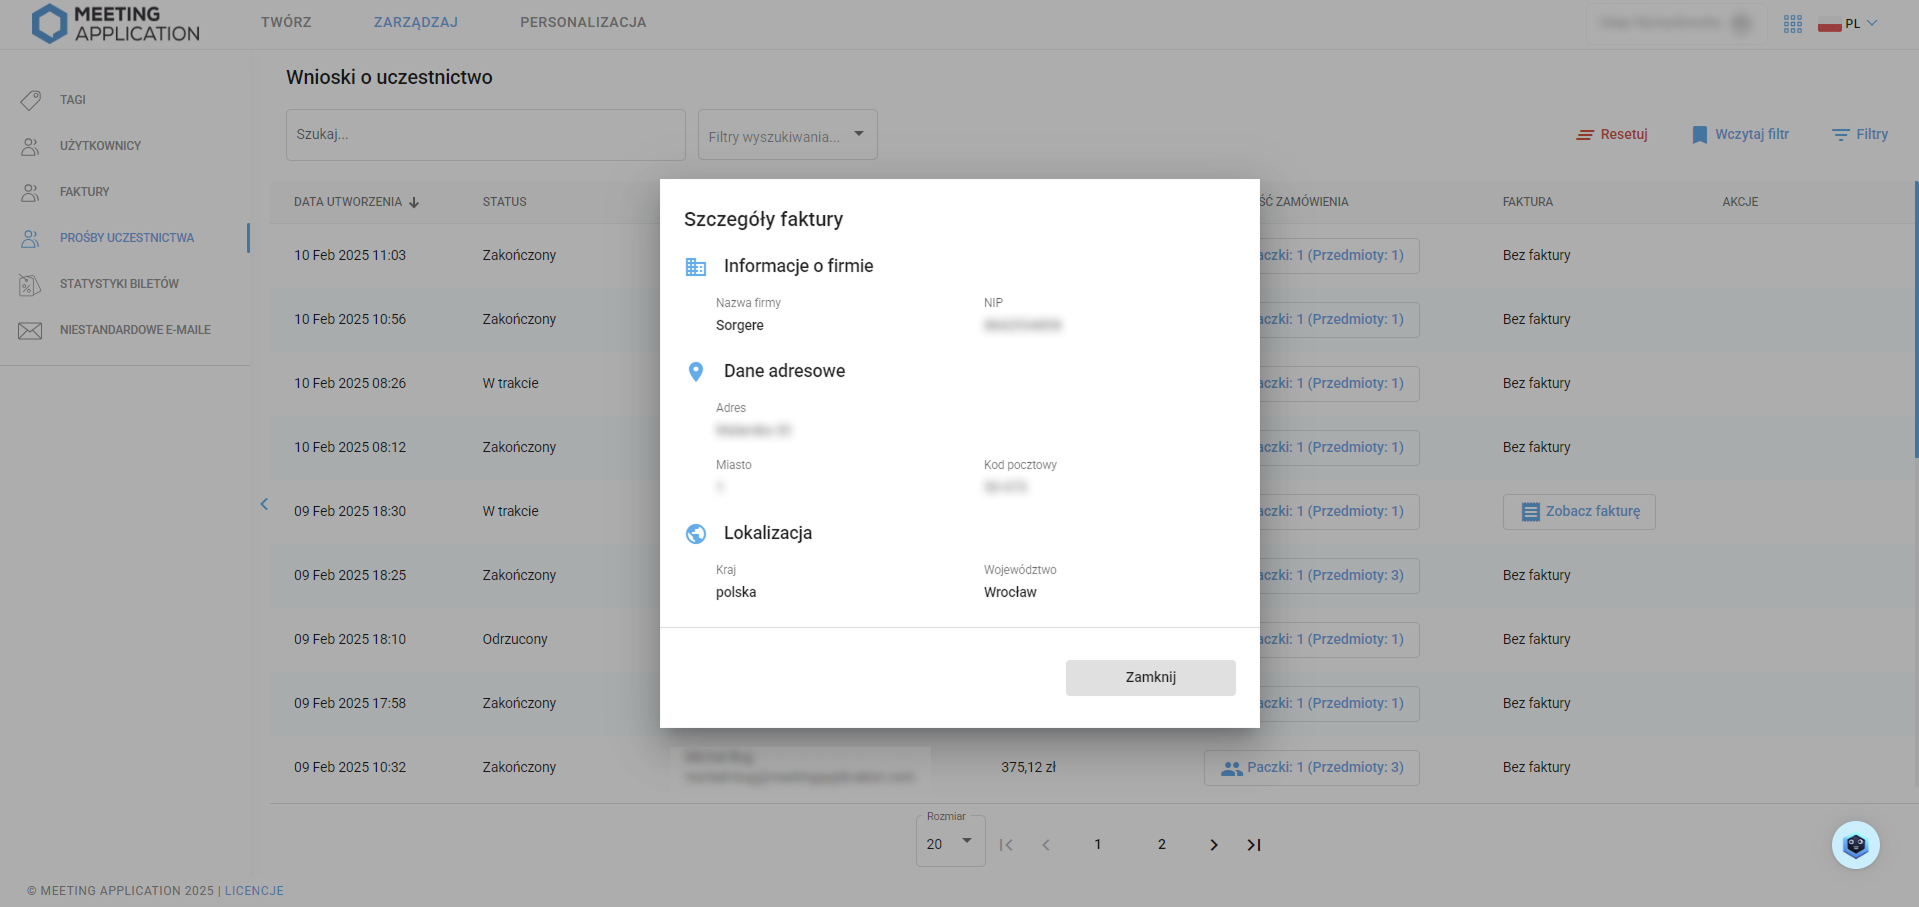
If the buyer selects the option ☑I want an invoice, you'll see the entered company details here.
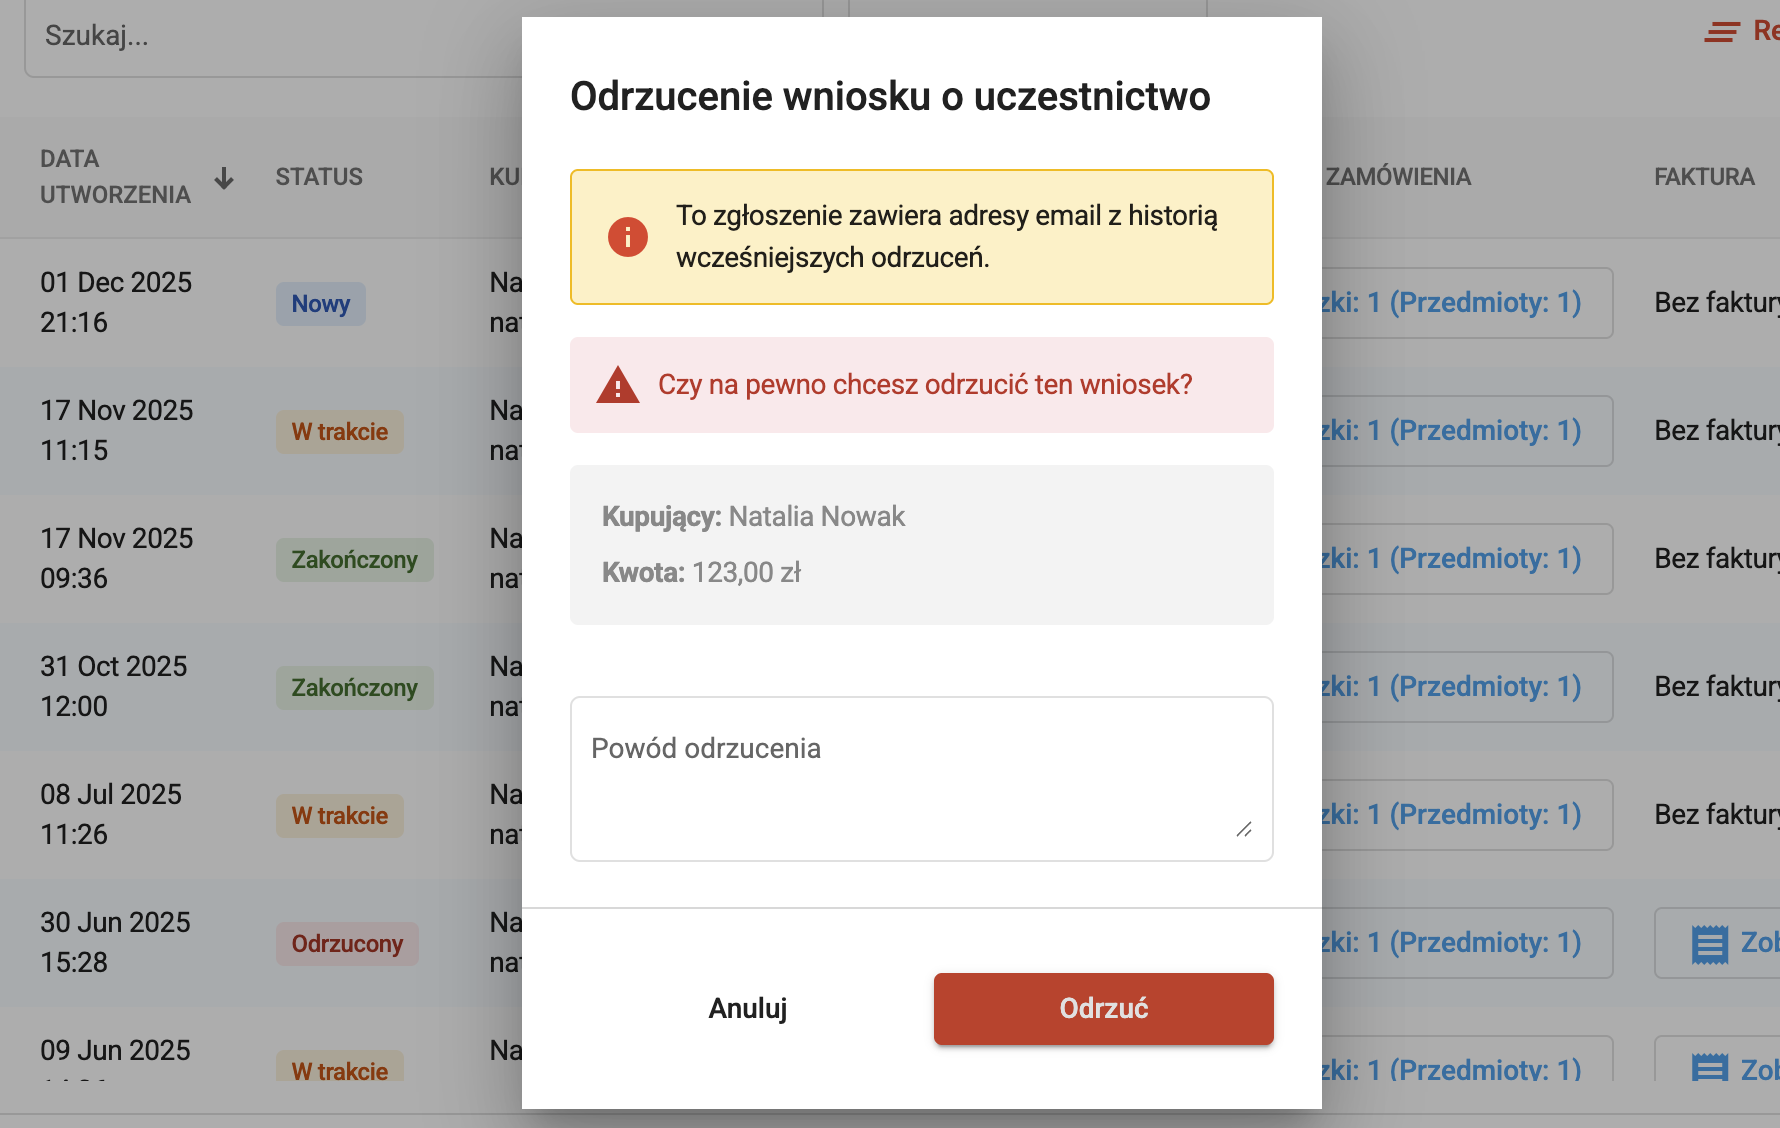
When a new participation request for the event comes in, the system lets you accept the request or reject it. Both actions are available in the Participation Requests table in the Actions column.

When you reject a participation request, a window will pop up letting you add a note, so you can check at any time why this particular participation request was rejected.
This option is available only for paid tickets, until the tickets are paid.
Reversing an acceptance cancels all pending transactions, and the administrator can add a reason for the decision, which will be saved in the history in the Admin Panel.

This option is possible during the active timeout period (3 days from submitting the request or from the last canceled payment). After that time, changing your decision is no longer possible.
After accepting participation, the system will automatically send an email with a payment link to the user.


In the MANAGE → PARTICIPATION REQUESTS tab, there's an extensive history of submissions, thanks to which you can check at any time all actions taken for a given email address. When you hover over the icon in the History column, the system displays a full activity log: all acceptances, rejections, cancellations, and additional notes left by administrators. This way, you get instant insight into the participant's previous submissions and can make informed decisions about further processing.
The history feature and the ability to change your decision let you efficiently manage submissions, keeping full transparency and control over the registration process for events that require participant verification.
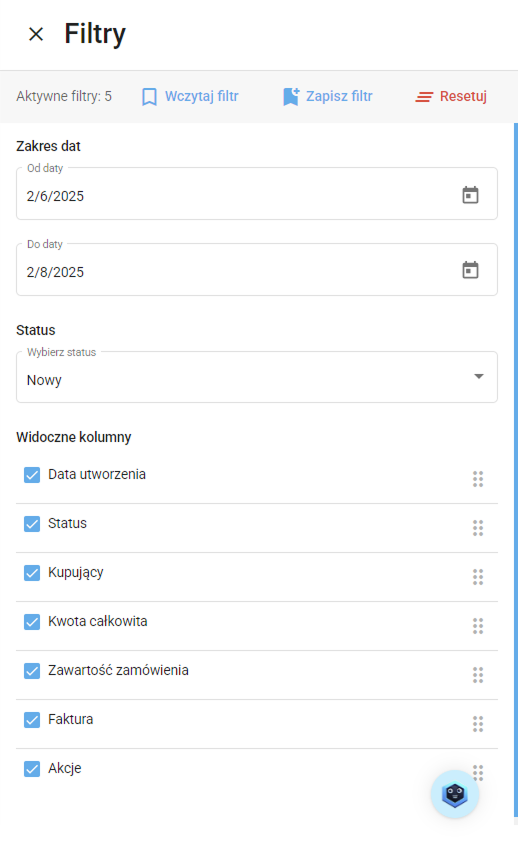
Want to see only a specific range of records? You can sort and filter all requests however you like using the arrows next to the column names and filter attributes.
An up arrow next to a column means records are sorted in that column in ascending order - the lowest value will be first, and the highest last. Similarly, a down arrow means the record with the highest value in that column will be first.
Filtering is available in the top right corner after you click the Filters button. You can show records for a selected date range (from → to, from, or to) and by request status. The order and display of individual columns can be edited - you can adjust which information you want to see to match what you need right now.
If you use the same filter parameters repeatedly, save your settings for later by clicking Save filter - system and your saved filters can be found in Loaded filters.
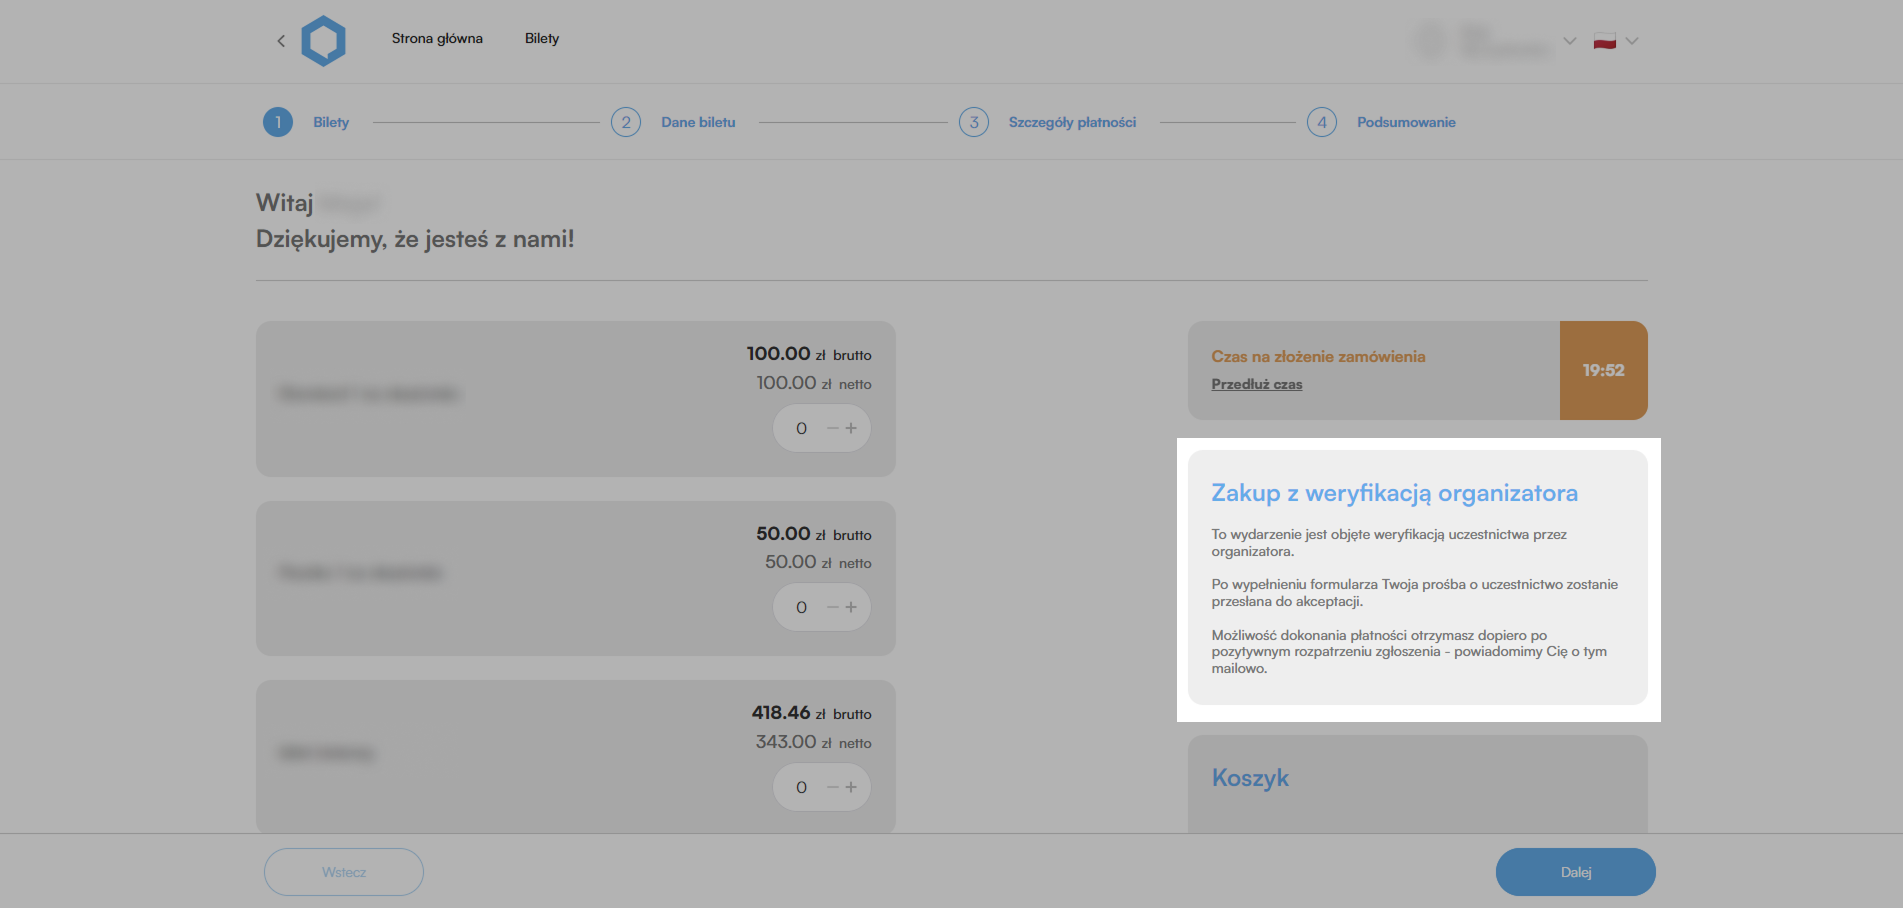
A Potential Participant of your event will go through the payment path just like a standard ticket buying process—the only difference is that instead of getting straight to the payment and receiving a confirmation email with a ticket, they’ll see a message saying the ticket purchase is limited by the Organizer’s verification.
Depending on the admin’s decision and the payment status, the system automatically sends the right email messages to participants. That way, the user is always up to date on the status of their request and knows what to do next.
The system sends m.in.:
mail about submitting a participation request – confirmation that the application has been sent to the Organizer,
mail about accepting the request – with a link to start or complete the payment,
mail about rejection – information about not being able to participate,
mail about starting payment – with the option to retry the transaction if the user interrupted the process,
mail about changing the request status to rejected – informing about the decision changing from YES to NO
mail about changing the request status to accepted – informing about the decision changing from NO to YES, with a link to payment
You can edit and customize the content of individual emails in the MANAGE → Custom E-mails, so the communication matches the tone of voice of your event.
You can find more details about configuration and types of messages in THIS ARTICLE.

the user selects a ticket,
fills out the registration form,
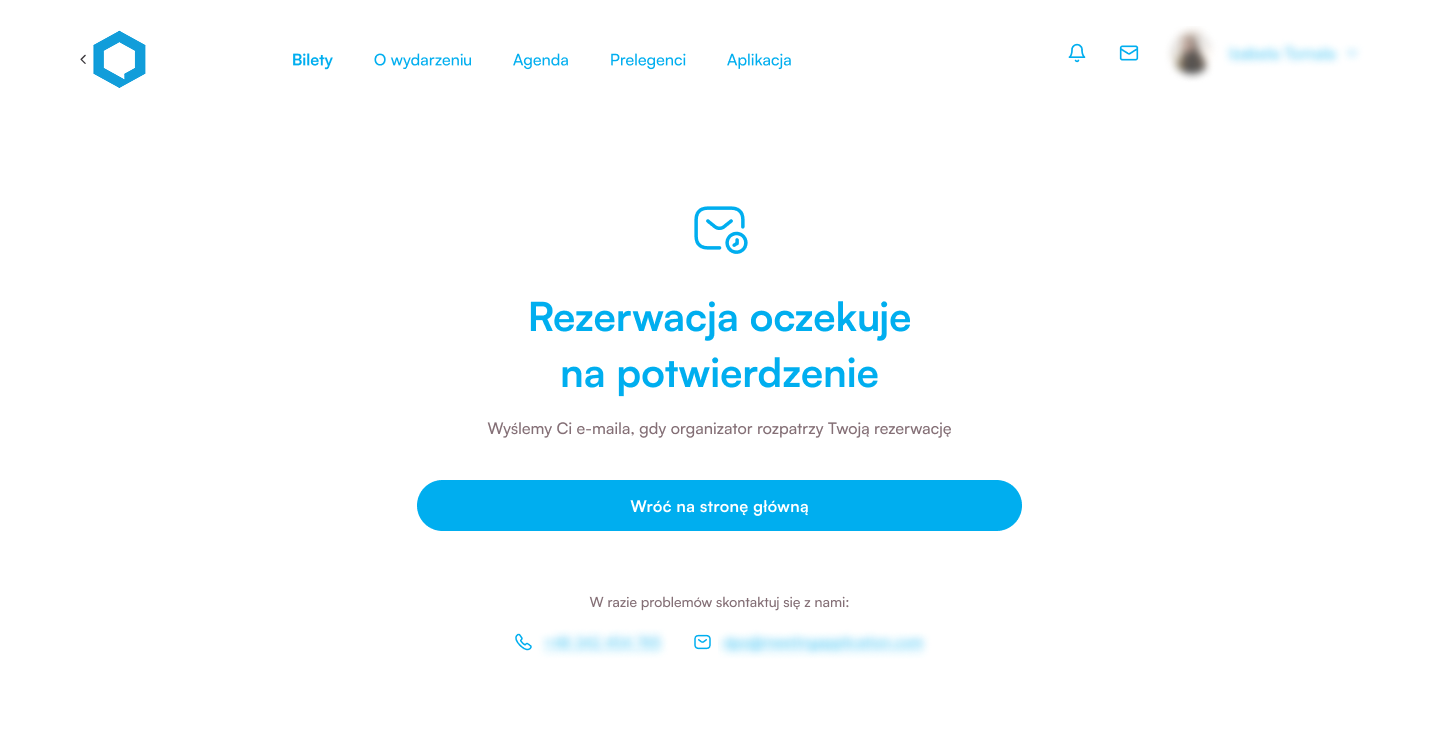
sees a message: “Reservation is waiting for confirmation”,
gets an email confirming the request was sent,
after acceptance – an email with a payment link,
option to retry payment multiple times,
after a successful payment – the ticket gets assigned,
after a failed payment – retry option,
after timeout – the request expires, ticket goes back to the pool.
to get a ticket, you need to go through the cart process again.
After receiving participation approval, the system sends the Participant a confirmation email with the payment link.
To get a paid ticket, you need to make the payment within 3 days of your participation request being accepted.
Timeout is the period in which the participant has to pay for the ticket after the request is accepted.
Timeout = 3 days (first session at midnight).
We count the timeout:
a) from the moment of request acceptance – if the participant hasn't started the payment,
b) from the moment a webhook is received from the gateway: canceled / failed – if the user started the payment but didn't finish it (returns to payment method selection; closes the payment gateway page).
After the time limit is exceeded:
the system changes the status to Overdue or Rejected, overdue,
tickets are automatically returned to the pool,
no possibility for re-acceptance.
from the cart after returning from the payment gateway (LP scrolls to the top automatically),
from the MyOrders tab (separate tabs: Orders and Participation requests),
from links in emails sent when:
payment is started (new email),
payment fails,
participation request.
The participant can switch between gateways:
PayU ↔ Stripe ↔ Autopay
Exception:
after selecting proforma invoice the payment method is blocked,
if the organizer rejects the payment for the proforma → the ticket goes back to the pool → the user has to start the process again.
Have a great event with Meeting Application!
